
monTEK HW1240BK
monTEK HW1240BK Full Motion TV Wall Mount Instruction Manual
Model: HW1240BK
Important Safety Instructions
Please read this entire instruction manual before installation and assembly. If you have any questions regarding these instructions or the safety of the installation, please contact customer support.
- Ensure the mounting surface can safely support the combined weight of the mount and the display.
- Do not install on drywall alone. This mount is designed for wood stud, concrete, and brick walls.
- Always use a stud finder to locate wood studs accurately.
- Do not exceed the maximum weight capacity of 55 lbs (25 kg).
- Do not use this product for any purpose not explicitly specified by the manufacturer.
- Keep children and pets away during installation.
- Tighten all screws firmly but do not overtighten. Overtightening can damage components.
Package Contents
Verify that all components are present and undamaged before beginning installation. If any parts are missing or defective, contact customer support.

This image displays the complete set of components included with your monTEK HW1240BK TV wall mount, featuring the main articulating arm assembly, VESA adapter plates, a comprehensive hardware kit with various screws, wall anchors, a small spirit level for accurate installation, and a wrench.
- Main Wall Mount Assembly (Articulating Arms and Wall Plate)
- VESA Extension Arms (4 pieces)
- Hardware Kit (various screws, washers, spacers, concrete anchors)
- Spirit Level
- Wrench
- Instruction Manual
Product Specifications
| Specification | Detail |
|---|---|
| Model Number | HW1240BK |
| TV Size Compatibility | 13-55 inches |
| Weight Capacity | Up to 55 lbs (25 kg) |
| VESA Compatibility | 75x75mm to 400x400mm |
| Tilt Angle | +5° to -15° |
| Swivel Angle | +/- 90° (depends on TV size) |
| Rotation Angle | -5° to 90° (for landscape/portrait) |
| Extension from Wall | 2.6 inches (retracted) to 14.4 inches (extended) |
| Material | Alloy Steel |
Compatibility Check
TV Size and Weight
This mount is compatible with most 13-55 inch flat or curved screen TVs and monitors weighing up to 55 lbs (25 kg).

This graphic demonstrates the range of TV sizes (13, 30, and 55 inches) that the mount can accommodate, along with its maximum weight capacity of 55 lbs.
VESA Pattern
The VESA pattern refers to the four mounting holes on the back of your TV. This mount supports VESA patterns from 75x75 mm up to 400x400 mm.

This image illustrates how to measure the VESA pattern on the back of a TV, highlighting the minimum (75x75mm) and maximum (400x400mm) compatible VESA dimensions for this mount.
Compatible Wall Types
This mount is designed for installation on solid concrete walls, brick walls, or wood studs. DO NOT install on drywall alone. Concrete anchors are included for brick and concrete walls.

This graphic depicts the types of walls suitable for mounting: concrete, wood stud, and brick. It explicitly warns against installing the mount on drywall without a stud.
Installation Guide
Before You Begin
- Gather necessary tools: pencil, drill, level, stud finder (for wood studs), measuring tape, screwdriver.
- Ensure you have all parts as listed in the 'Package Contents' section.
- Determine the desired height and location for your TV.
Step-by-Step Installation
The installation process involves three main steps:

This graphic outlines the simplified three-step installation process for the TV mount: attaching the VESA plate to the TV, securing the wall plate to the wall, and finally hanging the TV onto the mounted plate.
Step 1: Attach VESA Plate to TV
- Carefully place your TV face down on a soft, clean surface.
- Identify the VESA mounting holes on the back of your TV.
- Attach the VESA plate (and extension arms if needed for larger VESA patterns) to the back of your TV using the appropriate screws and washers from the hardware kit. Ensure they are securely tightened.
Step 2: Mount Wall Plate
- Mark the desired mounting height on the wall.
- For wood stud installation: Use a stud finder to locate the center of a wood stud. Mark the drill holes for the wall plate. Drill pilot holes (recommended size in manual) into the stud. Secure the wall plate using the lag bolts and washers.
- For concrete/brick wall installation: Mark the drill holes. Drill pilot holes (recommended size in manual) into the concrete/brick. Insert concrete anchors into the holes. Secure the wall plate using the lag bolts and washers into the anchors.
- Use the included spirit level to ensure the wall plate is perfectly horizontal before fully tightening all bolts.
Step 3: Hang the TV
- With assistance, carefully lift the TV (with the VESA plate attached) and hook it onto the wall plate.
- Ensure the TV is securely seated on the wall plate.
- Tighten any safety screws or locking mechanisms to prevent accidental dislodgement.
Operating Instructions: Adjusting Your TV Mount
The monTEK HW1240BK mount offers various adjustments for optimal viewing comfort.
Tilt Adjustment
Adjust the vertical angle of your TV to reduce glare or achieve a better viewing position. The mount allows for a tilt range of +5° (upward) to -15° (downward).

This image demonstrates the tilt functionality of the mount, showing how the TV can be angled upwards by 5 degrees or downwards by 15 degrees to optimize viewing and reduce glare.
Swivel Adjustment
Pivot your TV horizontally up to +/- 90° to view from different seating areas. The maximum swivel angle may vary depending on your TV's size and its distance from the wall.

This image illustrates the swivel capability of the mount, allowing the TV to be rotated horizontally up to 90 degrees in either direction for flexible viewing angles.
Extension and Retraction
Extend the TV up to 14.4 inches from the wall for greater flexibility or retract it back to a slim 2.6 inches to save space when not in use.
This image visually represents the mount's ability to extend the TV up to 14.4 inches from the wall and retract it to a compact 2.6 inches, highlighting its space-saving design.
Rotation Adjustment
The mount allows for a rotation from -5° to 90°, enabling transitions between landscape and portrait screen orientations for multi-functional viewing.

This image illustrates the mount's rotation capability, allowing the TV to be easily switched between landscape and portrait modes, with a rotation range of -5 to 90 degrees.
Cable Management
Utilize the integrated cable management clips on the articulating arms to keep cables organized and out of sight, contributing to a neat and orderly viewing area.
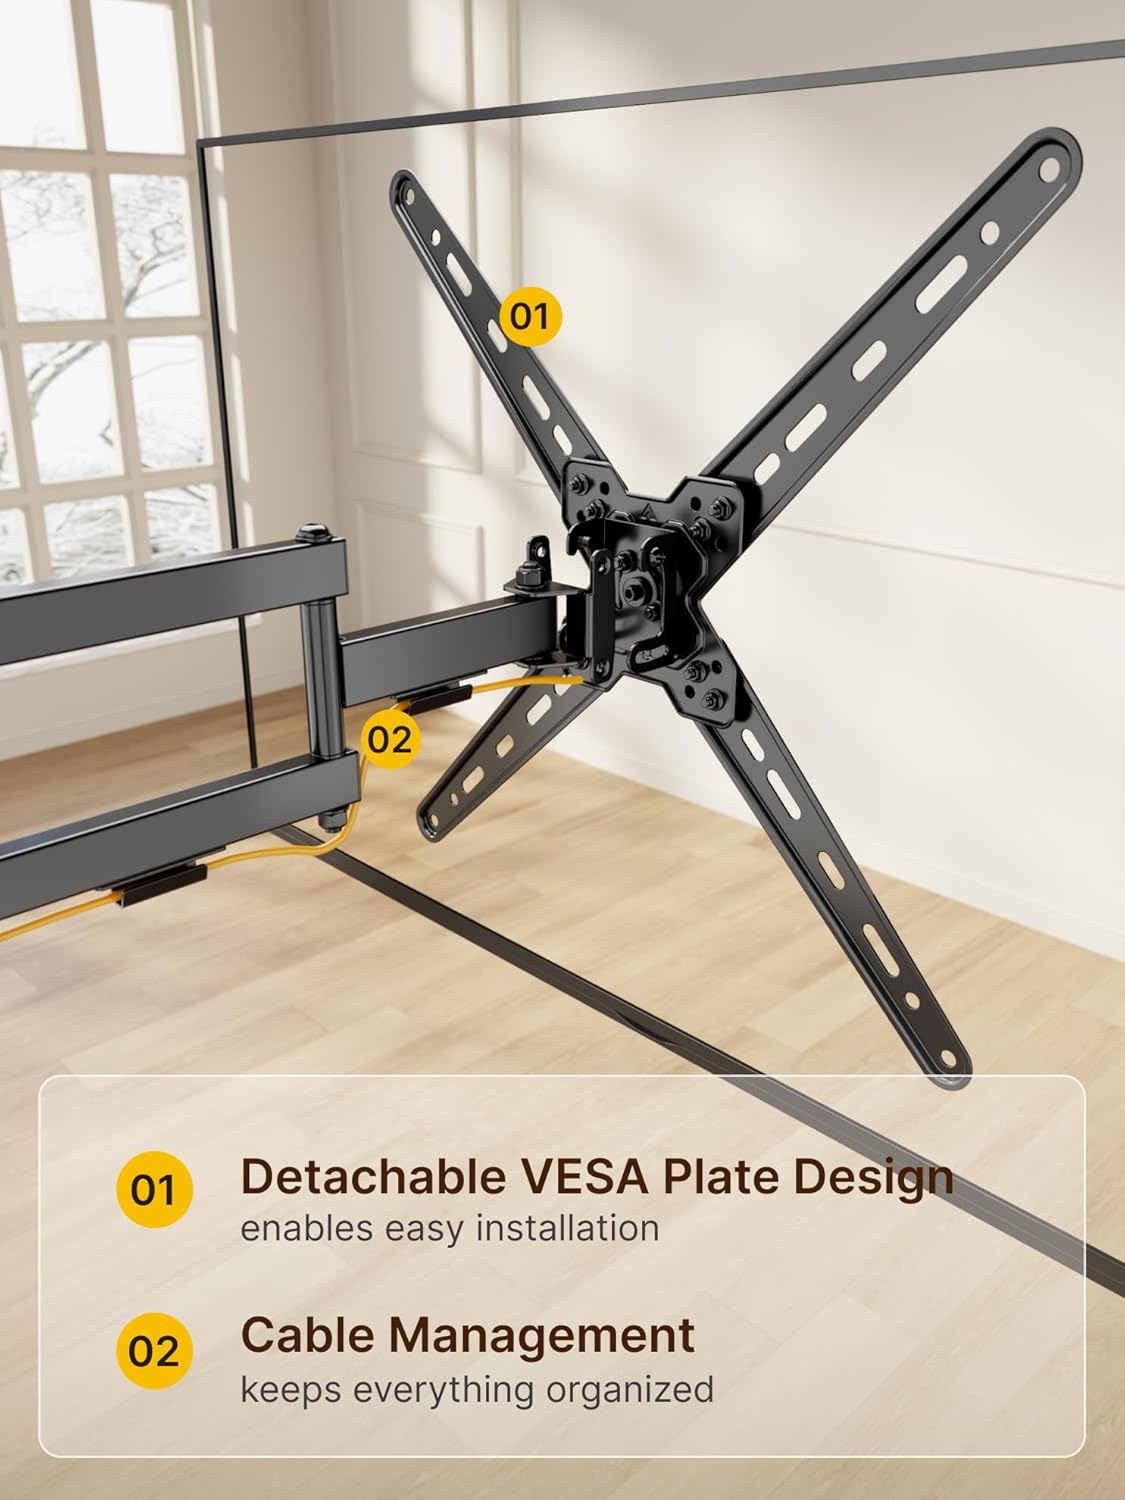
This image highlights the mount's detachable VESA plate for easy installation and the integrated cable management system designed to keep wires tidy along the articulating arms.
Care and Maintenance
- Cleaning: Dust the mount regularly with a soft, dry cloth. For stubborn marks, use a slightly damp cloth and mild detergent, then wipe dry. Avoid abrasive cleaners or solvents.
- Periodic Checks: Periodically check all screws and bolts to ensure they remain tight and secure. Over time, vibrations or adjustments can cause fasteners to loosen.
- Lubrication: The articulating joints are designed for smooth movement and generally do not require lubrication. If movement becomes stiff, contact customer support for advice.
Troubleshooting Guide
If you encounter issues with your monTEK TV wall mount, refer to the following common problems and solutions:
- TV is not level: Ensure the wall plate was installed level. Some mounts allow for minor post-installation leveling adjustments; check your specific model's features. If not, the wall plate may need to be re-installed.
- Difficulty adjusting tilt/swivel: Check if any adjustment knobs or bolts are overtightened. Loosen them slightly to allow movement, then re-tighten to secure the desired position. Ensure the TV's weight is within the mount's capacity.
- Mount feels loose on the wall: Immediately remove the TV from the mount. Re-check all wall mounting bolts and anchors for tightness. Ensure the wall type is appropriate and that the installation followed the instructions for your specific wall type. If installed on wood studs, verify the bolts are securely in the center of the stud.
- TV is too heavy for the mount: If the TV sags or the mount struggles to hold its position, the TV's weight exceeds the mount's capacity. Remove the TV immediately and replace the mount with one rated for your TV's weight.
- Missing parts or damaged components: Do not proceed with installation. Contact monTEK customer support for replacement parts.
Warranty Information and Customer Support
monTEK is committed to providing high-quality products and reliable customer service. This product is backed by a manufacturer's warranty. For specific warranty details, please refer to the product packaging or contact monTEK customer support directly.
If you have any questions, require technical assistance, or need support with your monTEK HW1240BK TV wall mount, please do not hesitate to contact our customer support team. We offer free technical support to ensure your satisfaction.
Contact information can typically be found on the product packaging, our official website, or through your point of purchase.
Related documentsHW1240BK


Ask a question about this manual
Ask about setup, troubleshooting, compatibility, parts, safety, or missing instructions. Manuals+ will review the question and use this page’s manual context to help answer it.