
1. Introduction
Thank you for choosing PChero Rechargeable LED Tealight Candles. This product offers a safe, flameless, and eco-friendly alternative to traditional candles, perfect for various decorative purposes. These electric tealights do not produce fire or messy hot wax, making them safe for daily home decoration. They are designed to be rechargeable, reducing battery waste and carbon emissions.
This manual provides detailed instructions for the setup, operation, and maintenance of your LED tealight candles to ensure optimal performance and longevity.
2. Safety Information
- These flameless electric tealights are designed for indoor decorative use.
- Keep the charging cables and tealights away from water or excessive moisture.
- Do not attempt to open or modify the tealight candles or the remote control. This may void the warranty and pose a safety risk.
- Avoid bending or applying excessive force to the flame component of the tealights, as this can cause damage.
- Use only the provided USB-C charging cables for recharging.
- Keep out of reach of children and pets.
3. Package Contents
Please verify that all items are present in your package:
- 12 x PChero Rechargeable LED Tealight Candles
- 2 x USB-C Charging Cables (each with 6 ports)
- 1 x Remote Control (with pre-installed CR2025 battery)
- 1 x User Manual (this document)
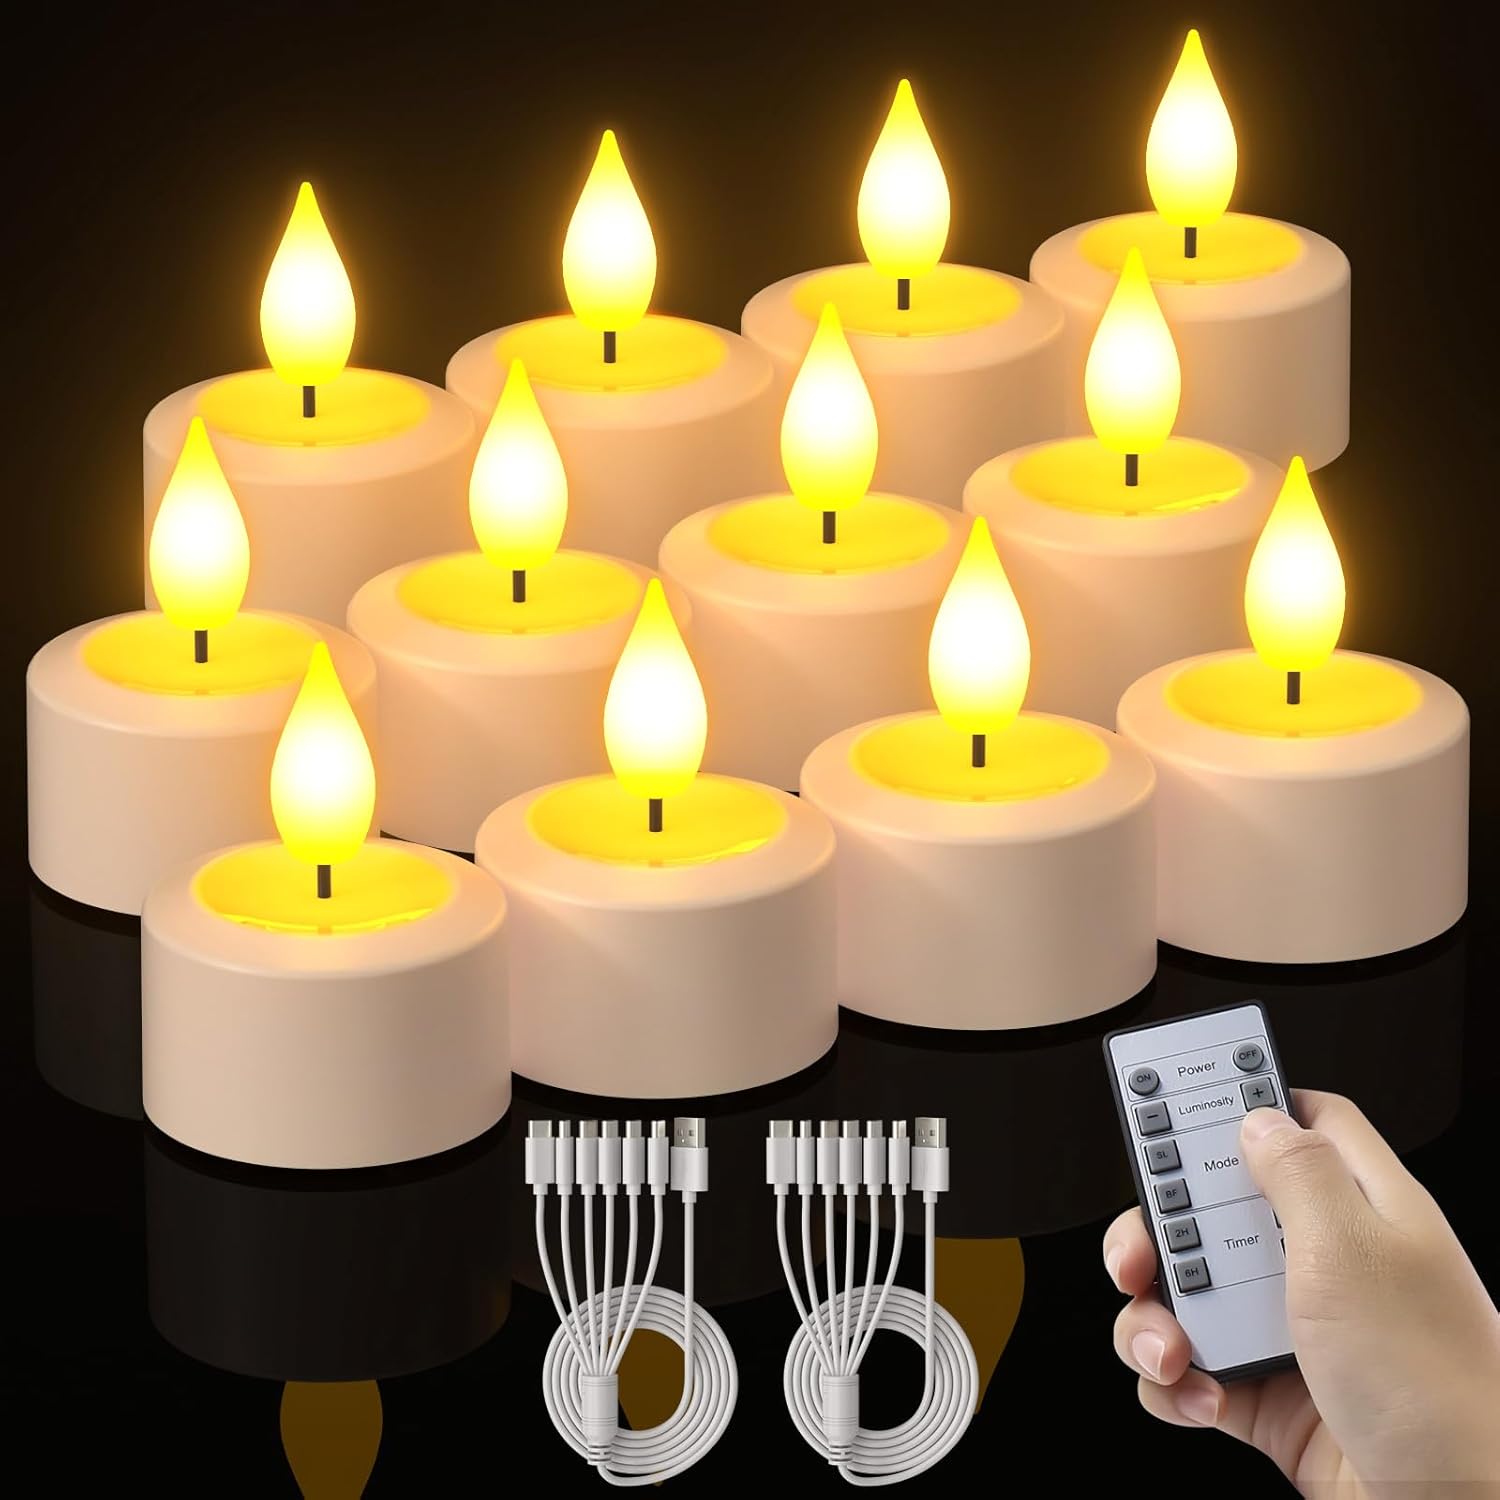
Figure 1: Overview of the PChero Rechargeable LED Tealight Candles, including the 12 candles, two 6-port USB-C charging cables, and the remote control.
4. Setup
4.1 Initial Charging
Before first use, it is recommended to fully charge all tealight candles.
- Locate the USB-C charging port on the bottom of each tealight candle.
- Connect one end of the provided USB-C charging cable to a power source (e.g., USB wall adapter, computer USB port).
- Plug the other end of the USB-C cable into the charging port of each tealight candle. Each cable can charge up to 6 candles simultaneously.
- During charging, a red indicator light will illuminate inside the tealight. Once fully charged, this red light will turn off.
- A full charge typically takes approximately 2 hours and provides up to 42 hours of illumination.

Figure 2: Charging status indication. A red light inside the candle signifies charging, and it turns off when charging is complete.

Figure 3: The USB-C charging port on the bottom of the tealight, highlighting the rechargeable design without the need for disposable batteries.
4.2 Remote Control Preparation
The remote control comes with a pre-installed CR2025 battery. Before use, remove the transparent plastic tab from the battery compartment to activate the battery.
5. Operating Instructions
The tealight candles can be operated using the switch on the bottom of each candle or via the included 12-key remote control.
5.1 Manual Operation
- Each tealight has an ON/OFF switch on its base. Slide the switch to 'ON' to turn on the candle, and to 'OFF' to turn it off.
5.2 Remote Control Operation
The remote control allows for convenient operation from a distance of up to 6 meters.

Figure 4: The 12-key remote control and its various functions for adjusting the tealight candles.
| Button | Function |
|---|---|
| ON / OFF | Turns all paired candles ON or OFF. |
| Luminosity + / - | Adjusts brightness (5 levels). '+' increases brightness, '-' decreases brightness. |
| Mode | Cycles through lighting modes:
|
| Timer (2H / 4H / 6H / 8H) | Sets an automatic timer for the candles to stay on for 2, 4, 6, or 8 hours. Once set, the candles will turn on at the same time each day and turn off after the selected duration. |

Figure 5: Illustration of the 'Set It and Forget It' timer function, demonstrating how to set an 8-hour timer for automatic daily operation.
6. Maintenance
6.1 Cleaning
- Wipe the tealight candles with a soft, dry cloth.
- Do not use abrasive cleaners or immerse the candles in water.
6.2 Battery Care
- Recharge the candles when the light output diminishes or they no longer turn on.
- For optimal battery life, avoid completely draining the batteries frequently.
- If storing the candles for an extended period, charge them fully every 3-6 months to maintain battery health.
- The remote control battery (CR2025) can be replaced by sliding open the battery compartment on the back of the remote. Ensure correct polarity when inserting a new battery.
7. Troubleshooting
- Candle not turning on: Ensure the switch on the bottom of the candle is in the 'ON' position. If it still doesn't light up, the battery may be depleted; recharge the candle.
- Remote control not working: Check if the transparent plastic tab has been removed from the remote's battery compartment. Ensure the remote's battery is not depleted; replace the CR2025 battery if necessary. Make sure there are no obstructions between the remote and the candles.
- Candle not charging: Verify that the USB-C cable is securely connected to both the power source and the candle. Check if the power source is active. The red charging indicator light should be visible.
- Flickering flame component is bent or broken: The flame component is delicate. If it becomes bent or breaks off, the tealight may be permanently damaged and cannot be repaired. Handle with care.
- Short battery life: Ensure the candles are fully charged (red light off). Battery life can vary slightly based on brightness settings and usage patterns.
8. Specifications

Figure 6: Detailed dimensions of the PChero LED Tealight Candle and key features on its base.
| Feature | Detail |
|---|---|
| Brand | PChero |
| Model Number | LC004RN1 |
| Dimensions (L x W x H) | 4 x 4 x 5.5 cm (1.57 x 1.57 x 2.16 inches) |
| Weight (per item) | Approx. 35g (Total 420g for 12 items) |
| Battery Type | Lithium-polymer (12 included) |
| Charging Time | Approx. 2 hours |
| Operating Time | Up to 42 hours (on a full charge) |
| Input Voltage | 5 Volts |
| Light Source Type | LED |
| Color | Ivory White |
| Material | Plastic |
| Remote Control Range | Up to 6 meters |
| Remote Control Battery | CR2025 (included) |
9. Warranty and Support
For any product inquiries, technical support, or warranty claims, please contact PChero customer service through the platform where you purchased the product. Please have your order number and product model (LC004RN1) available when contacting support.