
1. Introduction
The GardePro A50 Trail Camera is designed for capturing high-quality images and videos of wildlife and for surveillance purposes. Featuring a 4K Sony Starvis sensor, it delivers exceptional daytime, low-light, and night vision performance. This manual provides detailed instructions for setting up, operating, and maintaining your A50 trail camera.

Figure 1: Front view of the GardePro A50 Trail Camera, showcasing its camouflage design and sensor layout.
2. What's in the Box
Verify that all components are present upon unpacking:
- 1 x GardePro A50 Trail Camera
- 1 x Mounting Strap
- 1 x Instruction Manual (this document)
- 1 x USB Cable
3. Product Overview
Familiarize yourself with the key components of your GardePro A50 Trail Camera.
3.1 Camera Components
- Main Lens: Captures images and videos.
- PIR Sensors: Detect motion to trigger recording.
- Infrared LEDs: Provide illumination for night vision.
- 2.4" Color Screen: For menu navigation and viewing media.
- Control Buttons: Menu, OK, Navigation (Up/Down/Left/Right), Start, On/Off.
- SD Card Slot: For memory card insertion.
- USB Port: For connecting to a computer.
- Battery Compartment: Holds 8 AA batteries.

Figure 2: The GardePro A50 Trail Camera with its front cover open, revealing the 2.4-inch color screen, control buttons, SD card slot, and USB port.
4. Setup
4.1 Battery Installation
- Open the camera's latch and swing open the front cover.
- Locate the battery compartment on the side.
- Insert 8 new 1.5V AA batteries, ensuring correct polarity (+/-).
- Close the battery compartment securely.
Note: The camera can also be powered by a GardePro SP350 solar panel (sold separately) for continuous operation.

Figure 3: A hand demonstrating the proper insertion of AA batteries into the camera's battery compartment.
4.2 SD Card Installation
- With the camera off, locate the SD card slot.
- Insert a full-size SD/SDHC/SDXC memory card (up to 512GB, not included) into the slot until it clicks. Ensure the card is inserted in the correct orientation.
- To remove, push the card in until it clicks, then release.
4.3 Mounting the Camera
The GardePro A50 is designed for tree mounting.
- Thread the provided mounting strap through the slots on the back of the camera.
- Securely fasten the camera to a tree or pole at the desired height and angle.
- Ensure the camera is stable and pointed towards the area you wish to monitor.

Figure 4: The GardePro A50 Trail Camera securely mounted to a tree using its included strap, positioned for outdoor monitoring.
4.4 Initial Power On and Basic Settings
- Switch the camera to the 'ON' position. The screen will illuminate.
- Use the 'MENU' button to access settings.
- Navigate through the menu using the arrow buttons and confirm selections with 'OK'.
- Set the current date, time, and desired operating mode (Photo, Video, or Photo+Video).
5. Operating Instructions
5.1 Recording Modes
The A50 offers versatile recording options:
- Photo Mode: Captures still images (up to 64MP).
- Video Mode: Records video clips (up to 4K resolution).
- Photo + Video Mode: Captures a still image followed by a video clip upon trigger.
5.2 Motion Detection and Trigger Speed
The camera features a rapid 0.1-second trigger speed to capture fast-moving subjects. Its wide detection angle ensures comprehensive coverage.

Figure 5: A visual comparison illustrating the effectiveness of the GardePro A50's 0.1-second trigger speed in capturing clear images of fast-moving subjects, such as an eagle in flight, compared to a slower 0.5-second trigger speed.
5.3 Night Vision
Equipped with smart night vision technology, the A50 provides a 100ft night vision range. It intelligently adjusts infrared illumination to prevent over-exposure or under-exposure, ensuring clear images in low-light conditions.
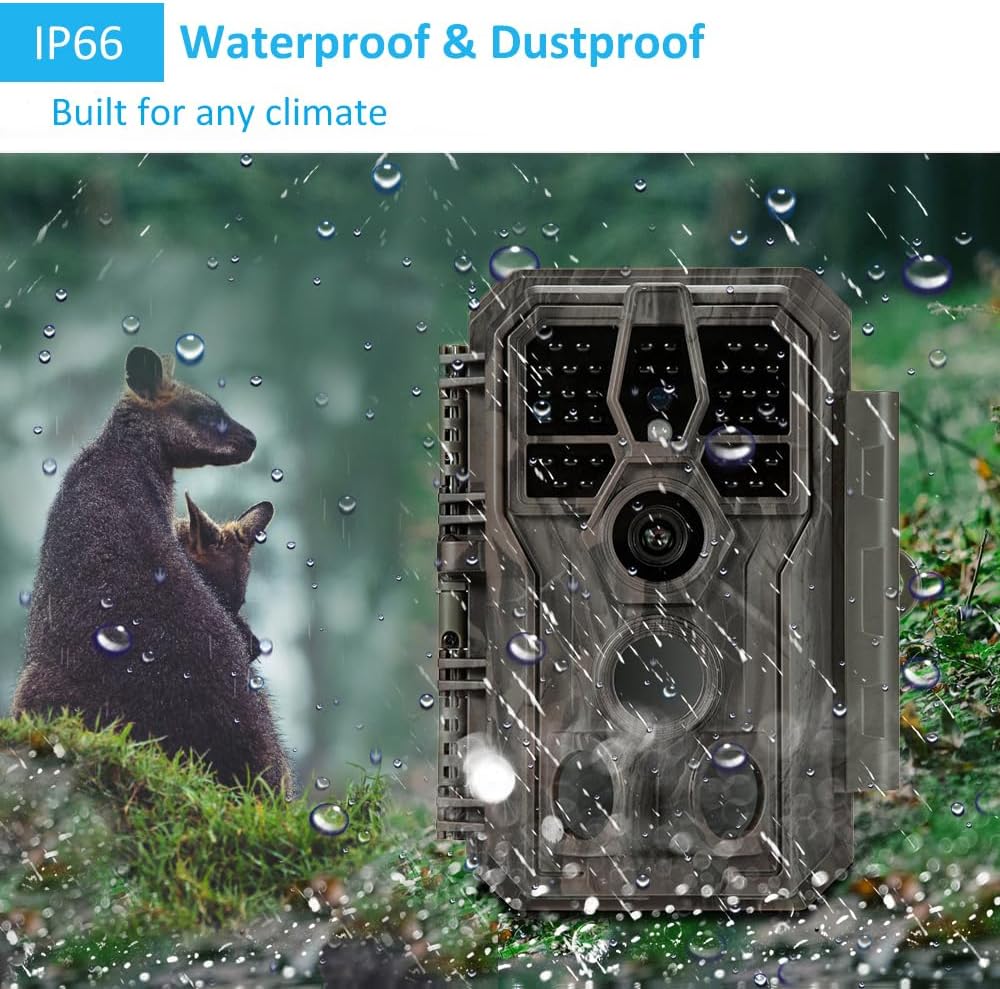
Figure 6: A diagram illustrating the GardePro A50 Trail Camera's 100-foot night vision flash range, effectively illuminating a deer in a dark environment.
5.4 Advanced Features
- Loop Recording: Overwrites oldest files when the SD card is full.
- Time-Lapse: Captures images at set intervals.
- Operation Hours: Define specific timeframes for camera activity.
- Time Stamp: Adds date, time, and temperature information to recordings.
5.5 Viewing Files
You can review captured images and videos directly on the camera's 2.4-inch color screen. Alternatively, connect the camera to a computer using the USB cable or insert the SD card into a card reader.
6. Maintenance
6.1 Cleaning
- Gently wipe the camera lens and PIR sensors with a soft, dry cloth to remove dust and debris.
- Do not use abrasive cleaners or solvents.
6.2 Battery Replacement
Replace all 8 AA batteries when the low battery indicator appears on the screen. For optimal performance, use high-quality alkaline or rechargeable lithium batteries.
6.3 SD Card Management
- Regularly format the SD card within the camera's menu to ensure optimal performance and prevent data corruption.
- Back up important files to a computer before formatting.
6.4 Weather Resistance
The GardePro A50 has an IP66 waterproof rating, making it resistant to dust and strong jets of water. While designed for outdoor use, avoid submerging the camera in water.
7. Troubleshooting
- Camera not powering on:
Ensure batteries are inserted correctly with proper polarity. Check battery charge level. Try new batteries. - Poor image/video quality:
Clean the camera lens and PIR sensors. Ensure the camera is securely mounted and not vibrating. Check settings for resolution and compression. For night vision, ensure no obstructions are blocking the IR LEDs. - Camera not detecting motion:
Adjust the PIR sensitivity setting in the menu. Ensure the camera is positioned correctly, not facing direct sunlight or heat sources that could cause false triggers. Clear any vegetation in front of the camera that might sway and trigger it. - SD card error:
Ensure the SD card is properly inserted. Try formatting the SD card in the camera's menu. If the issue persists, try a different SD card (ensure it's a compatible type and capacity). - Short battery life:
Reduce the number of photos per trigger, video length, or trigger interval. Use high-quality batteries. Consider using the GardePro SP350 solar panel for extended operation.
8. Specifications
| Feature | Specification |
|---|---|
| Model Name | A50 |
| Image Sensor | Sony 4K Starvis Image Sensor |
| Photo Resolution | Up to 64MP |
| Video Resolution | Up to 4K (3840x2160) |
| Trigger Speed | 0.1 seconds |
| Night Vision Range | 100 feet (30 meters) |
| IR LEDs | 36 pcs high performance No Glow 940nm LEDs |
| Display Screen | 2.4-inch Color Screen |
| Memory Card Support | SD/SDHC/SDXC up to 512GB |
| Power Source | 8x AA 1.5V batteries or GardePro SP350 Solar Panel (sold separately) |
| Waterproof Rating | IP66 |
| Connectivity | USB |
| Mounting Type | Tree Mount |
| Dimensions (L x W x H) | 4.2 x 2.86 x 5.6 inches |
| Weight | 1.12 pounds |
9. Warranty and Support
9.1 Warranty Information
GardePro products are covered by a limited warranty. Please refer to the warranty card included with your purchase or visit the official GardePro website for detailed warranty terms and conditions.
9.2 Customer Support
For technical assistance, troubleshooting, or product inquiries, please contact GardePro customer support through their official website or the contact information provided in your product packaging. When contacting support, please have your model number (A50) and purchase details ready.


