
1. Introduction
This manual provides essential information for the proper use and maintenance of the Castex Engine Timing Tool, Model C01/0275. This specialized kit is designed to assist automotive professionals and enthusiasts in accurately aligning, adjusting, and checking the camshaft timing of specific Volkswagen Group engines.
The C01/0275 kit utilizes a battery-operated digital inclinometer in conjunction with precisely manufactured adapters and alignment tools to ensure accurate camshaft positioning. This tool is crucial for maintaining engine performance and preventing damage during engine service.
2. Product Overview
The Castex Engine Timing Tool kit includes a comprehensive set of components housed in a durable case, designed for professional use. Key components facilitate precise camshaft timing adjustments.

Figure 2.1: The complete Castex Engine Timing Tool kit, Model C01/0275, neatly organized within its protective storage case. The case ensures all components are secure and easily accessible.
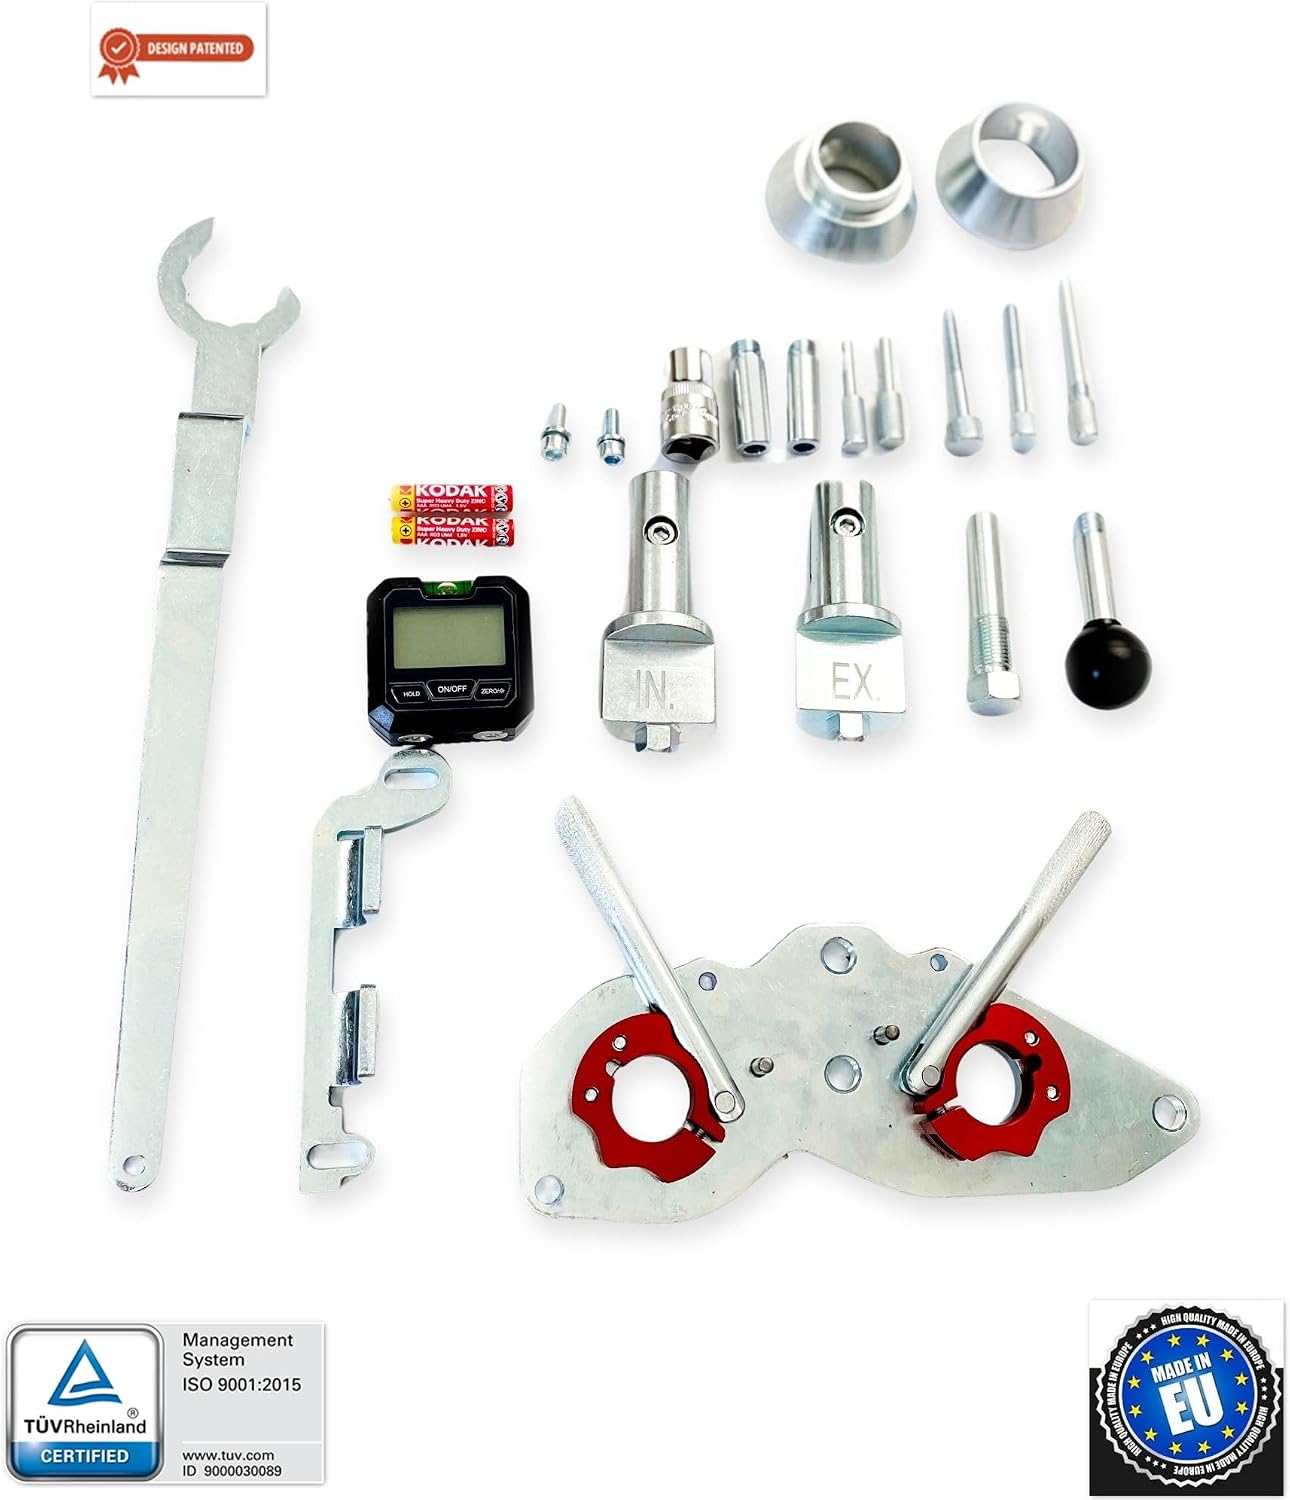
Figure 2.2: A detailed view of the individual components included in the kit, such as the specialized wrench, digital inclinometer, camshaft locking tools (marked 'IN' and 'EX'), and various pins and adapters necessary for precise engine timing.
2.1 Kit Contents
- Digital Inclinometer: Battery-operated device for precise angle measurements.
- Camshaft Locking Tools: Specific tools for securing intake ("IN") and exhaust ("EX") camshafts.
- Crankshaft Locking Pin: Used to lock the crankshaft in the correct position.
- Tensioner Pin: For locking the tensioner during belt or chain replacement.
- Various Adapters and Pins: For different engine configurations and precise alignment.
- Specialized Wrench: Designed for specific engine components.
- Storage Case: Durable case for organized storage and transport.
3. Compatibility
The Castex Engine Timing Tool C01/0275 is specifically designed for Volkswagen Group 1.5L TSi gasoline engines (EA211, EVO 4-cylinder TSi ACT variants). It is compatible with a range of vehicles from Audi, Seat, Skoda, Cupra, and Volkswagen.
3.1 Compatible Vehicle Models (from year of manufacture)
- Audi: A1 (from 2018), A3 (from 2017), Q2 (from 2018), Q3 (from 2018)
- Seat: ARONA (2017-2021), ATECA (from 2018), IBIZA (2017-2021), LEON (from 2018), TARRACO (from 2019)
- Skoda: KAMIQ (from 2019), KAROQ (from 2017), KODIAQ (from 2019), Octavia III/IV (from 2017), SCALA (from 2019), SUPERB III (2017-2020)
- Volkswagen: ARTEON (2018-2020), GOLF VII/VIII (from 2017), PASSAT (from 2018), POLO (2017-2021)
- Cupra: LEON (from 2022), FORMENTOR (from 2020), ATECA (from 2023)
3.2 Compatible Engine Codes
This tool is designed for 1.5L TSi gasoline engines with the following codes:
- DACA
- DACB
- DADA
- DFYA
- DPBA
- DPCA
- DPBE
4. Setup and Preparation
Before using the Castex Engine Timing Tool, ensure the vehicle is safely secured and the engine has cooled down. Always refer to the vehicle manufacturer's service manual for specific procedures and torque specifications.
4.1 Safety Precautions
- Always wear appropriate personal protective equipment (PPE), including safety glasses and gloves.
- Ensure the vehicle is on a stable, level surface and properly supported with jack stands.
- Disconnect the vehicle's battery to prevent accidental starting.
- Keep all tools clean and free of debris.
4.2 Initial Tool Inspection
Before each use, inspect all components of the C01/0275 kit for any signs of damage, wear, or corrosion. Ensure the digital inclinometer is functioning correctly and has sufficient battery power.

Figure 4.1: Inspecting the intake (IN) and exhaust (EX) camshaft locking tools, along with the various pins and adapters, for any signs of wear or damage before use.
5. Operating Instructions
The following steps outline the general procedure for using the Castex Engine Timing Tool. Specific engine timing procedures vary by vehicle and engine type; always consult the vehicle manufacturer's repair manual for detailed instructions.
5.1 Camshaft Timing Adjustment
- Position Crankshaft: Rotate the crankshaft to the Top Dead Center (TDC) position for cylinder 1. Use the crankshaft locking pin to secure it.
- Install Camshaft Locking Tools: Place the designated intake ("IN") and exhaust ("EX") camshaft locking tools onto the respective camshafts. These tools are designed to fit precisely and hold the camshafts in their correct timed positions.
- Use Digital Inclinometer: Attach the digital inclinometer to the appropriate surface as indicated by the vehicle's service manual or the tool's specific instructions. Use it to verify the precise angular position of the camshafts.
- Adjust Timing: If adjustments are necessary, carefully loosen the camshaft sprockets (if applicable) and rotate the camshafts until the locking tools fit perfectly and the inclinometer shows the correct angle.
- Tighten Components: Once timing is confirmed, tighten all fasteners to the manufacturer's specified torque values. Remove the locking tools in reverse order of installation.
- Verify Timing: After reassembly, manually rotate the engine through several cycles (at least two full crankshaft rotations) and re-check the timing marks and tool fitment to ensure proper alignment.

Figure 5.1: The main camshaft locking plate, showing the precise fitment points for securing the camshafts during timing procedures. The red inserts indicate specific alignment features.
6. Maintenance and Storage
Proper maintenance and storage will extend the lifespan of your Castex Engine Timing Tool and ensure its accuracy for future use.
6.1 Cleaning
- After each use, clean all tool components with a clean, dry cloth to remove oil, grease, and dirt.
- Do not use harsh chemicals or abrasive cleaners, as they may damage the tool's finish or calibration.
6.2 Storage
- Store the tool kit in its original protective case in a dry, cool environment, away from direct sunlight and excessive humidity.
- Ensure all components are securely placed in their designated slots within the case to prevent movement and damage.
- Remove batteries from the digital inclinometer if storing for extended periods to prevent leakage.
7. Troubleshooting
This section addresses common issues that may arise during the use of the Castex Engine Timing Tool.
7.1 Common Issues and Solutions
| Problem | Possible Cause | Solution |
|---|---|---|
| Tool components do not fit correctly. | Incorrect engine model/code; debris obstructing fit; component damage. | Verify engine compatibility (Section 3); clean components thoroughly; inspect for damage. Do not force tools. |
| Digital inclinometer not powering on. | Dead batteries; incorrect battery installation. | Replace batteries; ensure correct polarity. |
| Inaccurate timing readings after use. | Improper tool usage; components not tightened to spec; worn engine parts. | Review operating instructions (Section 5); ensure all fasteners are torqued correctly; consult a professional if engine wear is suspected. |
8. Specifications
| Feature | Detail |
|---|---|
| Model Number | C01/0275 |
| Brand | CASTEX |
| Engine Compatibility | VW Group 1.5L TSi Gasoline Engines (EA211, EVO 4-cylinder TSi ACT) |
| Engine Codes Supported | DACA, DACB, DADA, DFYA, DPBA, DPCA, DPBE |
| Primary Function | Camshaft timing alignment, adjustment, and checking |
| Material | High-quality materials for professional use |
| Manufacturing Origin | Made in EU |

Figure 8.1: TÜV Rheinland Certified logo, indicating compliance with ISO 9001:2015 management system standards.
9. Warranty and Support
Specific warranty details for the Castex Engine Timing Tool C01/0275 are typically provided at the point of purchase or within the product packaging. Please retain your proof of purchase for any warranty claims.
For technical support, inquiries regarding tool usage, or warranty service, please contact your authorized Castex dealer or the retailer from whom the product was purchased. Provide your model number (C01/0275) and a detailed description of your issue to facilitate prompt assistance.
This product is manufactured in the EU using high-quality materials for professional applications, ensuring reliability and durability.

