1. Introduction
Thank you for choosing the qirita 52" Selfie Stick Tripod with Remote. This versatile device combines the functionality of a selfie stick and a stable tripod, designed to enhance your photography and videography experience. It is ideal for group selfies, live streaming, video recording, and more, offering wide compatibility with various smartphones and action cameras.
Please read this manual carefully before using the product to ensure proper operation and to maximize its features.
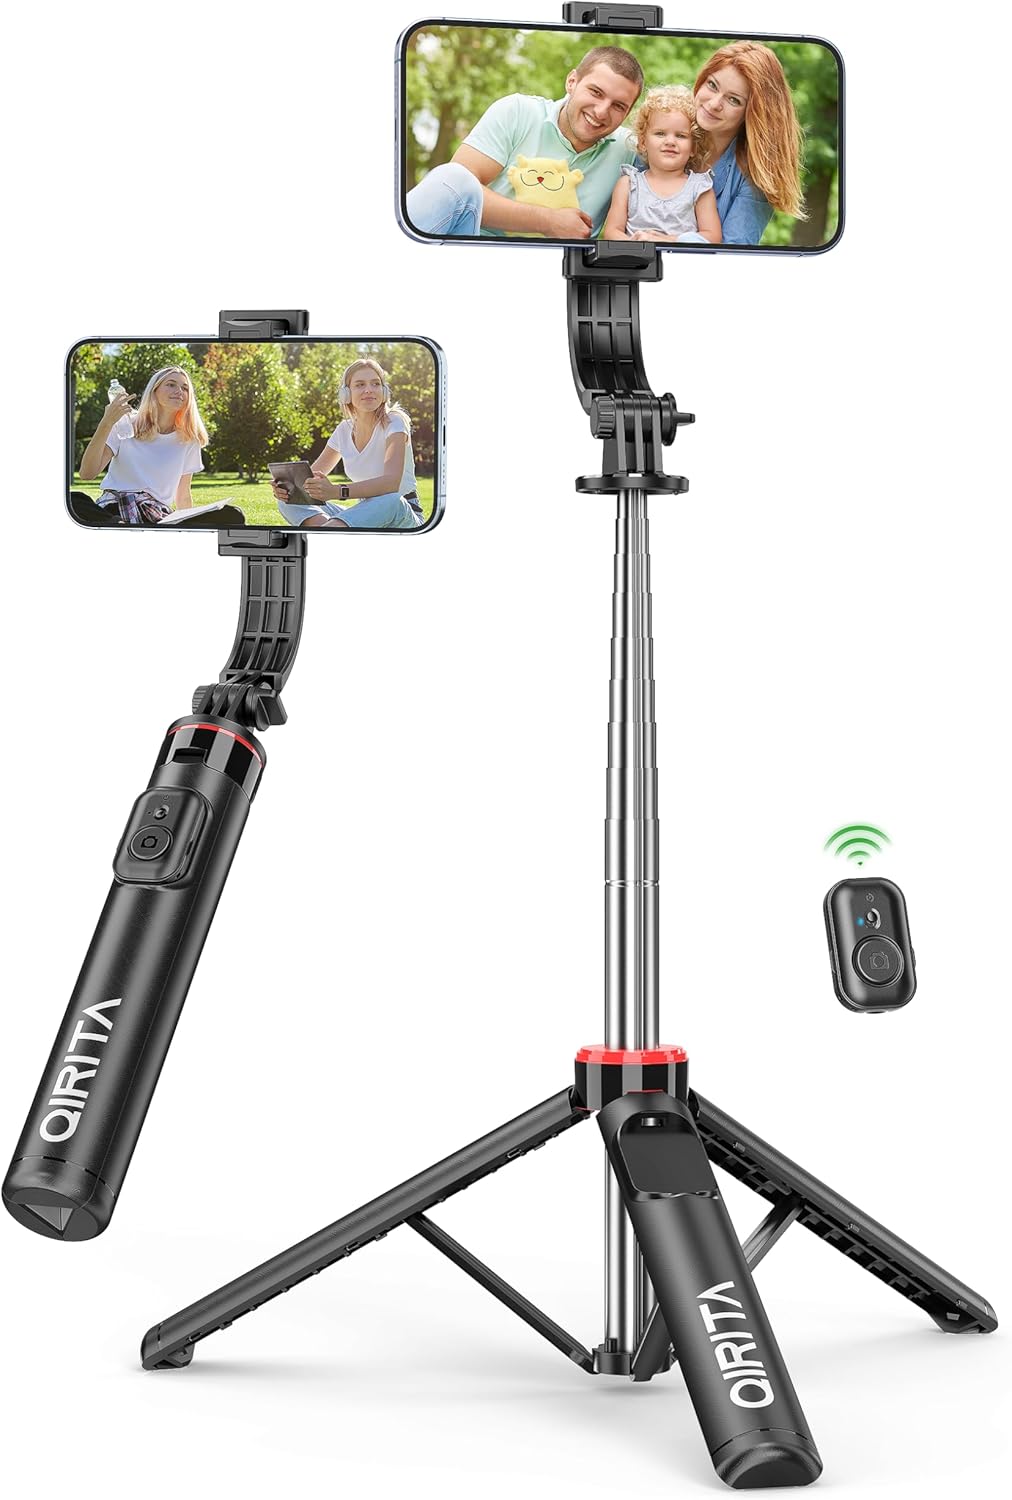
Figure 1.1: The qirita Selfie Stick Tripod in its two primary modes: handheld selfie stick and freestanding tripod. A small remote control is also shown.
2. Product Components
The qirita Selfie Stick Tripod consists of the following main components:
- Telescopic Pole: Extendable pole for adjustable height.
- Phone Holder: Adjustable clamp to secure your smartphone.
- Tripod Base: Foldable legs for stable freestanding use.
- Bluetooth Remote Control: Detachable wireless remote for capturing photos/videos from a distance.
- Handle: Ergonomic grip for handheld use.

Figure 2.1: The phone holder offers 360-degree rotation for horizontal or vertical phone orientation and a 225-degree adjustable arm for various shooting angles.

Figure 2.2: The tripod base features an umbrella-shaped structure with extended leg proportions and anti-slip silicone for enhanced stability.
3. Setup Guide
3.1 Unfolding the Selfie Stick Tripod
- Gently pull the top phone holder upwards to extend the telescopic pole.
- To deploy the tripod legs, hold the handle and push the bottom part downwards until the three legs fully spread out, forming a stable base.
- Adjust the height of the telescopic pole by pulling out or pushing in the sections to your desired length. The maximum extension is 52 inches (133 cm).

Figure 3.1: Adjusting the telescopic pole to achieve the desired height for various shooting scenarios.
3.2 Attaching Your Phone
- Open the phone holder clamp by pulling the top jaw upwards.
- Carefully place your smartphone into the holder, ensuring it is securely gripped by both jaws. The holder supports phones with widths between 2.5 to 3.7 inches (6-9 cm).
- Adjust the phone holder's angle and rotation (360° rotation and 225° arm rotation) to achieve your desired shooting orientation (horizontal or vertical).

Figure 3.2: The phone holder is compatible with a wide range of mobile phones and can also accommodate action cameras.
3.3 Pairing the Bluetooth Remote Control
- Locate the detachable remote control on the handle of the selfie stick. Gently slide it out.
- Press and hold the button on the remote control for a few seconds until the indicator light starts blinking, indicating it is in pairing mode.
- On your smartphone, go to Settings > Bluetooth.
- Turn on Bluetooth and search for available devices.
- Select "QIRITA" (or similar name) from the list of devices to pair. The indicator light on the remote will stop blinking and remain solid once successfully paired.
- The remote control is compatible with iOS (5.1+) and Android (4.4+) devices and has an effective range of up to 10 meters (33 feet).

Figure 3.3: The detachable Bluetooth remote control allows for convenient hands-free operation from a distance.
4. Operating Instructions
4.1 Using as a Selfie Stick
- Ensure the tripod legs are folded and secured into the handle.
- Extend the telescopic pole to your desired length.
- Adjust the phone holder's angle to frame your shot.
- Press the button on the Bluetooth remote control to capture photos or start/stop video recording.

Figure 4.1: The selfie stick mode is perfect for capturing individual or small group photos and videos.
4.2 Using as a Tripod Stand
- Deploy the tripod legs as described in Section 3.1, ensuring they are fully extended and stable on a flat surface.
- Extend the telescopic pole to the desired height.
- Adjust the phone holder's angle and orientation.
- Use the Bluetooth remote control to capture photos or videos from a distance, allowing for full-body shots or group photos without holding the device.

Figure 4.2: The tripod stand mode provides stability for group photos, video calls, or time-lapse recordings.
4.3 Detachable Phone Holder Functionality
The phone holder can be detached from the selfie stick and used independently as a desktop phone stand. This is convenient for watching videos, making video calls, or simply holding your phone upright on a flat surface.

Figure 4.3: The phone holder can be used separately as a convenient desktop stand.
5. Maintenance
- Cleaning: Wipe the surface of the selfie stick tripod with a soft, dry cloth. Do not use abrasive cleaners or solvents.
- Storage: When not in use, fold the tripod legs and retract the telescopic pole completely. Store the device in a cool, dry place away from direct sunlight and extreme temperatures.
- Remote Control Battery: The remote control uses a Lithium Metal battery. If the remote stops responding, the battery may need replacement. Refer to the remote control's compartment for battery type and replacement instructions.
- Avoid Over-extension: Do not force the telescopic pole beyond its maximum extension limit.
- Handle with Care: Avoid dropping the device or subjecting it to strong impacts, which could damage internal components.
6. Troubleshooting
| Problem | Possible Cause | Solution |
|---|---|---|
| Remote control not pairing. | Bluetooth not enabled on phone; remote battery low; remote not in pairing mode. | Ensure phone Bluetooth is on. Check remote battery and replace if necessary. Press and hold remote button until light blinks to enter pairing mode. |
| Phone not fitting in holder. | Phone width exceeds holder's capacity. | Verify phone width is between 2.5-3.7 inches (6-9 cm). Do not force larger phones. |
| Tripod unstable. | Legs not fully extended; uneven surface; pole over-extended. | Ensure all three legs are fully deployed. Place on a flat, stable surface. Do not extend the pole excessively high, especially with heavier phones. |
| Telescopic pole difficult to extend/retract. | Dust/debris in joints; minor friction. | Clean the pole sections. Apply gentle, even pressure. Avoid forcing. |
7. Specifications
| Feature | Detail |
|---|---|
| Model Number | C13SS-Red |
| Material | Stainless Steel |
| Maximum Height | 133 Centimeters (52 inches) |
| Folded Length (Storage) | 23 Centimeters (9 inches) |
| Item Weight | 259 Grams (9.1 ounces) |
| Phone Holder Width | 6-9 cm (2.5-3.7 inches) |
| Rotation Angle (Phone Holder) | 360 degrees |
| Rotation Angle (Arm) | 225 degrees |
| Remote Control Range | Up to 10 meters (33 feet) |
| Remote Control Battery | 1 Lithium Metal battery (required) |
| Compatible Devices | Smartphones (iOS 5.1+, Android 4.4+), GoPro, Action Cameras |
8. Warranty and Support
For any questions, technical support, or warranty inquiries regarding your qirita Selfie Stick Tripod, please contact the manufacturer or seller directly through the platform where you purchased the product. Please retain your proof of purchase for warranty claims.
Manufacturer: SHENZHEN YUANSU CHUANGDA TECHNOLOGY CO., LTD


