
1. Introduction
Thank you for choosing the HOMCOM Portable Clothes Dryer. This manual provides essential information for the safe and efficient operation, installation, and maintenance of your new appliance. Please read these instructions thoroughly before use and retain them for future reference.

Image 1.1: The HOMCOM Portable Clothes Dryer in a typical home environment.
2. Safety Instructions
To reduce the risk of fire, electric shock, or injury, adhere to the following safety precautions:
- Always connect the dryer to a properly grounded 120V, 1300W electrical outlet.
- Do not dry items that have been soiled with cooking oils, flammable chemicals, or other combustible substances.
- Clean the lint filter before or after each load to prevent fire hazards and maintain drying efficiency.
- Ensure adequate ventilation around the dryer. Do not block air openings.
- Do not allow children to play on or in the dryer. Supervise children when the dryer is in use.
- If the dryer door is opened during operation, the machine will automatically stop for safety.
3. Product Overview
The HOMCOM Portable Clothes Dryer is designed for compact spaces, offering efficient drying with multiple modes. Key features include a stainless steel drum, a transparent door window, and a convenient carry handle.

Image 3.1: Detailed view of the dryer's transparent door, stainless steel inner drum, and integrated carry handle.

Image 3.2: Visual representation of the dryer's high power, 13 lbs / 3.22 cu ft capacity, and high temperature capabilities.
4. Setup and Installation
Before operating your dryer, ensure it is properly installed according to these guidelines.
4.1 Unpacking
Carefully remove all packaging materials. Inspect the dryer for any shipping damage. Retain packaging for potential future transport or service.
4.2 Placement
The dryer can be placed freestanding on the floor, stacked on a compatible washer, or wall-mounted using the included brackets. Ensure the surface is level and stable. For wall mounting, consult a professional to ensure proper installation and structural support.

Image 4.1: Product dimensions for placement planning.
4.3 Ventilation
Connect the provided air vent connector to the exhaust port at the rear of the dryer. Secure it with the three included screws. Ensure the exhaust hose (not included) is directed outdoors or to a suitable ventilation system to prevent moisture buildup.

Image 4.2: Rear view detailing the air vent connector, protective foot pads, and air inlet filter screen.
Video 4.1: Demonstrates the installation of the air vent connector on the HOMCOM portable dryer.
4.4 Power Connection
Plug the dryer into a dedicated 120V, 60Hz, 15A (minimum) grounded electrical outlet. Do not use extension cords or adapters.
5. Operating Instructions
Follow these steps for effective drying of your laundry.
5.1 Loading Clothes
Open the dryer door and load clothes into the stainless steel drum. Do not overload the dryer; ensure clothes can tumble freely. For optimal results, spin-dry clothes thoroughly before placing them in the dryer.
5.2 Selecting a Drying Mode
Turn the control knob to select one of the seven available drying modes:
- Extra: 160 minutes, 140°F (60°C) - For heavy or bulky items.
- Smart: 100 minutes, 140°F (60°C) - For standard loads.
- Mix: 47 minutes, 131°F (55°C) - For mixed fabric loads.
- Airing: 100 minutes, 77°F (25°C) - For refreshing items without heat.
- Timed Modes: 30 minutes, 90 minutes, 150 minutes - For custom drying times.
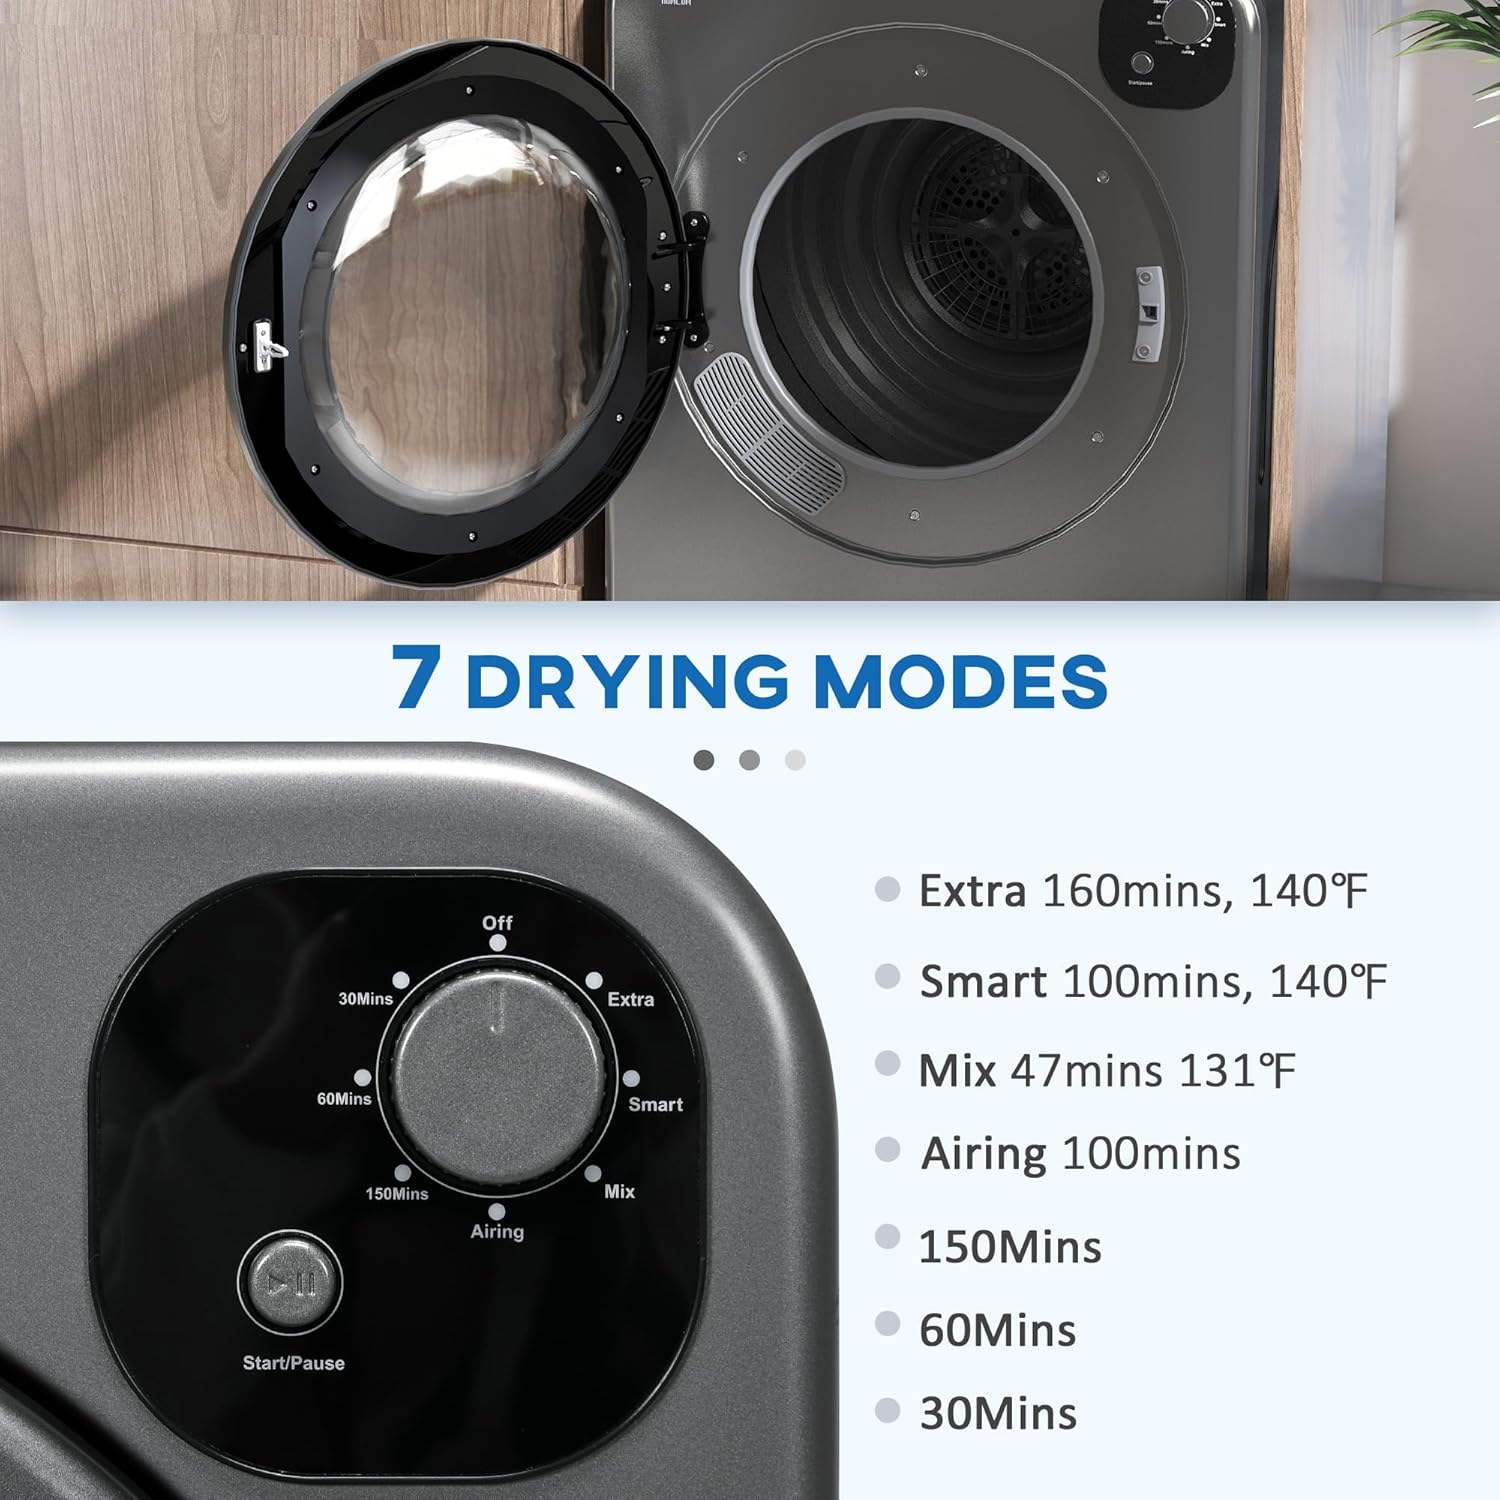
Image 5.1: The control panel with the rotary knob for selecting drying modes and the Start/Pause button.
5.3 Starting the Cycle
Press the Start/Pause button to begin the selected drying cycle. The dryer will automatically stop when the cycle is complete or if the door is opened.
5.4 Removing Clothes
Once the cycle is finished, open the door and remove your dry clothes. Promptly removing clothes can help reduce wrinkles.
6. Maintenance
Regular maintenance ensures optimal performance and extends the lifespan of your dryer.
6.1 Cleaning the Lint Filter
The dryer features a two-layer filter to effectively trap lint. Clean the lint filter located inside the drum before or after every load. Pull the filter out, remove accumulated lint, and reinsert it securely.
6.2 Cleaning the Exterior
Wipe the exterior of the dryer with a soft, damp cloth. Avoid abrasive cleaners or solvents that could damage the finish.
6.3 Internal Cleaning
Periodically inspect the interior of the drum for any residue. Wipe with a damp cloth if necessary. Ensure the drum is dry before operating the dryer again.
7. Troubleshooting
If you encounter issues with your dryer, refer to the following common problems and solutions:
| Problem | Possible Cause | Solution |
|---|---|---|
| Dryer does not start | Power cord unplugged, door not closed, circuit breaker tripped. | Ensure power cord is securely plugged in. Close the door firmly. Check and reset the circuit breaker. |
| Clothes are not drying | Overloaded dryer, clogged lint filter, incorrect drying mode selected. | Reduce load size. Clean the lint filter. Select a longer or hotter drying mode. |
| Unusual noises during operation | Foreign objects in the drum, dryer not level. | Check the drum for loose items. Ensure the dryer is on a level surface. |
| Dryer stops mid-cycle | Door opened, power interruption. | Close the door securely. Check power supply. |
If the problem persists after attempting these solutions, please contact customer support.
8. Specifications
| Feature | Specification |
|---|---|
| Brand | HOMCOM |
| Model Number | 853-025V80GY |
| Item Weight | 60 pounds |
| Product Dimensions (L x W x H) | 20 x 23.5 x 27.5 inches |
| Capacity | 13 Pounds (3.22 Cu. Ft) |
| Voltage | 120 Volts |
| Wattage | 1300 watts |
| Noise Level | 65 Decibels |
| Installation Type | Freestanding, Stackable, Wall Mounted |
| Material Type | Alloy Steel |
| Color | Gray |
| Included Components | Air Vent Connector, Screws |
| Certification | cETL, cUL |
9. Warranty and Support
For warranty information and customer support, please refer to the documentation provided with your purchase or visit the official HOMCOM website. Keep your purchase receipt as proof of purchase for warranty claims.
Aosom Direct is the seller of this product. For specific inquiries, you may contact them directly through your purchase platform.