1. Introduction
Welcome to the iBUYPOWER TraceMesh 7 Gaming Desktop PC user manual. This guide provides essential information for setting up, operating, maintaining, and troubleshooting your new gaming system. Please read this manual thoroughly before using your PC to ensure proper function and longevity.
1.1 Safety Information
- Always ensure the PC is placed on a stable, level surface with adequate ventilation.
- Do not block any ventilation openings on the PC case.
- Keep the PC away from direct sunlight, heat sources, and liquids.
- Use only the power cable provided with your PC.
- Before performing any maintenance or opening the case, ensure the PC is powered off and unplugged from the wall outlet.
1.2 Package Contents
Your iBUYPOWER TraceMesh 7 Gaming Desktop PC package should contain the following items:
- iBUYPOWER TraceMesh 7 Gaming Desktop PC Tower
- iBUYPOWER Gaming USB Keyboard
- iBUYPOWER Gaming USB Mouse
- Power Cable
- Quick Start Guide and other documentation
- Accessory bag (containing screws, cables, etc.)
2. Setup Guide
2.1 Unboxing and Initial Inspection
Carefully remove the PC and all accessories from the packaging. It is recommended to have two people for safe removal of the PC tower from its box due to its size and weight. Inspect all components for any signs of damage during transit. Remove any protective plastic films from the case panels.
Inside the PC case, you may find a protective bag or foam inserts. These are designed to secure internal components during shipping. Carefully open the side panel of the PC (usually secured with thumbscrews at the rear) and remove all internal packaging materials before powering on the system. Ensure all cables and components inside are securely seated.

Figure 1: Side view of the PC tower, showing the transparent panel and internal components.
2.2 Connecting Peripherals
Connect your monitor, keyboard, mouse, and other peripherals to the appropriate ports on the PC. Refer to the diagram below for common port locations.
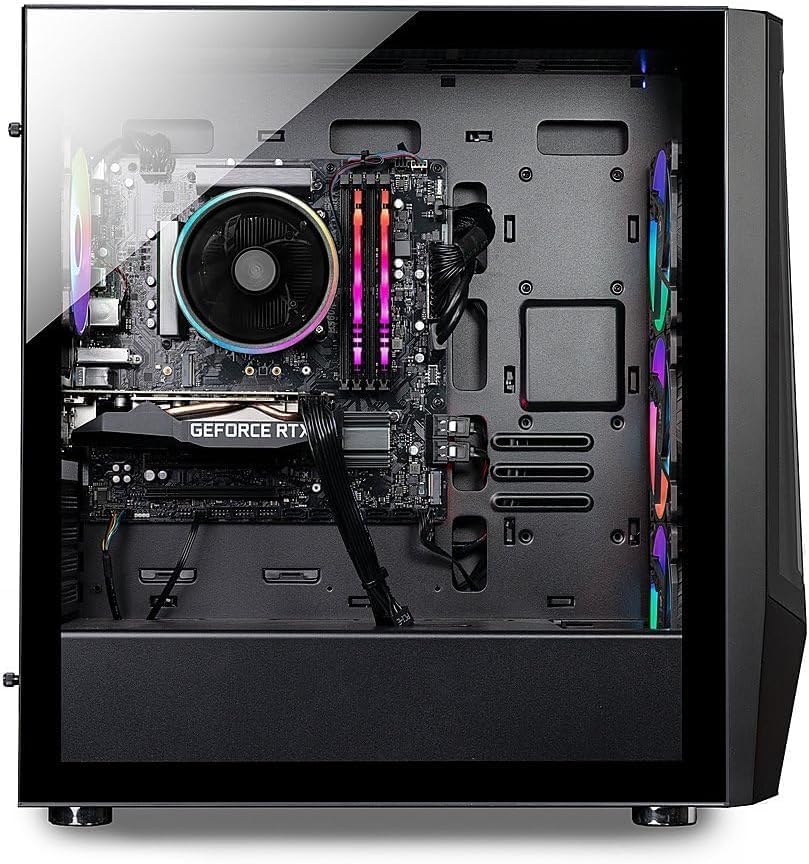
Figure 2: Internal view of the PC, illustrating component layout.
- Monitor: Connect your monitor to the graphics card's display outputs (HDMI or DisplayPort) located at the rear of the PC. Do not connect to the motherboard's video outputs unless specifically instructed.
- Keyboard and Mouse: Plug the USB cables from your iBUYPOWER gaming keyboard and mouse into any available USB ports on the PC.
- Power: Connect the provided power cable to the power supply unit (PSU) at the rear of the PC, then plug the other end into a wall outlet or surge protector.
- Network: For a wired internet connection, connect an Ethernet cable from your router/modem to the RJ-45 port at the rear. For wireless, ensure the Wi-Fi antennas (if included) are attached.
- Audio: Connect speakers or headphones to the audio jacks (green for line out/speakers, pink for microphone) at the rear or front of the PC.
2.3 Powering On
Once all connections are secure, flip the power switch on the PSU (located at the rear of the PC, near where the power cable connects) to the 'ON' position. Then, press the power button on the top front of the PC case. The system will begin to boot up.

Figure 3: The iBUYPOWER TraceMesh 7 Gaming Desktop PC.
Follow the on-screen instructions to complete the Windows 11 Home setup. This typically involves selecting your region, language, creating a user account, and connecting to a network.
3. Operating Your PC
3.1 Basic Operation
Your iBUYPOWER TraceMesh 7 PC comes pre-installed with Windows 11 Home. Familiarize yourself with the operating system's interface, including the Start Menu, Taskbar, and File Explorer. The included gaming keyboard and mouse are plug-and-play devices. For advanced customization of the keyboard and mouse, refer to their individual documentation or the iBUYPOWER support website.
3.2 RGB Lighting Control
The TraceMesh 7 features internal ARGB fans and an external ARGB strip on the front of the case, providing customizable lighting effects. These can typically be controlled via pre-installed software (e.g., motherboard RGB software) or dedicated buttons on the case (if available). Consult the system's documentation or iBUYPOWER support for specific instructions on adjusting RGB lighting.
4. Maintenance
Regular maintenance helps ensure optimal performance and extends the lifespan of your PC.
4.1 Cleaning
- Exterior: Use a soft, damp cloth to wipe down the exterior of the case. Avoid harsh chemicals.
- Dust Filters: The PC case may have removable dust filters (e.g., on the top, front, or bottom). Clean these regularly by rinsing with water and allowing them to dry completely before reattaching.
- Internal Components: Periodically, with the PC powered off and unplugged, use compressed air to gently clear dust from fans, heatsinks, and other internal components. Hold fans in place while spraying to prevent damage.
4.2 Software Updates
- Windows Updates: Regularly check for and install Windows updates through the 'Settings' app to ensure security and performance.
- Driver Updates: Keep your graphics card drivers (NVIDIA GeForce RTX 4060) and other component drivers updated. Visit the NVIDIA website or the iBUYPOWER support page for the latest drivers.
- Antivirus Software: Maintain up-to-date antivirus software to protect your system from malware.
5. Troubleshooting
If you encounter issues with your PC, try these basic troubleshooting steps:
- No Power: Ensure the power cable is securely connected to both the PC and the wall outlet. Check the PSU switch at the rear is in the 'ON' position. Try a different power outlet.
- No Display: Verify the monitor is connected to the graphics card (not the motherboard) and is powered on. Try a different display cable or monitor if possible.
- Peripherals Not Working: Ensure USB devices are properly plugged in. Try different USB ports. Restart the PC.
- System Slowdown: Check for background applications consuming resources. Ensure drivers and Windows are updated. Run a malware scan.
- Unusual Noises: If you hear grinding or loud fan noises, power off the PC and inspect internal fans for obstructions. If the issue persists, contact support.
For more advanced troubleshooting or persistent issues, please contact iBUYPOWER technical support.
6. Technical Specifications
| Component | Specification |
|---|---|
| Processor | 14th Gen Intel Core i7-14700F (20-Core, 2.10 GHz, up to 5.4 GHz) |
| Memory (RAM) | 64GB DDR5 5600MHz RAM |
| Storage | 4TB NVMe Solid State Drive (SSD) |
| Graphics Card | NVIDIA GeForce RTX 4060 (8GB GDDR6) |
| Operating System | Windows 11 Home |
| Wireless Connectivity | 802.11 Wireless-AC |
| Ethernet | 10/100/1000 Gigabit Ethernet LAN |
| Audio | Integrated High Definition Channel Audio Processing |
| Front I/O Ports | 1x USB 3.2 Gen 2 Type-C, 2x USB 3.2 Gen 1 Type-A, Headphone Jack, Microphone Jack, Power Button |
| Rear I/O Ports | 1x PS/2 Keyboard/Mouse Port, 2x USB 2.0 Type-A, 4x USB 3.2 Gen 1 Type-A, 1x USB 3.2 Gen 2 Type-A, 2x Antenna Ports, 1x RJ-45 Port, HD Audio Jacks |
| Power Supply | 600W |
| Cooling | Tower Air Fan, Internal: 4x lighted ARGB Fan; External: 1x ARGB Strip in front of case |
| Dimensions (H x W x D) | 18.9” x 8.6” x 19.3” |
| Weight | Approximately 30 pounds |
7. Warranty and Support
7.1 Product Warranty
Your iBUYPOWER TraceMesh 7 Gaming Desktop PC is covered by a limited warranty. The specific terms and duration of the warranty may vary. Please refer to the warranty card included in your package or visit the official iBUYPOWER website for detailed warranty information and registration procedures. Keep your proof of purchase for warranty claims.
7.2 Technical Support
Should you require technical assistance, please contact iBUYPOWER customer support. Before contacting support, ensure you have your PC's serial number and a clear description of the issue. Support contact information can typically be found on the iBUYPOWER website or in the documentation provided with your PC.
iBUYPOWER Customer Service Hours: Mon - Fri: 8:30 AM - 5:00 PM PST
iBUYPOWER Technical Support Hours: Mon - Fri: 8:30 AM - 5:00 PM PST
For the most current contact details, please visit the official iBUYPOWER website.


