
1. Introduction
The Proster T21D is a high-precision, high-performance 6000 counts digital multimeter designed for a wide range of electrical measurements. This versatile tool is suitable for both professional technicians and home users, offering reliable readings for various parameters. Its compact design, clear display, and robust construction make it an essential device for electrical testing and troubleshooting.
2. Safety Information
Always read and understand all safety warnings and operating instructions before using this instrument. Failure to observe safety precautions can result in electric shock, fire, or injury.
- Do not exceed the maximum input values specified for each measurement range.
- Exercise extreme caution when working with voltages above 36V DC or 25V AC RMS, as these can pose a shock hazard.
- Ensure the test leads are in good condition, without any damage or exposed wiring.
- Always disconnect power to the circuit under test before connecting or disconnecting test leads, especially when measuring current.
- Do not operate the multimeter if it appears damaged or if the protective casing is removed.
- Replace batteries promptly when the low battery indicator appears to ensure accurate readings.
- This device is rated for CAT III 600V, meaning it is suitable for measurements in building installations (e.g., distribution boards, circuit breakers, wiring, including cables, bus-bars, junction boxes, switches, socket outlets in the fixed installation, and equipment for industrial use and some other equipment, e.g., stationary motors with permanent connection to the fixed installation).
3. Package Contents
Upon opening the package, please verify that all the following items are included:
- Proster 6000 Counts Digital Multimeter (Model T21D)
- Pair of Test Probes (Red and Black)
- Temperature Probe
- User Manual
- Alligator Clip
- Screwdriver
- 3 x 1.5V AAA Batteries (pre-installed or included separately)
- 2 x Fuses (spare)
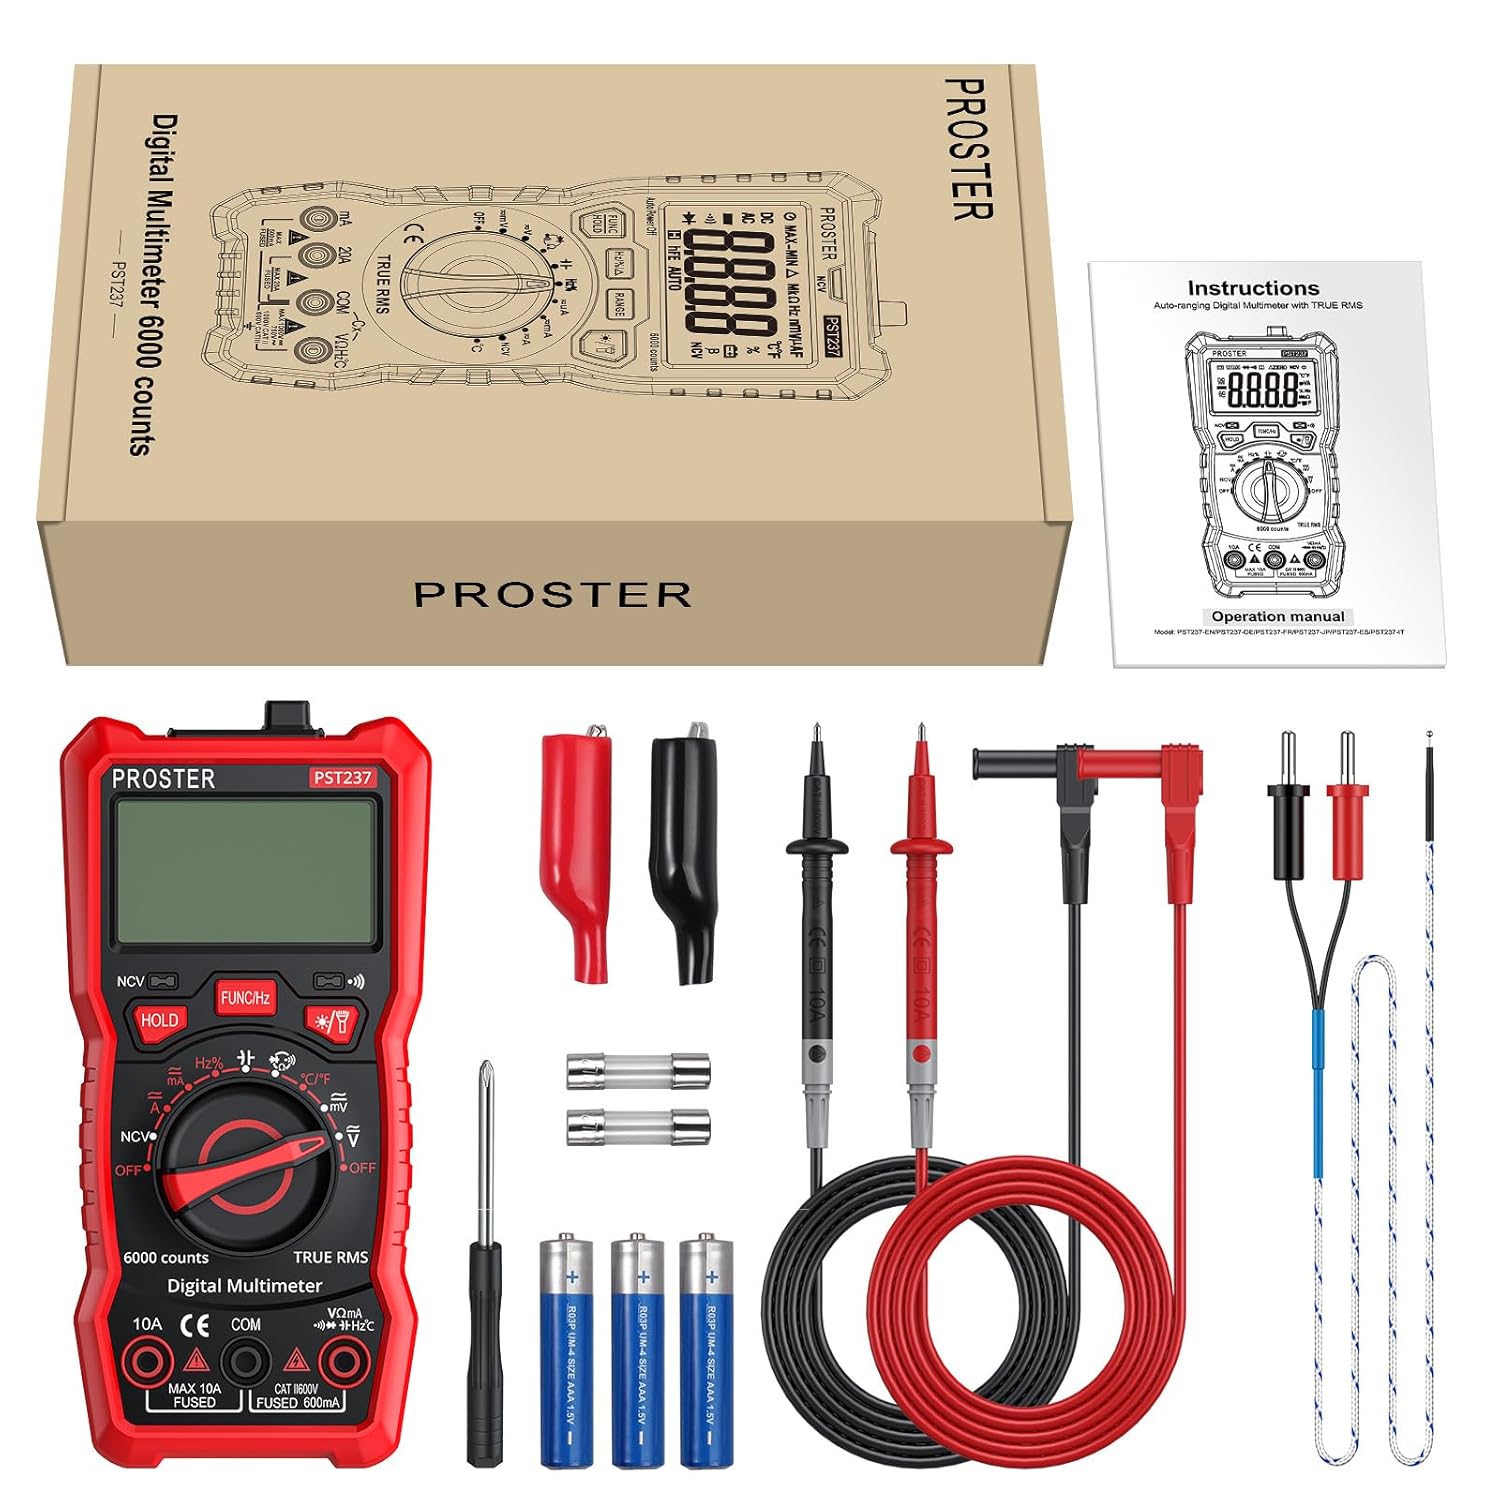
Image: Contents of the Proster Digital Multimeter package, including the multimeter, test leads, temperature probe, and other accessories.
4. Product Overview
The Proster T21D Digital Multimeter features a robust design with a clear, backlit LCD display for easy reading in various lighting conditions. It includes a kickstand for convenient tabletop use and a magnetic back for attachment to metal surfaces.

Image: Front view of the Proster Digital Multimeter, showing the display, rotary dial, function buttons, and input jacks, along with the included test leads.

Image: An illustration highlighting the key features of the multimeter, including AC/DC voltage, current, frequency, resistance, temperature, duty cycle, capacitance, diode, continuity, data hold, and NCV functions.

Image: Close-up of the multimeter's large, backlit LCD display, demonstrating its readability from various angles, especially in low-light conditions.

Image: An exploded view of the multimeter, illustrating its internal intelligent protection circuit board with built-in double safety fuses, designed to prevent overload damage.
5. Setup
5.1 Battery Installation
The multimeter requires 3 AAA 1.5V batteries for operation. These are typically included in the package. To install or replace batteries:
- Ensure the multimeter is turned OFF.
- Locate the battery compartment on the back of the unit.
- Use the included screwdriver to loosen the screw securing the battery cover.
- Remove the battery cover.
- Insert the 3 AAA batteries, observing the correct polarity (+/-) as indicated inside the compartment.
- Replace the battery cover and tighten the screw securely.
5.2 Connecting Test Leads
For most measurements, the test leads will be connected to the 'COM' (Common, black lead) and 'VΩmAHz' (red lead) input jacks. For high current measurements (up to 10A), the red lead should be connected to the '10A' input jack.
- Insert the black test lead into the 'COM' (Common) jack.
- Insert the red test lead into the appropriate jack for your measurement:
- 'VΩmAHz' for Voltage, Resistance, Capacitance, Frequency, Diode, Continuity, and small Current measurements (mA).
- '10A' for high Current measurements (up to 10A).
6. Operating Instructions
The Proster T21D offers a wide range of measurement functions. Use the rotary dial to select the desired measurement mode.
6.1 Basic Measurements
- Voltage Measurement (AC/DC):
Turn the rotary dial to the 'V~' (AC Voltage) or 'V=' (DC Voltage) position. Connect the test leads in parallel to the circuit or component. The multimeter will automatically select the range. - Current Measurement (AC/DC):
Turn the rotary dial to the 'A~' (AC Current) or 'A=' (DC Current) position. For currents up to 600mA, connect the red lead to 'VΩmAHz'. For currents up to 10A, connect the red lead to '10A'. Connect the multimeter in series with the circuit. - Resistance Measurement:
Turn the rotary dial to the 'Ω' (Resistance) position. Connect the test leads across the component. Ensure the circuit is de-energized before measuring resistance. - Capacitance Measurement:
Turn the rotary dial to the '∔' (Capacitance) position. Connect the test leads across the capacitor. Ensure the capacitor is fully discharged before testing. - Frequency Measurement:
Turn the rotary dial to the 'Hz' (Frequency) position. Connect the test leads to the signal source. - Temperature Measurement:
Turn the rotary dial to the '°C/°F' (Temperature) position. Connect the temperature probe to the appropriate input jacks (usually VΩmAHz and COM). Place the probe on or near the object whose temperature is to be measured. - Diode Test:
Turn the rotary dial to the 'Diode' position. Connect the red lead to the anode and the black lead to the cathode of the diode. The display will show the forward voltage drop. Reverse the leads to check for open circuit. - Continuity Test:
Turn the rotary dial to the 'Continuity' position. Connect the test leads across the circuit or component. A continuous beep indicates continuity (low resistance).

Image: A user demonstrating how to measure AC voltage from a power outlet using the Proster Digital Multimeter and its test leads.
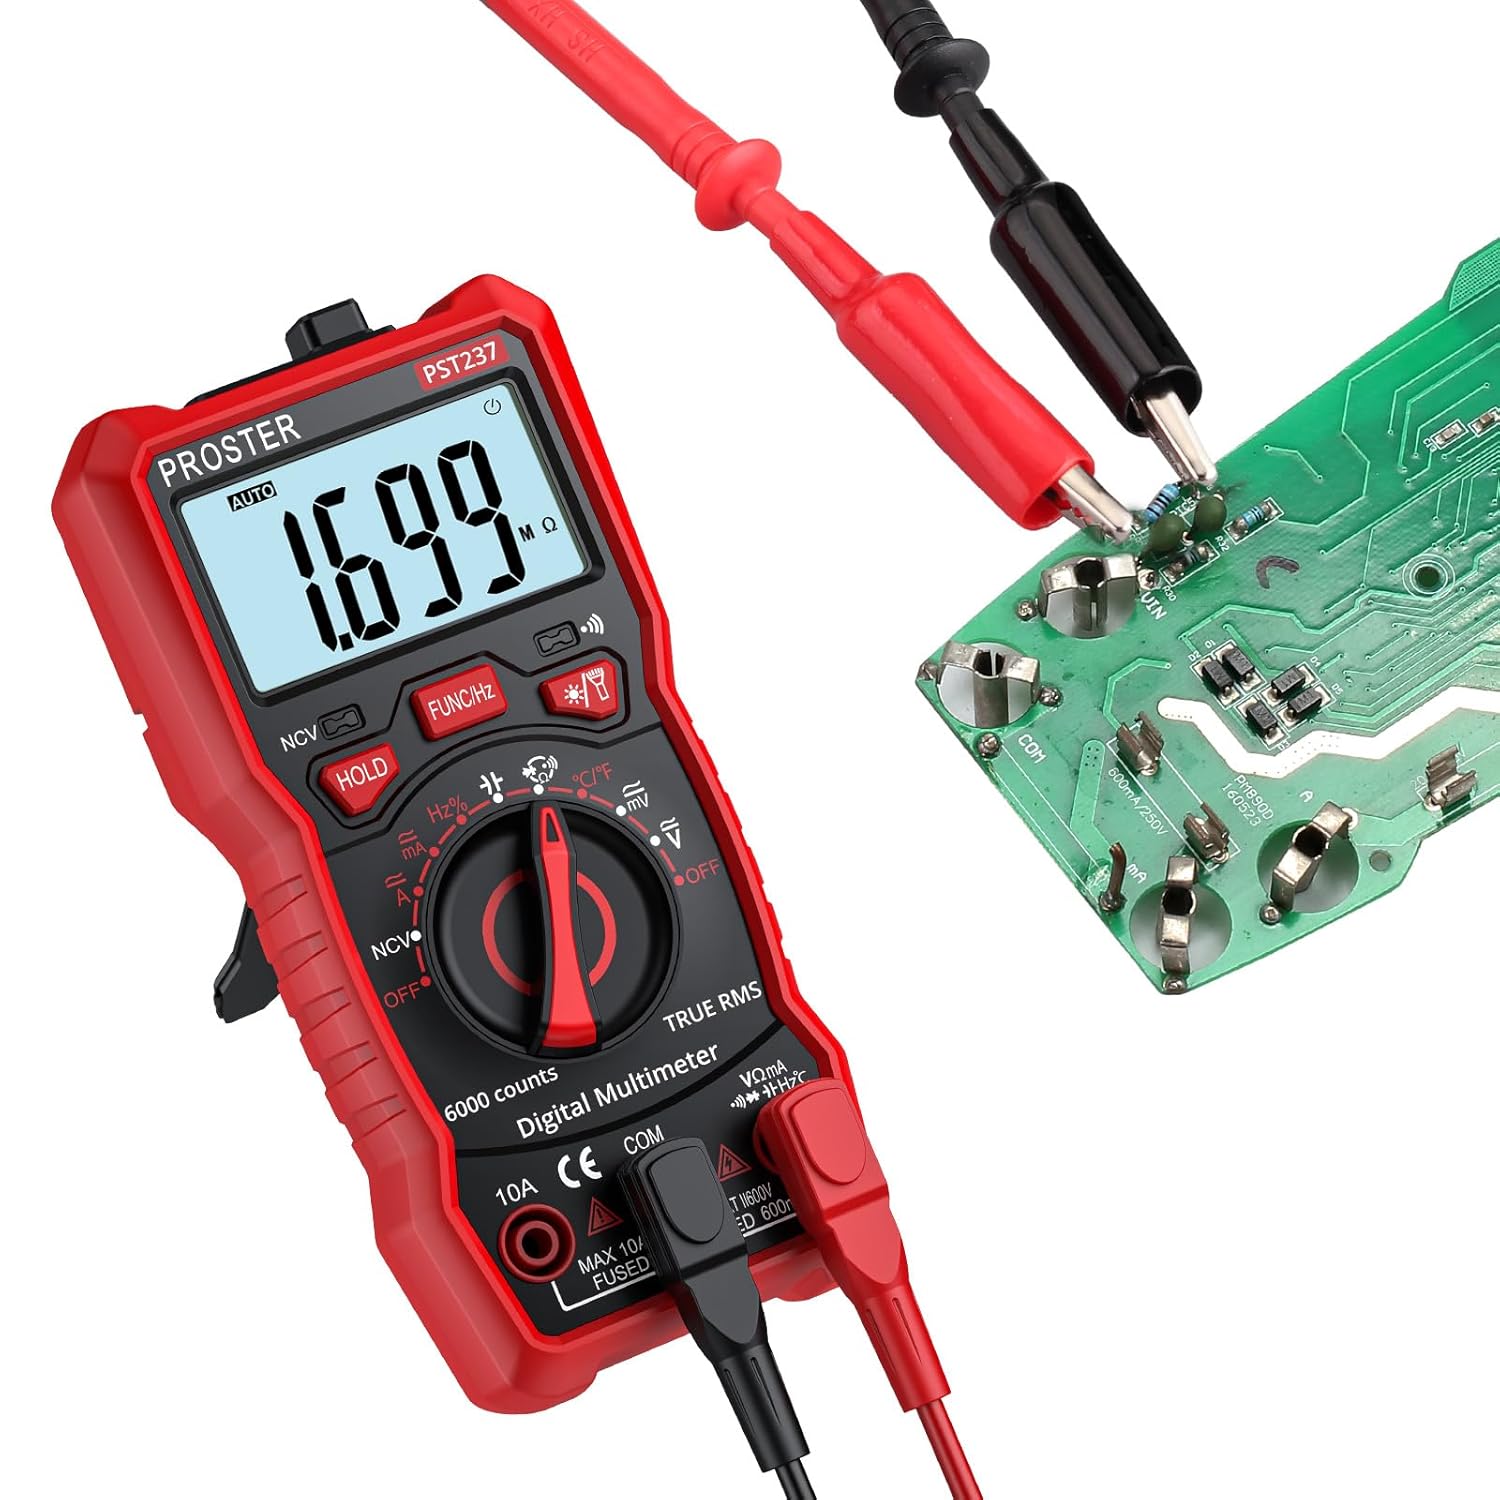
Image: A user measuring the resistance of a component on a circuit board using the Proster Digital Multimeter.
6.2 Advanced Functions
- NCV (Non-Contact Voltage) Detection:
Move the rotary dial to the 'NCV' position. Hold the top of the multimeter near an AC voltage source. The NCV indicator and audible alarm will activate if voltage is detected, providing a non-contact method to identify live wires. - Data Hold:
Press the 'HOLD' button to freeze the current reading on the display. Press it again to release. - Backlight/Flashlight:
Press the backlight button (often marked with a light bulb icon) to turn on the display backlight for improved visibility in dim conditions. Some models also integrate a flashlight function activated by the same button or a dedicated one. - True RMS:
This multimeter features True RMS measurement, which provides accurate readings for both sinusoidal and non-sinusoidal AC waveforms, unlike average-responding meters.

Image: An overview of the Proster Multimeter's functions and a detailed table of its measurement ranges and precision for various electrical parameters.
7. Maintenance
7.1 Cleaning
To clean the multimeter, use a soft cloth dampened with mild detergent. Do not use abrasives or solvents. Ensure the device is completely dry before use.
7.2 Battery Replacement
When the low battery indicator appears on the display, replace the batteries as described in Section 5.1. Always use 3 new 1.5V AAA batteries.
7.3 Fuse Replacement
If the current measurement function stops working, the fuse may be blown. The multimeter includes spare fuses. To replace a fuse:
- Ensure the multimeter is turned OFF and all test leads are disconnected.
- Open the battery compartment cover as described in Section 5.1.
- Carefully remove the old fuse(s). Note the rating of the fuse being replaced.
- Insert a new fuse of the correct type and rating (e.g., F600mA/250V for mA range, F10A/250V for 10A range).
- Replace the battery cover and tighten the screw.
8. Troubleshooting
| Problem | Possible Cause | Solution |
|---|---|---|
| No display or dim display | Low batteries or no batteries installed. | Replace or install new AAA batteries. |
| Incorrect readings | Incorrect function selected, poor test lead connection, or out of range. | Verify function selection, ensure secure lead connection, check if measurement is within specified range. |
| Current measurement not working | Blown fuse. | Replace the appropriate fuse (refer to Section 7.3). |
| NCV not detecting voltage | Voltage too low, or not an AC voltage. | Ensure the voltage source is AC and strong enough for detection. |
9. Specifications
| Parameter | Value |
|---|---|
| Model Number | T21D |
| Display | 6000 Counts, Backlit LCD |
| DC Voltage Range | 600mV/6V/60V/600V (Precision: ±(0.5%+5)) |
| AC Voltage Range | 600mV/6V/60V/600V (Precision: ±(1.0%+4)) |
| DC Current Range | 60mA/600mA/10A (Precision: ±(1.2%+5)) |
| AC Current Range | 60mA/600mA/10A (Precision: ±(1.5%+5)) |
| Resistance Range | 600Ω/6KΩ/60KΩ/600KΩ/6MΩ/60MΩ (Precision: ±(0.8%+5)) |
| Frequency Range | 9.999Hz/99.99Hz/999.9Hz/9.999kHz/99.99kHz/999.9kHz/9.999MHz (Precision: ±(1.5%+5)) |
| Capacitance Range | 60nF/600nF/6uF/60uF/600uF/6mF/100mF (Precision: ±(4.0%+5)) |
| Temperature Range | -20~1000°C / -4~1832°F (Precision: ±(1.0%+3)) |
| True RMS | Yes |
| NCV Detection | Yes |
| Data Hold | Yes |
| Power Source | 3 x 1.5V AAA Batteries |
| Dimensions | 14.7 x 7.1 x 4.5 cm |
| Weight | 220 grams |
| Color | Red |
| Safety Rating | CAT III 600V |
| Country of Origin | China |
10. Warranty and Support
Proster products are designed for reliability and performance. For any questions, technical assistance, or warranty claims, please contact Proster customer support through the retailer's platform or the official Proster website. Please retain your proof of purchase for warranty purposes.
