
Sperax DP2-Z8E
Contents
Sperax Walking Pad Instruction Manual
Brand: Sperax | Model: DP2-Z8E
1. Introduction
The Sperax Walking Pad is a versatile 3-in-1 under-desk treadmill designed for home workouts. It seamlessly integrates the functionality of walking and jogging, offering a speed range of 0.5 to 4 mph to cater to users of all fitness levels. Its powerful yet silent motor ensures a high-performance session without disturbing your surroundings, making it ideal for use in various home environments.

The Sperax Walking Pad in a typical home office setup.
2. What's in the Box
Upon unboxing your Sperax Walking Pad, you will find the following components:
- Main Unit: The pre-assembled walking pad treadmill.
- Remote Controller: For operating the treadmill's functions.
- Lubricant Oil (25ml): For routine belt maintenance.
- L-Shaped Wrench: For belt adjustments.
- User Manual: This instruction guide.

All items included in the Sperax Walking Pad package.
3. Setup
The Sperax Walking Pad requires no assembly. Follow these steps for initial setup:
- Unpack: Carefully remove the walking pad from its packaging and discard any protective plastic or foam.
- Placement: Place the walking pad on a flat, stable surface. Its compact design (4.6 inches thick) and built-in wheels allow for effortless portability and storage under a desk, bed, or sofa.
- Power Connection: Plug the power cord into a suitable electrical outlet. Ensure the connection is secure.
- Safety Check: Before first use, ensure the running belt is centered and free from any obstructions.
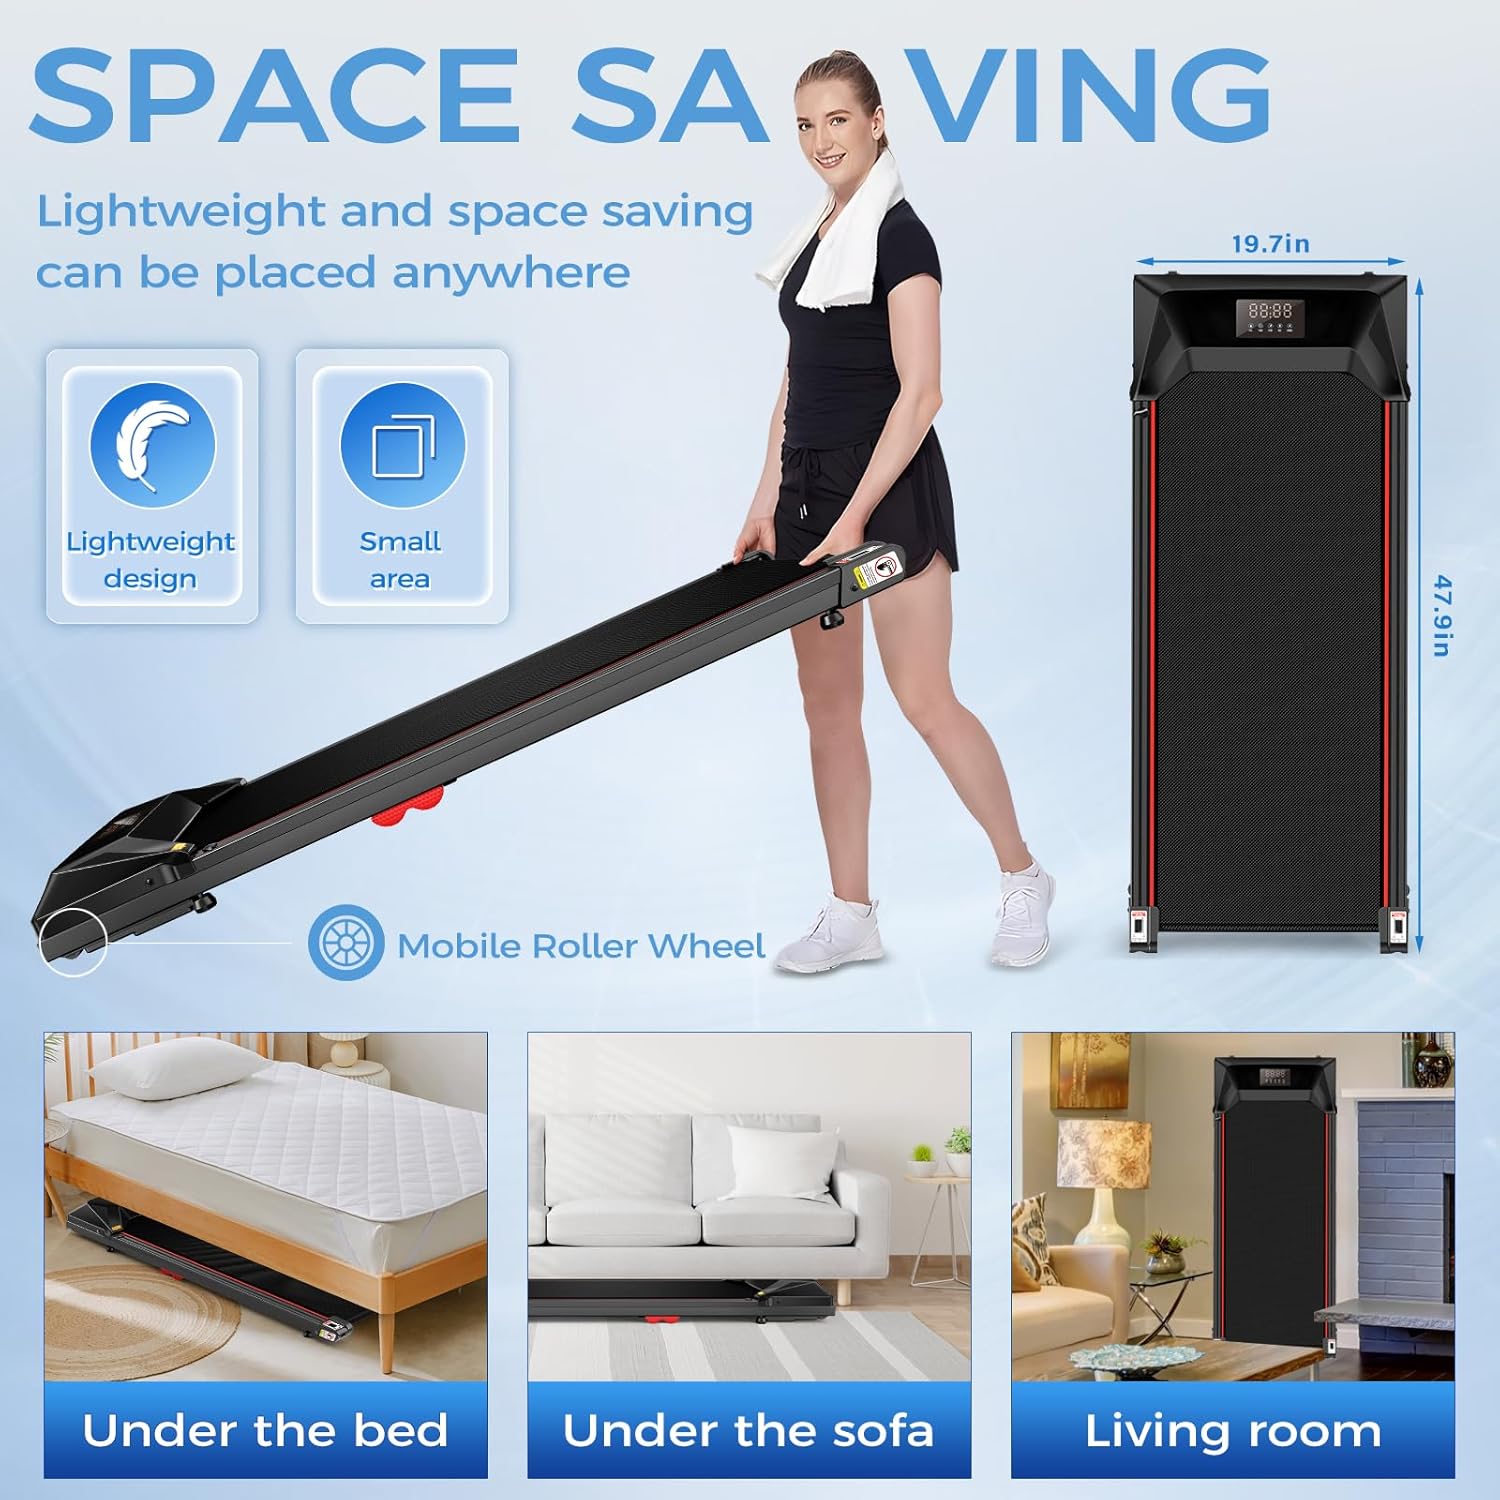
The compact design allows for easy placement and storage.
4. Operating Instructions
Operate your Sperax Walking Pad using the provided remote control and monitor your progress via the integrated LED display.
- Power On/Off: Press the "ON/OFF" button on the remote control to start or stop the walking pad.
- Speed Adjustment: Use the "+" button to increase speed and the "-" button to decrease speed. The speed range is from 0.5 mph (walking) to 4 mph (jogging).
- Display Information: The LED display screen automatically cycles through various metrics, including:
- CAL: Calories burned
- TIME: Duration of your workout
- STEP: Number of steps taken
- DIS: Distance covered
- SPEED: Current speed in mph

Seamless integration with a standing desk.

Comprehensive LED display for tracking progress.
5. Maintenance
Regular maintenance ensures the longevity and optimal performance of your walking pad.
- Lubrication: It is recommended to apply lubricant to the running belt every 300 km of use. Lift one side of the running belt and apply the lubricant oil in the middle of the running board. Run the treadmill at the lowest speed (1 km/h) for about a minute to spread the oil evenly. Do not add too much oil at once.
- Belt Elasticity Adjustment: All treadmills have adjusted the tightness of the running belt before leaving the factory. However, after a period of use, the running belt may inevitably loosen. If the belt slips while running, it is necessary to adjust the bolts at the rear of the treadmill using the provided L-shaped wrench. Turn clockwise (CW) to tighten and counter-clockwise (CCW) to loosen.
- Running Belt Deviation Adjustment: If the running belt is off-center, adjustments are needed. To determine left/right orientation, stand at the rear of the treadmill, facing the display. Use the provided hex wrench to make all belt adjustments on the rear bolt.
- Off-center to the Left: Turn the left bolt clockwise 1/4 circle. Turn the right bolt counter-clockwise 1/4 circle.
- Off-center to the Right: Turn the right bolt clockwise 1/4 circle. Turn the left bolt counter-clockwise 1/4 circle.
Important: Do not turn the bolt more than 1/4 turn at a time. Repeatedly run the treadmill to check alignment. Excessive tightening can damage the treadmill.

Applying lubricant to the running belt.

Adjusting the running belt.
6. Troubleshooting
Refer to the table below for common issues and their solutions:
| Error Code | Error Judgment | Solution |
|---|---|---|
| E6 | Motor over-voltage protection - User's power grid or voltage is unstable. - Peak voltage is too high. - Wheel diameter value was set incorrectly. - Controller damage. | - Add an external filter regulator. - Re-set the wheel diameter value so as not to exceed the rated voltage of the motor. - Replace the controller. |
| E5 | Over-current protection - Excessive load. - The motor or roller is stuck with foreign objects. - The roller is not lubricated enough, and the resistance increases. - The motor is damaged and the resistance increases. | - Reduce the load and try not to exceed the rated load. - Remove the stuck object. - Add lubricant. - Replace the motor. |
| E2 | Motor damaged - The motor wire is not connected or loose. - Carbon brush cover for motor is damaged. - The motor is damaged. | - Reinforce the motor cable. - Replace the carbon brush cover for motor. - Replace the motor. |
| E1 | Connection error - The interface of the upper and lower control main connection units is loose. | - Reinforce the cable interface. |
7. Specifications
Detailed technical specifications for your Sperax Walking Pad:
- Brand: Sperax
- Model Name: Walking Pad
- Item Model Number: DP2-Z8E
- Color: Black
- Product Dimensions: 48 x 18 x 4.49 inches
- Item Weight: 45.7 Pounds
- Frame Material: Alloy Steel
- Running Belt Area: 15.7 x 38 inches
- Minimum Speed: 0.5 Miles per Hour
- Maximum Speed: 4 Miles per Hour
- Maximum Weight Recommendation: 320 Pounds
- Display Type: LCD (measures Speed, Calories Burned, Distance)
- Power Source: Corded Electric
- Number of Programs: 1
- Assembly Required: No
- UPC: 726960217288
- Date First Available: June 5, 2024

Key features and specifications of the Sperax Walking Pad.
8. Warranty and Support
For warranty information, technical support, or any inquiries regarding your Sperax Walking Pad, please refer to the contact details provided in your product packaging or visit the official Sperax website. Keep your purchase receipt for warranty claims.
Ask a question about this manual
Ask about setup, troubleshooting, compatibility, parts, safety, or missing instructions. Manuals+ will review the question and use this page’s manual context to help answer it.