
1. Introduction
This manual provides essential information for the safe installation, operation, and maintenance of your FIREGAS 24-inch Under Cabinet Range Hood, Model FGS-UWF39A560AC. Please read these instructions thoroughly before installation and use, and retain them for future reference. This range hood is designed to efficiently remove smoke and cooking odors from your kitchen environment.
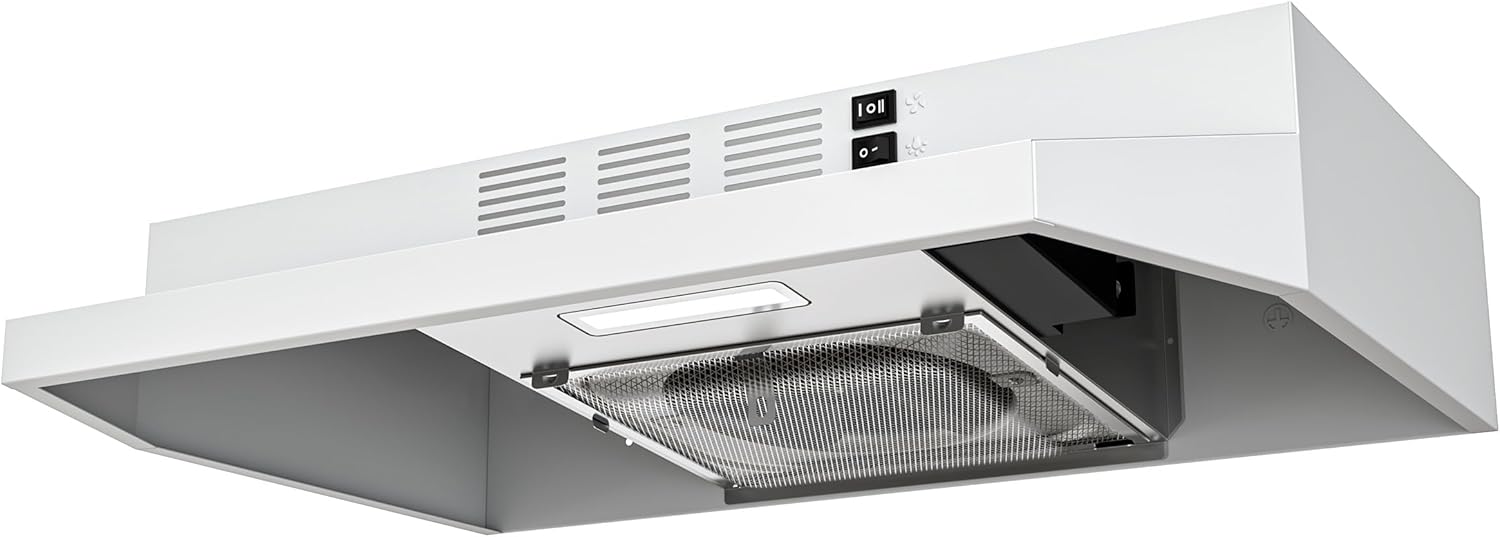
Figure 1.1: FIREGAS 24-inch Under Cabinet Range Hood (Model FGS-UWF39A560AC)
2. Safety Information
To reduce the risk of fire, electric shock, or injury, observe the following:
- Read all instructions before operating the range hood.
- Installation work and electrical wiring must be done by qualified person(s) in accordance with all applicable codes and standards, including fire-rated construction.
- Sufficient air is needed for proper combustion and exhausting of gases through the flue (chimney) of fuel-burning equipment to prevent back-drafting.
- When cutting or drilling into wall or ceiling, do not damage electrical wiring and other hidden utilities.
- Ducted fans must always be vented to the outdoors.
- Always disconnect power from the range hood before servicing or cleaning.
- Clean grease filters frequently. Grease should not be allowed to accumulate on the fan or filters.
- Never operate the range hood without filters in place.
3. Package Contents
Verify that all components are present in the package before beginning installation:
- 24 inch Range Hood
- Aluminum Filter (without charcoal cotton filter)
- Installation Manual
- Installation Drawing
- Screws & Recirculation Sheet

Figure 3.1: Included Components
4. Specifications
| Feature | Specification |
|---|---|
| Model Info | FGS-UWF39A560AC |
| Air Flow Capacity | 300 Cubic Feet Per Minute (CFM) |
| Material | Aluminum, White Painted Stainless Steel |
| Noise Level | 57 Decibels |
| Mounting Type | Under Cabinet Mount |
| Controls Type | Rocker Button |
| Voltage | 120 Volts |
| Number of Speeds | 2 |
| Light Source Type | LED (2 Watt) |
| Filter Type | Mesh (Multi-layer Aluminum) |
| Ventilation Type | Convertible (Ducted/Ductless) |
| Product Dimensions (W x D x H) | 23.9 x 17.5 x 4.7 inches (607 x 445 x 120 mm) |
| Top Vent Port | 7-inch round |
| Rear Vent Port | 9.92"W x 3.07"H rectangular |

Figure 4.1: Product Dimensions and Vent Options
5. Installation
5.1 Pre-Installation Considerations
- Ensure the mounting surface (under cabinet) is structurally sound to support the weight of the range hood.
- Determine your preferred ventilation mode: ducted (vented to outside) or ductless (recirculating with optional charcoal filters).
- For ductless operation, an additional charcoal filter (FGS-TF39-LW, sold separately) is required.
- The range hood requires hardwiring; ensure a suitable electrical connection point is available.

Figure 5.1: Compact Design for Space Saving
5.2 Ventilation Modes
Your range hood supports two ventilation modes:
- Ducted Mode: Smoke and odors are expelled outdoors through a duct pipe. This mode utilizes either the 7-inch round top exhaust port or the rectangular rear exhaust port.
- Ductless (Recirculation) Mode: Air is filtered through aluminum and optional charcoal filters, then recirculated back into the kitchen. This mode is suitable when external venting is not possible.

Figure 5.2: Ducted vs. Ductless Ventilation
5.3 Electrical Connection (Hardwiring)
The range hood is designed for hardwired installation. Follow these steps for a secure electrical connection:
- Step 1: Pry open the designated hole on the range hood for wiring access.
- Step 2: Install the black rubber ring into the hole and extend the wires from inside the range hood through the hole to the outside.
- Step 3: Connect the range hood wires to your household electrical wiring, matching colors (e.g., black to black, white to white, green/bare to ground).
- Step 4: Secure the wire connections with appropriate wire caps and tools. Ensure all connections are tight and insulated.
After installation, the wires will be safely contained and not exposed to the cooking area.

Figure 5.3: Wiring Connection Steps
6. Operation
The FIREGAS range hood features simple rocker switch controls for fan speed and lighting.
6.1 Fan Speed Control
The range hood is equipped with a 2-speed fan. Use the rocker switch to select the desired fan speed:
- Low Speed: Suitable for light cooking or simmering.
- High Speed: Recommended for heavy cooking, frying, or when significant smoke and odors are present.

Figure 6.1: Fan Speed Rocker Switches

Figure 6.2: Fan Speed in Operation (Low vs. High)
6.2 LED Light Operation
The range hood includes a 2-watt LED light to illuminate your cooking area. Use the dedicated rocker switch to turn the light on or off.

Figure 6.3: LED Light and Control Switch

Figure 6.4: LED Light Illumination
7. Maintenance
Regular maintenance ensures optimal performance and longevity of your range hood.
7.1 Cleaning the Aluminum Filters
The multi-layer aluminum filters capture grease and should be cleaned regularly (typically monthly, depending on cooking frequency) to maintain airflow efficiency.
- Step 1: Ensure the range hood is turned off and unplugged from power.
- Step 2: Locate the buckles on the filters. Open the buckle to release the filter.
- Step 3: Carefully slide the aluminum filter out in a parallel motion.
- Step 4: Clean the filters using warm soapy water or a non-abrasive degreaser. They are also dishwasher safe.
- Step 5: Allow filters to dry completely before re-installing.

Figure 7.1: Multi-layer Aluminum Filter

Figure 7.2: Filter Removal for Cleaning
7.2 Exterior Cleaning
Clean the exterior surfaces of the range hood with a soft cloth and mild detergent. Avoid abrasive cleaners or scouring pads, as they can damage the finish.

Figure 7.3: Easy Exterior Cleaning
8. Troubleshooting
If you encounter issues with your range hood, refer to the following common problems and solutions:
- Fan not operating: Check if the power supply is connected and the circuit breaker is not tripped. Ensure the rocker switch is in the 'on' position.
- LED light not working: Verify the light switch is on. Check for loose wiring connections if recently installed.
- Poor suction: Clean the aluminum filters as accumulated grease can restrict airflow. For ductless mode, ensure the charcoal filter (if installed) is not clogged and replace if necessary. Check for obstructions in the ductwork if in ducted mode.
- Excessive noise: Ensure the range hood is securely mounted. Check if filters are properly installed. Inspect the fan for any obstructions.
If problems persist after attempting these solutions, please contact customer support.
9. Warranty and Support
Your FIREGAS range hood comes with a 1-year limited warranty from the date of purchase. This warranty covers defects in materials and workmanship under normal use.
FIREGAS is committed to customer satisfaction and offers lifetime technical help. If you have any questions, require assistance with installation, operation, or troubleshooting, or need to claim warranty service, please do not hesitate to contact our customer service team.
Please refer to your purchase documentation or the FIREGAS official website for specific contact details.