
1. Introduction
The FrSky Tandem X20R Transmitter is an advanced radio control system designed for professional RC pilots. It features a robust dual-band 900M/2.4G RF signal link, high-precision Hall gimbals, and an intuitive ETHOS operating system. This manual provides essential information for the proper setup, operation, and maintenance of your Tandem X20R transmitter.

Figure 1.1: Front view of the FrSky Tandem X20R Transmitter in Cherry Red with ETHOS operating system displayed on screen. This image shows the front view of the FrSky Tandem X20R Transmitter in Cherry Red. The touchscreen display is active, showing the main menu of the ETHOS operating system, including options for model selection, editing, flight modes, mixes, outputs, timers, trims, and RF system settings. The dual high-precision Hall gimbals, various switches, knobs, and quick-mode custom buttons are visible.

Figure 1.2: Angled front view of the FrSky Tandem X20R Transmitter in Cherry Red, screen off. An angled view of the FrSky Tandem X20R Transmitter, showcasing its ergonomic design and the layout of its controls. The screen is off, highlighting the physical buttons, switches, and gimbals. The reinforced antenna handle is also visible.
2. Key Features
- Built-in TD-ISRM RS Dual-Band Internal RF Module (900M/2.4G Dual Band TD Mode, Dual 2.4G TW Mode, ACCESS 2.4G & ACCESS R9 Modes, 2.4G ACCST D16 Mode).
- Super Low-Latency and Long-Range Control with Telemetry.
- Upgraded Robust Antenna Handle and External LoRa Antenna Connectors (900M/2.4G).
- 800×480 Resolution Outdoor High Brightness Touchscreen.
- M20 High-Precision 4 Ball-Bearing Hall-Sensor Gimbals with Metal Panel.
- 2 Angle Adjustable Slider Levers, 2 Knobs, 4 Standard Trims with 2 Extra Trims.
- 6 Quick-Mode Custom Buttons (Front) and 2 Momentary Buttons (Rear).
- All Knobs, Trims, and Central Linear-Slider with All-CNC Metal Caps.
- Built-in 8GB Flash Drive Storage.
- Digital Audio Power Amplifier and Built-in 6-axis Gyroscope Sensor.
- High-Speed PARA Wireless Training System.
- Data Transmission & Recharge System via USB Type-C Interface.
- Haptic Vibration Alerts and Voice Speech Outputs.
3. Setup
3.1 Package Contents

Figure 3.1: Contents of the FrSky Tandem X20R Transmitter package. This image illustrates the typical contents included with the FrSky Tandem X20R Transmitter. While the transmitter shown is a white variant, the accessories are representative. The package includes a protective carrying case, a 2S Li-ion battery, a USB Type-C charging cable, a neck strap for comfortable use, and various gimbal stick ends for customization.
Upon unboxing, verify that all components are present:
- FrSky Tandem X20R Transmitter
- 2S Li-ion Battery
- USB Type-C Cable
- Neck Strap
- Gimbal Stick Ends (various types)
- Carrying Case
3.2 Battery Installation and Charging
- Locate the battery compartment on the back of the transmitter.
- Carefully connect the provided 2S Li-ion battery to the internal connector, ensuring correct polarity.
- Place the battery securely within the compartment and close the cover.
- To charge, connect the USB Type-C cable to the transmitter's USB port and to a 5V USB adapter (not included, >2.0A recommended). The charging current is ≤1A ±200mA.
3.3 Initial Power-On and Basic Configuration

Figure 3.2: FrSky Tandem X20R Transmitter ready for initial setup. The FrSky Tandem X20R Transmitter is shown resting on a wooden surface, ready for initial setup. This view emphasizes the overall form factor and the placement of the main controls before powering on the device.
- Press and hold the power button located on the front panel to turn on the transmitter.
- The ETHOS operating system will boot up. Follow the on-screen prompts for initial setup, including language selection and calibration of gimbals and switches.
- Familiarize yourself with the touchscreen interface and navigation buttons (MDL, SYS, DISP, RTN).
3.4 Binding to a Receiver
The Tandem X20R supports multiple RF protocols. Refer to your receiver's manual for specific binding procedures. Generally, the steps involve:
- Access the RF System settings on the transmitter's ETHOS interface.
- Select the appropriate internal RF module (TD-ISRM RS) and desired protocol (e.g., TD, TW, ACCESS, ACCST D16).
- Initiate the binding process on the transmitter.
- Put your receiver into binding mode (usually by pressing a F/S button while powering on).
- Confirm successful binding on both the transmitter and receiver.
4. Operating the Transmitter
4.1 Controls Overview

Figure 4.1: Close-up of the right-side controls. A detailed close-up of the right-hand side controls of the transmitter. This includes the right high-precision Hall gimbal, various toggle switches (T1, T2), a rotary knob (S2), and the linear slider. The metal trim caps and center-slider cap are visible, indicating their robust construction.

Figure 4.2: Close-up of the left-side controls. This image provides a close-up of the left-hand side controls. It features the left high-precision Hall gimbal, toggle switches (T3, T4), and the navigation cluster with MDL (Model), SYS (System), DISP (Display), and RTN (Return) buttons. The metal trim caps are also highlighted.
The Tandem X20R features a comprehensive set of controls:
- Gimbals: Two high-precision M20 Hall-sensor gimbals for primary control inputs.
- Switches: Multiple 2-position and 3-position toggle switches (e.g., T1-T4, SA-SH) for various functions.
- Knobs: Two rotary knobs (S1, S2) for proportional control.
- Sliders: Two angle-adjustable linear slider levers for additional proportional control.
- Trims: Four standard trims and two extra trims for fine-tuning control surfaces.
- Buttons: Six quick-mode custom buttons on the front and two momentary buttons on the rear for instant actions.
4.2 ETHOS Operating System Navigation
The ETHOS system is navigated primarily via the 800×480 touchscreen. You can also use the navigation buttons and scroll wheels for precise input.
- Model Select: Choose and manage your aircraft models.
- Edit Model: Configure channels, mixes, and flight modes for the selected model.
- RF System: Manage internal and external RF modules, binding, and protocol settings.
- System Settings: Adjust general transmitter settings, including display, audio, and calibration.
4.3 External Connectivity

Figure 4.3: Side switches and external antenna connectors. A detailed view of the side of the transmitter, showing additional switches (e.g., SS, HS) and the external antenna connectors (ANT2). These connectors are designed for mounting additional 2.4G and 900M antennas to enhance RF capabilities in LoRa modes for extended range control.
The X20R is equipped with 2 external antenna connectors for enhancing RF capabilities, particularly when operating in LoRa modes for extended range control. It also features a Lite Type External Module Bay for compatibility with various external modules.
5. Maintenance
5.1 Cleaning
Regularly clean the transmitter with a soft, dry cloth. Avoid using harsh chemicals or solvents that could damage the finish or electronic components. For the touchscreen, use a microfiber cloth specifically designed for electronics.
5.2 Battery Care
To prolong battery life:
- Avoid fully discharging the battery.
- Store the transmitter with the battery at a storage voltage (around 3.8V per cell for Li-ion) if not used for extended periods.
- Charge the battery using only the provided USB Type-C interface and a compatible 5V adapter.
5.3 Firmware Updates
FrSky periodically releases firmware updates for the ETHOS operating system and internal RF modules. It is recommended to keep your transmitter's firmware up-to-date for optimal performance and new features. Visit the official FrSky website for the latest firmware and update instructions.
6. Troubleshooting
This section addresses common issues you might encounter with your FrSky Tandem X20R Transmitter.
6.1 Transmitter Does Not Power On
- Ensure the battery is correctly installed and fully charged.
- Check the battery connection for any loose contacts.
- If charging, verify the USB cable and adapter are functional.
6.2 No Signal or Intermittent Connection
- Confirm the transmitter is properly bound to the receiver.
- Check the selected RF protocol on the transmitter matches the receiver.
- Ensure the transmitter's antenna is correctly positioned and not obstructed.
- Verify the receiver's antenna placement and condition.
- Avoid operating in areas with high RF interference.
6.3 Controls Not Responding Correctly
- Recalibrate the gimbals and switches through the ETHOS system settings.
- Check model settings for correct channel assignments and mixes.
- Ensure no physical obstructions are affecting gimbal or switch movement.
For more complex issues, refer to the official FrSky support resources or contact their customer service.
7. Specifications
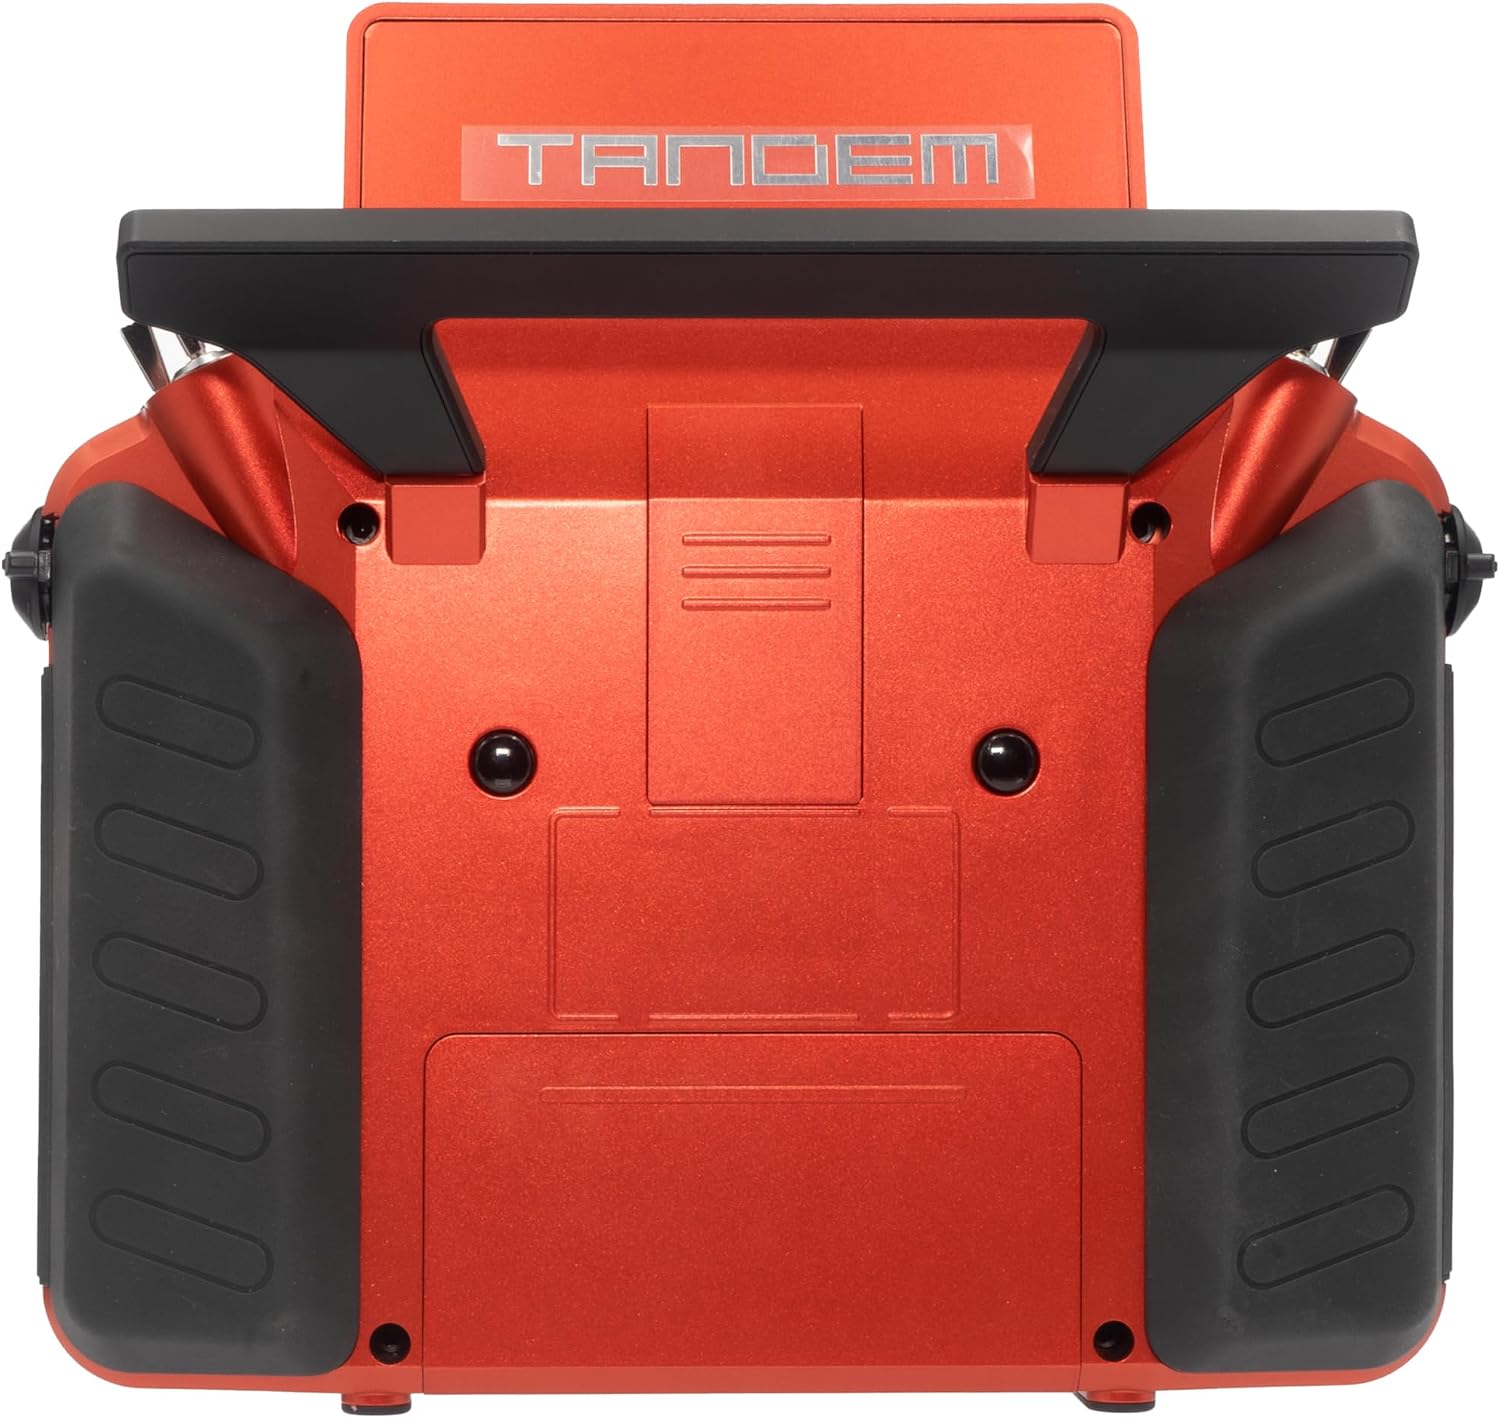
Figure 7.1: Back view of the FrSky Tandem X20R Transmitter. This image displays the rear of the FrSky Tandem X20R Transmitter. It highlights the redesigned bottom hand grip, which provides a comfortable and relaxed hold, allowing the palm to fully grasp the device. The external module slot is also visible.
| Specification | Value |
|---|---|
| Model | TANDEM X20R |
| Dimensions | 205*213*90mm (L*W*H) |
| Weight (Battery Excl.) | 892g |
| Weight (Battery Incl.) | 1024g |
| Operating System | ETHOS |
| Internal RF Module | TD-ISRM RS |
| Number of Channels | Up to 24 |
| Built-in Flash Storage | 8GB |
| Operating Voltage Range | 6.5 ~ 8.4V (2S Li-battery) |
| Operating Temperature | -10°C~60°C (14°F~140°F) |
| Operating Current | 600mA@7.4V (typ.) |
| Charging Current | ≤1A ±200mA |
| USB Adaptor Voltage | 5V+0.2V |
| USB Adaptor Current | >2.0A |
| Backlit Touchable LCD Resolution | 800*480 |
| Compatibility | ACCST D16 & ACCESS & TD & TW receivers |
| External Module Bay | Lite Type |
8. Warranty and Support
For warranty information, please refer to the documentation provided with your purchase or visit the official FrSky website. For technical support, firmware updates, and additional resources, please visit the FrSky support page or contact their customer service directly.
FrSky Official Website: www.frsky-rc.com