1. Introduction
This manual provides detailed instructions for the safe and efficient operation of your CREWORKS 11-in-1 Heat Press Machine, Model HPM-1211. This versatile heat press is designed for transferring images onto a wide variety of items, including T-shirts, mugs, hats, plates, shoes, pens, and baseballs. Please read this manual thoroughly before initial use to ensure proper setup, operation, and maintenance.

Figure 1: CREWORKS 11-in-1 Heat Press Machine with various accessories.
2. Product Features
- 11-in-1 Versatility: Includes a 30 x 38 cm flat platen, 265, 325, 355, and 500 ml mug press attachments, 12.7 and 15.2 cm plate press attachments, a pen press, a baseball press, a shoe press, and a hat press.
- 360° Rotation: The heating platen features a 360-degree swivel design for easy placement and removal of materials, enhancing operational efficiency and safety.
- Intuitive Digital Control: An easy-to-use LED control box allows precise adjustment of temperature (up to 259°C) and timer (up to 999 seconds) for various customization projects.
- Efficient and Uniform Heating: Equipped with a thick aluminum platen and dual heating tubes to ensure consistent heat distribution across the entire surface, suitable for chemical fibers, ceramics, cotton, and more.
- Simple Setup: Designed with convenient sliders and an adjustment knob for effortless project positioning and quick installation.
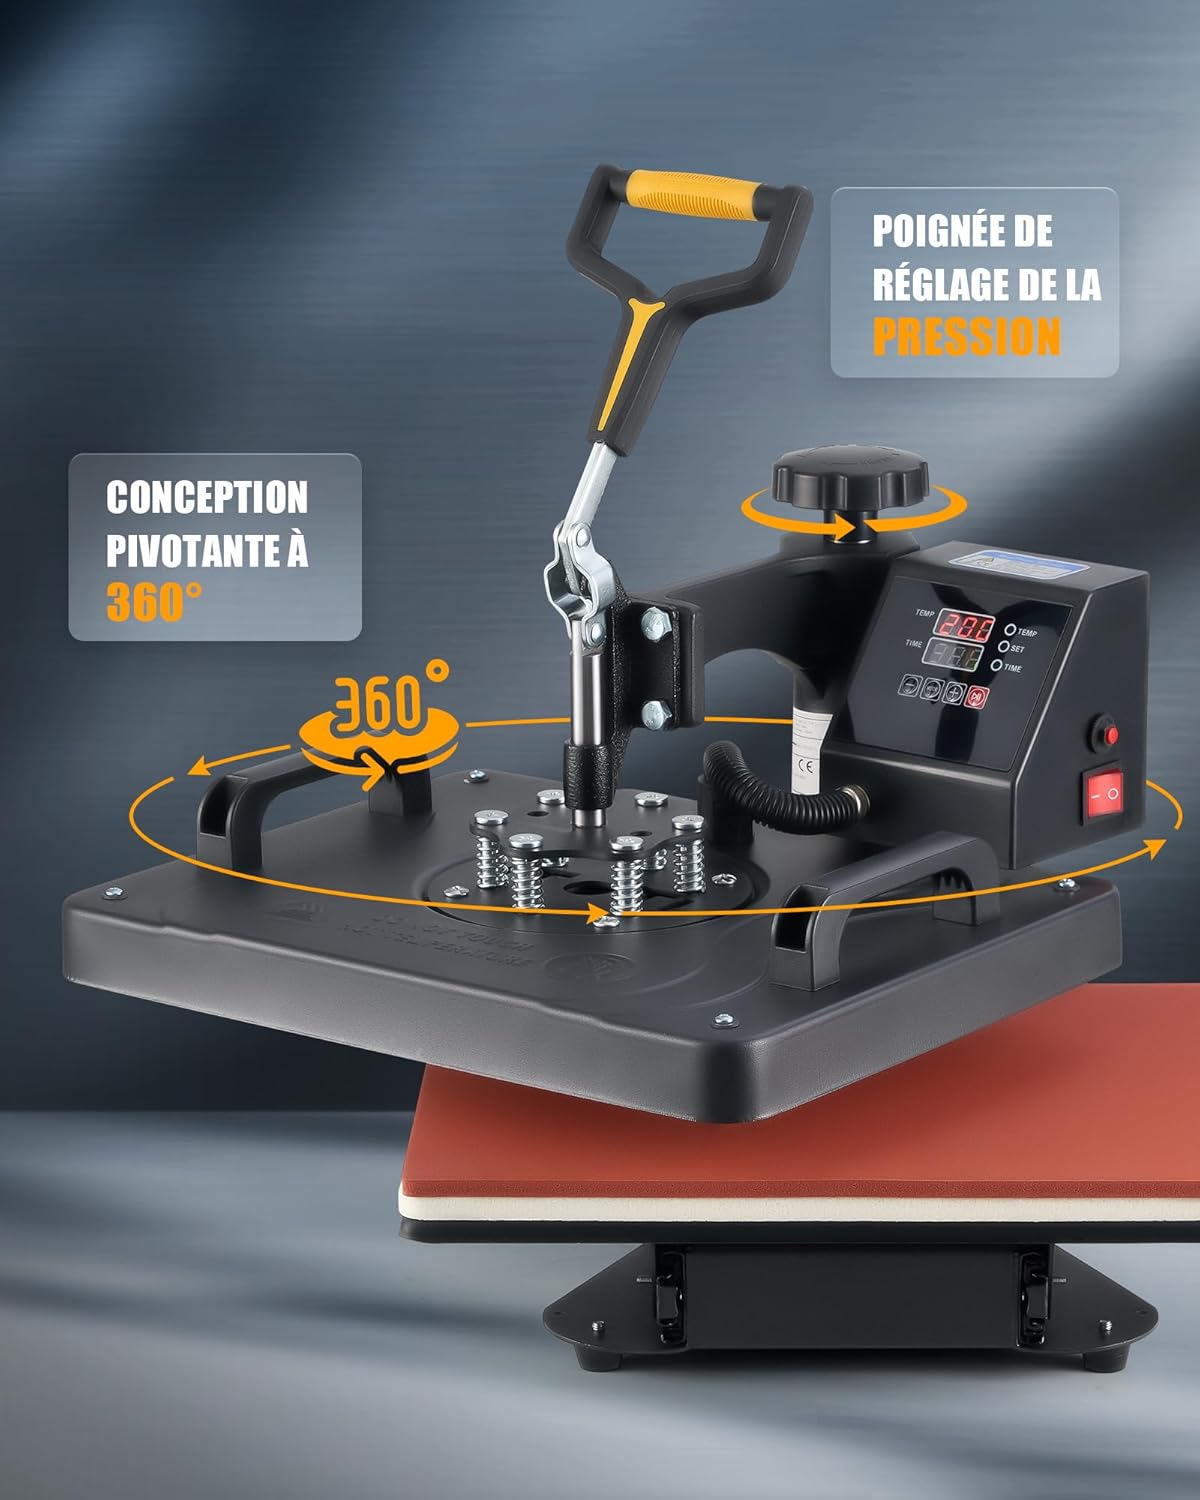
Figure 2: 360° swivel design for enhanced usability.
3. Components Overview
Familiarize yourself with the main components of your heat press machine:
- Lifting Handle: Used to raise and lower the heating platen.
- Pressure Adjustment Knob: Adjusts the pressure applied during heat transfer.
- Control Panel: Digital display for temperature and time settings.
- Power Switch: Turns the machine on/off.
- Swivel Handles: For rotating the heating platen.
- Flat Platen: Main heating surface for flat items.
- Foam Mat: Provides even pressure and heat distribution.
- Base Plate: Supports the item being pressed.
- Support Feet: Ensures stability of the machine.

Figure 3: Key components of the heat press machine.
4. Safety Information
WARNING: This heat press operates at high temperatures. Always exercise extreme caution to prevent burns or other injuries. Read all instructions before use.
- Keep hands clear of the heating platen during operation.
- Use heat-resistant gloves when handling hot items or attachments.
- Ensure the machine is placed on a stable, heat-resistant surface.
- Do not leave the machine unattended while in operation.
- Unplug the machine when not in use or during maintenance.
- Keep children and pets away from the machine.

Figure 4: Reinforced safety features including anti-scald handles and insulated heating plate.
5. Setup and Assembly
The CREWORKS 11-in-1 Heat Press Machine requires minimal assembly. Follow these general steps:
- Unpack all components and ensure all parts are present according to the packing list.
- Place the main heat press unit on a stable, flat, and heat-resistant surface.
- Attach the desired accessory (e.g., mug press, hat press) to the main unit by aligning the connectors and securing them firmly.
- Connect the power cord to a grounded electrical outlet.
6. Operating Instructions
The digital control panel allows for precise temperature and time settings. Refer to the image below for control panel details.

Figure 5: Intuitive digital control panel.
6.1. Setting Temperature and Time
- Turn on the power switch.
- Press the 'SET' button to toggle between temperature and time settings.
- Use the '+' and '-' buttons to adjust the desired temperature (0-259°C) and time (0-999 seconds).
- Press 'SET' again to confirm the settings. The machine will begin heating to the set temperature.
6.2. General Heat Transfer Process (Flat Items)
- Prepare the Item: Place your T-shirt or other flat item on the base plate. Ensure it is smooth and wrinkle-free.
- Position the Design: Place your transfer design (e.g., vinyl, sublimation paper) onto the item in the desired location.
- Apply Pressure: Lower the heating platen and press it firmly onto the item. Adjust the pressure knob if necessary.
- Start Transfer: The timer will automatically start once the platen is closed.
- Remove Item: Once the timer alarms, lift the heating platen and carefully remove the transferred item.
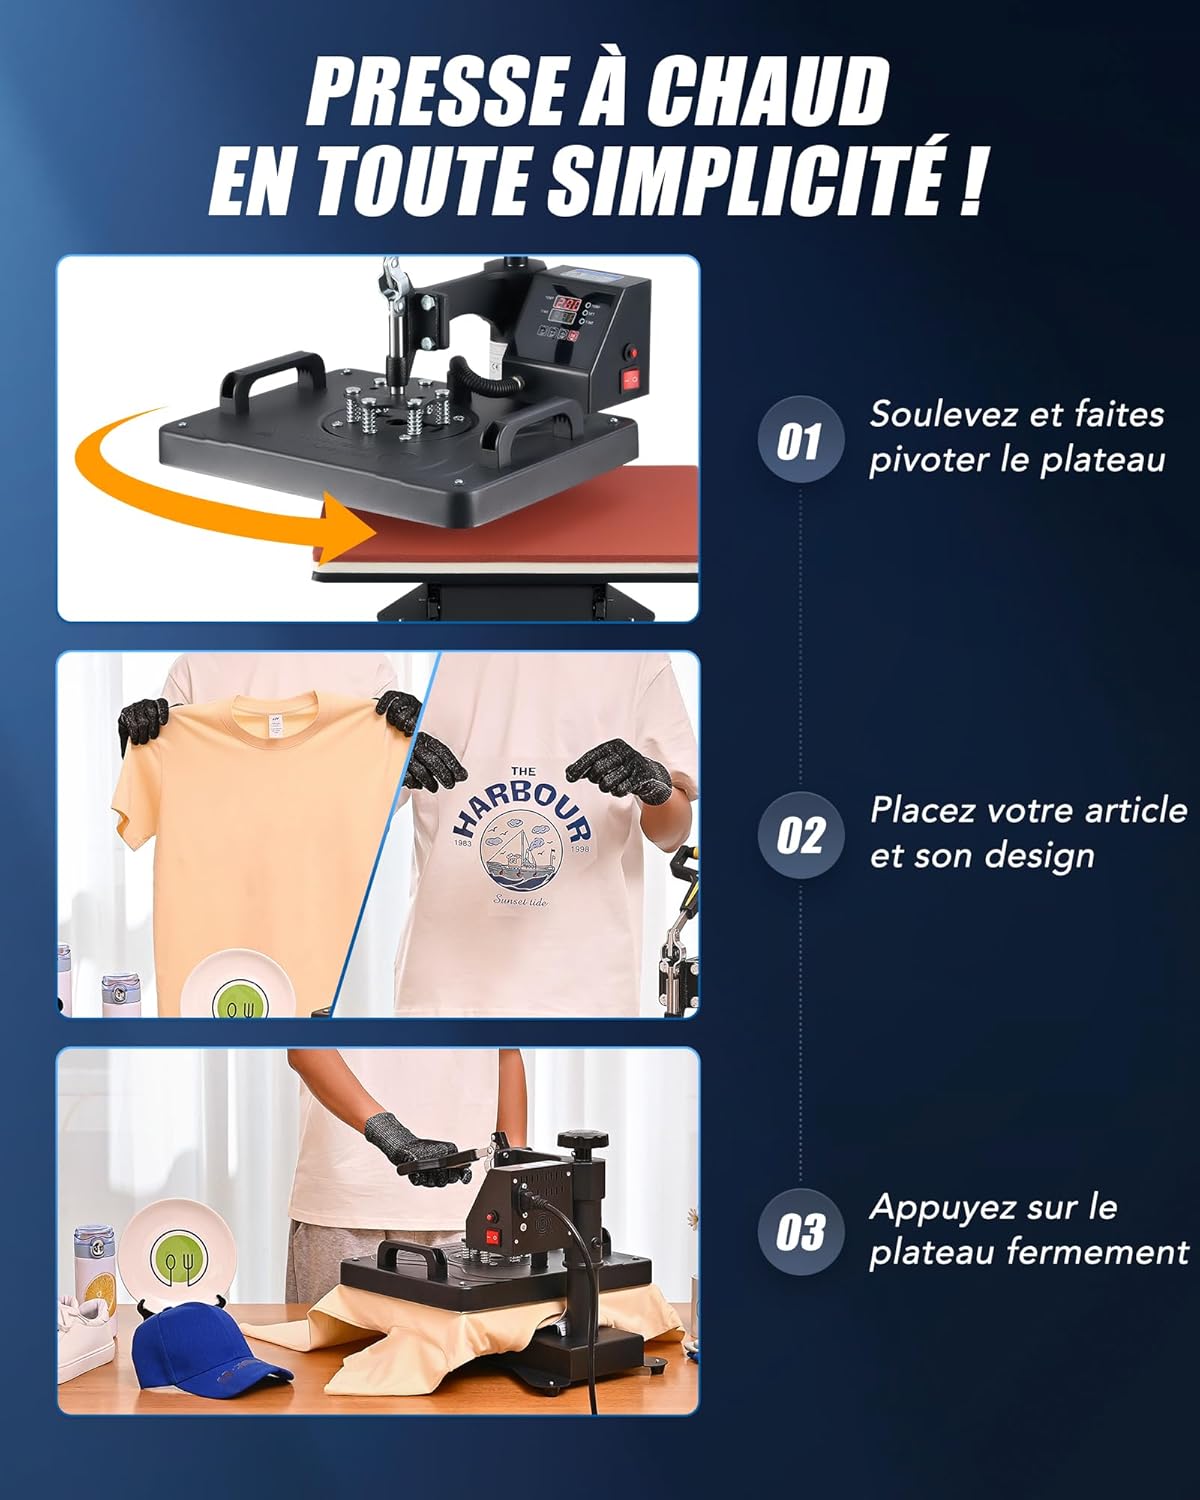
Figure 6: Simplified steps for heat pressing.

Figure 7: Applying a design to a T-shirt.
6.3. Using Specific Attachments
Each attachment (mug, hat, plate, shoe, pen, baseball) has a specific mounting procedure and may require different temperature and time settings. Always refer to your transfer material's instructions for recommended settings.
- Mug Press: Attach the appropriate mug heating element. Place the mug with the design wrapped around it into the element and secure it.
- Hat Press: Attach the hat platen. Place the hat over the platen and position the design.
- Plate Press: Attach the plate heating element. Place the plate with the design onto the element.
- Shoe, Pen, Baseball Press: Follow similar steps, ensuring the item and design are securely positioned within their respective attachments.

Figure 8: Examples of items customizable with the 11-in-1 heat press.
6.4. Official Product Video (CREWORKS 8-in-1 Heat Press)
This video demonstrates the operation of a CREWORKS 8-in-1 Heat Press Machine. While your model is 11-in-1, the general principles of operation for the flat press, mug press, and hat press are similar.
Video 1: General operation of a CREWORKS heat press (8-in-1 model shown).
7. Maintenance
- Cleaning: Regularly wipe down the exterior of the machine with a soft, damp cloth. Ensure the machine is unplugged and cool before cleaning.
- Platen Care: Clean the heating platen with a non-abrasive cleaner if residue builds up. Avoid scratching the surface.
- Storage: Store the machine in a dry, dust-free environment when not in use.
- Inspection: Periodically check all connections and moving parts for wear or damage.
8. Troubleshooting
| Problem | Possible Cause | Solution |
|---|---|---|
| Machine does not power on | Power cord not connected; Power switch off; Outlet malfunction | Check power cord connection; Turn on power switch; Test outlet with another device |
| Uneven heat transfer | Insufficient pressure; Uneven surface; Faulty heating element | Adjust pressure knob; Ensure item is flat; Contact customer support if heating element is suspected |
| Design not adhering | Incorrect temperature/time; Insufficient pressure; Incorrect transfer material | Verify settings with material manufacturer; Increase pressure; Ensure compatible transfer material is used |
| Machine overheating | Incorrect temperature setting; Sensor malfunction | Check temperature setting; Unplug and allow to cool; Contact customer support |
9. Specifications
| Specification | Value |
|---|---|
| Model Number | HPM-1211 |
| Dimensions (L x W x H) | 46.99 x 43.79 x 48.49 cm |
| Item Weight | 11.5 Kilograms |
| Brand | CREWORKS |
| Material | Aluminum, Steel, Rubber, Plastic |
| Color | Yellow |
| Recommended Uses | T-shirt printing, mug customization, hat decoration, shoe printing, pen customization, baseball printing, plate printing |
| Max Temperature | 259 Degrees Celsius |
| Voltage | 220 Volts |
| Power | 1250 Watts |
10. Warranty and Support
For warranty information, technical support, or service inquiries, please refer to the contact details provided with your product packaging or visit the official CREWORKS website. Keep your purchase receipt as proof of purchase for warranty claims.


