
1. Introduction
Thank you for choosing the Restokki Pocket Hole Jig Kit. This kit is designed to assist in creating strong and precise pocket hole joints and dowel joints in various woodworking projects. This manual provides essential information for the safe and effective use of your new tool. Please read it thoroughly before operation and retain it for future reference.
2. Safety Information
Always follow basic safety precautions when using power tools and woodworking equipment to reduce the risk of personal injury. This jig is intended for use with appropriate drilling tools.
- Wear Eye Protection: Always wear safety glasses or goggles to protect your eyes from flying debris.
- Wear Hearing Protection: Use ear protection, especially when operating loud drilling equipment.
- Secure Workpiece: Ensure your workpiece is firmly clamped to prevent movement during drilling.
- Use Sharp Bits: Dull drill bits can cause kickback or splintering.
- Keep Hands Clear: Never place hands near the drilling area while the drill is operating.
- Read Drill Manual: Refer to your drill's instruction manual for its specific safety guidelines.
- Work in a Well-Lit Area: Ensure adequate lighting for clear visibility of your work.
3. Package Contents
The Restokki Pocket Hole Jig Kit includes the following components:
- 1x Main Pocket Hole Jig / Dowel Punch Locator
- 1x Adjustable Clamp/Guide Piece
- Drill Bits (various sizes for pocket holes and dowels)
- Stop Collars
- Hex Wrench
- Dowel Pins (assorted sizes)
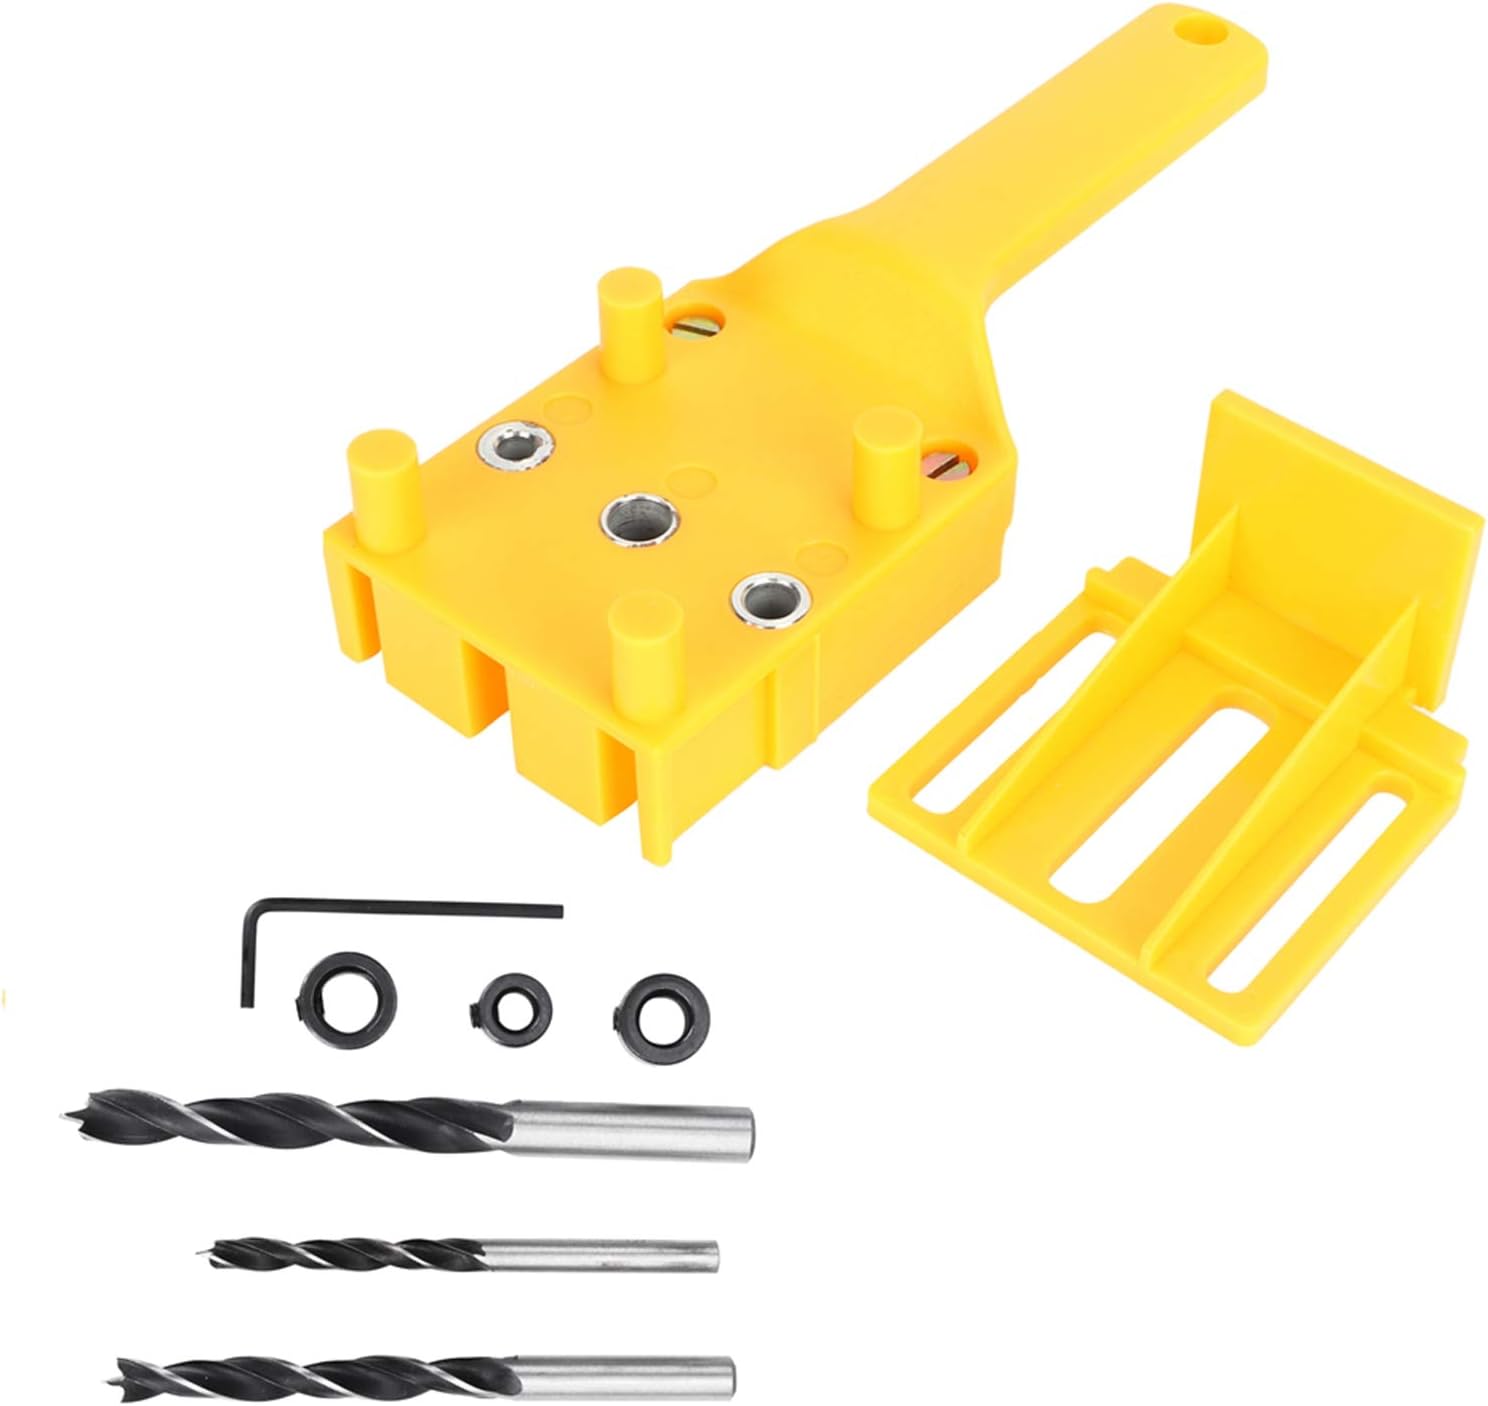
Figure 3.1: All components of the Restokki Pocket Hole Jig Kit, including the main jig, adjustable guide, drill bits, stop collars, hex wrench, and dowel pins.
4. Product Overview
The Restokki Pocket Hole Jig Kit is a versatile tool for creating strong and concealed joints in woodworking. It features a main body with multiple drill guide holes and an adjustable guide for different material thicknesses and joint types.

Figure 4.1: Front view of the main pocket hole jig, showing the angled drill guides and the base for workpiece support.

Figure 4.2: Bottom view of the jig, illustrating the various drill guide holes for different dowel and pocket hole applications.
5. Setup
Proper setup is crucial for accurate and safe operation.
5.1 Attaching the Adjustable Guide
- Identify the main jig body and the separate adjustable clamp/guide piece.
- Align the slots on the adjustable guide with the corresponding rails on the main jig body.
- Slide the adjustable guide onto the main jig. It can be positioned to support the workpiece or to act as a depth stop.
- Secure the guide in place using the integrated fasteners or screws, if applicable, to match your workpiece thickness.

Figure 5.1: The main jig body shown alongside the adjustable guide piece, ready for assembly or use in different configurations.
5.2 Setting Drill Bit Depth
The stop collar is used to control the drilling depth, preventing over-drilling.
- Insert the appropriate drill bit into the desired guide hole on the jig.
- Place the tip of the drill bit against a scrap piece of material of the same thickness as your workpiece.
- Slide the stop collar onto the drill bit until it rests against the top surface of the jig or the desired depth mark.
- Tighten the set screw on the stop collar with the hex wrench to secure it.

Figure 5.2: A drill bit with a stop collar correctly inserted into one of the jig's guide holes, demonstrating depth setting.
6. Operating Instructions
This jig supports both pocket hole and dowel joint applications.
6.1 Creating Pocket Holes
- Prepare Workpiece: Ensure the workpiece edge is clean and square.
- Position Jig: Place the main jig body on the edge of your workpiece where the pocket hole is desired. The flat base of the jig should rest firmly on the workpiece surface.
- Secure Jig: Clamp the jig firmly to the workpiece using a suitable woodworking clamp. Ensure there is no movement.
- Drill: Insert the pocket hole drill bit (with stop collar set) into the appropriate angled guide hole. Start the drill and slowly plunge the bit through the guide until the stop collar contacts the jig.
- Clear Chips: Retract the drill bit periodically to clear wood chips, especially in deeper holes.
- Remove Jig: Once the hole is drilled, remove the drill and unclamp the jig.

Figure 6.1: The pocket hole jig clamped to a workpiece, with a drill being used to create an angled pocket hole.
6.2 Creating Dowel Joints
The jig can also be used as a dowel punch locator for precise dowel placement.
- Mark Joint: Clearly mark the mating surfaces of your workpieces where the dowel joint will be made.
- Position Jig (First Piece): Place the jig on the edge of the first workpiece, aligning the desired dowel guide holes with your marks. The adjustable guide can be used to set the offset from the edge.
- Secure and Drill (First Piece): Clamp the jig and drill the dowel holes using the appropriate straight drill bit with a stop collar set for the correct depth.
- Transfer Marks (Second Piece): Use dowel centers or carefully align the first workpiece with the second to transfer the exact locations for the mating dowel holes.
- Position Jig (Second Piece): Place the jig on the second workpiece, aligning the dowel guide holes with the transferred marks.
- Secure and Drill (Second Piece): Clamp the jig and drill the dowel holes.
- Assemble: Insert dowel pins into the drilled holes with wood glue and assemble the joint.
7. Maintenance
Regular maintenance ensures the longevity and accuracy of your Restokki Pocket Hole Jig Kit.
- Cleaning: After each use, wipe down the jig to remove sawdust and debris. A soft brush can be used to clear out drill guide holes.
- Storage: Store the jig and its components in a dry, clean environment to prevent rust on metal parts and degradation of plastic.
- Inspect Drill Bits: Regularly inspect drill bits for sharpness and damage. Replace dull or damaged bits to maintain drilling accuracy and prevent splintering.
- Check Fasteners: Periodically check any screws or fasteners on the jig for tightness.
8. Troubleshooting
Here are some common issues and their potential solutions:
| Problem | Possible Cause | Solution |
|---|---|---|
| Inaccurate hole depth | Stop collar not set correctly or slipped. | Ensure stop collar is securely tightened at the correct depth. Re-check depth on a scrap piece. |
| Splintering around hole | Dull drill bit; too much pressure; incorrect drill speed. | Use a sharp drill bit. Apply steady, moderate pressure. Adjust drill speed according to wood type. |
| Jig moves during drilling | Jig not clamped securely to workpiece. | Always use a strong clamp to hold the jig firmly in place on the workpiece. |
| Drill bit binds in guide | Accumulated sawdust; bent drill bit. | Clear sawdust from guide holes. Inspect drill bit for straightness; replace if bent. |
9. Specifications
- Model: B0D5PYCZ5N
- Material: ABS Plastic
- Weight: Approximately 10.6 ounces (298 g)
- Purpose: Woodworking Dowel and Pocket Hole Drilling
- Kit Includes: Main drilling locator, adjustable guide, various drill bits, stop collars, hex wrench, dowel pins.
10. Warranty and Support
For warranty information or technical support regarding your Restokki Pocket Hole Jig Kit, please refer to the retailer's return policy or contact Restokki customer service through the platform where the product was purchased. Keep your purchase receipt as proof of purchase.
For additional assistance, you may visit the Restokki Store on Amazon.