
1. Introduction
This manual provides detailed instructions for the installation, operation, and troubleshooting of your PEMP 10.25" Linux Head Unit. This unit is designed to integrate seamlessly with BMW X1 E84 models (2009-2015) equipped with the CIC original 4PIN LVDS system, offering enhanced features like Wireless CarPlay and Android Auto.
2. Safety Information
Please read all instructions carefully before installation and operation. Improper installation or use can lead to damage to the product or vehicle, and may void your warranty. Always disconnect the vehicle's battery before performing any electrical work. Consult a professional if you are unsure about any installation steps.
- Ensure the vehicle is turned off and the battery is disconnected before installation.
- Avoid obstructing airbags or other safety features during installation.
- Do not operate the device in a way that distracts you from driving.
- Keep the device away from water and extreme temperatures.
- Only use specified cables and accessories.
3. Package Contents
Verify that all components are present in the package:
- PEMP 10.25" Linux Head Unit
- ISO Wiring Harness
- USB Cable
- Audio Cable
- Pry Tool
- Installation Manual (this document)

Figure 3.1: Included components of the PEMP 10.25" Linux Head Unit package.
4. Compatibility
This head unit is specifically designed for BMW X1 E84 models manufactured between 2009 and 2015. It is compatible only with vehicles that have the original CIC 4PIN LVDS system.
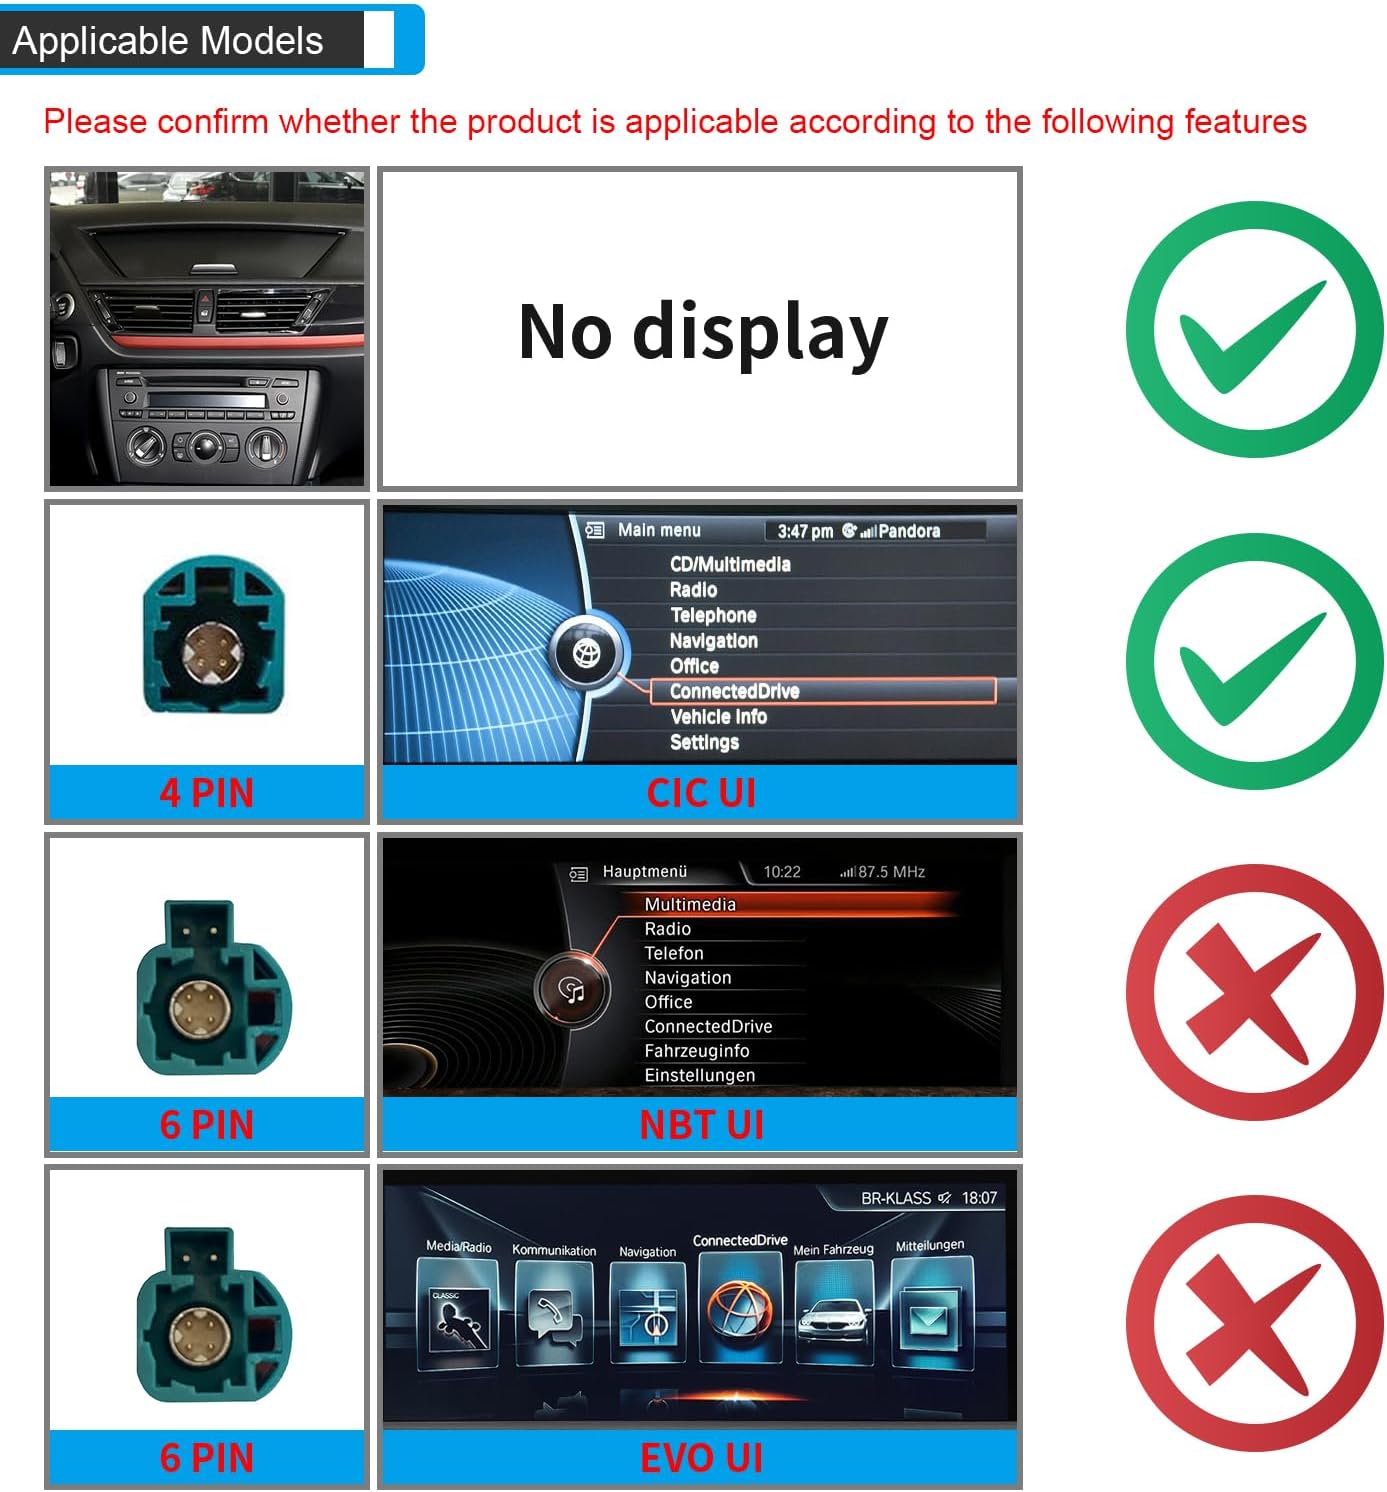
Figure 4.1: Applicable models and system types. Ensure your vehicle matches the compatible 4PIN CIC UI.
5. Key Features
- Vertical Screen Design: Ergonomic vertical display for improved visibility and touch interaction.
- Wireless & Wired CarPlay/Android Auto: Seamless integration with your smartphone for navigation, music, and communication.
- OEM Bluetooth Support: Utilize your vehicle's original Bluetooth for high-quality calls without echo when using CarPlay or Android Auto.
- High-Definition Display: 1920x720 HD capacitive touchscreen.
- OEM System Integration: Supports factory monitor information display and allows switching between the original OEM interface and the new system by long-pressing the Menu button.
- Steering Wheel Control: Retains original steering wheel button functionality.
- Fast Boot: Quick access to CarPlay/Android Auto interface and reverse camera video (within 2 seconds).
- USB Media Playback: Play music and videos via USB.
- Camera Support: Compatible with OEM and aftermarket front/rear view cameras (aftermarket cameras up to 720P AHD format).
6. Setup and Installation
This section outlines the general installation process. Professional installation is recommended. Refer to the specific wiring diagrams provided with your unit for detailed connections.
6.1 Pre-Installation Overview
Before beginning, ensure your vehicle is turned off and the battery is disconnected. Use the provided pry tool to carefully remove trim pieces and access the original head unit.
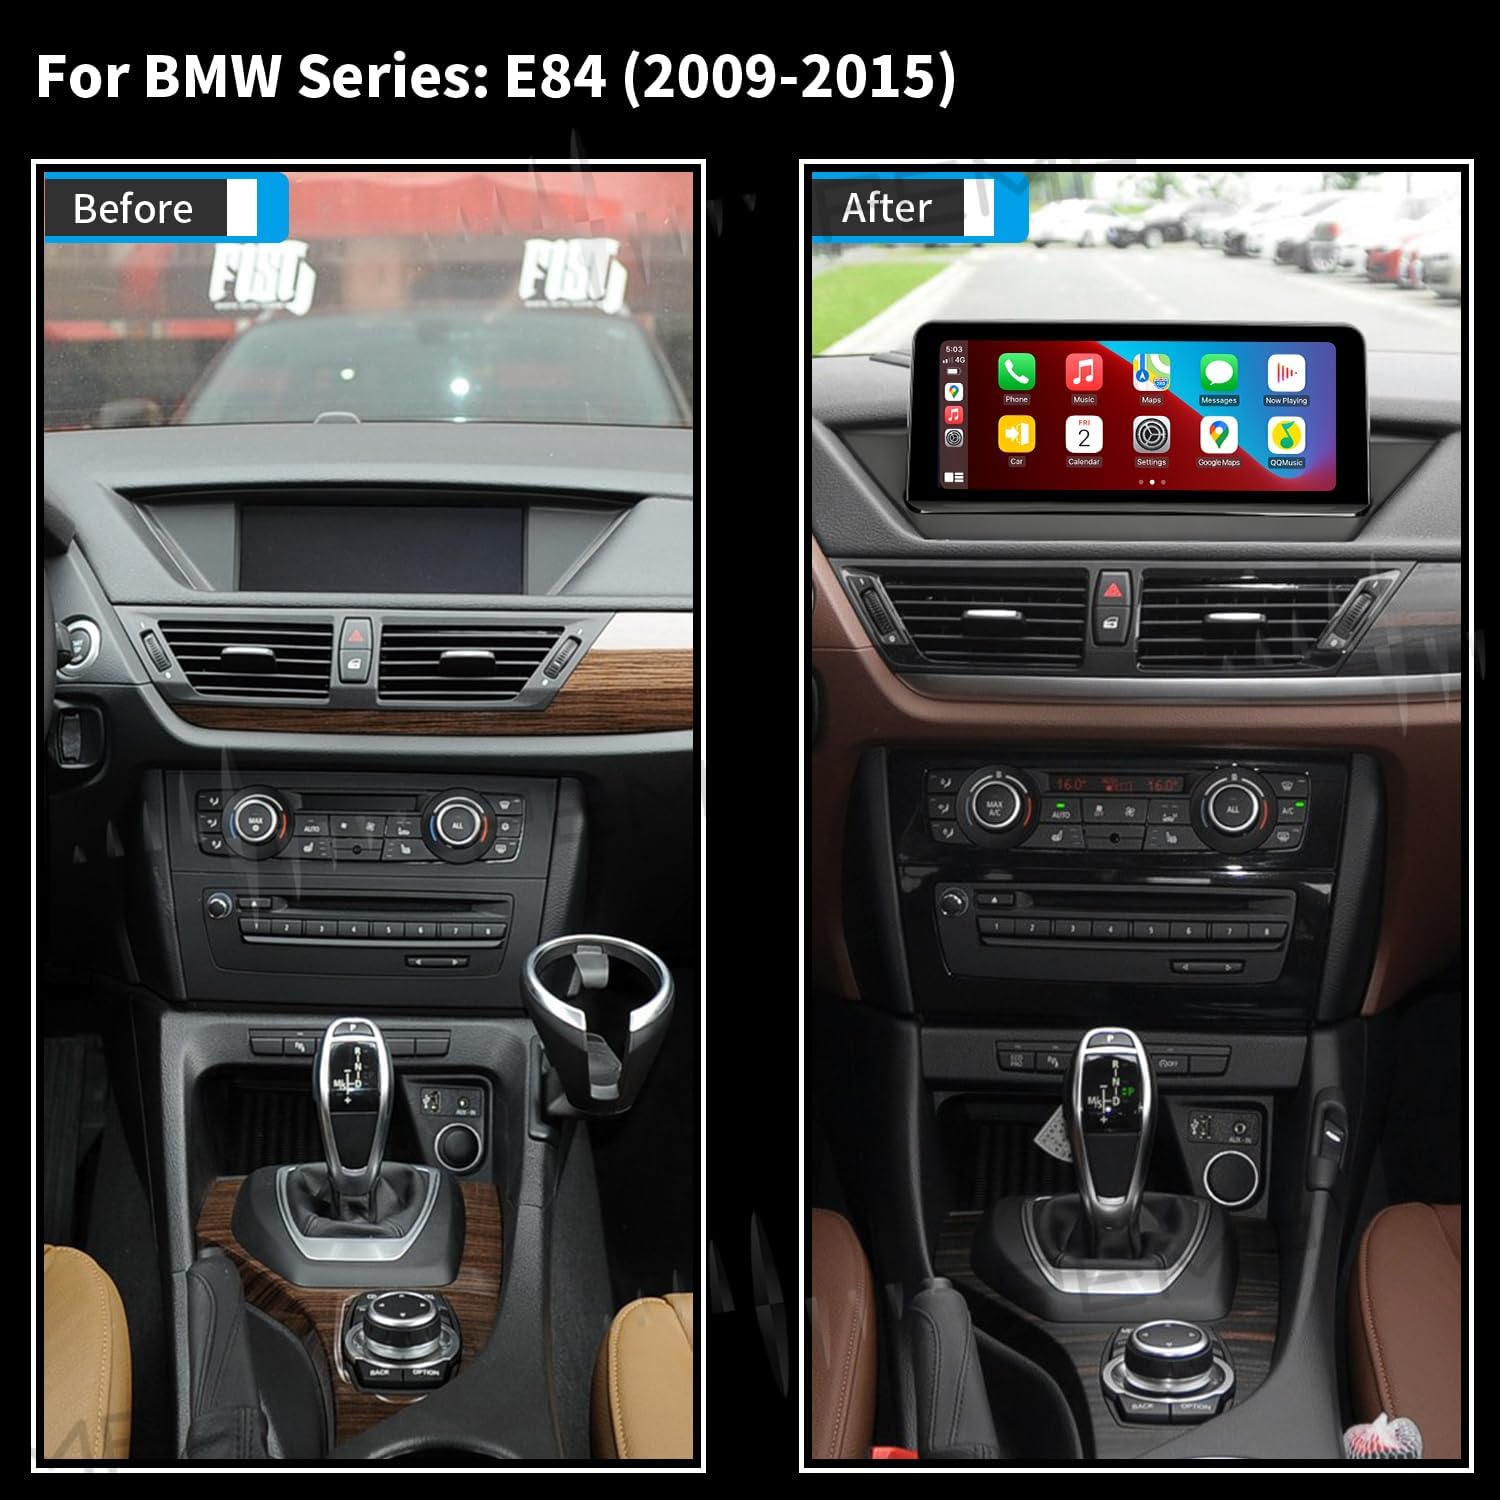
Figure 6.1: Comparison of the BMW X1 E84 dashboard before and after installing the PEMP head unit.
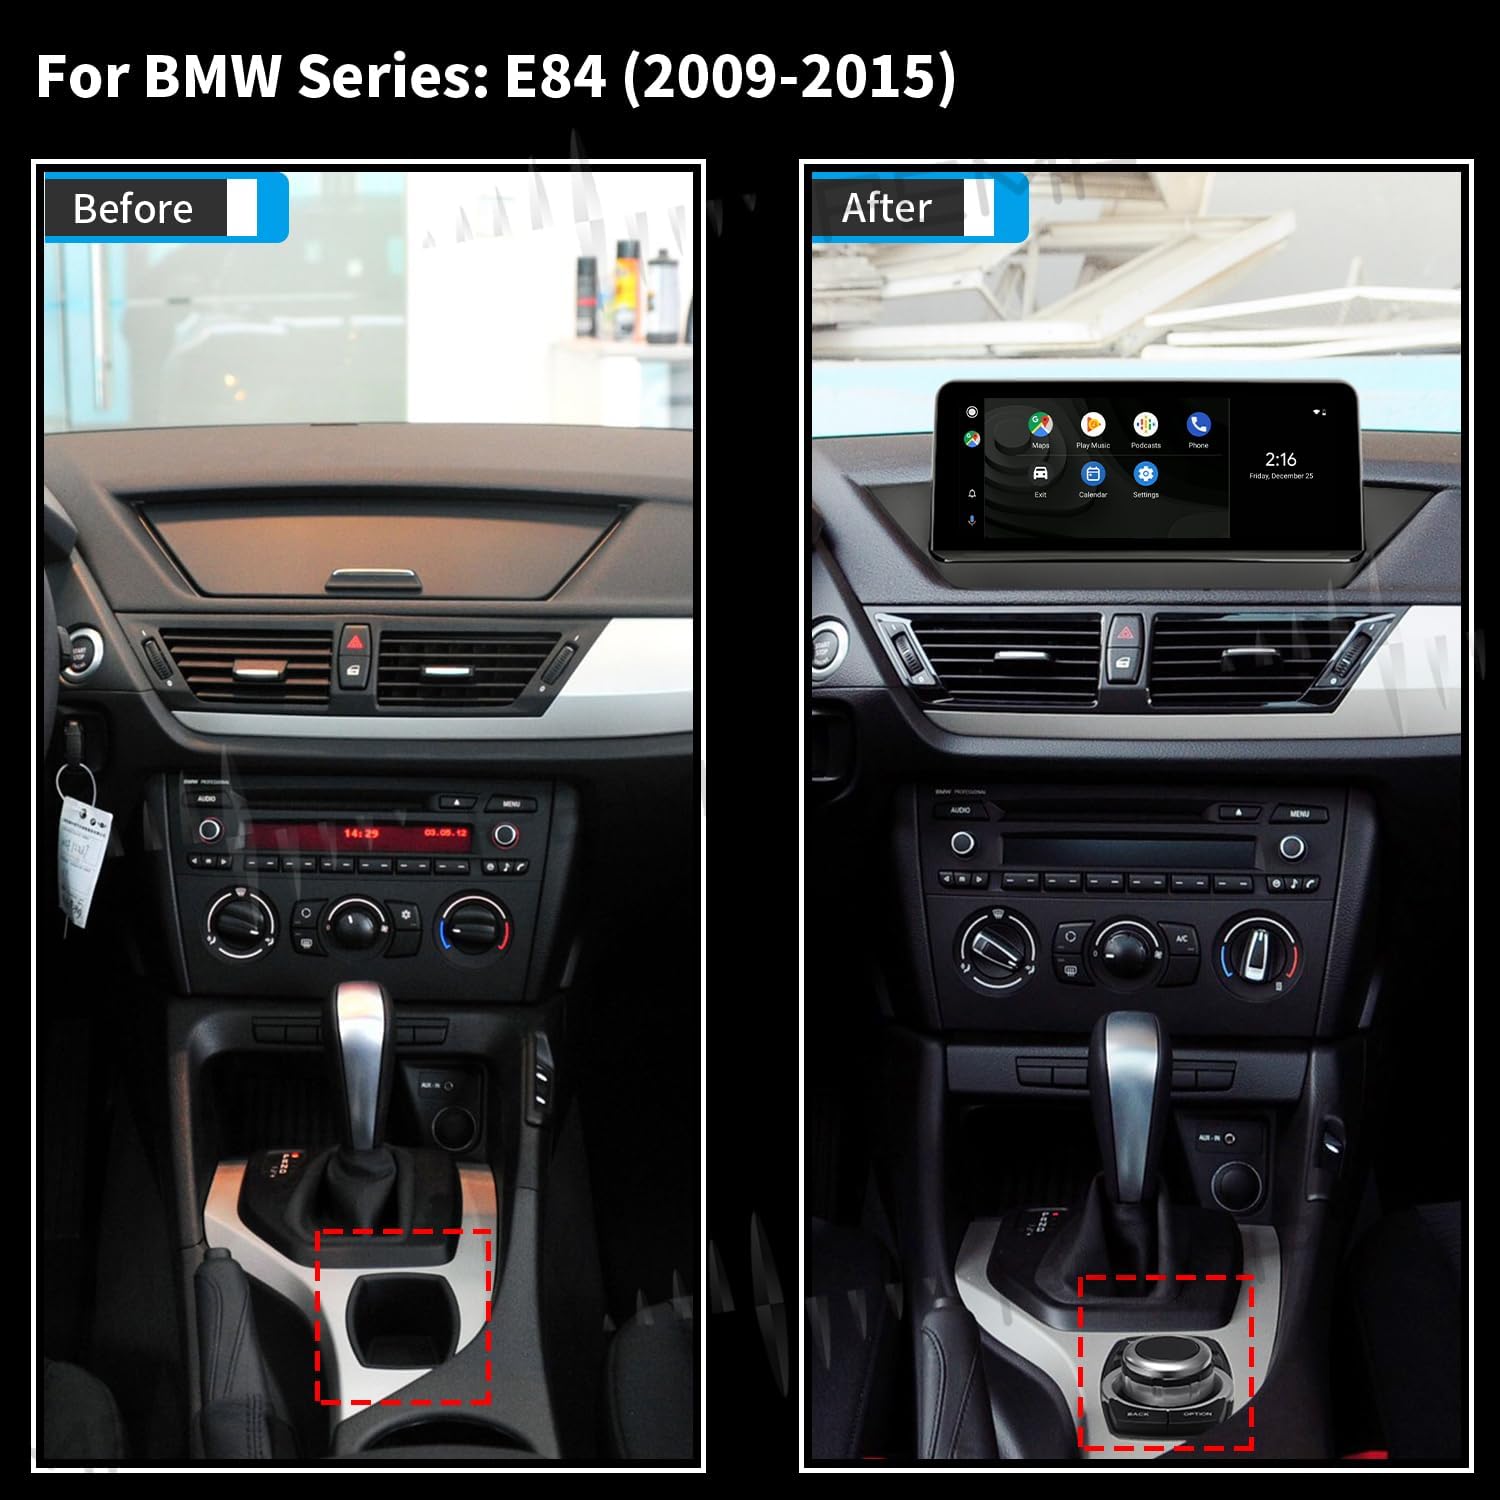
Figure 6.2: Dashboard view focusing on the iDrive controller, before and after head unit installation.
6.2 Wiring Connections
Connect the provided ISO wiring harness to the original vehicle's wiring. Pay close attention to the optical fiber cable connection.

Figure 6.3: Optical fiber cable transfer diagram. Ensure the 2-pin green optical fiber cable is correctly transferred to the Linux harness.
Video 6.1: General installation guide for Autoabc Touchscreen Multimedia Radio for BMW. This video demonstrates common wiring and installation steps applicable to similar BMW head units.
Video 6.2: F30 LINUX Screen Installation Method. While for an F30, this video provides visual guidance on the general process of installing a Linux screen in a BMW, including cable management.
6.3 USB Cable Routing
Route the USB cable from the head unit to a convenient location, such as the co-driver's storage box, for easy access.
Video 6.3: USB cable routing demonstration. This video illustrates how to route the USB cable from the head unit to the storage box.
For wired CarPlay and Android Auto, always use USB IN 1.
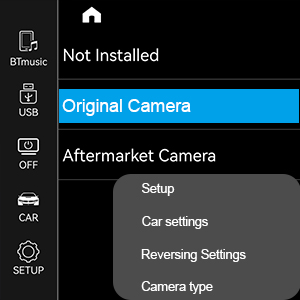
Figure 6.4: USB input ports. Use USB IN 1 for wired CarPlay and Android Auto connections.
7. Operation
7.1 Switching Between OEM and New Interface
To switch between the factory OEM interface and the new CarPlay/Android Auto interface, long-press the Menu button on your car's knob controller.

Figure 7.1: Switching between OEM and new system interfaces.
7.2 CarPlay and Android Auto
The unit supports both wireless and wired CarPlay and Android Auto. Connect your smartphone via Bluetooth for wireless functionality, or use USB IN 1 for a wired connection.

Figure 7.2: Wireless CarPlay, Android Auto, and Mirror Link functionality.
Video 7.1: How to connect Apple CarPlay. This video demonstrates the steps to connect your iPhone to the head unit for Apple CarPlay functionality.
Video 7.2: How to connect Android Auto. This video demonstrates the steps to connect your Android phone to the head unit for Android Auto functionality.
7.3 Using OEM Bluetooth for Calls
The unit supports using your vehicle's original Bluetooth for calls while CarPlay or Android Auto is active. This ensures high-quality audio and no echo.

Figure 7.3: OEM Bluetooth support for calls and audio.
Video 7.3: How to use OEM Bluetooth for calls in CarPlay. This video guides you through configuring the system to use your car's original Bluetooth for phone calls.
7.4 Setting OEM Resolution
To ensure optimal display, set the correct OEM resolution in the unit's settings.
- Go to Setup.
- Select Car Settings.
- Choose Original Car's Screen Resolution.
- Select the appropriate resolution for your vehicle (e.g., 800x480 for NBT/CIC/EVO).

Figure 7.4: Setting the OEM screen resolution.
Video 7.4: How to set the OEM resolution. This video demonstrates the steps to correctly configure the OEM resolution for your vehicle's display.
7.5 AUX Audio Settings
To ensure audio output, configure the AUX settings. You can choose between automatic or manual AUX switching.
Automatic AUX Switching:
- Navigate to Car Settings in the setup menu.
- Find and select Auto Switch to AUX.
- Choose either "Harman Head Unit" or "Alpine Head Unit" based on your car's audio system.
Manual AUX Setting Method:
- Go to the Main menu and select Multimedia.
- Then select External devices.
- Long press the number key "8" until you hear a tone.
- Press "8" eight times before entering the new system to get CarPlay sound.

Figure 7.5: AUX audio setting methods.
7.6 Camera Settings
The unit supports both original and aftermarket cameras. Configure the camera type in the settings.
- Go to Setup.
- Select Car settings.
- Choose Reversing Settings.
- Select Camera type and choose between "Original Camera" or "Aftermarket Camera".
Note: Aftermarket cameras are supported up to 720P AHD format. Cameras exceeding this specification are not supported.

Figure 7.6: Camera settings interface and camera support illustration.

Figure 7.7: Selecting camera type in settings.
8. Troubleshooting
8.1 No Sound from OEM Radio / CarPlay Audio Issues
If you experience no sound from the OEM radio or issues with CarPlay audio, follow these steps:
- Press the FM/AM button to confirm if the OEM radio has sound.
- If the OEM radio has sound: You need to set the resolution. Go to Setup > Car Settings > Original Car's Screen Resolution and select the correct item.
- If there is no sound from the OEM radio: You will need to reconnect the socket on the back of the OEM radio. Refer to the image below for guidance.

Figure 8.1: Troubleshooting guide for no sound issues.
Video 8.1: How to fix the no sound issue. This video provides a visual guide to resolve common audio problems.
8.2 Call Audio Issues (Cannot hear other's voice)
If you are on a call via CarPlay/Android Auto and cannot hear the other person's voice, you may need to select the sound source from your mobile phone to output through the car's system.
Video 8.2: PEMP connected to OEM Bluetooth and Carplay at the same time. This video demonstrates how to manage audio sources during calls when both OEM Bluetooth and CarPlay are active.
9. Specifications
| Feature | Specification |
|---|---|
| Brand | PEMP |
| Model Number | PP-9239P |
| Screen Size | 10.25 Inches |
| Display Resolution | 1920x720 HD |
| Operating System | Linux |
| Connectivity Technology | Bluetooth, Wi-Fi |
| Special Features | Wireless/Wired CarPlay, Wireless/Wired Android Auto, Touchscreen, OEM Bluetooth Support |
| Compatible Devices | iPhone, Android Phone |
| Supported Navigation | GPS (via CarPlay/Android Auto) |
| Mounting Type | Dashboard Mount |
| Item Dimensions (L x W x H) | 12.2"L x 2"W x 5.1"H |
| Item Weight | 2.4 Kilograms |
10. Warranty and Support
For warranty information and technical support, please refer to the documentation included with your purchase or contact PEMP customer service directly. Specific warranty terms may vary by region and retailer.
