
1. Important Safety Instructions
Please read all instructions carefully before using this appliance. Failure to follow these instructions may result in electric shock, fire, or serious injury.
- This appliance is for household use only. Do not use outdoors or on commercial surfaces.
- Do not immerse the appliance in water or other liquids.
- Keep hair, loose clothing, fingers, and all parts of the body away from openings and moving parts.
- Use only Proscenic recommended cleaning solutions.
- Do not pick up flammable or combustible liquids, such as gasoline, or use in areas where they may be present.
- Do not pick up anything that is burning or smoking, such as cigarettes, matches, or hot ashes.
- Always turn off the appliance before making any adjustments, changing accessories, or storing.
- Store the appliance indoors in a cool, dry place.
2. Product Overview and Components
The Proscenic F10 Pro is a 3-in-1 wet dry vacuum cleaner designed for efficient cleaning of hard floors. It vacuums, mops, and washes simultaneously.
Included Components:
- Main unit (including floor brush, roller brush, HEPA filter)
- Handle
- Charging Base
- Power Adapter
- Cleaning Brush
- Instruction Manual
- After-sales Card

Figure 2.1: Proscenic F10 Pro Wet Dry Vacuum Cleaner and accessories.
3. Setup and Initial Use
3.1 Assembly
- Insert the handle into the main unit until it clicks securely into place.
- Place the assembled unit onto the charging base.
3.2 Charging
- Connect the power adapter to the charging base and plug it into a wall outlet.
- Ensure the unit is properly seated on the charging base. The LED display will indicate charging status.
- Allow approximately 5 hours for a full charge before first use.
3.3 Filling the Clean Water Tank
- Press the tank release button and remove the clean water tank.
- Open the tank cap and fill with clean tap water. For enhanced cleaning, add a small amount of Proscenic cleaning solution (follow solution instructions for dilution).
- Close the cap securely and reinsert the tank into the main unit until it clicks.
4. Operating the Appliance
4.1 Power On/Off
Press the power button on the handle to turn the appliance on or off.
4.2 Cleaning Modes
The F10 Pro offers three cleaning modes, selectable via the mode button on the handle:
- Smart Mode: For general daily cleaning. The appliance automatically adjusts suction and water flow based on floor dirt detection.
- Max Mode: Provides maximum suction and water flow for heavy-duty stains and deeply embedded dirt.
- Suction Mode: Designed for absorbing liquids without dispensing water, ideal for spills.
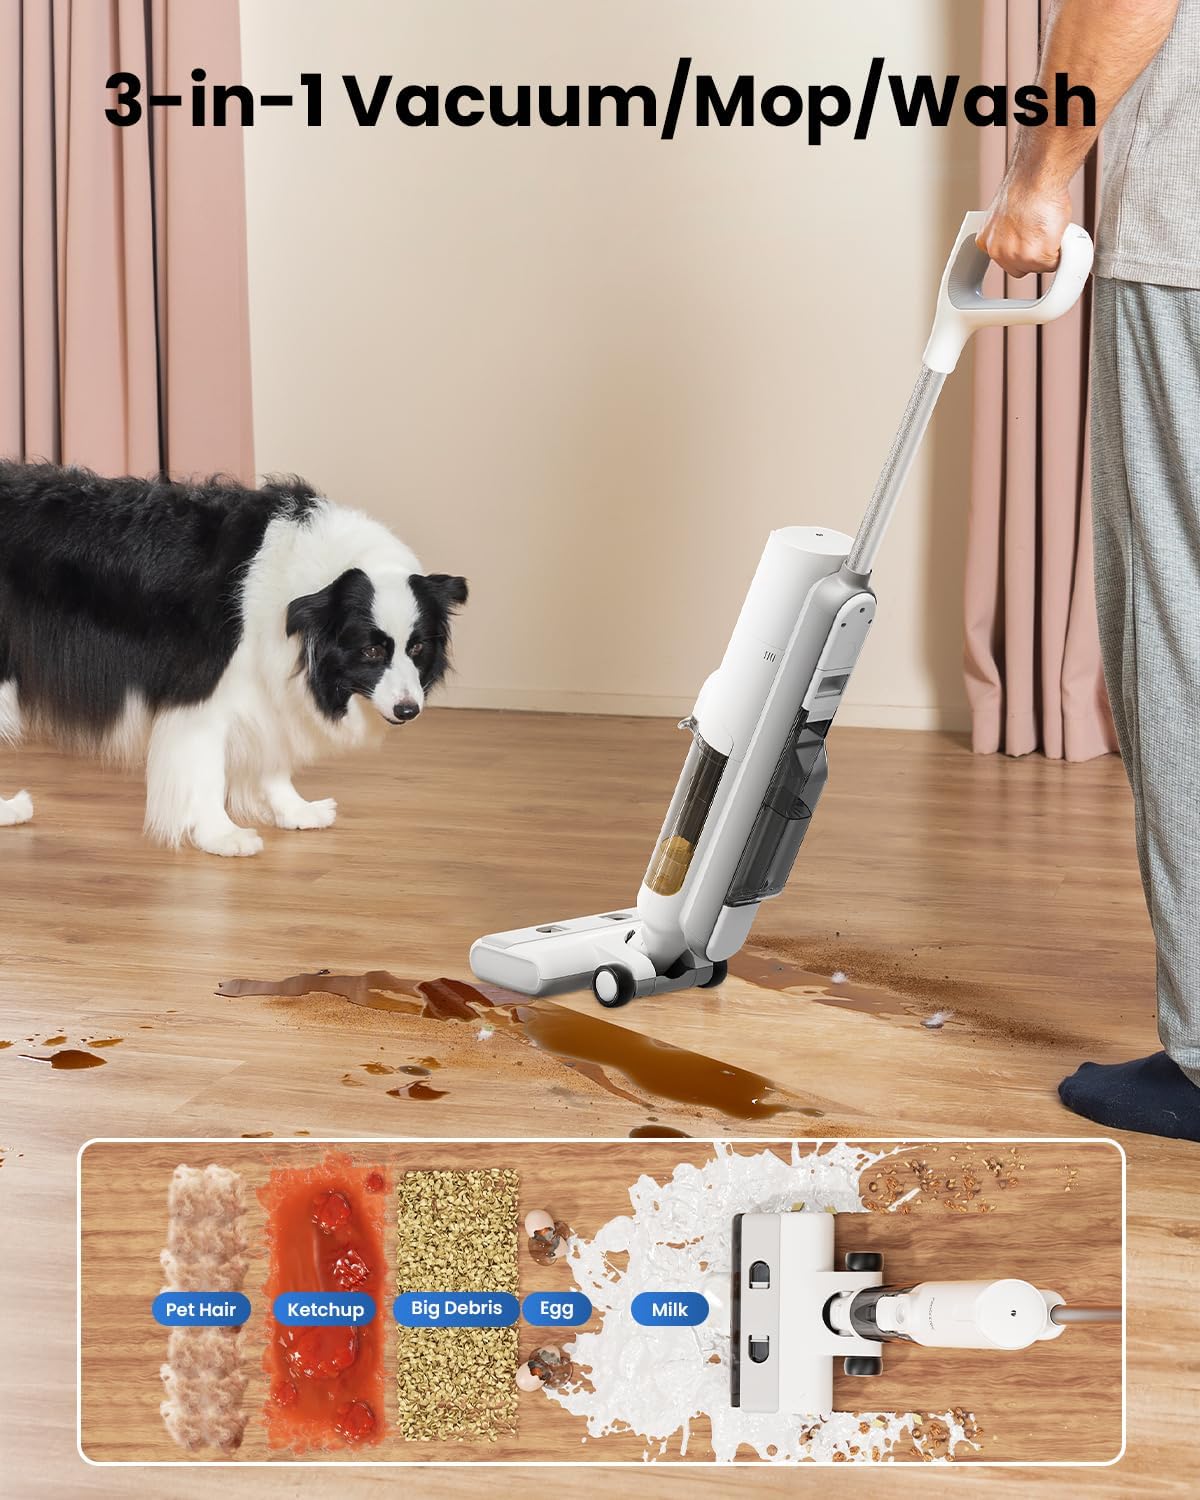
Figure 4.1: The F10 Pro performing 3-in-1 vacuum, mop, and wash functions on a hard floor.
4.3 LED Display and Voice Guidance
The integrated LED display provides real-time information on battery life, current cleaning mode, and maintenance alerts. Voice prompts guide you through various operations and alerts, such as tank status or self-cleaning initiation.
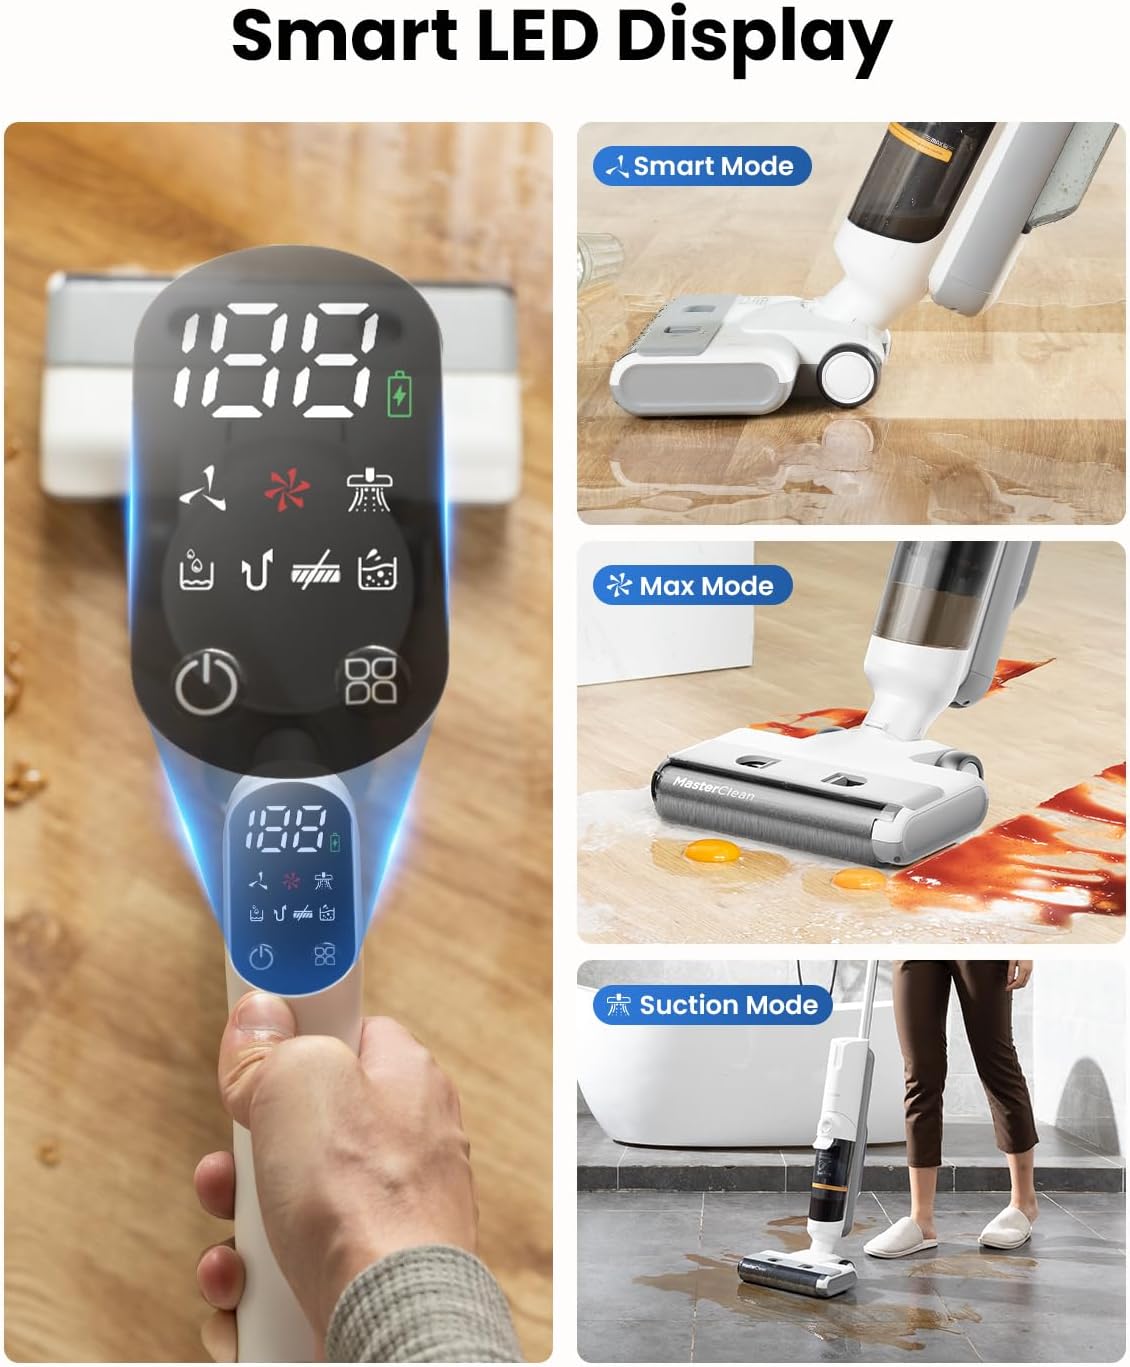
Figure 4.2: User-friendly LED display showing operational status.
4.4 Self-Propelled Movement
The F10 Pro features a self-propulsion system that assists in forward movement, reducing effort during cleaning. The flexible floor brush enhances maneuverability around obstacles.

Figure 4.3: The self-propelled system makes cleaning effortless.
4.5 Edge Cleaning
The design of the floor brush allows for effective cleaning close to edges and baseboards, minimizing uncleaned areas.

Figure 4.4: Edge-to-edge cleaning capability.
5. Maintenance
Regular maintenance ensures optimal performance and extends the lifespan of your F10 Pro.
5.1 Automated Self-Cleaning
After each use, place the appliance on the charging base and press the self-cleaning button. The appliance will automatically wash the roller brush and internal tubing with clean water, helping to prevent odors and maintain hygiene.

Figure 5.1: Automated self-cleaning cycle on the charging base.
5.2 Emptying and Cleaning the Dirty Water Tank
Empty the dirty water tank after each use. The tank features a solid-liquid separator for easy disposal of solid debris.
- Press the dirty water tank release button and remove the tank.
- Open the tank lid and dispose of dirty water and debris.
- Rinse the tank and the solid-liquid separator thoroughly with clean water.
- Ensure all parts are dry before reassembling and reinserting the tank.
5.3 Cleaning the Roller Brush
While the self-cleaning function helps, occasional manual cleaning of the roller brush may be necessary.
- Turn off the appliance and remove the dirty water tank.
- Open the roller brush cover and remove the roller brush.
- Use the provided cleaning brush to remove any hair or debris tangled around the roller.
- Rinse the roller brush under running water. Allow it to air dry completely before reinstallation.
5.4 HEPA Filter Maintenance
The HEPA filter should be cleaned regularly and replaced periodically to maintain suction performance.
- Locate and remove the HEPA filter (typically found within the dirty water tank assembly).
- Tap the filter gently to dislodge dust and debris. You may rinse it under running water if heavily soiled, but ensure it is completely dry before reinstallation.
- Replace the HEPA filter every 3-6 months, depending on usage.
6. Troubleshooting
Refer to this section for common issues and their solutions.
| Problem | Possible Cause | Solution |
|---|---|---|
| Appliance does not power on | Low battery; Not charged | Charge the appliance fully. Ensure the power adapter is connected correctly. |
| No water dispensed / Low water flow | Clean water tank empty; Tank not installed correctly; Nozzle blocked | Refill the clean water tank. Reinstall the tank securely. Check and clean the water dispensing nozzle. |
| Poor suction / Leaves streaks | Dirty water tank full; Roller brush tangled/dirty; HEPA filter clogged | Empty and clean the dirty water tank. Clean the roller brush. Clean or replace the HEPA filter. |
| Self-cleaning function not working | Dirty water tank not installed correctly; Appliance not on charging base; Low battery | Ensure the dirty water tank is securely in place. Confirm the appliance is correctly seated on the charging base. Ensure sufficient battery charge. |
| Unpleasant odor | Dirty water tank not cleaned; Roller brush not cleaned/dried properly | Empty and thoroughly clean the dirty water tank after each use. Clean and allow the roller brush to air dry completely. Run the self-cleaning cycle. |
| Voice prompts are too loud/soft | Volume settings | Refer to the appliance's controls for adjusting voice prompt volume. |
7. Specifications
| Feature | Specification |
|---|---|
| Model Name | US-F10 Pro |
| Brand | Proscenic |
| Special Features | Automated Self-Cleaning, Headlight, Lightweight, Vacuum and Mop Combo, Wet/Dry |
| Filter Type | HEPA Filter |
| Cordless | Yes |
| Clean Water Tank Capacity | 650 Milliliters |
| Dirty Water Tank Capacity | 500 Milliliters (approximate, inferred from runtime description) |
| Wattage | 125 watts |
| Charging Time | 5 Hours |
| Battery Type | Lithium-Ion (6x2,600 mAh battery pack) |
| Battery Life (Runtime) | Up to 30 minutes |
| Noise Level | 79 dB |
| Product Dimensions | 43"L x 10"W x 8"H |
| Item Weight | 9 pounds |
| Control Method | Push Button, Voice |

Figure 7.1: Runtime and tank capacities of the F10 Pro.
8. Warranty and Support
For warranty information, please refer to the 'After-sales Card' included in your product packaging. If you encounter any issues or require technical assistance, please contact Proscenic customer support through the official website or the contact information provided in your documentation.