1. Introduction
This manual provides essential information for setting up, operating, and maintaining your Beelink SER5 Mini PC. The Beelink SER5 is a compact, high-performance mini computer featuring an AMD Ryzen 5 5500U processor, designed for various tasks including office work, 4K video playback, and light gaming.
For optimal performance and longevity, please read this manual thoroughly before using your device.
2. Package Contents
Verify that all items are present in your package:
- 1x Beelink SER5 5500U Mini PC
- 1x HDMI Cable
- 1x Power Adapter
- 1x User Manual (this document)
- 1x Wall-mounted bracket

Figure 2.1: Beelink SER5 Mini PC and included accessories.
3. Product Overview
The Beelink SER5 Mini PC is engineered for efficiency and versatility. It features a compact design with robust connectivity options and an advanced cooling system.
3.1 Key Features
- High Performance Processor: Powered by AMD Ryzen 5 5500U (6 Cores/12 Threads, up to 4.0 GHz) for stable and reliable performance.
- Graphics: Integrated Radeon Graphics with 7 cores at 1800 MHz, supporting 4K FPS video playback.
- Memory & Storage: Equipped with 16GB DDR4 RAM (expandable up to 64GB) and a 500GB M.2 NVMe 2280 SSD (expandable up to 4TB).
- Triple Display Support: Connect up to three monitors simultaneously via HDMI, DisplayPort (DP), and Type-C ports for enhanced productivity.
- Connectivity: Features WiFi 6, RJ45 2.5G LAN, and Bluetooth 5.2 for fast and stable network and peripheral connections.
- Efficient Cooling: A silent and powerful fan with a dual heat pipe system ensures rapid heat dissipation, maintaining optimal operating temperatures.
3.2 Ports and Interfaces
The Mini PC offers a variety of ports for connecting peripherals and displays:
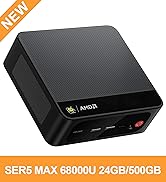
Figure 3.1: Front and Rear Ports of the Beelink SER5 Mini PC.
- Front: 1x Type-C (Data & Video), 3x USB 3.2 Gen 2, 1x Earphone Jack, Power Button, CLR CMOS button.
- Rear: 1x HDMI, 1x DisplayPort (DP), 1x USB 2.0, 1x RJ45 2.5G LAN, DC Power Input.
3.3 Cooling System
The Mini PC incorporates a large fan and dual heat conduction tubes to ensure efficient heat dissipation, maintaining system stability during demanding tasks.

Figure 3.2: Internal Cooling System.
4. Setup Guide
4.1 Initial Setup
- Connect Power: Plug the power adapter into the DC input port on the rear of the Mini PC, then connect it to a power outlet.
- Connect Display: Use an HDMI, DisplayPort, or Type-C cable to connect your monitor(s) to the corresponding port(s) on the Mini PC.
- Connect Peripherals: Plug in your keyboard, mouse, and any other USB devices into the available USB ports.
- Power On: Press the power button on the front of the Mini PC. The power indicator light will illuminate.
- Operating System Setup: Follow the on-screen instructions to complete the initial setup of your operating system (e.g., Windows 11).
4.2 Wall Mounting
The included wall-mounted bracket allows you to discreetly install the Mini PC behind a monitor or on a wall.
- Attach the bracket to the Mini PC using the provided screws.
- Secure the bracket to the back of your display (if VESA compatible) or to a wall using appropriate mounting hardware (not always included).
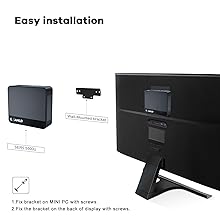
Figure 4.1: Wall Mounting Installation.
5. Operating Instructions
5.1 Power On/Off
- Power On: Press the power button once.
- Power Off: From the operating system, select 'Shut down'. Alternatively, press and hold the power button for 5-7 seconds for a forced shutdown (use only when necessary).
5.2 Network Connectivity
- Wi-Fi: The Mini PC supports Wi-Fi 6. To connect, navigate to your operating system's network settings, select your Wi-Fi network, and enter the password.
- Ethernet (LAN): For a wired connection, plug an Ethernet cable into the RJ45 2.5G LAN port on the rear of the Mini PC.
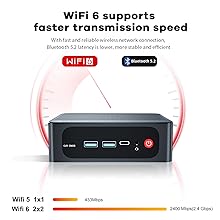
Figure 5.1: WiFi 6 Connectivity.
5.3 Bluetooth
The Mini PC supports Bluetooth 5.2. To pair Bluetooth devices, go to your operating system's Bluetooth settings and follow the pairing instructions for your specific device.
6. Maintenance
6.1 Cleaning
Regularly clean the exterior of the Mini PC with a soft, dry cloth. Ensure ventilation openings are free from dust and debris to maintain optimal cooling performance. Do not use liquid cleaners directly on the device.
6.2 Storage and Memory Upgrades
The Beelink SER5 Mini PC supports upgrades for both RAM and SSD storage.
- RAM: The device has two DDR4 RAM slots, supporting up to 64GB (2x 32GB).
- SSD: The M.2 NVMe 2280 SSD can be upgraded to a maximum of 4TB.
For detailed upgrade instructions, please refer to the official Beelink support resources or consult a qualified technician.
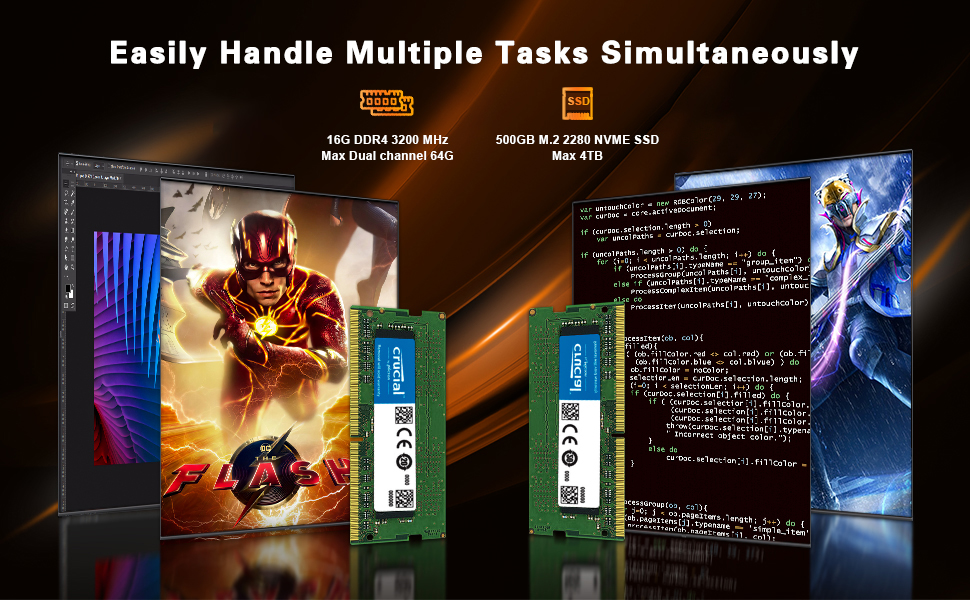
Figure 6.1: RAM Upgrade Capability.

Figure 6.2: SSD Upgrade Capability.
7. Troubleshooting
- No Power: Ensure the power adapter is securely connected to both the Mini PC and a working power outlet. Test the outlet with another device.
- No Display: Verify that the monitor is powered on and the display cable (HDMI, DP, or Type-C) is firmly connected to both the Mini PC and the monitor. Try a different cable or monitor if possible.
- No Internet Connection: For Wi-Fi, check your network settings and ensure you are connected to the correct network. For wired LAN, ensure the Ethernet cable is properly connected and your router is functioning.
- System Slowdown/Overheating: Ensure the Mini PC's ventilation holes are not obstructed. Close unnecessary applications. If issues persist, consider cleaning the internal fan (refer to maintenance section or professional service).
- BIOS Access: To access the BIOS setup, press the F7 key repeatedly during startup.
8. Specifications
Detailed technical specifications for the Beelink SER5 Mini PC:
| Feature | Specification |
|---|---|
| Processor | AMD Ryzen 5 5500U (6 Cores/12 Threads, up to 4.0 GHz) |
| Graphics | AMD Radeon Graphics 7 CUs, 1800 MHz |
| RAM | 16GB DDR4 (2x 8GB), expandable to 64GB |
| Storage | 500GB M.2 NVMe 2280 SSD, expandable to 4TB |
| Operating System | OS (e.g., Windows 11) |
| Video Output | HDMI (4K HD), DisplayPort (DP 1.4), Type-C (Data & Video) - Triple Display Support |
| USB Ports | 3x USB 3.2 Gen 2, 1x USB 2.0, 1x Type-C |
| Network | WiFi 6 (802.11ax), Bluetooth 5.2, RJ45 2.5G LAN |
| Dimensions | 4.96 x 4.45 x 1.65 inches (126 x 113 x 42 mm) |
| Weight | Approx. 1.94 pounds |
Table 8.1: Beelink SER5 Mini PC Specifications.
9. Warranty and Support
Beelink provides comprehensive support for your Mini PC:
- Warranty: 1-Year Free Warranty.
- Technical Support: Lifetime technical issue assistance.
- Customer Service: 7 Days/24 Hours serving.
For technical assistance or warranty claims, please contact the Beelink customer service team. All Beelink Mini PCs have obtained FCC, CE, and ROSH Certifications.
10. Product Video Overview
Watch an official introduction video for the Beelink SER5 5500U Mini PC:
Video 10.1: Introduction to Beelink SER5 5500U Mini PC. This video provides a visual overview of the product's features and design.


