1. Introduction
This manual provides essential instructions for the safe and effective use, setup, operation, and maintenance of your PLASMARGON P80 Pilot Arc Plasma Cutter Torch. Please read this manual thoroughly before operating the equipment to ensure proper function and safety.
2. Safety Information
Plasma cutting involves high temperatures, electricity, and fumes. Always prioritize safety. Failure to follow these safety guidelines can result in serious injury or death.
- Eye Protection: Always wear appropriate welding helmets or safety glasses with suitable shade levels to protect against intense light and sparks.
- Body Protection: Wear flame-resistant clothing, gloves, and protective footwear.
- Ventilation: Ensure adequate ventilation to remove fumes and gases produced during cutting. Work in a well-ventilated area or use fume extraction equipment.
- Electrical Safety: Ensure your plasma cutter is properly grounded. Do not operate in wet conditions. Inspect cables and connections for damage before each use.
- Fire Hazards: Keep flammable materials away from the cutting area. Have a fire extinguisher readily available.
- Hot Surfaces: The torch and cut material will be extremely hot after use. Allow them to cool before handling.
3. Product Overview and Components
The PLASMARGON P80 Pilot Arc Plasma Cutter Torch is designed for efficient and clean cutting of various metals. It features a pilot arc system for non-touch cutting, reducing slag and extending consumable life.
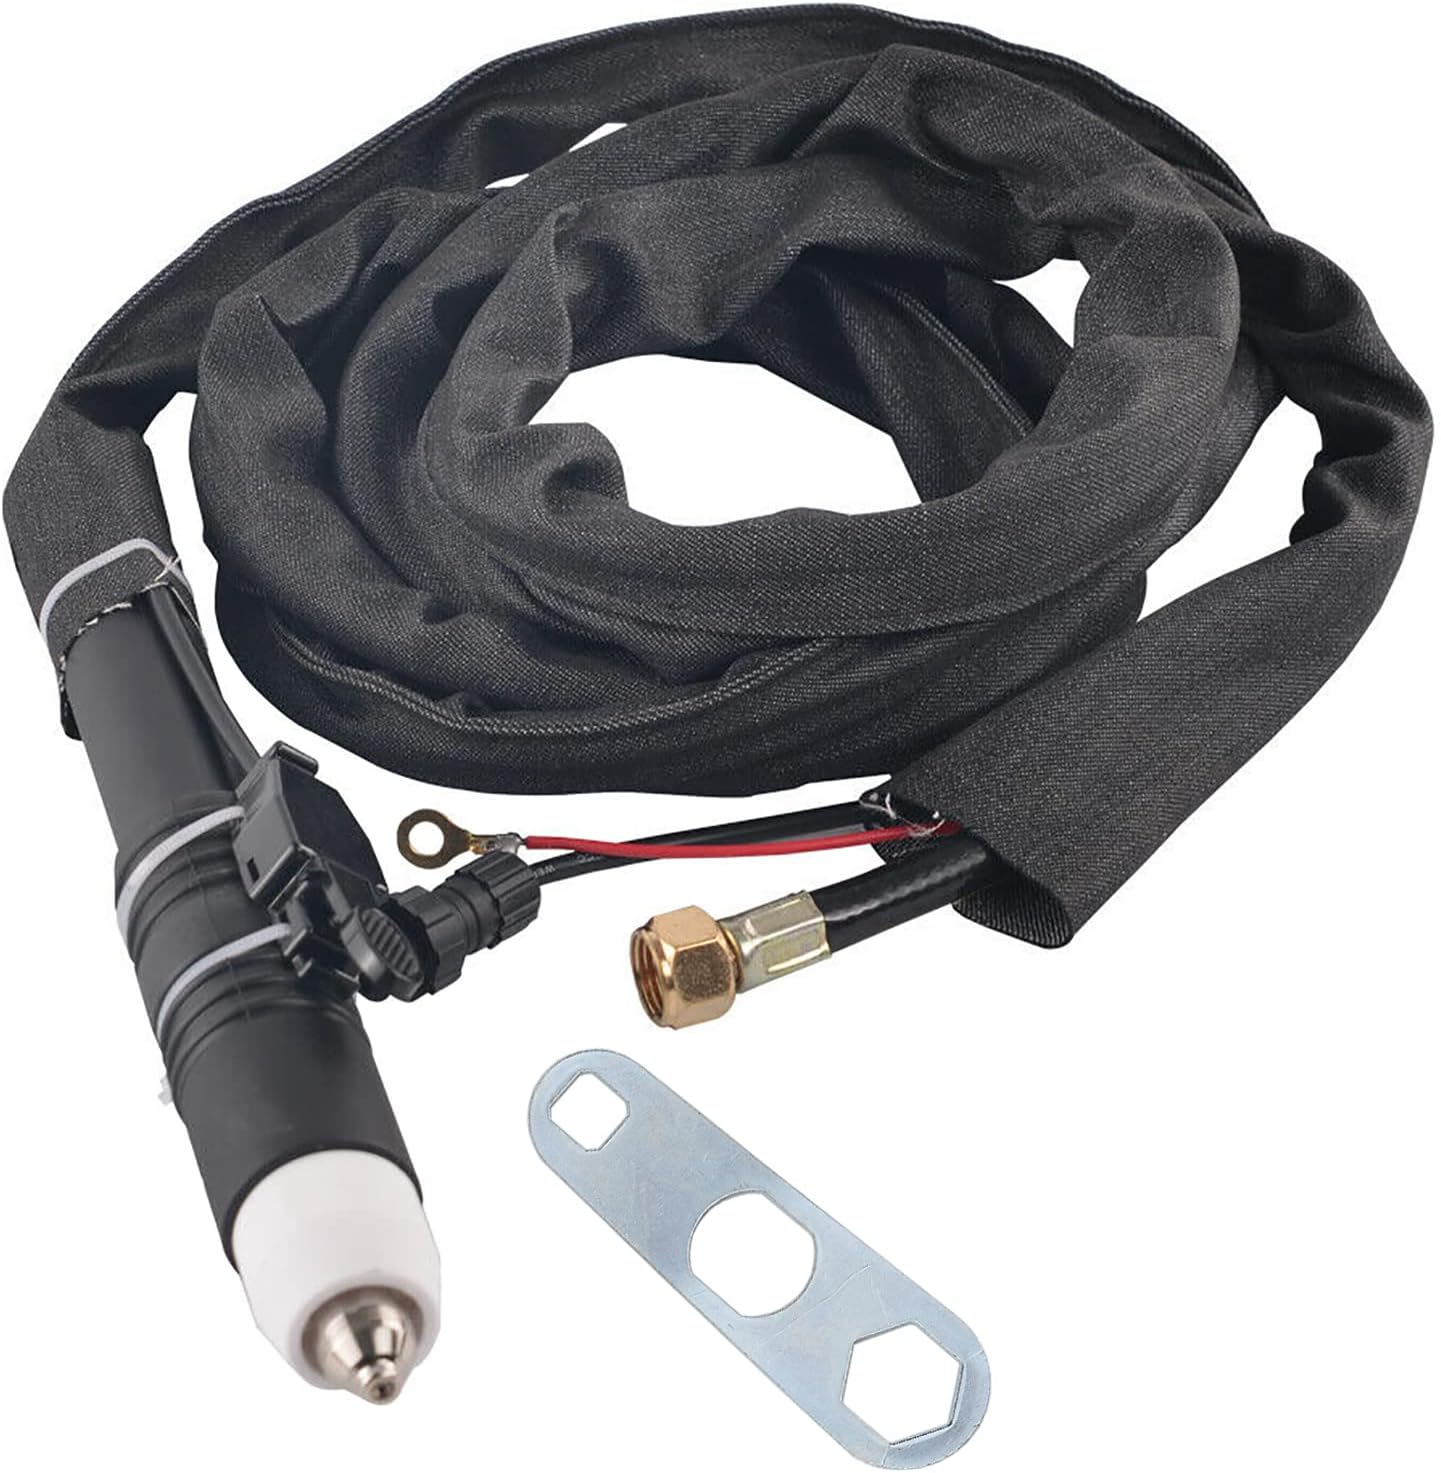
Figure 3.1: Complete PLASMARGON P80 Pilot Arc Plasma Cutter Torch assembly, including the torch head, cable, and a specialized wrench for maintenance.
Key Components:
- P80 Torch Head: The main cutting component.
- Torch Cable (16ft / 5m): Connects the torch to the plasma cutting machine.
- Control Switch: Activates the plasma arc.
- Consumables: Electrodes, Tip Nozzles, and Porcelain Cups (Shield Cups). These are replaceable parts that wear out during use.
- Wrench: Used for replacing consumables.

Figure 3.2: Individual components of the P80 torch, including the porcelain cups, tip nozzles, electrodes, and the specialized wrench for assembly and disassembly.
4. Specifications
- Model: P80 Straight Torch
- Torch Type: Pilot Arc, Non-Touch
- Cable Length: 16 feet (5 meters)
- Rated Cutting Current: 30A - 80A
- Maximum Cutting Thickness: 1 inch (25mm)
- Ignition: High-Frequency (HF)
- Compatibility: Standard P80 torch for 30A-80A plasma cutting machines, including models such as CUT50P, CUT60P, PLC55P, PLC65P, CT418P.
- Item Weight: Approximately 3.98 pounds
- Package Dimensions: Approximately 15.75 x 11.81 x 1.97 inches

Figure 4.1: The P80 torch assembly, highlighting its 16.4 feet (5m) cable length, suitable for various workshop setups.
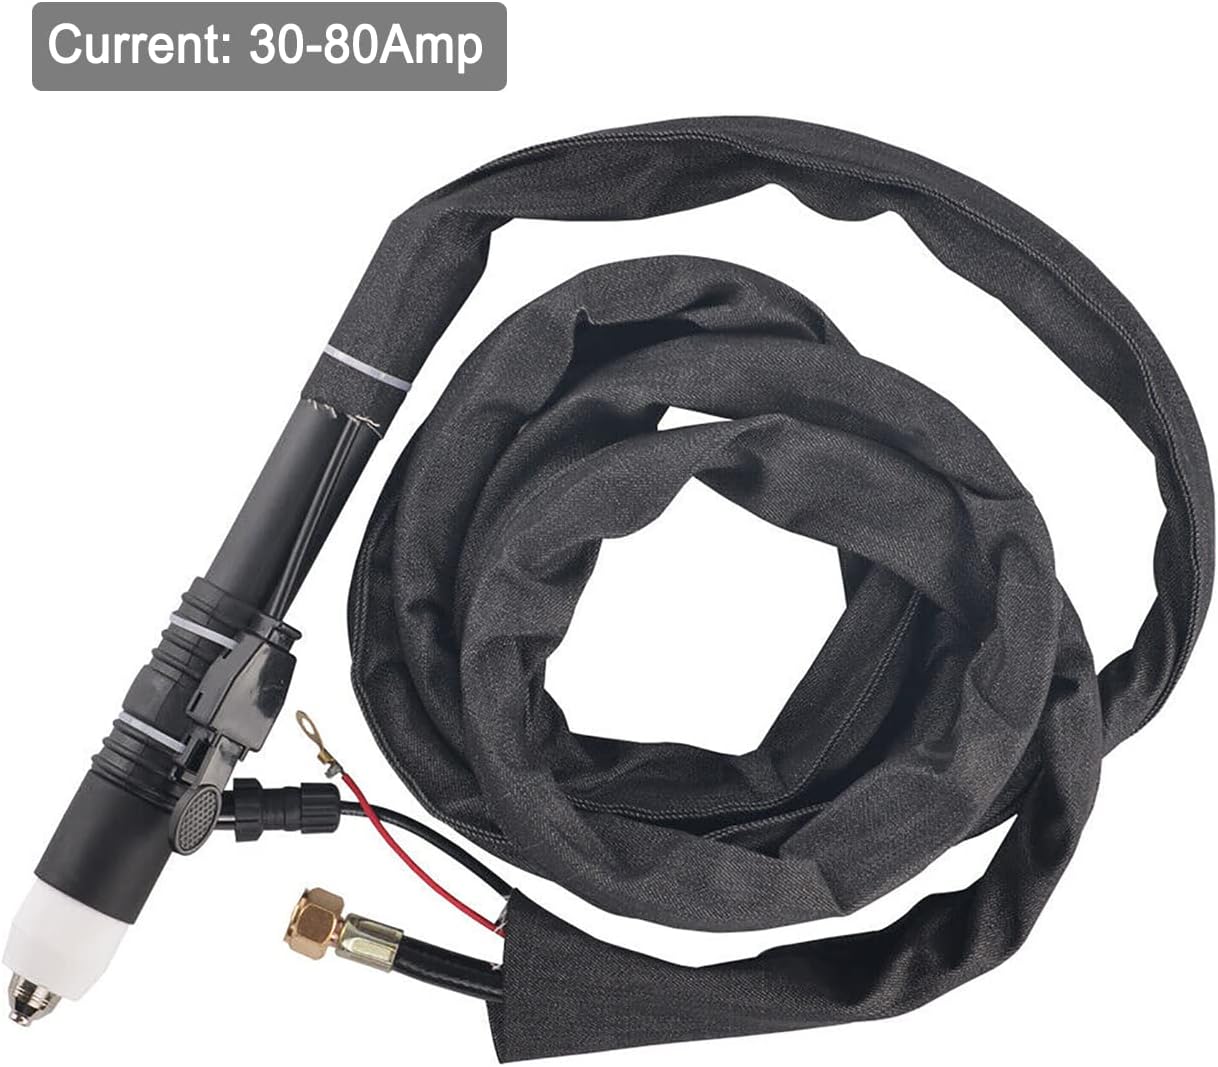
Figure 4.2: The P80 torch, indicating its operational current range of 30-80 Amperes, suitable for a variety of cutting tasks.
5. Setup
Before connecting the P80 torch, ensure your plasma cutting machine is turned off and disconnected from the power source.
- Verify Compatibility: Confirm that your plasma cutter is compatible with a standard P80 torch and operates within the 30A-80A range. Compatible models include CUT50P, CUT60P, PLC55P, PLC65P, CT418P.
- Connect Power/Gas Line: Securely attach the main power and gas line connector from the torch cable to the corresponding port on your plasma cutting machine. Ensure a tight seal to prevent gas leaks.
- Connect Control Switch: Plug the 2-pin control switch connector into the designated control port on your plasma cutter. This connection enables the torch trigger.
- Connect Ground Cable: Attach the ground lug (usually a copper ring terminal) from the torch cable to the ground terminal on your plasma cutter. This is crucial for safety and proper operation.
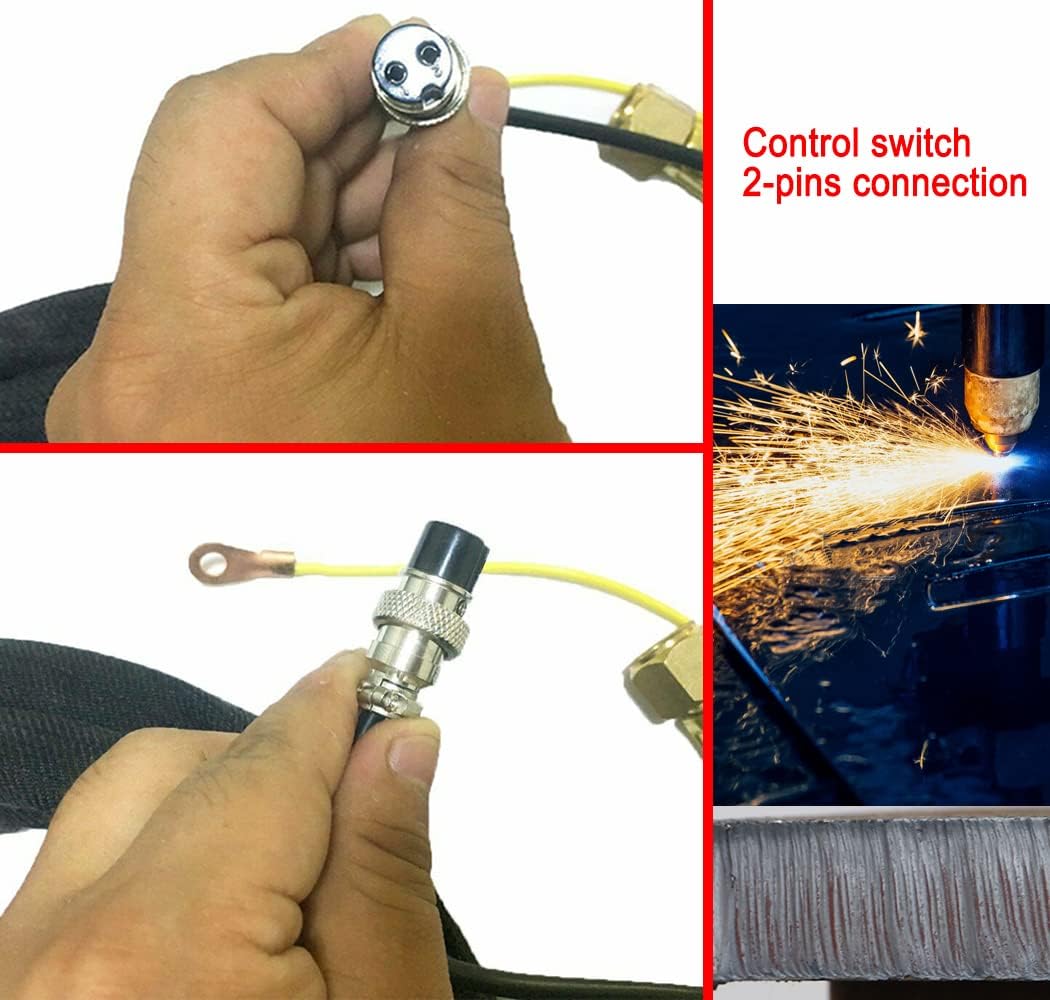
Figure 5.1: Detailed view of the 2-pin control switch connection and the ground lug, essential for proper torch functionality and safety.
6. Operating Instructions
The P80 torch utilizes a pilot arc system, allowing for non-contact cutting and improved performance.
- Prepare Workpiece: Ensure the metal to be cut is clean and free of excessive rust or paint. Secure the workpiece firmly.
- Connect Work Clamp: Attach the work clamp (ground clamp) from your plasma cutter securely to the workpiece or work table.
- Set Plasma Cutter: Turn on your plasma cutter and set the appropriate amperage (30A-80A) based on the material type and thickness. Adjust air pressure according to your machine's recommendations.
- Initiate Arc: Position the torch nozzle approximately 1/8 to 1/4 inch (3-6mm) above the workpiece. Press the trigger on the torch. The HF ignition will create a pilot arc.
- Begin Cutting: Once the pilot arc transfers to the workpiece, slowly move the torch along the desired cut line. Maintain a consistent speed and standoff distance for optimal cut quality. The non-touch pilot arc allows for cutting through rough, painted, and rusty surfaces with minimal slag.
- Observe Cut: Ensure the plasma stream is cutting completely through the material. Adjust travel speed or amperage if necessary.
- Finish Cut: Release the trigger at the end of the cut. Allow the torch and workpiece to cool.

Figure 6.1: The P-80 non-touch plasma cutter torch in action, demonstrating stable arcing and its ability to produce clean cuts without direct contact with the material.

Figure 6.2: Proper grip on the P80 plasma cutter torch, ensuring comfortable and controlled operation during cutting tasks.
7. Maintenance
Regular maintenance of your P80 torch ensures optimal performance and extends its lifespan. Always disconnect the plasma cutter from power before performing any maintenance.
- Inspect Consumables: Regularly check the electrode, tip nozzle, and porcelain cup for wear. Replace them when they show signs of pitting, excessive erosion, or damage. Worn consumables lead to poor cut quality and reduced efficiency.
- Clean Torch Head: Keep the torch head and consumables clean from slag and debris. Use a soft brush or cloth.
- Check Cables: Inspect the torch cable for any cuts, abrasions, or damage. Damaged cables can be a safety hazard and affect performance.
- Air Quality: Ensure your plasma cutter's air supply is clean and dry. Moisture and oil in the air can significantly reduce consumable life and cut quality.
8. Troubleshooting
If you encounter issues with your P80 torch, refer to the following common problems and solutions:
- No Arc:
- Check power supply to the plasma cutter.
- Ensure work clamp is securely attached to the workpiece.
- Inspect torch consumables (electrode, nozzle) for wear or improper installation.
- Verify control switch connection.
- Poor Cut Quality (Rough, Excessive Slag):
- Replace worn consumables.
- Adjust cutting speed (too fast or too slow).
- Check air pressure settings.
- Ensure proper standoff distance from the workpiece.
- Short Consumable Life:
- Check for proper air pressure and quality (moisture/oil).
- Ensure correct amperage settings for the material.
- Avoid dragging the torch (pilot arc is non-touch).
9. Warranty and Support
For warranty information or technical support, please refer to the documentation provided with your PLASMARGON plasma cutting machine or contact PLASMARGON customer service directly. Keep your purchase receipt as proof of purchase.


