
Introduction
Thank you for choosing the MWrouqfur Metal Canopy Bed Frame. This manual provides essential information for the safe assembly, operation, and maintenance of your new bed frame. Please read all instructions carefully before beginning assembly and retain this manual for future reference.
Important Safety Information:
- Ensure all parts are present and undamaged before assembly. Do not use if any parts are missing or broken.
- Assemble on a soft, clean surface to prevent scratching the product or your floor.
- Do not overtighten screws during assembly. Tighten all fasteners securely once assembly is complete.
- Keep small parts away from children during assembly.
- This bed frame is designed to support a maximum weight of 500 pounds. Do not exceed this limit.
Parts List
Please verify that all components listed below are included in your package. If any parts are missing, contact customer support.
- Headboard and Footboard sections
- Side Rails
- Canopy Posts (4)
- Canopy Top Rails
- Bed Slats/Support Bars
- Center Support Legs
- Hardware Pack (screws, bolts, washers, Allen wrench)

Image: Overview of bed frame components with key dimensions and weight capacity.
Setup and Assembly Instructions
Follow these steps carefully for proper assembly. It is recommended to have two people for assembly.
- Unpack and Identify Parts: Lay out all components on a clean, soft surface. Compare them with the parts list to ensure everything is present.
- Assemble Headboard and Footboard: Attach the X-shaped decorative panels to the main headboard and footboard frames using the provided hardware. Do not fully tighten bolts yet.
- Attach Side Rails: Connect the side rails to the assembled headboard and footboard sections. Ensure the connection points are aligned. Secure with bolts, but do not fully tighten.
- Install Center Support Legs: Attach any center support legs to the main frame or crossbars as indicated in the detailed diagram (refer to included paper manual for specific diagrams).
- Place Bed Slats: Position the metal bed slats across the frame. Secure them to the side rails using the designated fasteners. Ensure even spacing for optimal mattress support.
- Install Canopy Posts: Attach the four vertical canopy posts to the corners of the bed frame.
- Attach Canopy Top Rails: Connect the horizontal canopy top rails to the top of the canopy posts, forming the upper frame.
- Final Tightening: Once all components are in place and aligned, systematically tighten all bolts and screws using the provided Allen wrench. Ensure all connections are secure.
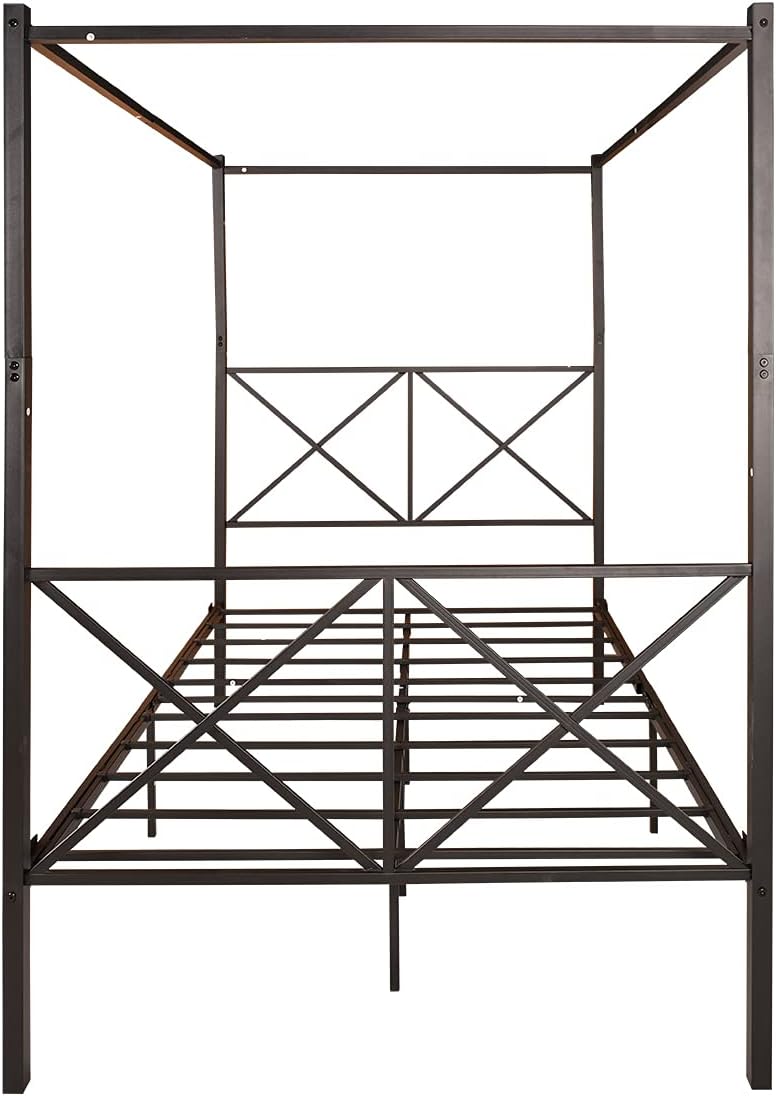
Image: Assembled bed frame structure, illustrating the X-shaped design.
Operating Instructions
This bed frame is designed for use with a standard full-size mattress. No box spring is required due to the integrated slat support system.
- Mattress Placement: Carefully place your full-size mattress directly onto the bed slats. Ensure it is centered and sits securely within the frame.
- Weight Capacity: The bed frame has a maximum weight capacity of 500 pounds. Exceeding this limit may compromise the structural integrity and void any warranty.
- Canopy Use: The canopy posts are suitable for hanging lightweight curtains, drapes, or decorative lighting. Do not hang heavy objects that could destabilize the frame.
Maintenance
Regular maintenance will help prolong the life and appearance of your bed frame.
- Cleaning: Wipe the metal frame with a soft, damp cloth. Avoid using harsh chemicals or abrasive cleaners, as these can damage the finish.
- Fastener Check: Periodically check all bolts and screws to ensure they remain tight. Retighten if necessary to prevent wobbling or squeaking.
- Inspection: Inspect the frame for any signs of wear, damage, or rust. Address any issues promptly to maintain safety and stability.
Troubleshooting
Here are solutions to common issues you might encounter:
- Wobbling or Instability: Ensure all bolts and screws are fully tightened. Check that the bed frame is on a level surface.
- Squeaking Noises: Squeaking often indicates loose connections. Retighten all hardware. Applying a small amount of lubricant (e.g., silicone spray) to metal-on-metal contact points can also help.
- Parts Don't Fit: Double-check the assembly steps and ensure you are using the correct parts for each connection. Sometimes parts may appear similar but are designed for specific locations. Do not force parts together.
Specifications
| Feature | Detail |
|---|---|
| Size | Full |
| Material | Metal |
| Product Dimensions (L x W x H) | 77.95" x 55" x 73.23" |
| Weight Capacity | 500 pounds |
| Under-bed Clearance | 12.4 inches |
| Color | Black |
| Assembly Required | Yes |

Image: Detail of under-bed clearance, illustrating storage space.
Warranty Information
MWrouqfur products are manufactured with quality and durability in mind. This product typically comes with a limited manufacturer's warranty covering defects in materials and workmanship. For specific warranty terms and conditions, please refer to the warranty card included with your purchase or contact MWrouqfur customer support directly. Keep your proof of purchase for warranty claims.
Customer Support
If you have any questions, require assistance with assembly, or need to report missing/damaged parts, please contact MWrouqfur customer support. Have your model number and purchase information ready when contacting support.
For further assistance, please visit the official MWrouqfur store on Amazon: MWrouqfur Store