
1. Product Overview
This manual provides detailed instructions for the installation, operation, and maintenance of your DEWENWILS 200W Low Voltage Landscape Transformer, Model HALT04E. This device is designed to convert standard 120V AC household electricity to a safe 12V/14V AC for outdoor landscape lighting systems. It features two independently controlled zones, a built-in timer, and a photocell sensor for automated lighting control.

Image 1.1: Front view of the DEWENWILS 200W Low Voltage Landscape Transformer, showing the control panel, power cord, and photocell sensor.
2. Important Safety Information
WARNING: To reduce the risk of fire or electric shock, read and follow all instructions carefully. Keep this manual for future reference.
- Always disconnect power before installing or servicing the transformer.
- Do not immerse the transformer in water. It is weatherproof, not submersible.
- Ensure the total wattage of connected fixtures does not exceed 80% of the transformer's rated capacity (160W for this 200W model).
- Use only with low voltage outdoor landscape lighting fixtures.
- Install the transformer at least 1 foot (0.3 meters) above ground level.
- Do not connect two or more transformers in parallel.
- Ensure all connections are secure and protected from moisture.
- If the transformer is damaged, do not operate it. Contact customer support.
3. Package Contents
Verify that all items are present in the package:
- DEWENWILS Low Voltage Landscape Transformer (Model HALT04E)
4. Product Features
- 5 Operating Modes & Memory Function: Offers Manual, Dusk to Dawn, Dusk ON/Countdown OFF (2/3/4/6/8 hours), Dusk ON/Timer OFF, and Timer ON/OFF modes. The last selected mode is retained after power cycling.
- Compatibility & Safety: Converts 120V AC to 12V/14V AC, suitable for 12V/14V outdoor lighting fixtures. Includes a built-in automatic circuit breaker for overload and short-circuit protection.
- 2 Independent Outputs: Two separate zones allow for individual control and scheduling of different lighting groups. The combined power of both zones should not exceed 80% of the transformer's rated power.
- Robust Construction & Weatherproof: Constructed from durable PC material to withstand outdoor elements. Features an internal toroidal coil for reduced energy consumption and noise, and fan heat treatment for longevity.
- Effortless Installation: Designed with built-in hanging holes for quick wall mounting. Includes a 3.3ft SJTW 18AWG 3/C power cord.
5. Technical Specifications
| Specification | Value |
|---|---|
| Model Number | HALT04E |
| Input Voltage | 120V AC |
| Output Voltage | 12V/14V AC |
| Max Power Output | 200W |
| Recommended Load | Up to 160W (80% of max) |
| Power Source | AC |
| Mounting Type | Wall Mount |
| Dimensions (Package) | 12.05 x 8.23 x 4.96 inches |
| Weight (Package) | 7.58 Pounds |
| Certifications | ANSI, CE, CSA, ETL, FCC, NEMA, RoHS, UL, cUL |
6. Setup and Installation
Follow these steps for proper installation of your landscape lighting transformer:
6.1 Mounting the Transformer
- Choose a suitable outdoor location near a 120V AC GFCI outlet. The location should be protected from direct heavy rain and snow if possible, though the unit is weatherproof.
- Mount the transformer vertically on a wall or sturdy post using the built-in hanging holes. The recommended mounting height is between 12 inches (0.3m) and 48 inches (1.2m) from the ground.
- Ensure the photocell sensor (if used) is positioned where it can receive adequate ambient light for accurate dusk/dawn detection.
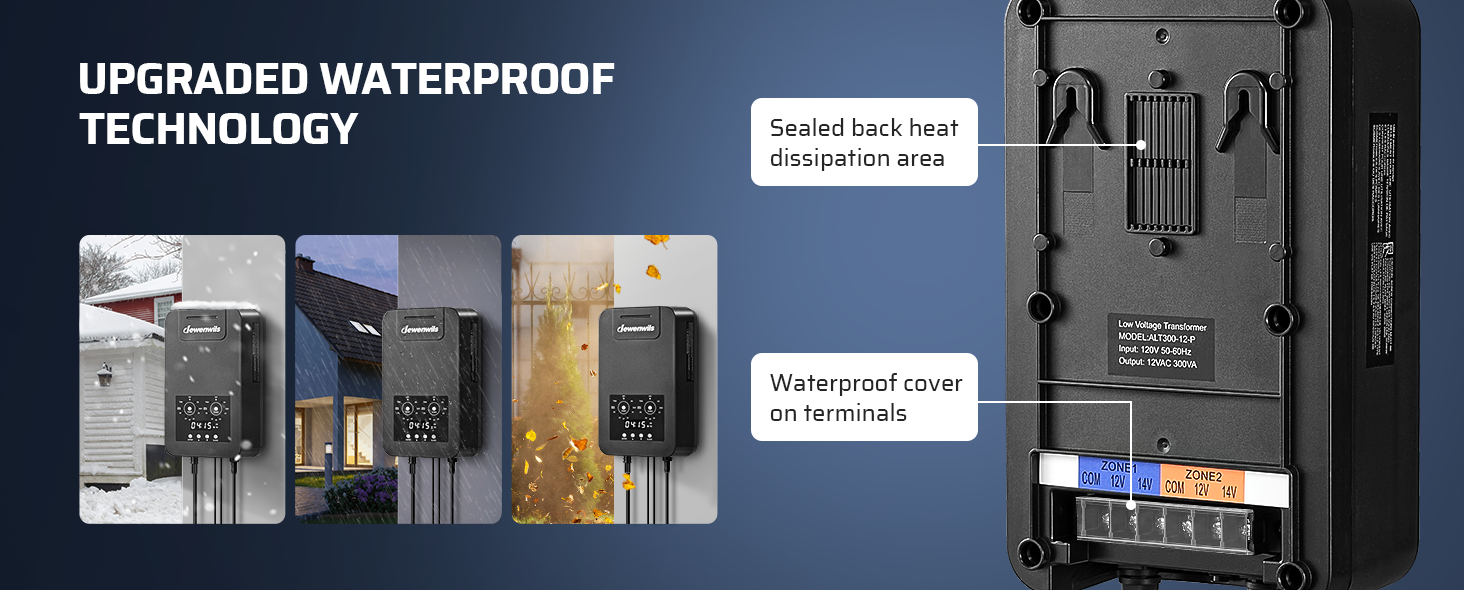
Image 6.1: Visual guide for connecting wires to terminal blocks and mounting the transformer on a wall.
6.2 Wiring the Landscape Lights
The transformer features two independent output zones (ZONE1 and ZONE2) with both 12V and 14V AC terminals. Use the 12V terminals for shorter wire runs or fewer lights, and 14V for longer wire runs or more lights to compensate for voltage drop.
- Disconnect Power: Ensure the transformer is unplugged from the main power outlet.
- Prepare Wires: Strip approximately 1/2 inch (1.2 cm) of insulation from the ends of your low voltage landscape lighting cables.
- Connect to Terminals: Loosen the screws on the desired terminal blocks (12V or 14V, and COM for common). Insert the stripped wire ends into the corresponding terminals. Typically, one wire from your lighting cable goes to 'COM' and the other to '12V' or '14V'. Tighten the screws firmly to ensure a secure connection.
- Utilize Two Zones: Connect different groups of lights to ZONE1 and ZONE2 as desired for independent control. Remember that the total wattage for each zone, and combined, must not exceed the transformer's capacity.
- Secure Connections: Ensure the waterproof cover on the terminals is properly closed after wiring to protect against moisture.
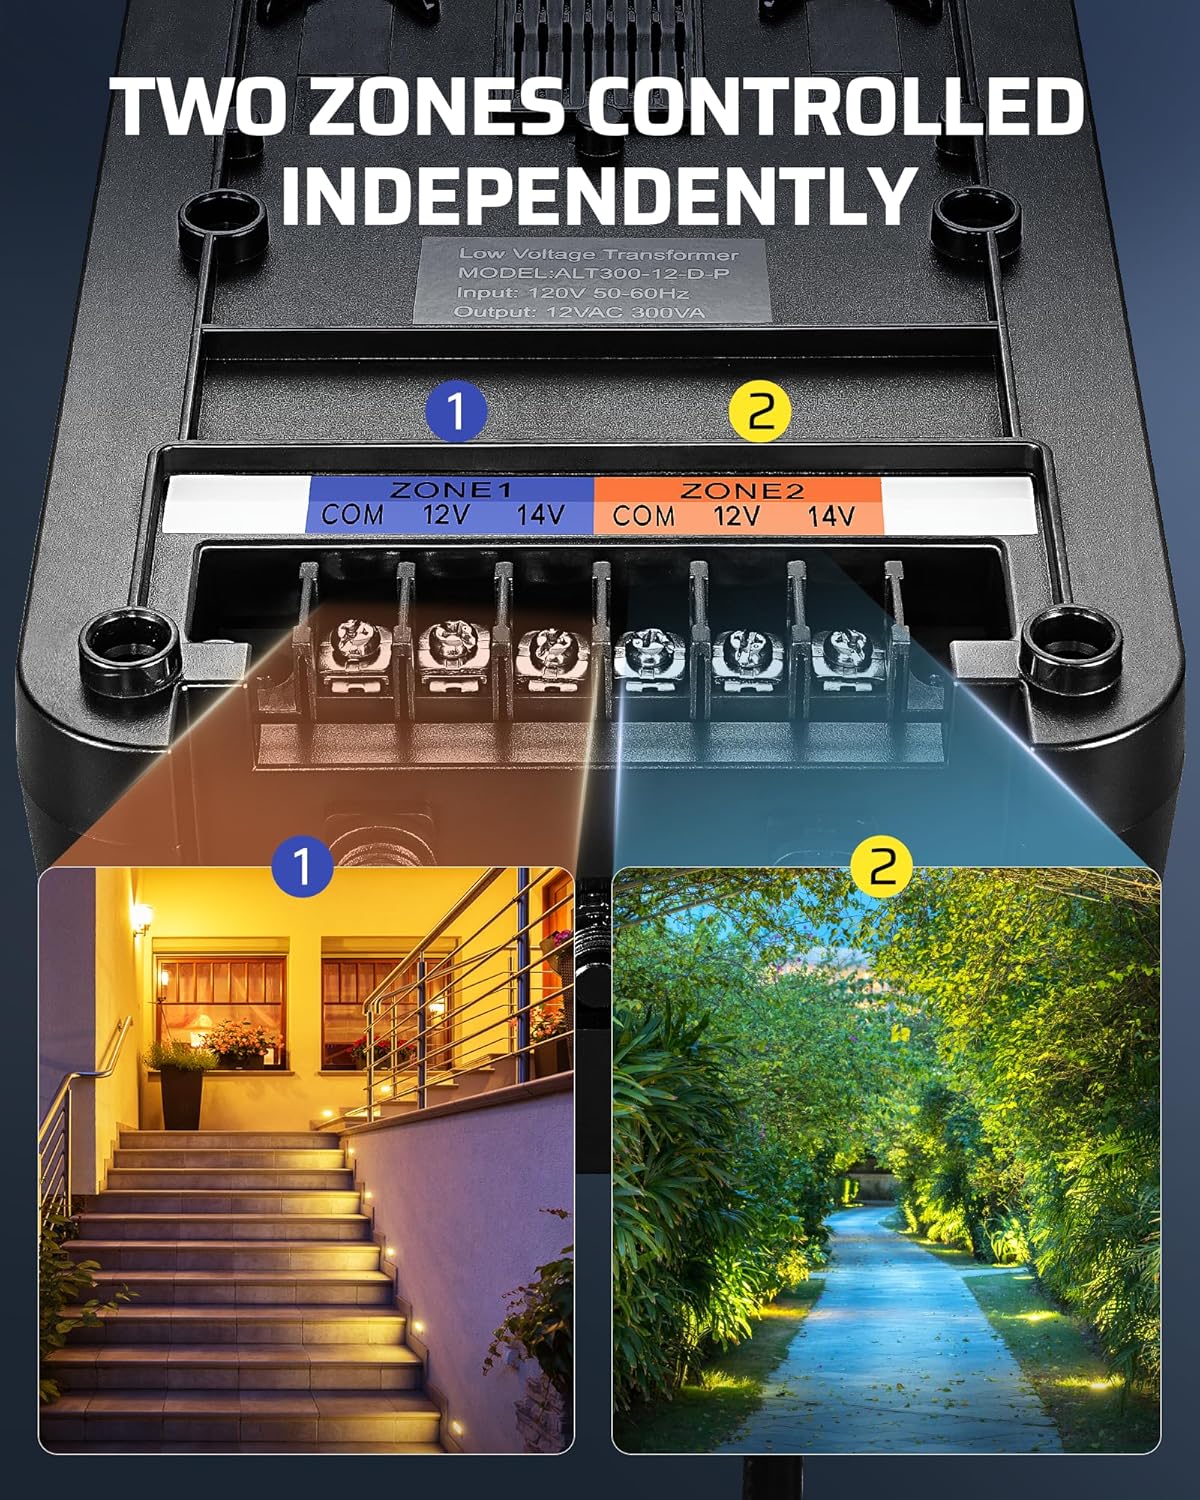
Image 6.2: Close-up view of the terminal blocks for ZONE1 and ZONE2, showing 12V, 14V, and Common (COM) connections.
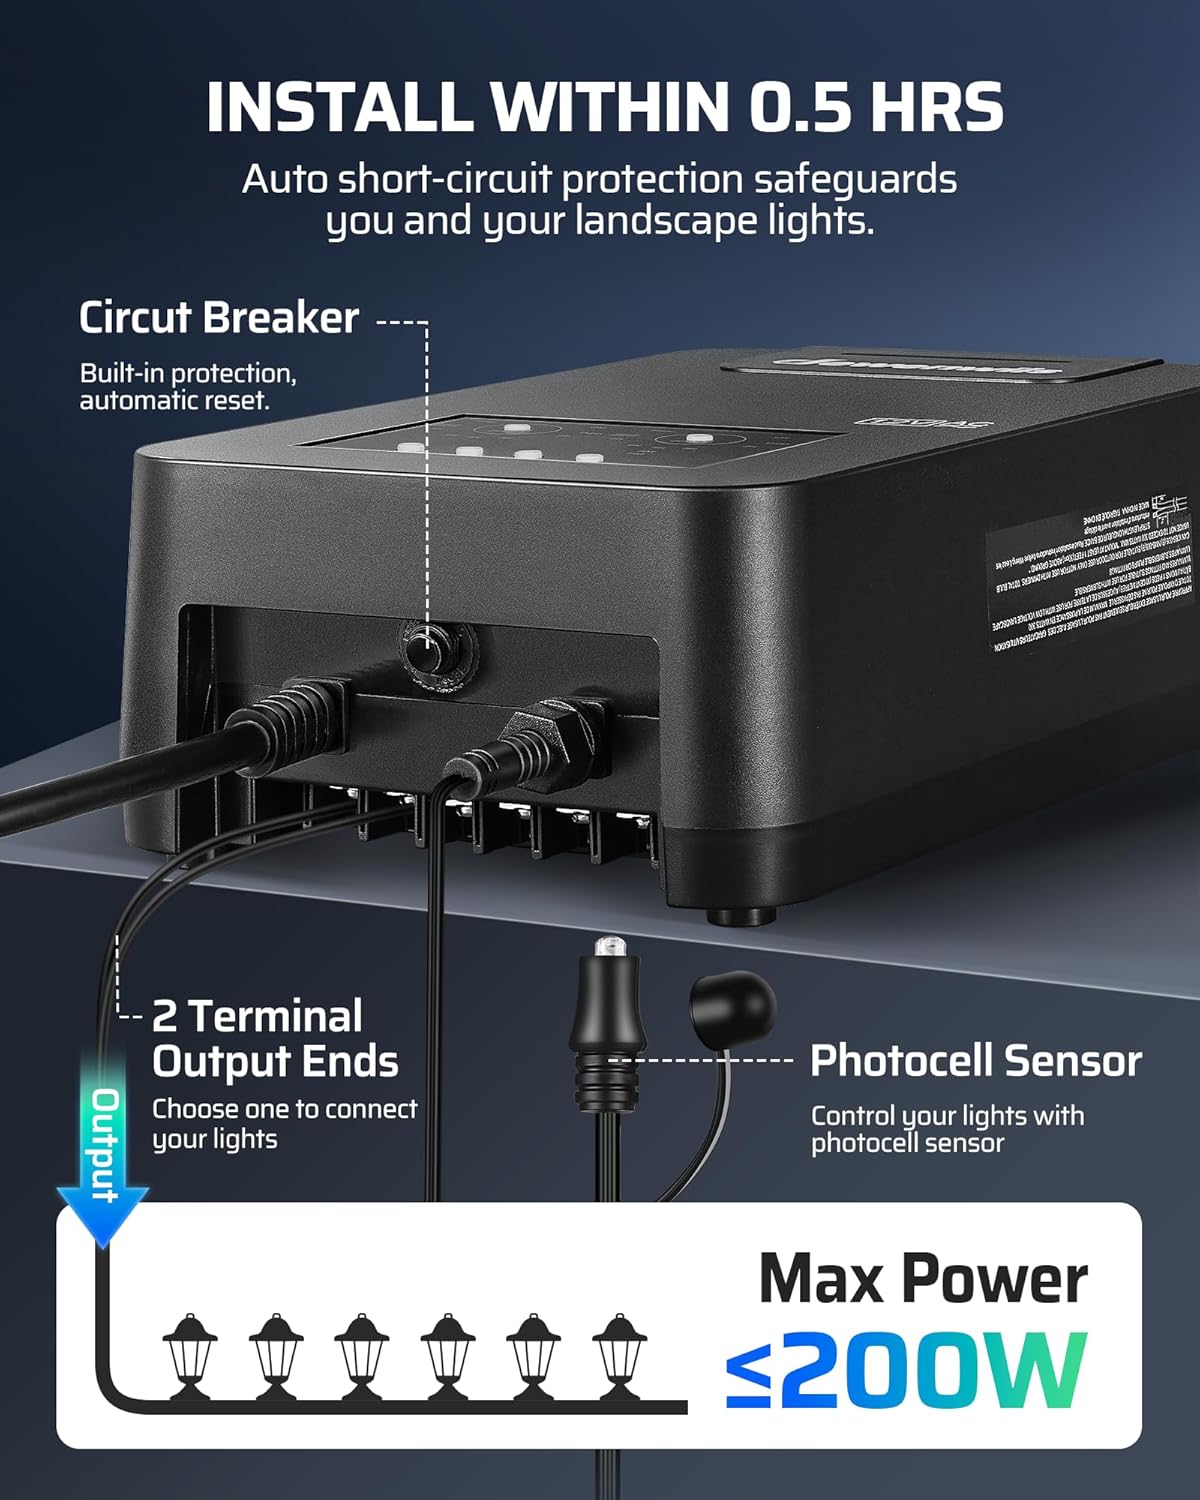
Image 6.3: Diagram illustrating the connection of landscape lights to the transformer's output terminals and the placement of the photocell sensor.
6.3 Powering On
Once all connections are secure, plug the transformer's power cord into a grounded 120V AC GFCI outlet. The display will illuminate, and the unit will be ready for programming.
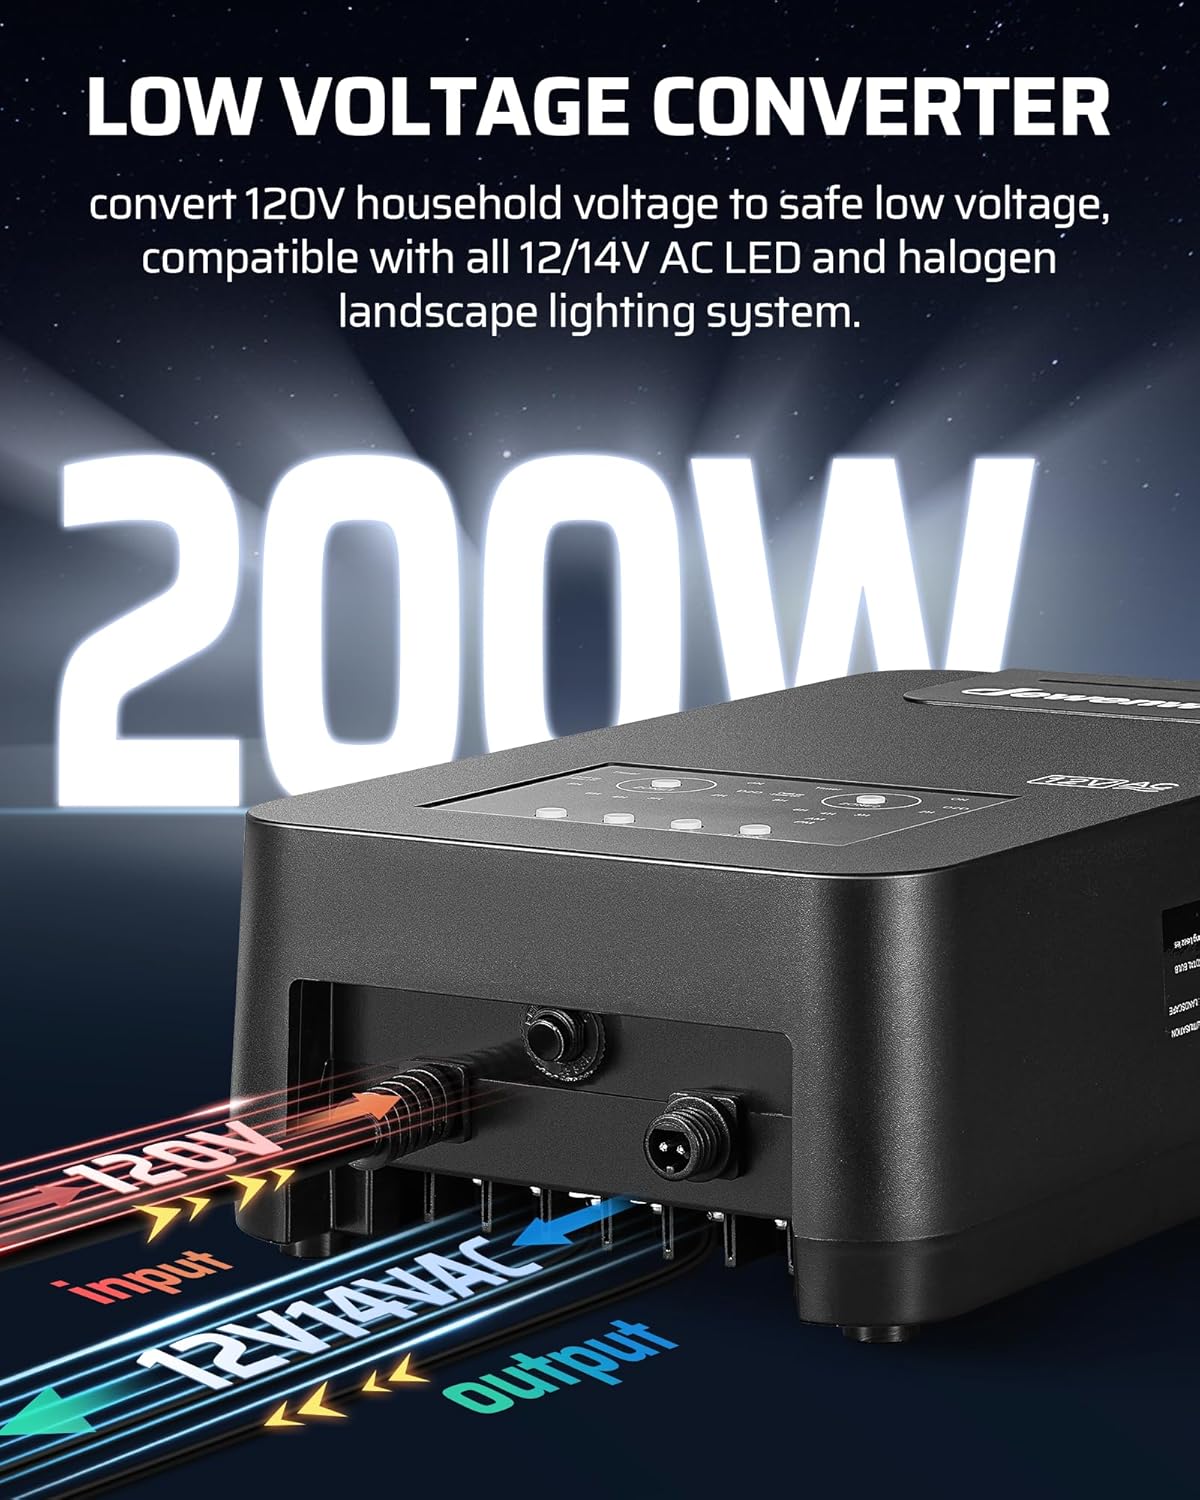
Image 6.4: Illustration showing the 120V AC input and the 12V/14V AC low voltage output of the transformer.
7. Operating Instructions
The DEWENWILS transformer offers 5 operating modes and independent control for two zones. The control panel features an LED screen and easy-to-use buttons.

Image 7.1: Overview of the 5 operating modes available on the transformer: Manual ON/OFF, Dusk to Dawn, Timer ON/OFF, Dusk ON/Timer OFF, and Dusk ON/Countdown OFF.
7.1 Setting the Clock
Press and hold the CLOCK button until the time display flashes. Use the UP/DOWN buttons to adjust the hour, then press CLOCK again to adjust minutes. Press CLOCK once more to save. Ensure AM/PM is set correctly.
7.2 Selecting Operating Modes for Each Zone
Each zone (ZONE1 and ZONE2) can be set independently. Press the ZONE1 or ZONE2 button to select the zone you wish to configure. Then, repeatedly press the MODE button for that zone to cycle through the available modes:
- Manual ON/OFF: Lights are turned on or off manually using the ON/OFF button for the respective zone.
- Dusk to Dawn (D2D): Lights automatically turn on at dusk and turn off at dawn, controlled by the photocell sensor.
- Dusk ON/Countdown OFF: Lights turn on at dusk and automatically turn off after a set duration (2, 3, 4, 6, or 8 hours). Use the TIMER button to select the countdown duration.
- Dusk ON/Timer OFF: Lights turn on at dusk and turn off at a specific time you set.
- Timer ON/OFF: Lights turn on and off at specific times you set, regardless of ambient light.
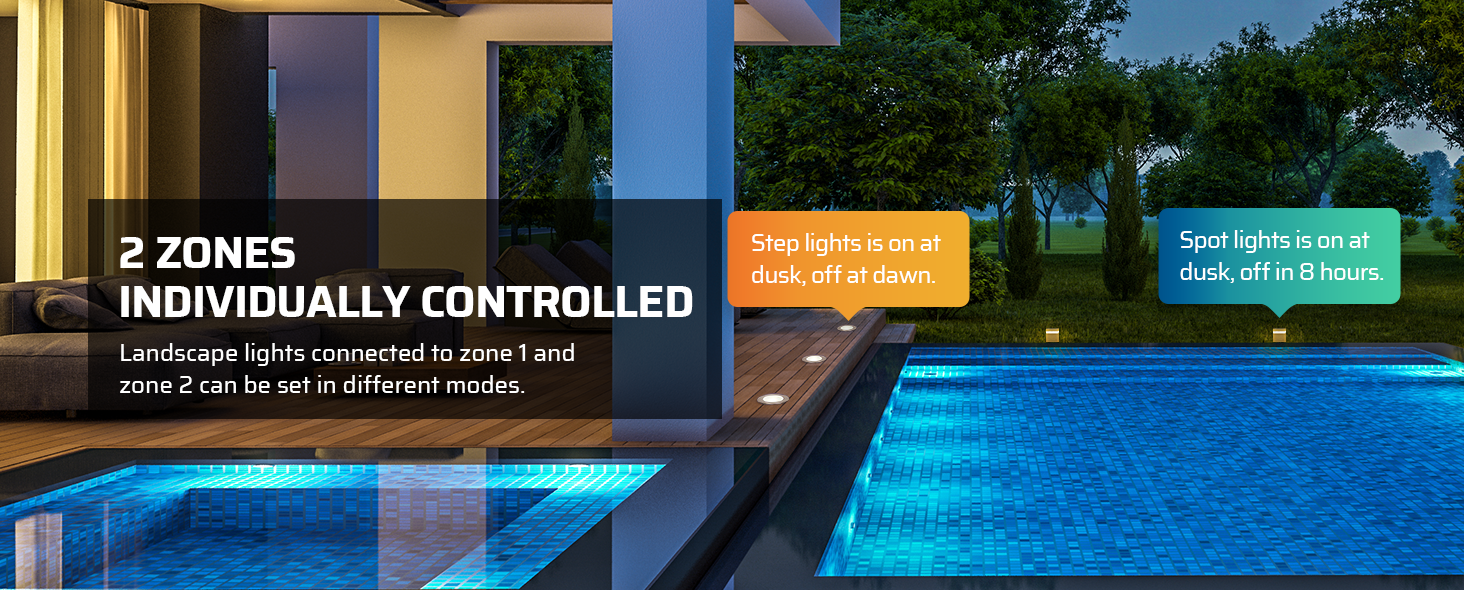
Image 7.2: Illustration demonstrating how two independent zones can be configured with different lighting schedules.
7.3 Photocell Sensor Operation
The photocell sensor detects ambient light levels to activate Dusk to Dawn or Dusk ON/Countdown OFF modes. Ensure the sensor is not obstructed and is placed in an area that accurately reflects natural light conditions.

Image 7.3: Visual representation of the photocell sensor's function in Dusk to Dawn mode (lights on at dusk, off at dawn) and Dusk On Timer Off mode (lights on at dusk, off after a set duration).
7.4 Memory Function
The transformer is equipped with a memory function that retains the last selected mode and settings even after a power outage or if the unit is unplugged and re-plugged. This eliminates the need for frequent readjustments.
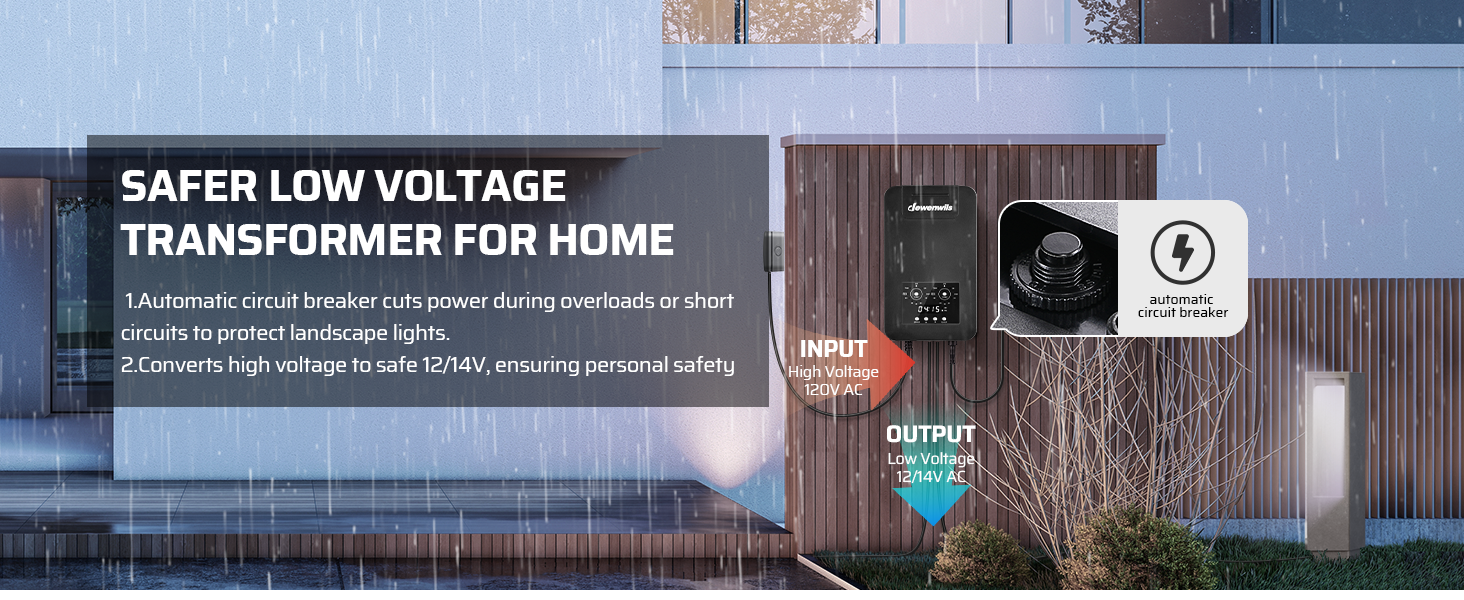
Image 7.4: Diagram illustrating the memory function, which saves the last settings even after power interruption.
8. Maintenance
Regular maintenance ensures optimal performance and longevity of your DEWENWILS transformer.
- Cleaning: Periodically wipe the exterior of the transformer with a soft, damp cloth to remove dirt and debris. Do not use harsh chemicals or abrasive cleaners.
- Connection Check: Annually inspect all wire connections to the terminal blocks. Ensure they are tight and free from corrosion. Loose connections can cause flickering lights or power loss.
- Photocell Sensor: Keep the photocell sensor clean and free from obstructions (e.g., leaves, dirt) to ensure accurate light detection.
- Circuit Breaker: The transformer has a built-in automatic circuit breaker. If lights go out unexpectedly, check the circuit breaker. If it has tripped, disconnect some lights to reduce the load, then press the reset button (if visible, typically on the bottom or side) or unplug and replug the unit to reset.

Image 8.1: Close-up of the transformer's robust construction, highlighting the sealed back heat dissipation area and waterproof cover on terminals, designed for durability in various weather conditions.
9. Troubleshooting
If you encounter issues with your transformer, refer to the following common problems and solutions:
| Problem | Possible Cause | Solution |
|---|---|---|
| Lights do not turn on. | No power to transformer, tripped circuit breaker, loose wire connections, incorrect mode setting, faulty lights. | Check power outlet. Reset circuit breaker. Inspect and tighten all wire connections. Verify operating mode is set correctly. Test individual lights. |
| Lights flicker or are dim. | Overloaded circuit, loose connections, voltage drop due to long wire runs or thin gauge wire. | Reduce total wattage of connected lights. Check and tighten all connections. Consider using the 14V output terminals or thicker gauge wire for longer runs. |
| Lights stay on during the day (Dusk to Dawn mode). | Photocell sensor obstructed or faulty, sensor not receiving enough light. | Ensure photocell sensor is clean and unobstructed. Relocate sensor to an area with adequate natural light. |
| Timer settings are not working. | Incorrect clock setting, incorrect mode selected, programming error. | Verify the current time and AM/PM setting. Ensure the correct timer mode (Dusk ON/Countdown OFF, Dusk ON/Timer OFF, or Timer ON/OFF) is selected for the zone. Re-program the timer settings carefully. |
| Transformer makes unusual noise. | Overload, internal component issue. | Reduce load on the transformer. If noise persists, discontinue use and contact customer support. |
10. Warranty and Customer Support
DEWENWILS products are designed for reliability and performance. For specific warranty details, please refer to the warranty card included with your product or visit the official DEWENWILS website.
If you require technical assistance, have questions about installation, or need to report a defect, please contact DEWENWILS customer support. Have your model number (HALT04E) and purchase information ready when contacting support.
Manufacturer: DEWENWILS
For the most up-to-date support information, please visit the DEWENWILS Store on Amazon.