
1. Important Safety Information
Please read and understand all instructions before installing or operating this low voltage landscape transformer. Failure to follow these instructions may result in electric shock, fire, or serious injury.
- Ensure the power supply is disconnected before any installation, maintenance, or troubleshooting.
- This transformer is designed for outdoor use and is weatherproof. However, avoid submerging it in water.
- Do not exceed the maximum wattage rating of 300W. Overloading the transformer can cause damage and pose a fire hazard.
- Use only with 12V/14V AC low voltage landscape lighting fixtures.
- All wiring should comply with local electrical codes and regulations.
- Keep children and pets away from the transformer and wiring during operation.
- The built-in automatic circuit breaker provides overload and short-circuit protection. If the circuit breaker trips, disconnect the load and identify the cause before resetting.
2. Product Overview
The DEWENWILS 300W Low Voltage Landscape Transformer converts 120V AC household voltage to a safe 12V/14V AC for outdoor landscape lighting systems. It features multiple operating modes, independent zone control, and robust weatherproof construction.
Key Features:
- 5 Operating Modes: Manual, Dusk to Dawn, Dusk ON/Countdown OFF (2/3/4/6/8 hours), Dusk ON/Timer OFF, and Timer ON/OFF.
- Memory Function: Retains the last selected mode after power interruption.
- Compatibility: Suitable for 12V/14V AC outdoor lighting fixtures, including spot lights, step lights, and garden lights.
- Safety Features: Built-in automatic circuit breaker for overload and short-circuit protection.
- Dual Independent Outputs: Two independently controlled zones for flexible lighting management.
- Durable Construction: Made from high-quality PC material, designed to withstand harsh weather conditions.
- Efficient Design: Internal toroidal coil reduces energy consumption and noise; fan heat treatment for longevity.
What's in the Box:
- 1 x DEWENWILS Low Voltage Landscape Transformer (300W)

Figure 2.1: Front view of the DEWENWILS 300W Low Voltage Landscape Transformer, showing the digital display, control buttons, and power cord.

Figure 2.2: Diagram illustrating the transformer's function as a low voltage converter, showing 120V AC input and 12V/14V AC output.

Figure 2.3: Image highlighting the upgraded waterproof technology, including the sealed back heat dissipation area and waterproof cover on terminals.
3. Setup & Installation
Follow these steps for proper installation of your landscape transformer.
Mounting the Transformer:
- Select a suitable outdoor location for mounting. The recommended mounting height ranges from 12 inches (0.3m) to 48 inches (1.2m) from the ground for optimal performance and photocell sensor function.
- Ensure the location is protected from direct heavy rain and snow if possible, although the unit is weatherproof.
- Use appropriate screws or nails (not included, as per user review feedback) to secure the transformer to a wall or sturdy surface using the built-in hanging holes on the back.
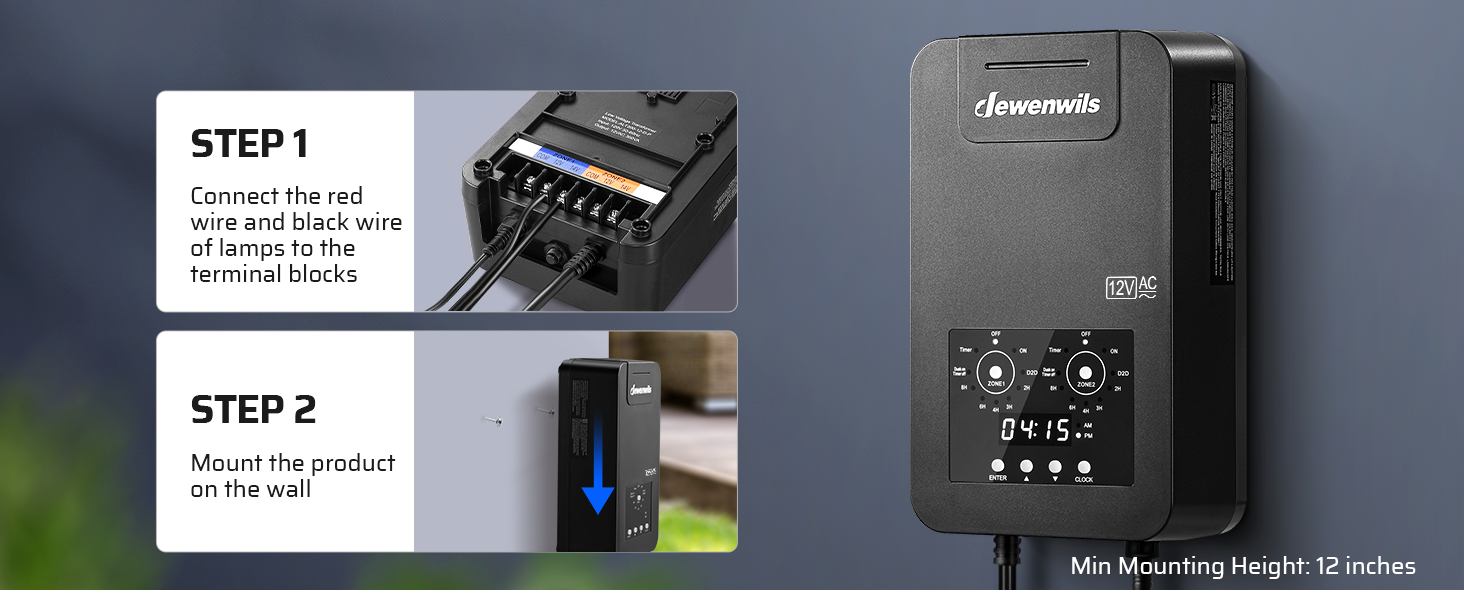
Figure 3.1: Visual guide for installation, showing connection of wires to terminal blocks and mounting the unit on a wall.
Wiring the Landscape Lights:
- Ensure the transformer is unplugged from the main power outlet before making any connections.
- Locate the terminal blocks at the bottom of the transformer. There are two independent output zones (Zone 1 and Zone 2). Each zone has COM (Common), 12V, and 14V terminals.
- Connect the positive and negative wires from your landscape lights to the appropriate terminals. For most applications, connect the common wire to the COM terminal and the other wire to either the 12V or 14V terminal, depending on your lighting requirements and desired brightness.
- Ensure all connections are secure and tight to prevent loose contacts and potential hazards.
- The total power of lights connected to Zone 1 and Zone 2 combined should not exceed 80% of the transformer's rated power (300W * 0.8 = 240W) to ensure optimal performance and longevity.
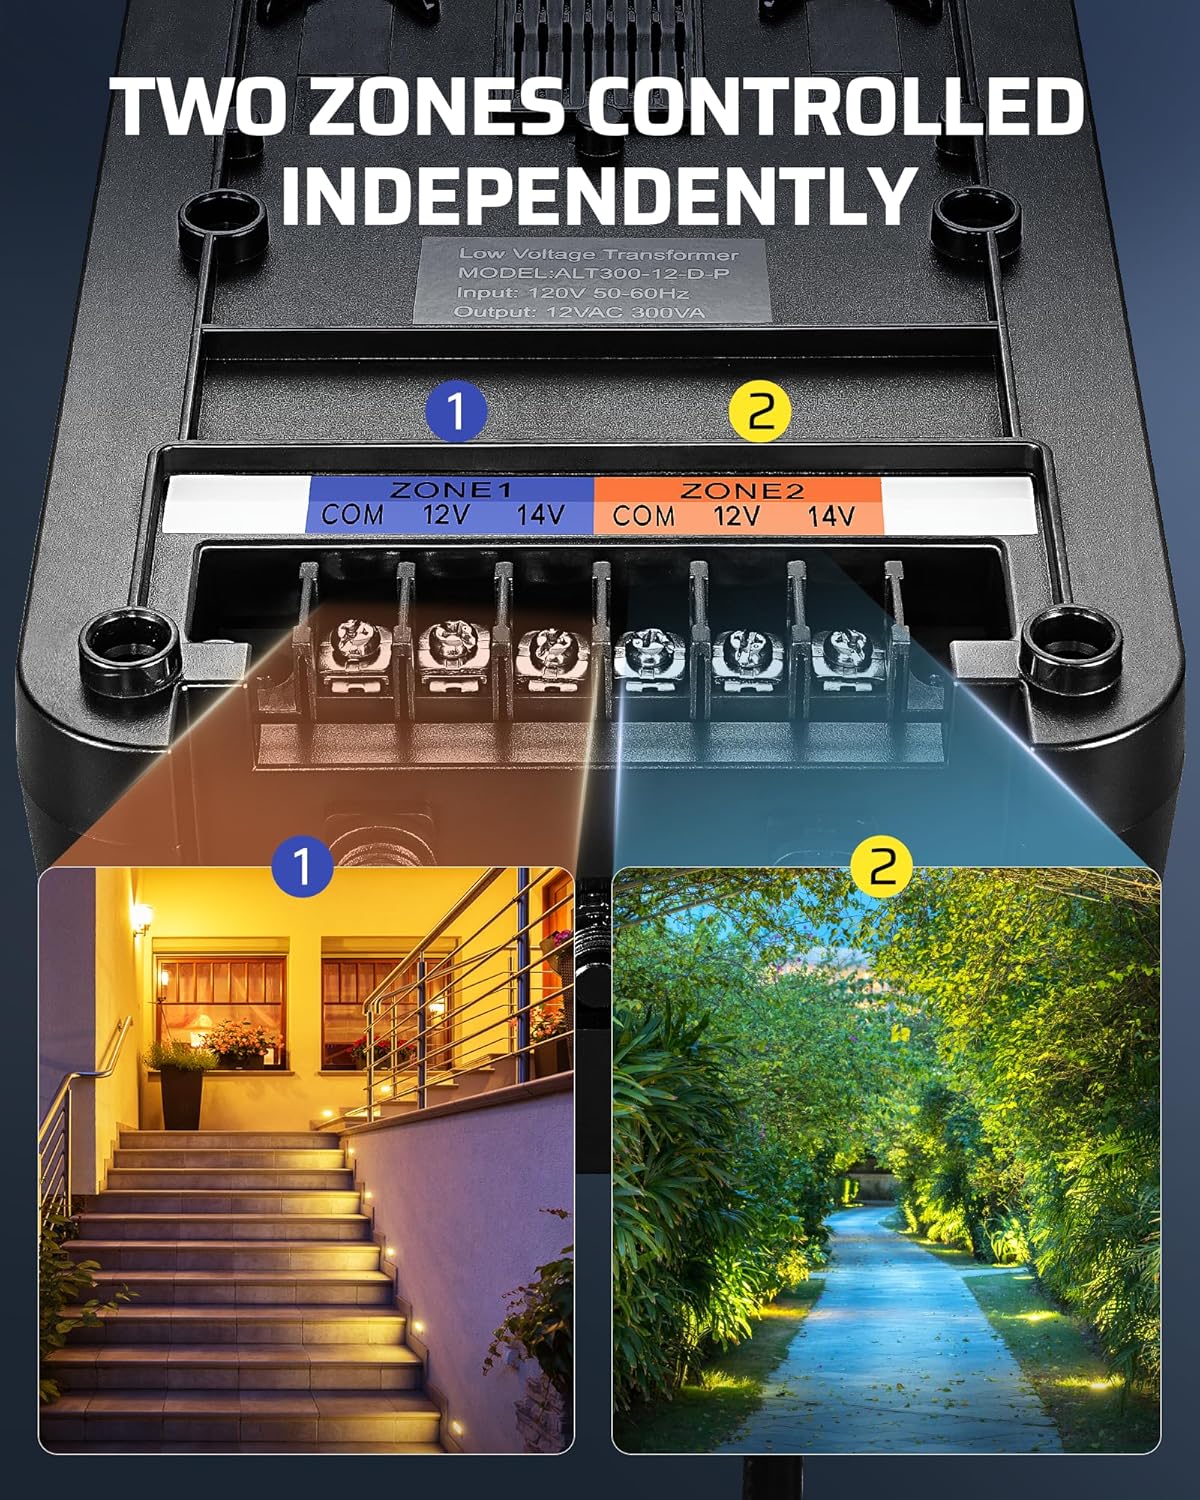
Figure 3.2: Close-up view of the two independent output zones (Zone 1 and Zone 2) with COM, 12V, and 14V terminals for connecting landscape lighting wires.

Figure 3.3: Diagram showing the location of the circuit breaker, two terminal output ends, and the photocell sensor connection point.
Photocell Sensor Installation:
The photocell sensor automatically detects ambient light levels to control the transformer's operation in certain modes. Ensure the photocell is placed in a location that receives natural light and is not obstructed by shadows or artificial light sources (e.g., porch lights) that could interfere with its function.

Figure 3.4: Illustration of the photocell sensor's operation, demonstrating Dusk to Dawn and Dusk On/Timer Off modes based on light detection.
4. Operating Instructions
The DEWENWILS transformer offers five distinct operating modes and independent control for two zones. Use the buttons on the control panel to navigate and set your desired mode.
Control Panel Overview:
- LED Screen: Displays current time, mode, and settings.
- Zone 1 / Zone 2 Buttons: Select the zone you wish to configure.
- Mode Selection Buttons (Timer, D2D, etc.): Choose the operating mode for the selected zone.
- ENTER Button: Confirm selections.
- CLOCK Button: Set the current time.

Figure 4.1: Diagram illustrating the five available operating modes: Manual ON/OFF, Dusk to Dawn, Timer ON/OFF, Dusk ON/Timer OFF, and Dusk ON/Countdown OFF.
Setting the Current Time:
Press the CLOCK button and use the arrow buttons to set the current hour and minute. Press ENTER to confirm.
Operating Modes:
For each zone, press the corresponding Zone button (Zone 1 or Zone 2) and then select one of the following modes:
- Manual ON/OFF:
Lights are turned on or off manually using the ON/OFF button for the selected zone. This mode bypasses all timer and photocell functions.
- Dusk to Dawn (D2D):
The photocell sensor automatically turns the lights ON at dusk and OFF at dawn. This mode is ideal for continuous nighttime illumination.

Figure 4.2: Visual representation of the Dusk to Dawn mode, where lights activate at sunset and deactivate at sunrise.
- Dusk ON/Countdown OFF (2/3/4/6/8 hours):
Lights turn ON at dusk (detected by the photocell) and automatically turn OFF after a set duration (2, 3, 4, 6, or 8 hours). Select the desired countdown duration using the corresponding button.
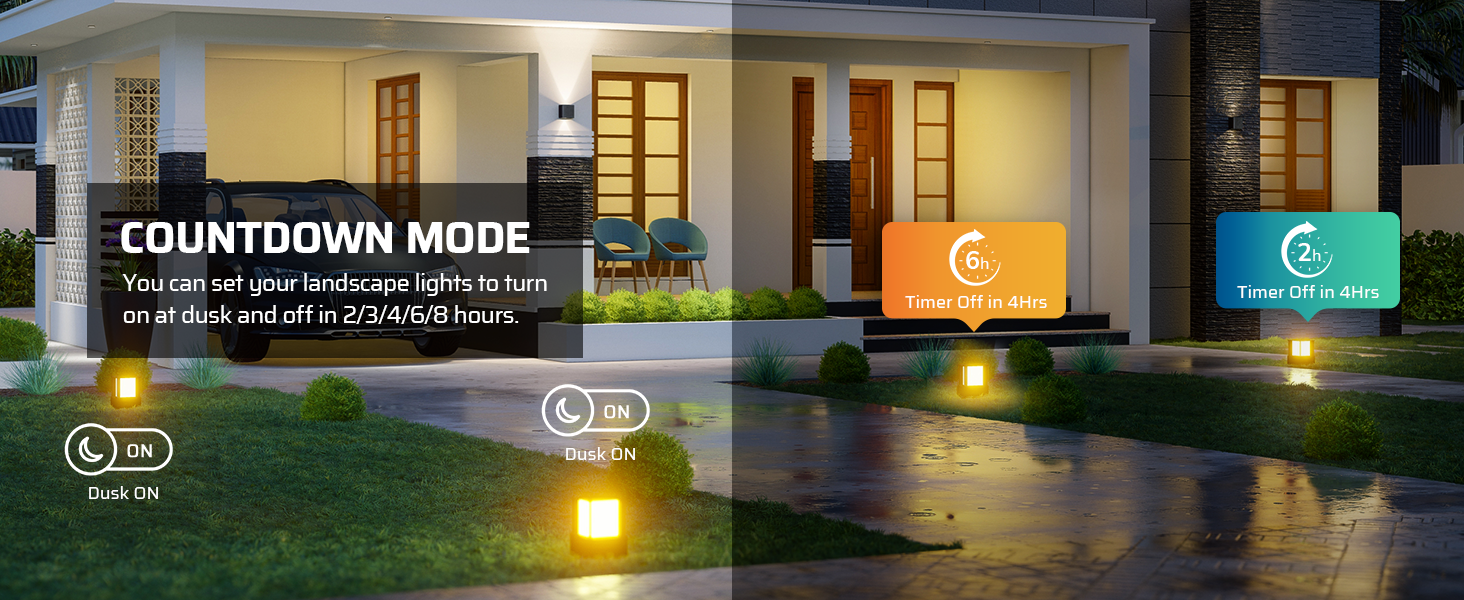
Figure 4.3: Illustration of the Countdown mode, showing lights turning on at dusk and off after a user-defined period (e.g., 4 hours).
- Dusk ON/Timer OFF:
Lights turn ON at dusk and turn OFF at a specific time you set. This allows for precise control over the OFF time regardless of the ON time.
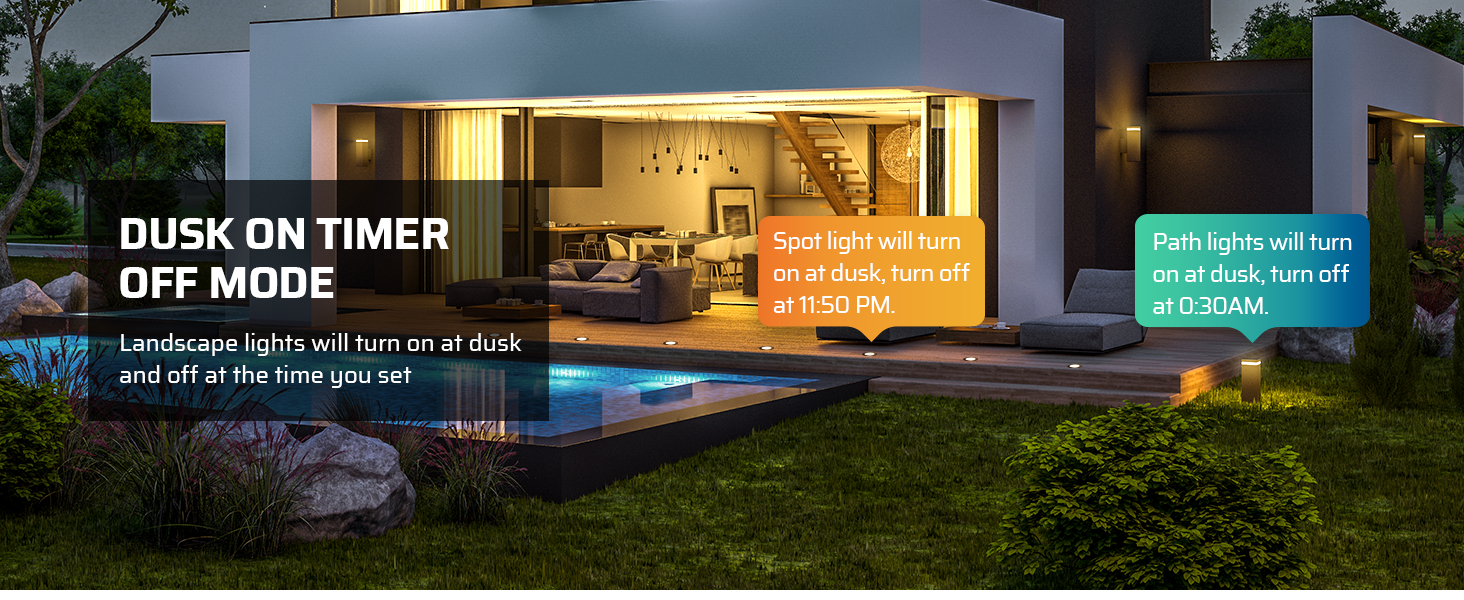
Figure 4.4: Visual example of the Dusk ON/Timer OFF mode, where lights activate at dusk and turn off at a pre-set time (e.g., 11:50 PM).
- Timer ON/OFF:
Lights turn ON and OFF at specific times you set, independent of the photocell sensor. This mode is useful for scheduled lighting regardless of ambient light conditions.
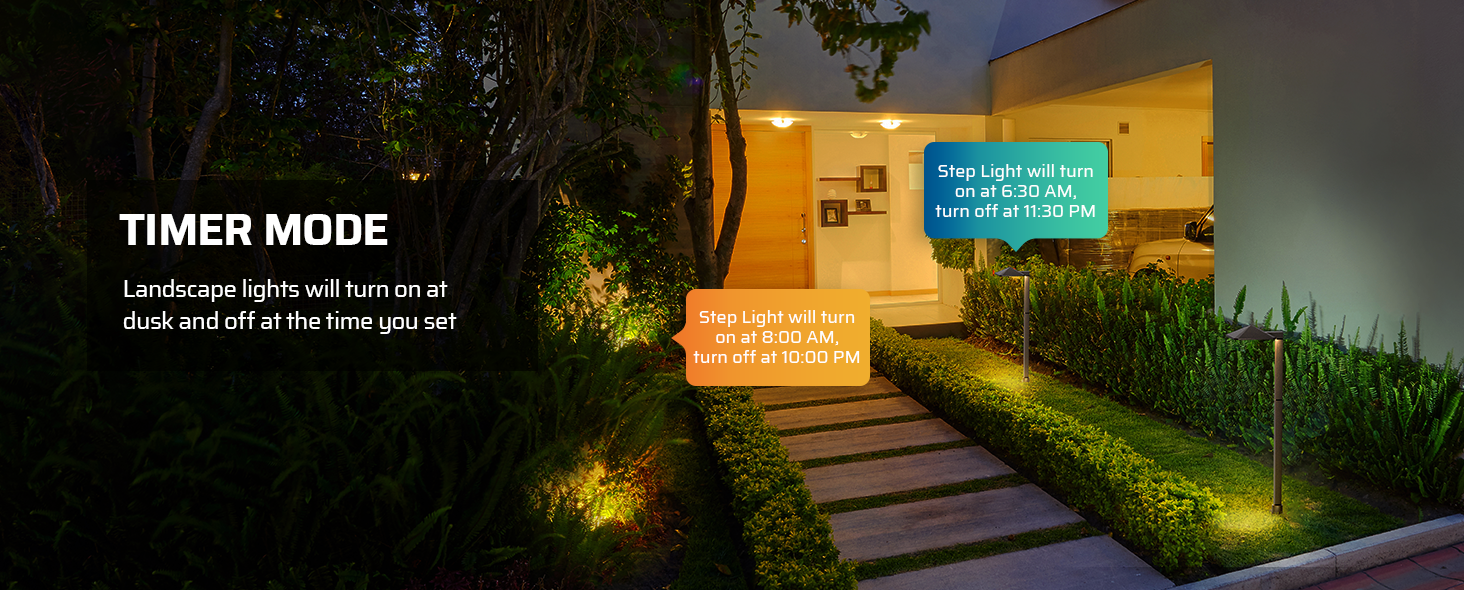
Figure 4.5: Illustration of the Timer mode, demonstrating lights turning on and off at specific programmed times (e.g., 6:30 PM ON, 6:30 AM OFF).
The transformer features a memory function, retaining your last selected mode even after a power outage. This eliminates the need for frequent readjustments.

Figure 4.6: Diagram illustrating the memory function, which ensures the transformer retains its last set mode after power cycling.
5. Maintenance
Regular maintenance helps ensure the longevity and optimal performance of your DEWENWILS landscape transformer.
- Cleaning: Periodically wipe the exterior of the transformer with a soft, damp cloth to remove dirt and debris. Do not use abrasive cleaners or solvents.
- Photocell Sensor: Ensure the photocell sensor is clean and free from obstructions (e.g., leaves, dirt, spiderwebs) that could block light and affect its operation.
- Connections: Annually inspect all wiring connections to the terminal blocks to ensure they remain tight and free from corrosion. Loose connections can lead to poor performance or safety hazards.
- Drainage: Ensure the area around the transformer allows for proper water drainage to prevent standing water.
6. Troubleshooting
If you encounter issues with your DEWENWILS landscape transformer, refer to the following common problems and solutions:
| Problem | Possible Cause | Solution |
|---|---|---|
| Lights are not turning on. |
|
|
| Lights stay on constantly or turn on during the day. |
|
|
| Timer settings are not accurate. |
|
|
7. Specifications
| Attribute | Detail |
|---|---|
| Brand | DEWENWILS |
| Model Number | HALT05E |
| Power Source | AC |
| Input Voltage | 120V AC |
| Output Voltage | 12V/14V AC |
| Maximum Wattage | 300W |
| Frequency | 60 Hz |
| Mounting Type | Wall Mount |
| Package Dimensions | 12.09 x 8.23 x 4.88 inches |
| Item Weight | 8.73 Pounds |

Figure 7.1: Image displaying the key dimensions of the DEWENWILS Low Voltage Landscape Transformer.
8. Warranty and Support
For warranty information or technical support, please contact DEWENWILS customer service. Refer to the product packaging or the official DEWENWILS website for the most current contact details.
DEWENWILS Official Store: Visit the DEWENWILS Store on Amazon
When contacting support, please have your model number (HALT05E) and purchase date available.