Introduction
This manual provides detailed instructions for the safe and efficient operation of your USHA Janome Allure Deluxe Fully Automatic Sewing Machine. Please read this manual thoroughly before using the machine to ensure proper setup, operation, and maintenance. Retain this manual for future reference.
Important Safety Instructions
When using an electrical appliance, basic safety precautions should always be followed, including the following:
- Always unplug the sewing machine from the electrical outlet immediately after using and before cleaning, removing covers, or making any user servicing adjustments.
- Do not allow children to play with the machine. Close supervision is necessary when the sewing machine is used by or near children.
- Use this appliance only for its intended use as described in this manual. Use only attachments recommended by the manufacturer.
- Never operate this sewing machine if it has a damaged cord or plug, if it is not working properly, if it has been dropped or damaged, or dropped into water.
- Keep fingers away from all moving parts. Special care is required around the sewing machine needle.
- Always use the proper needle plate. The wrong plate can cause the needle to break.
- Do not pull on the power cord to disconnect. Grasp the plug, not the cord.
Product Overview
The USHA Janome Allure Deluxe is a fully automatic sewing machine designed for various sewing tasks, featuring 13 built-in stitches and 21 stitch functions. It includes convenient features such as an automatic needle threader, auto feed drop, and an LED sewing light.
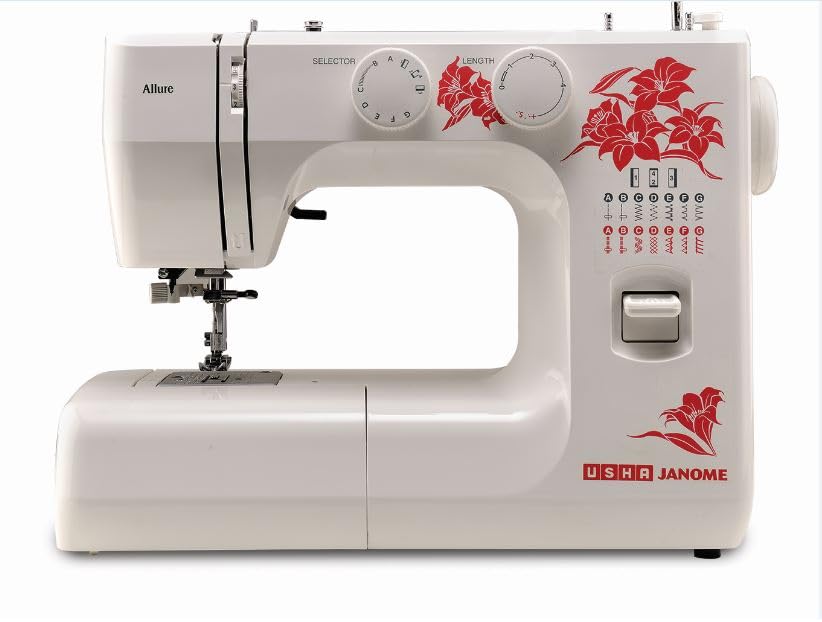
Figure 1: Front view of the USHA Janome Allure Deluxe Sewing Machine, showcasing the stitch selector and length dials, needle area, and free arm.

Figure 2: The sewing machine viewed from the front, with its integrated carrying handle in the upright position, highlighting its portability.
Setup
- Unpacking: Carefully remove the machine from its packaging. Retain all packaging materials for storage or future transport.
- Power Connection:
- Ensure the machine's power switch is in the "OFF" position.
- Connect the power cord to the machine and then to a suitable electrical outlet.
- Connect the foot pedal to the machine.
- Bobbin Winding:
- Place a spool of thread on the spool pin.
- Guide the thread through the tension disc for bobbin winding.
- Place an empty bobbin onto the bobbin winder spindle.
- Push the bobbin winder spindle to the right.
- Press the foot pedal to wind the bobbin. The auto tripping bobbin system will stop winding when the bobbin is full.
- Inserting the Bobbin:
- Open the bobbin cover.
- Insert the wound bobbin into the bobbin case, ensuring the thread unwinds in the correct direction (usually counter-clockwise).
- Pull the thread through the tension spring and guide it into the thread path.
- Close the bobbin cover.
- Upper Threading:
- Raise the presser foot lever.
- Place a spool of thread on the spool pin.
- Follow the numbered threading path indicated on the machine, guiding the thread through all tension guides and the take-up lever.
- Use the automatic needle threader for convenience. Lower the presser foot and engage the threader as per the machine's markings to pass the thread through the needle eye.
- Needle Installation:
- Ensure the machine is turned off.
- Loosen the needle clamp screw.
- Insert a new needle with the flat side facing the back of the machine, pushing it up as far as it will go.
- Tighten the needle clamp screw securely.
Operating Instructions

Figure 3: The sewing machine set up with fabric and various sewing accessories, demonstrating a typical working environment.
- Stitch Selection:
Rotate the Pattern Selection Dial (labeled "SELECTOR") to choose from the 13 built-in stitches, including the buttonhole stitch. Refer to the stitch chart on the machine for visual guidance.
- Stitch Length Adjustment:
Adjust the stitch length using the Stitch Length Selection Dial (labeled "LENGTH") to achieve the desired stitch density for your fabric and project.
- Using the Free Arm:
To use the free arm for circular stitching (e.g., cuffs, pant hems), slide off the accessory box from the base of the machine. This exposes the narrow free arm.
- Automatic Needle Threader:
After threading the upper thread path, use the automatic needle threader mechanism to quickly and easily thread the needle eye. Follow the specific instructions marked on the machine for its operation.
- LED Sewing Light:
The integrated LED sewing light illuminates your work area for improved visibility. It typically turns on automatically when the machine is powered on.
- Feed Drop Lever:
For specialized techniques like free-motion embroidery or darning, engage the feed drop lever to lower the feed dogs, allowing you to move the fabric freely.
- Face Plate Thread Cutter:
A convenient thread cutter is located on the face plate of the machine for quickly trimming threads after sewing.
- Triple Strength Stitch:
This machine offers a triple strength stitch for reinforced seams, ideal for areas requiring extra durability. Select the appropriate stitch pattern for this function.
- Applications:
The machine supports 9 applications including stretch stitching, button fixing, rolled hemming, satin stitch, zip fixing, and smocking. Consult the stitch chart and your project requirements to select the correct stitch and presser foot for each application.
Maintenance
Regular maintenance ensures the longevity and optimal performance of your sewing machine.
- Cleaning:
- Always unplug the machine before cleaning.
- Remove the needle plate and bobbin case.
- Use a small brush to remove lint and dust from the feed dogs and bobbin area.
- Wipe the exterior of the machine with a soft, dry cloth. Do not use harsh chemicals.
- Lubrication:
Refer to the specific lubrication points indicated in the full user manual (if provided separately) or consult a qualified service technician. Over-oiling can cause issues.
- Needle Replacement:
Replace needles regularly, especially if they become bent, dull, or if you notice skipped stitches or fabric damage. Use the correct needle type and size for your fabric.
Troubleshooting
Here are solutions to common issues you might encounter:
- Thread Breaking:
- Check if the machine is threaded correctly (upper and bobbin).
- Ensure the needle is inserted correctly and is not bent or dull.
- Adjust upper thread tension.
- Use good quality thread.
- Skipped Stitches:
- Replace the needle with a new, correct size/type needle.
- Ensure the needle is inserted fully and correctly.
- Check threading.
- Fabric Jamming:
- Do not force fabric through the machine.
- Ensure the presser foot is lowered before sewing.
- Check for tangled threads in the bobbin area.
- Machine Not Starting:
- Verify the power cord is securely plugged in.
- Check if the power switch is "ON".
- Ensure the bobbin winder spindle is not engaged.
For persistent issues, please contact customer support.
Specifications
| Feature | Detail |
|---|---|
| Model Number | 20117000003 |
| Stitches Per Minute | Up to 860 |
| Built-in Stitches | 13 (including buttonhole) |
| Stitch Functions | 21 |
| Button Hole | 4-Step Button Hole Sewing |
| Needle Threader | Automatic |
| Feed Drop | Automatic |
| Bobbin System | Auto Tripping |
| Sewing Light | LED Type |
| Stitch Strength | Triple Strength Stitch |
| Dimensions (LxWxH) | 35 x 23 x 45 Centimeters |
| Item Weight | 6 kg |
| Included Components | Machine, User Manual, Accessories, Warranty Documents |
Warranty and Support
Your USHA Janome Allure Deluxe Sewing Machine comes with a manufacturer's warranty. Please refer to the included Warranty Documents for details regarding coverage, terms, and conditions.
For technical assistance, service, or to inquire about replacement parts, please contact USHA customer support. Contact information can typically be found in the warranty documents or on the official USHA website.
Note: Only authorized service personnel should perform repairs to avoid voiding your warranty and to ensure safe operation.


