
1. Introduction
Thank you for choosing the Eapmic 800ml 17W Commercial Waterless HVAC Scent Diffuser. This manual provides essential information for the safe and efficient operation, setup, and maintenance of your new fragrance machine. Please read this manual thoroughly before use and retain it for future reference.
2. Safety Information
- Avoid direct skin contact with undiluted essential oils.
- Keep the device and essential oils out of reach of children and pets.
- Ensure proper ventilation in the area where the diffuser is used.
- Do not immerse the device in water or any other liquid.
- Use only the provided power adapter.
- Do not attempt to disassemble or repair the device yourself. Contact qualified personnel for service.
3. Product Overview
The Eapmic 800ml 17W Commercial Waterless HVAC Scent Diffuser is designed for large area fragrance distribution, suitable for commercial and residential spaces up to 7500 sq.ft. It features a durable aluminum alloy shell, a waterless nebulizing system, and a programmable LCD screen for precise control.
Key Features:
- Waterless Nebulizing Technology: Disperses pure essential oil without water, ensuring consistent scent coverage.
- Wide Coverage Area: Effectively scents spaces from 3500 to 7500 sq.ft.
- HVAC Connectivity: Can be integrated directly into your HVAC system for whole-building scenting.
- Large Capacity: 800ml essential oil bottle reduces the frequency of refills.
- Quiet Operation: Operates at a low noise level of under 42dB.
- Programmable LCD Display: Allows for digital setting of concentration, operating hours, and days.
- Durable Construction: Features a robust aluminum alloy shell for longevity.
Product Components:




4. Specifications
| Feature | Detail |
|---|---|
| Brand | Eapmic |
| Model | 800ml 17W |
| Usage Area | 3500-7500 sq.ft |
| Voltage | 110-240 Volt |
| Power | 17W |
| Consumption | 2-3ml per Hour |
| Bottle Capacity | 800ml (0.84Qt) |
| Noise Level | <42dBA |
| Material | Aluminum, Metal |
| Product Dimensions (L x W x H) | 5.11" x 9.84" x 13.77" (13cm x 25cm x 35cm) |
| Special Feature | Programmable, Silent Operation |
| Power Source | Corded Electric |
5. Setup
- Unboxing and Placement:
Carefully remove the diffuser and all accessories from the packaging. Place the diffuser on a stable, flat surface in the desired location. Ensure there is adequate space around the unit for air circulation.
- Filling the Essential Oil Bottle:
Locate the essential oil bottle compartment. Unscrew the empty bottle (if applicable) or the cap of the existing bottle. Carefully fill the 800ml bottle with your preferred waterless essential oil. Screw the cap back on tightly and reinsert the bottle into the compartment, ensuring it is securely connected to the nebulizing mechanism.
- Power Connection:
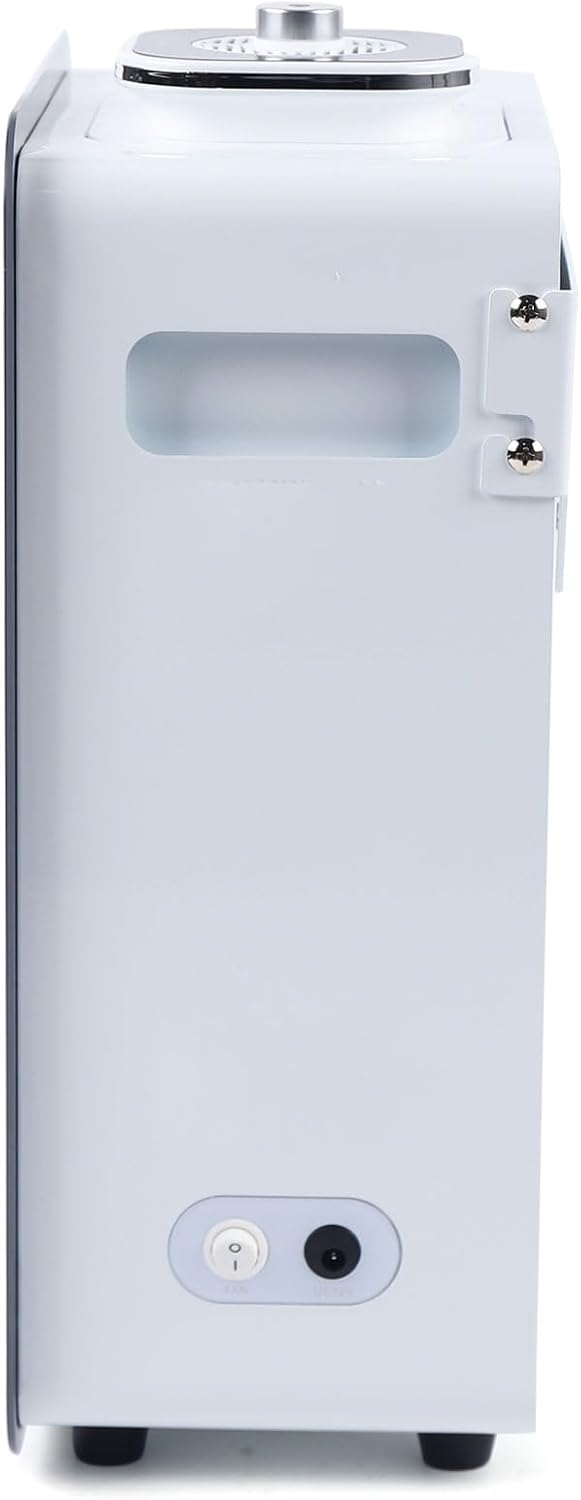
Connect the provided power adapter to the power input port on the side of the diffuser (refer to Figure 3). Plug the adapter into a suitable electrical outlet (110-240V). Flip the power switch to the 'ON' position.
- HVAC System Connection (Optional):
For whole-building scenting, the diffuser can be connected to your HVAC system. Use the included HVAC connection parts (refer to Figure 5). Consult a qualified HVAC technician for proper installation to ensure optimal performance and safety. The diffuser will disperse scent directly into your ventilation system.
6. Operating Instructions
The Eapmic diffuser features an intuitive LCD programmable screen for easy control of scent intensity and operating schedule.

- Power On/Off:
Ensure the main power switch on the side of the unit is in the 'ON' position. Press the POWER button on the control panel to turn the diffuser on or off.
- Setting the Current Time:
Upon first use or after a power outage, you may need to set the current time. Refer to the on-screen prompts or the detailed programming guide (if provided separately) to adjust the clock using the UP and DOWN buttons and confirm with SET.
- Programming Operating Periods:
Press the MODE button to cycle through programming options. You can typically set multiple operating periods (e.g., start time, end time) for each day of the week. Use UP and DOWN to adjust values and SET to confirm and move to the next setting.
- Adjusting Scent Concentration:
Within each operating period, you can set the scent concentration (e.g., working time and pause time). A common setting involves defining how many seconds the diffuser sprays and how many seconds it pauses. Higher spray time and lower pause time result in stronger scent. Adjust these values using the UP and DOWN buttons and confirm with SET.
- Saving Settings:
After configuring all desired settings, ensure they are saved according to the on-screen instructions, usually by pressing SET multiple times until the display returns to the main screen.
7. Maintenance
Regular maintenance ensures the longevity and optimal performance of your scent diffuser.
- Essential Oil Refill:
When the essential oil level is low, turn off the diffuser and carefully remove the bottle. Refill with essential oil as described in the Setup section. Avoid overfilling.
- Cleaning the Nebulizer Head:
If you notice a decrease in scent output or plan to switch essential oils, clean the nebulizer head. Turn off and unplug the device. Remove the essential oil bottle. Fill a clean, empty bottle with rubbing alcohol (isopropyl alcohol) and attach it to the nebulizer. Run the diffuser on a low setting for 15-30 minutes to clear any residue. Then, reattach your essential oil bottle.
- Exterior Cleaning:
Wipe the exterior of the diffuser with a soft, damp cloth. Do not use harsh chemicals or abrasive cleaners. Ensure no liquid enters the internal components.
- Storage:
If storing the diffuser for an extended period, ensure the essential oil bottle is empty and the nebulizer head is cleaned. Store in a cool, dry place.
8. Troubleshooting
| Problem | Possible Cause | Solution |
|---|---|---|
| No scent output or weak scent |
|
|
| Device not powering on |
|
|
| Unusual noise during operation |
|
|
If troubleshooting steps do not resolve the issue, please contact customer support for further assistance.
9. Warranty and Support
Warranty information for your Eapmic 800ml 17W Commercial Waterless HVAC Scent Diffuser is typically provided with your purchase documentation. Please refer to those materials for details regarding warranty coverage and terms.
For technical support, service, or inquiries about replacement parts, please contact the manufacturer or your retailer. Keep your purchase receipt and model number handy when contacting support.