1. Introduction
This manual provides essential information for the installation and proper handling of the Jaytong LCD Replacement Screen for the Infinix Note 40 Pro 4G X6850. This product is designed to replace old, broken, cracked, damaged, or non-functional LCD screens experiencing touch issues.
2. Safety Information and Important Warnings
- Fragile Item: The LCD screen is a delicate component. Handle with extreme care to prevent damage.
- Professional Installation Recommended: Installation of this replacement screen requires technical expertise and specialized tools. It is highly recommended that installation be performed by a qualified technician. Incorrect installation can lead to damage to the screen or the device.
- Device Identification: Ensure you have correctly identified your phone model (Infinix Note 40 Pro 4G X6850) before purchase and installation. Using the wrong model screen may cause damage to your device.
- No Installation Instructions Included: This product does not come with detailed installation instructions. Do not attempt installation without prior experience or professional guidance.
- Additional Tools: Basic opening tools may be included, but customers should be prepared to acquire additional specialized tools necessary for a complete and safe installation.
- Avoid Force: Do not force any components during the installation process. If you encounter difficulties, stop and seek professional assistance.
3. Package Contents
The package typically includes the following items:
- 1 x Jaytong LCD Display Touch Screen Assembly for Infinix Note 40 Pro 4G X6850
- Basic device opening tools (e.g., screwdrivers, pry tools, suction cup)
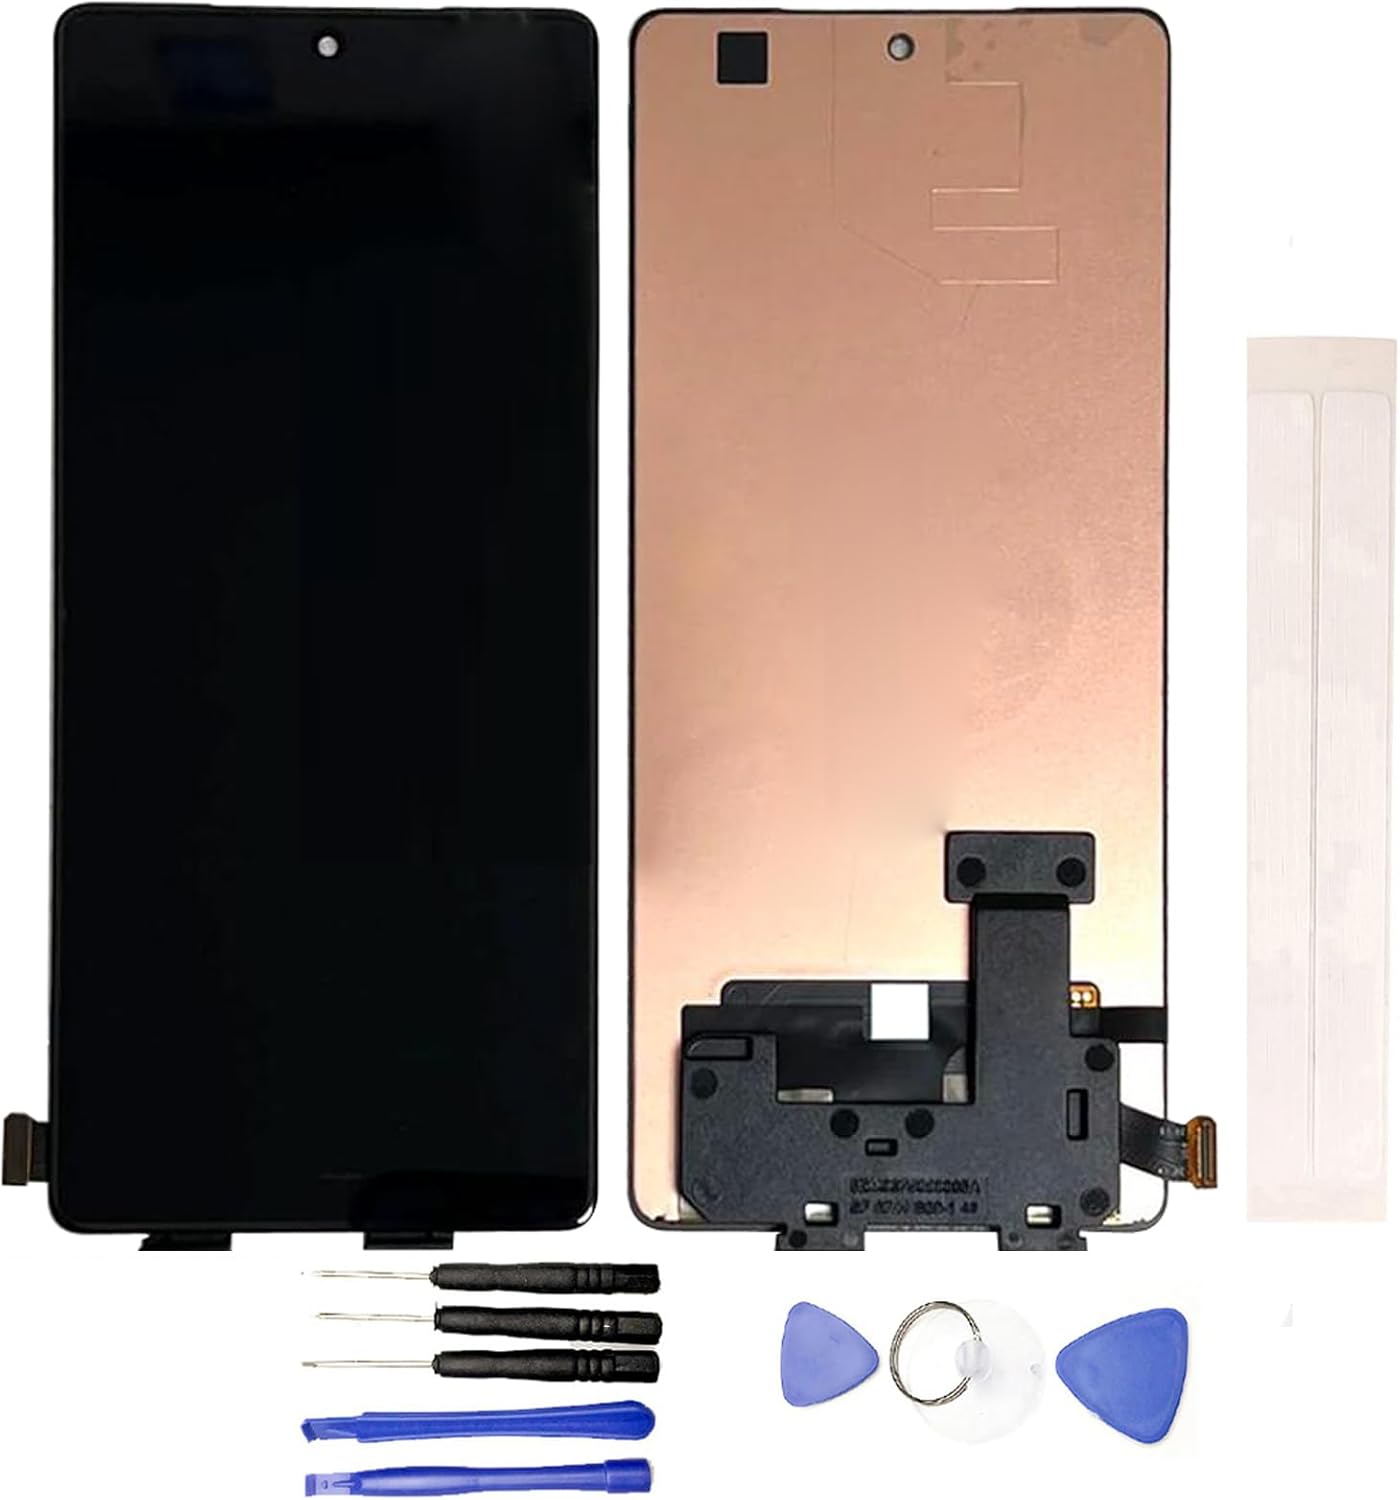
Image 1: Jaytong LCD Replacement Screen for Infinix Note 40 Pro 4G X6850. The image displays the front and back of the LCD assembly, along with a set of small screwdrivers, plastic pry tools, a suction cup, and adhesive strips, which are typically included for installation.
4. Pre-Installation Testing (Crucial Step)
Before proceeding with the full installation, it is imperative to test the functionality of the new LCD screen. Failure to test before installation may void return eligibility if issues are discovered later. Do not remove any protective films or tags during testing.
Testing Steps:
- Prepare for Test: Carefully clean the flex cable of the new screen and the corresponding slot on your phone's motherboard. Ensure both are free of dust or debris.
- Connect Screen: Gently connect the flex cable of the new screen to the motherboard. Ensure a secure and proper connection.
- Power Check: Verify that your phone's battery is sufficiently charged. Also, confirm that your phone's motherboard is not damaged or faulty.
- Power On and Test: Power on your phone. Test the display for clarity, color accuracy, and dead pixels. Thoroughly test the touch functionality across the entire screen, including multi-touch gestures.
- Completion: If the screen functions correctly during testing, you may proceed with the full installation. If any issues are observed, contact customer support immediately before attempting installation.
5. Installation Instructions
As noted in the safety section, professional installation is strongly recommended. This section provides general guidance, but detailed step-by-step instructions are beyond the scope of this manual and should be sourced from reputable repair guides or a professional technician.
- Power Off Device: Always ensure your phone is completely powered off and disconnected from any power source before beginning disassembly.
- Disassembly: Carefully disassemble your phone, following a reliable guide for the Infinix Note 40 Pro 4G X6850. This typically involves removing the back cover, battery, and various connectors to access the old screen.
- Remove Old Screen: Gently remove the damaged screen. Heat may be required to loosen adhesive. Be cautious of glass shards and internal components.
- Clean Frame: Thoroughly clean the phone's frame, removing all old adhesive and glass fragments. A clean surface is crucial for proper adhesion of the new screen.
- Install New Screen: Apply new adhesive to the phone frame. Carefully position and install the new Jaytong LCD replacement screen, ensuring all flex cables are properly connected and secured.
- Reassembly: Reassemble your phone by reversing the disassembly steps. Ensure all screws and connectors are in their correct places.
- Final Test: After reassembly, power on your phone and perform a final test of the screen and touch functionality.
6. Troubleshooting
If you encounter issues after installation, consider the following troubleshooting steps:
- Screen Not Turning On / No Display:
- Ensure all flex cables are securely connected to the motherboard.
- Check if the phone's battery is charged.
- Verify that the motherboard itself is not damaged.
- Perform a hard reset on the device.
- Touch Not Working / Unresponsive Touch:
- Recheck the touch screen flex cable connection.
- Ensure no debris is obstructing the connection points.
- Confirm that the screen was properly tested before full installation.
- Display Issues (e.g., lines, discoloration, flickering):
- Check the display flex cable for any damage or improper connection.
- Ensure no pressure is being applied to the screen from inside the phone casing.
If these steps do not resolve the issue, it is recommended to consult a professional repair technician or contact customer support.
7. Specifications
| Product Name | Jaytong LCD Replacement for Infinix Note 40 Pro 4G X6850 LCD Display Touch Screen Assembly |
| Compatible Model | Infinix Note 40 Pro 4G X6850 |
| Product Dimensions | 7.87 x 4.33 x 1.57 inches |
| Item Weight | 3.52 ounces |
| Color | Black |
| Manufacturer | Generic |
| ASIN | B0D5873YGZ |
8. Warranty and Support
For any questions, concerns, or issues regarding your Jaytong LCD Replacement Screen, please contact the seller directly through the platform where the purchase was made. It is important to address any problems promptly, especially before attempting full installation, as installation attempts may affect return eligibility.
Specific warranty details are not provided in this manual. Please refer to the product listing or contact the seller for information regarding warranty coverage and return policies.


