
Introduction
This manual provides detailed instructions for assembling, operating, and maintaining your Leo Jaymz DIY Guitar Kit ST TD Style. This kit allows you to build a personalized electric guitar featuring a mahogany body, maple neck, and laurel wood fretboard. Please read all instructions carefully before beginning assembly to ensure proper construction and optimal performance.
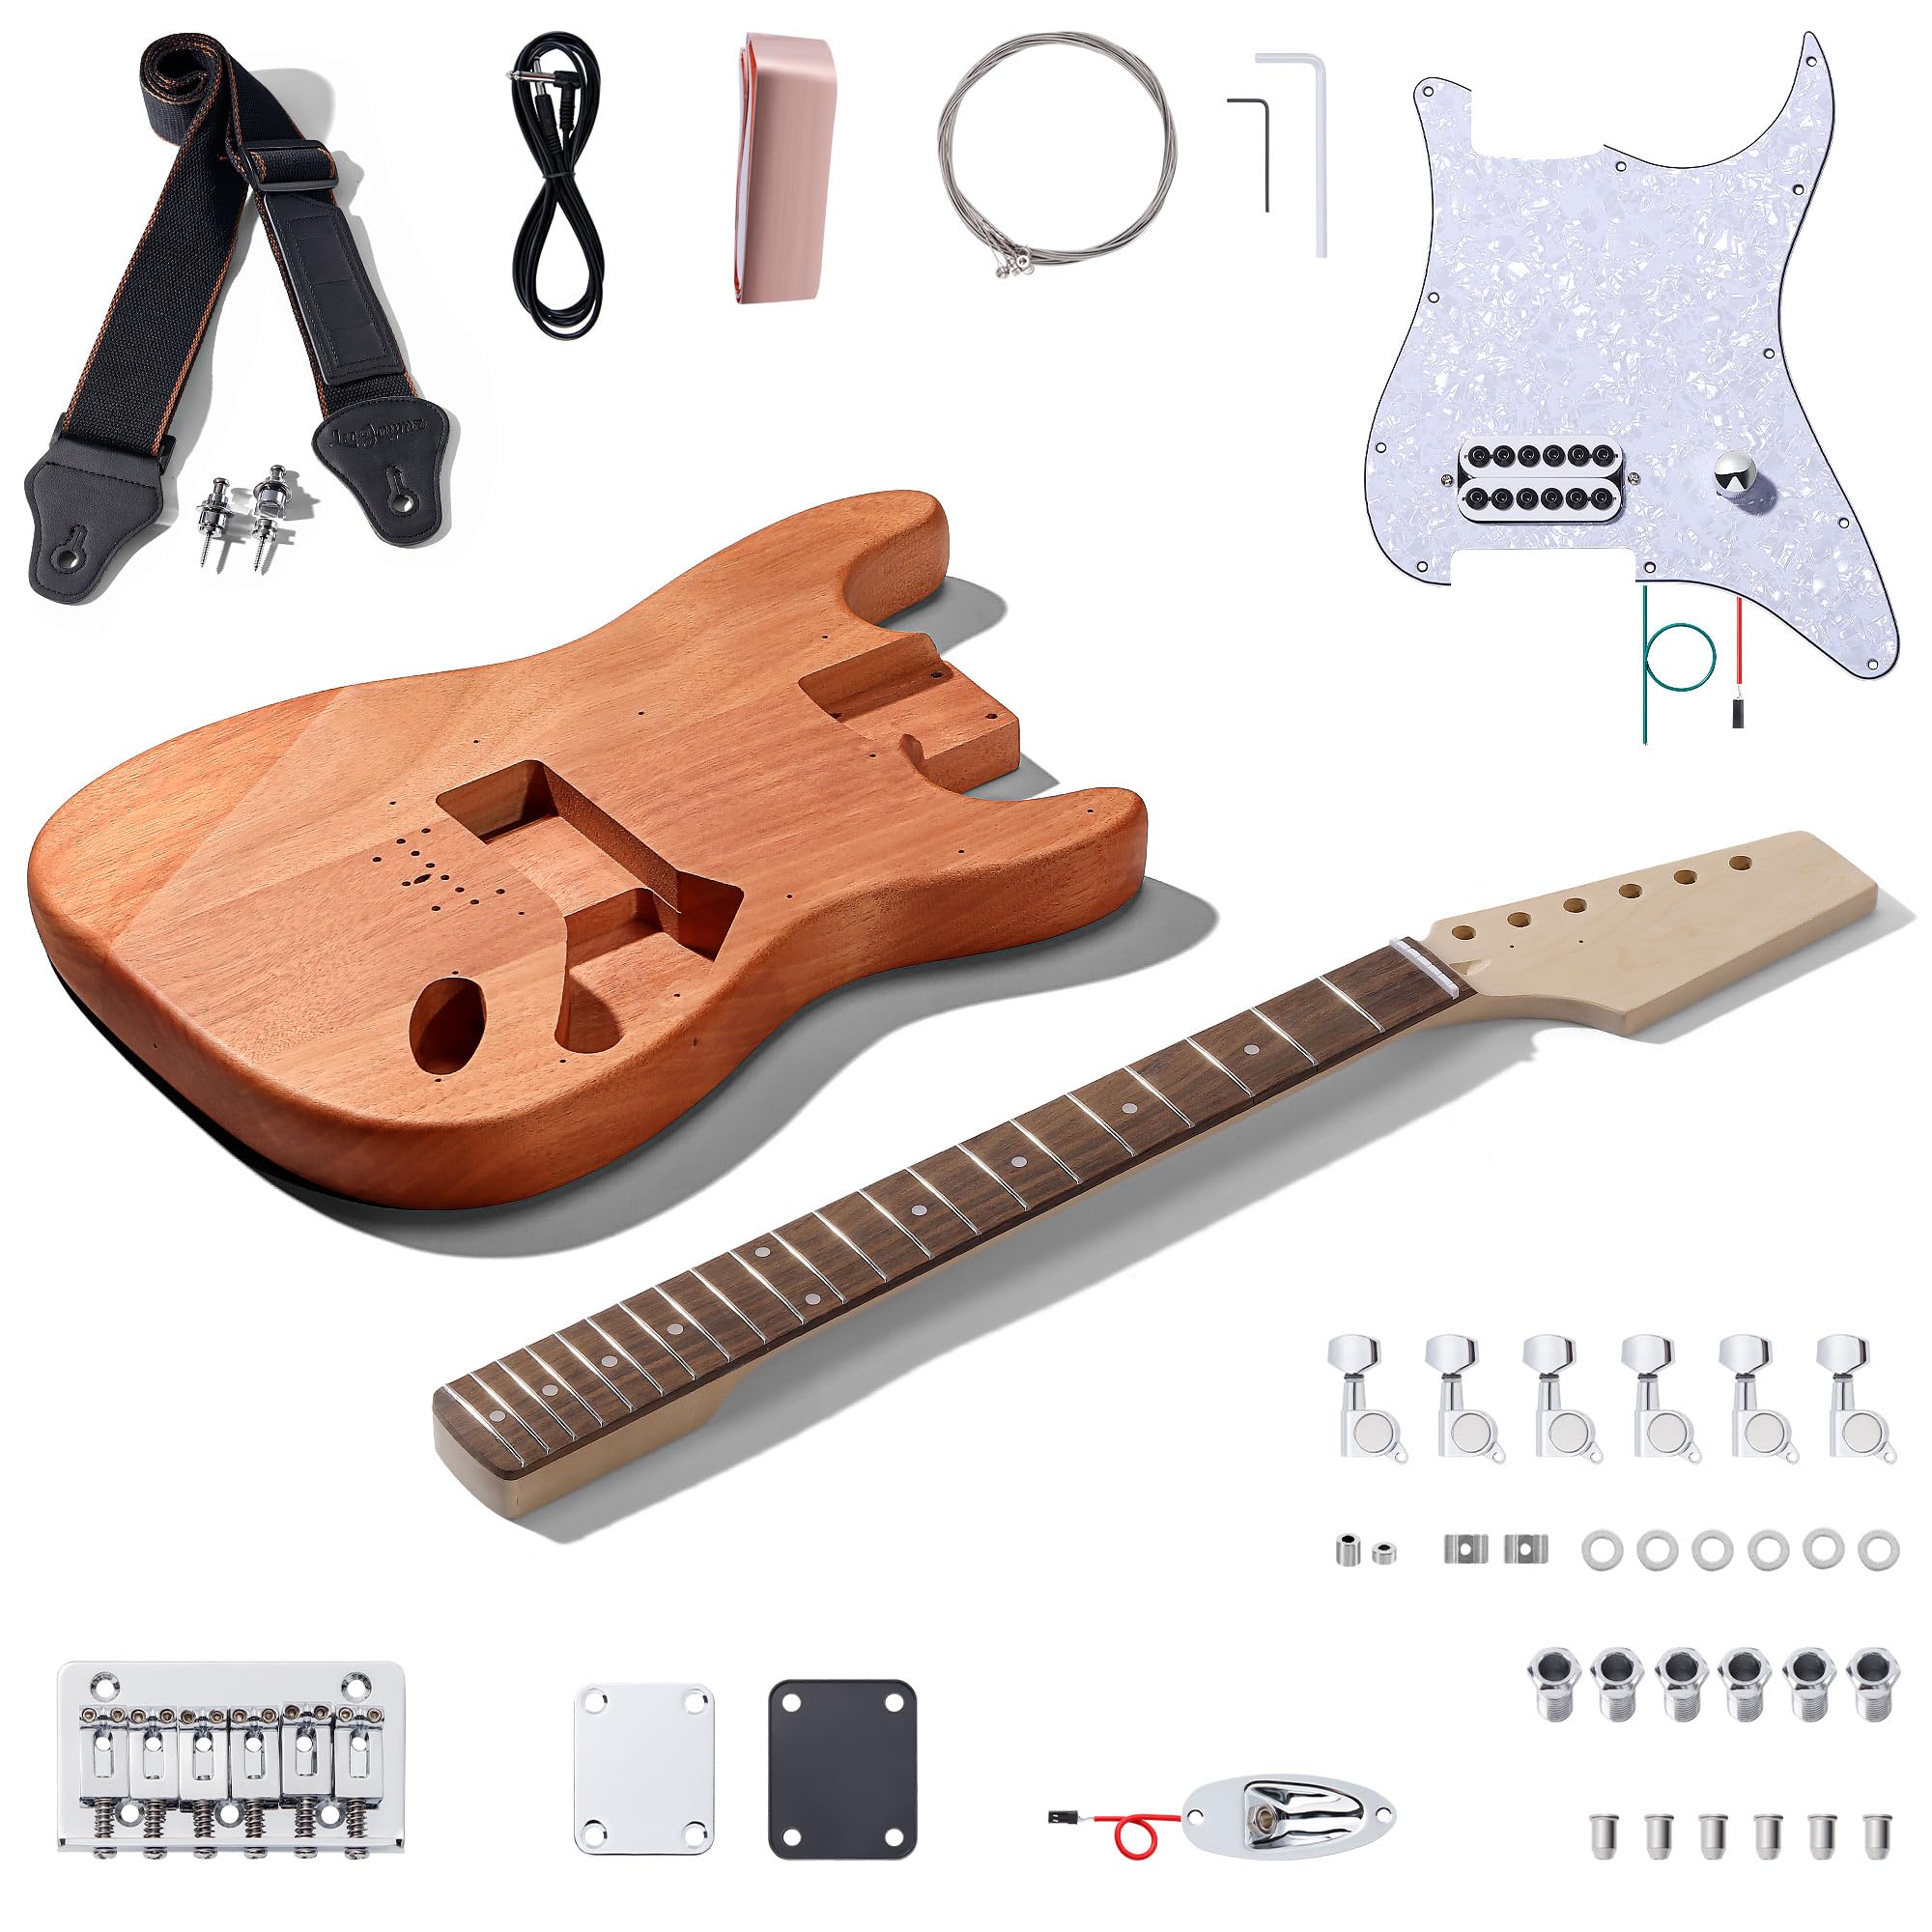
Figure 1: Fully assembled Leo Jaymz DIY ST TD Style Electric Guitar.
Safety Information
- Always wear appropriate safety gear, such as safety glasses, when using tools.
- Ensure your workspace is clean, well-lit, and free from obstructions.
- Use tools only as intended and follow manufacturer guidelines.
- Keep small parts out of reach of children.
- Exercise caution when handling sharp objects or electrical components.
What's in the Box
Your Leo Jaymz DIY Guitar Kit includes the following components:
- Mahogany body
- Maple neck
- Laurel Wood fretboard
- H pickup (Note: Product images may show SSS configuration, but specifications indicate H pickup)
- Fixed bridge
- Stainless Steel strings
- Mahogany back and top
- 3-3 Machine heads (tuners)
- Ivory ABS Pick Guard
- All necessary cables and screws

Figure 2: Overview of guitar accessories and components included in the kit.
Assembly Instructions
This section guides you through the assembly process. For a visual guide, please refer to the official assembly video below.
Video 1: Official Leo Jaymz DIY ST Guitar Assembly Video. This video demonstrates the step-by-step process of assembling a similar ST-style guitar kit, including tuner installation, wiring, bridge setup, and stringing.
1. Neck Assembly
- Install Tuning Pegs: Insert the tuning pegs into the pre-drilled holes on the headstock. Secure them with the washers and nuts from the front, then fasten the screws on the back of the headstock.
- Prepare Headstock: The maple neck features a large headstock, allowing for custom shaping if desired.

Figure 3: Maple neck with laurel wood fingerboard, ready for tuner installation.

Figure 4: Close-up of the guitar headstock with tuning pegs installed.
2. Body Preparation and Wiring
- Install Output Jack: Feed the output jack wires through the body cavity and secure the jack plate.
- Connect Pickguard: The kit features plug-and-play cables for the pickguard, minimizing soldering. Connect the pickguard's wiring to the output jack wires.
- Secure Pickguard: Align the pickguard with the pre-drilled holes on the mahogany body and fasten it with the provided screws.

Figure 5: Illustration of the simple plug-and-play wiring connections.

Figure 6: Solid mahogany guitar body with pre-drilled holes for easy assembly.
3. Neck Attachment
- Attach Neck to Body: Carefully align the neck with the neck pocket on the guitar body. Place the neck plate and secure it with the four screws. Ensure the neck is seated firmly and straight.
4. Bridge Installation
- Install Bridge: Position the fixed bridge over the pre-drilled holes and secure it with the provided screws. Ensure the bridge is aligned correctly for string path.
- Install Tremolo Springs (if applicable): If your kit includes a tremolo system, install the springs in the back cavity and connect them to the bridge.
- Attach Back Plate: Cover the tremolo spring cavity with the back plate and secure it with screws.
5. Stringing and Final Touches
- Install Strings: Thread the stainless steel strings through the bridge and up to the tuning pegs. Wind them securely around the pegs and tune to pitch.
- Install String Trees: If included, install the string trees on the headstock to provide proper string angle over the nut.
Operating Instructions
Once assembled, your Leo Jaymz DIY Guitar is ready to play. Connect your guitar to an amplifier using a 1/4" (6.35mm) jack cable. Use the volume and tone knobs on the pickguard to adjust your sound. The pickup selector switch allows you to choose between different pickup configurations for varied tonal options.
Maintenance
- Cleaning: Wipe down your guitar regularly with a soft, dry cloth to remove dust and fingerprints. For the fretboard, use a specialized fretboard cleaner periodically.
- String Replacement: Replace strings every few months or as needed, depending on play frequency. Old strings can affect tone and playability.
- Truss Rod Adjustment: The maple neck may require occasional truss rod adjustments to maintain proper neck relief. This should ideally be performed by an experienced technician.
- Hardware Check: Periodically check all screws and hardware for tightness. Loose components can affect tuning stability and sound.
Troubleshooting
- Buzzing Strings: This can be caused by low action, uneven frets, or improper neck relief. Check the bridge saddle height and consider a truss rod adjustment.
- Poor Tuning Stability: Ensure tuning pegs are securely tightened. New strings may take time to stretch and settle. Check the nut for proper string seating.
- No Sound/Weak Signal: Verify all plug-and-play connections are secure. Check your amplifier and cable. Ensure volume and tone knobs are not set to zero.
- Bridge/Body Incompatibility: Some users have reported issues with bridge alignment. If the bridge holes do not align with the body's pre-drilled holes, careful modification or filling and re-drilling may be necessary. This requires precision and may be best handled by a professional luthier.
Specifications
| Brand | Leo Jaymz |
| Model Name | ST TD |
| Model Number | SN079 |
| Body Material | Mahogany |
| Neck Material Type | Maple |
| Fretboard Material Type | Laurel Wood |
| Guitar Pickup Configuration | H |
| Guitar Bridge System | Fixed |
| Number of Strings | 6 |
| Scale Length | 25.5 Inches |
| Item Dimensions | 39 x 14 x 2.3 inches |
| Connector Type | 1/4" (6.35mm) jack |
Warranty and Support
This product comes with a 30-day warranty. For any questions, technical assistance, or warranty claims, please contact Leo Jaymz customer support through the retailer where the product was purchased. Ensure you have your purchase details and model number (SN079) available for faster service.


