
1. Introduction
Thank you for choosing the Spider Farmer Dehumidifier. This manual provides essential information for the safe and efficient operation, maintenance, and troubleshooting of your new dehumidifier. Please read this manual thoroughly before use and retain it for future reference.
2. Safety Instructions
- Always plug the unit into a grounded electrical outlet.
- Do not operate the dehumidifier with a damaged power cord or plug.
- Keep the unit away from water and other liquids to prevent electric shock.
- Ensure proper ventilation around the unit; do not block air inlets or outlets.
- Do not insert objects into the air vents.
- Unplug the unit before cleaning or performing any maintenance.
- This appliance is not intended for use by persons (including children) with reduced physical, sensory or mental capabilities, or lack of experience and knowledge, unless they have been given supervision or instruction concerning use of the appliance by a person responsible for their safety.
- Children should be supervised to ensure that they do not play with the appliance.
3. Package Contents
Verify that all components are present in the package:
- Dehumidifier (with Power Cord) x 1
- Connecting Components x 1
- Temp/humidity sensor wire x 1
- Air duct x 1
- Drain pipe x 1

Figure 3.1: Dehumidifier and Included Accessories
4. Product Features
- Unique Grow Tent Design: Equipped with an air duct, this dehumidifier can be placed outside the grow tent, preventing heat buildup that could negatively impact plant growth. Ideal for 3x3, 2x4, and 4x4 ft tents.

Figure 4.1: Dehumidifier Placement for Grow Tents
- High Performance: Capable of removing up to 32 pints of moisture per day (at 95°F, 90% RH) from areas up to 2000 square feet. Features a 24-hour timer, three switchable modes, and automatic defrosting to ensure efficient operation and extended lifespan.
- Smart Humidity Control: Humidity settings are adjustable from 30% to 80%. The unit automatically stops when the target humidity is reached. A sensor probe detects and displays the humidity, allowing for continuous monitoring.
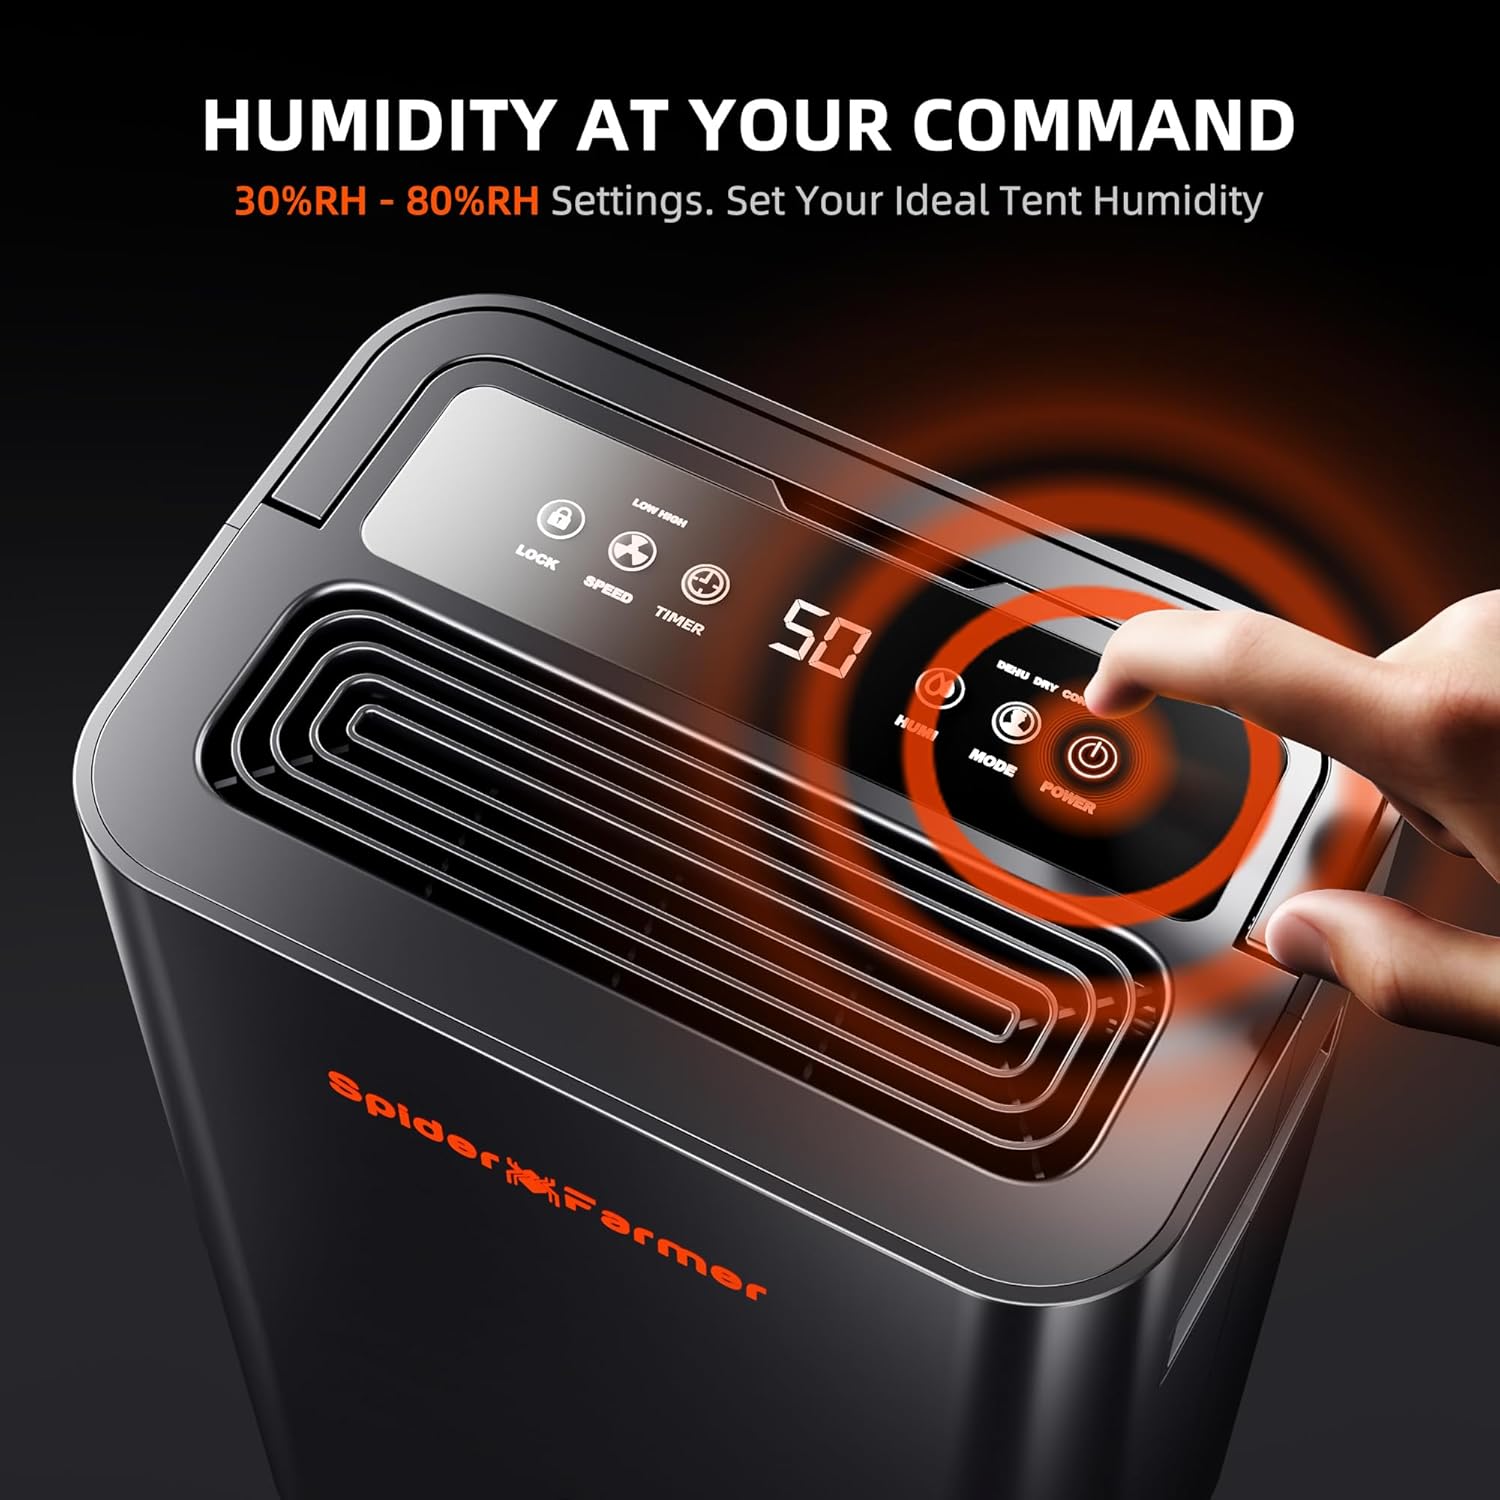
Figure 4.2: Digital Display and Humidity Control
- Dual Drainage Methods: Features a 2.1-liter water tank with a "full water" indicator and alarm. Alternatively, continuous drainage can be achieved via the included drain pipe. The unit automatically stops when the tank is full.

Figure 4.3: Water Tank and Continuous Drain Option
- User-Friendly Design: Equipped with 360° rotating wheels for easy mobility, a clear digital display, and a convenient handle. The filter screen is washable and reusable, reducing maintenance frequency.


Figure 4.4: Mobility, Portability, and Easy Maintenance
- Quiet Operation: Designed to operate at less than 40dB, ensuring minimal disturbance.

Figure 4.5: Silent Performance
5. Specifications
| Attribute | Value |
|---|---|
| Brand | Spider Farmer |
| Model Name | SF-Dehumidifier |
| Dehumidification Capacity | 32 Pints per Day (at 95°F, 90% RH) |
| Coverage Area | Up to 2000 sq.ft |
| Water Tank Capacity | 2.1 Liters |
| Product Dimensions (D x W x H) | 11.81" x 7.87" x 19.4" |
| Item Weight | 24.9 Pounds |
| Wattage | 230 watts |
| Humidity Setting Range | 30% - 80% RH |
| Noise Level | < 40dB |
6. Setup
6.1 Initial Placement
Place the dehumidifier on a flat, stable surface. Ensure there is at least 8 inches (20 cm) of space around the unit for proper airflow. For grow tent applications, the unit can be placed outside the tent.
6.2 Connecting Air Duct (for Grow Tent Use)
- Install the connecting components onto the dehumidifier's top air outlet.
- Attach one end of the air duct to the connecting component.
- Connect the other end of the air duct to your grow tent's intake port.
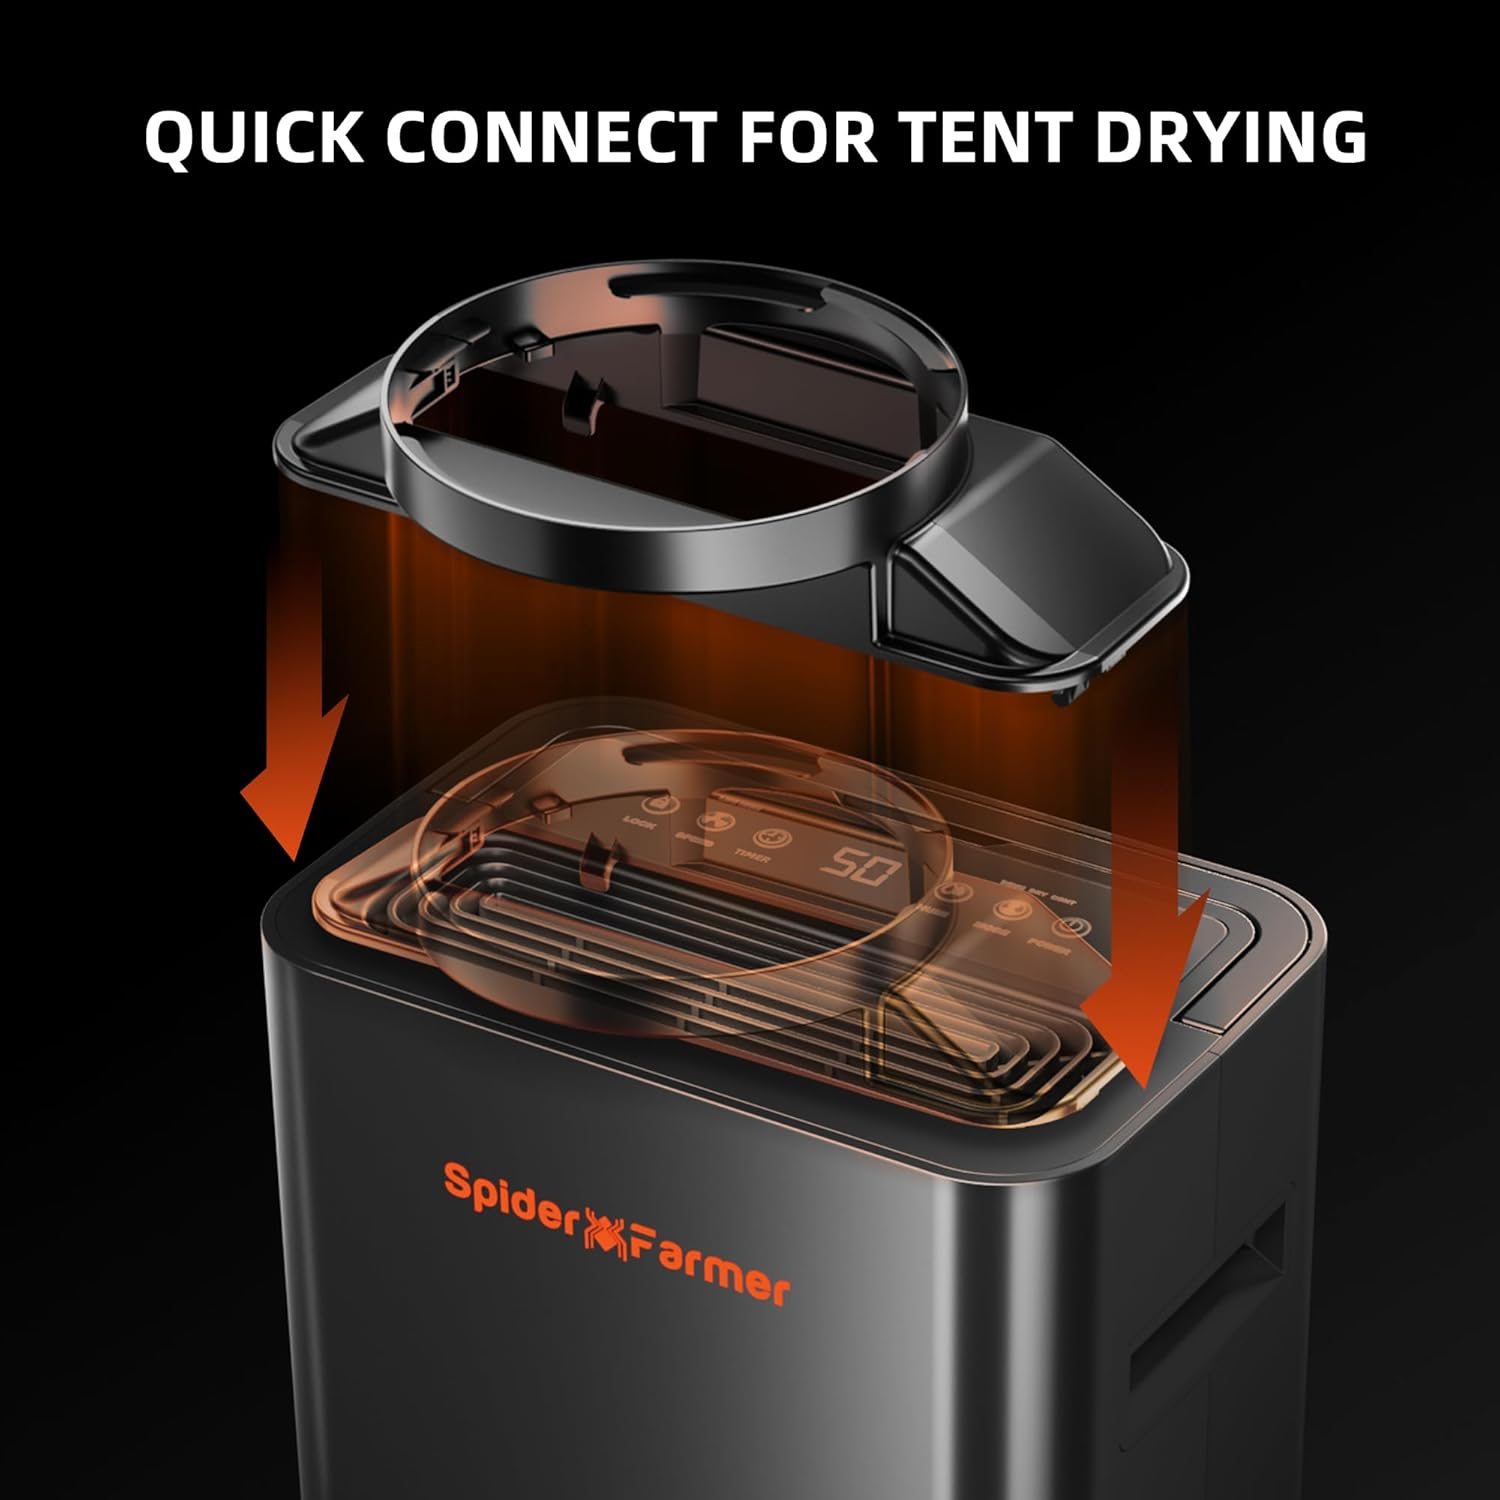
Figure 6.1: Air Duct Connection
6.3 Sensor Probe Placement
Place the temperature/humidity sensor wire inside the grow tent, near the plants, for accurate humidity readings. Avoid placing it directly in the path of the air duct outlet to prevent inaccurate measurements and ensure even air distribution. Maintain a distance of at least 1.6 feet (0.5m) between the air duct outlet and any plant leaves.
Video 6.1: Spider Farmer Dehumidifier for Grow Tent - Demonstrates setup and operation within a grow tent environment.
7. Operating Instructions
7.1 Control Panel Overview
Figure 7.1: Control Panel
- POWER Button: Press to turn the unit ON or OFF.
- MODE Button: Cycle through available operating modes:
- DEHU (Custom Mode): Humidity and fan speed can be adjusted.
- DRY (Dry Clothes Mode): Fixed humidity and speed, not adjustable.
- CONT (Continuous Dehumidifier Mode): Fixed humidity, speed can be adjusted.
- HUMI Button: Set your desired target humidity level (30% - 80% RH). The unit will automatically stop when this level is reached.
- TIMER Button: Set the 24-hour timer in 1-hour increments for automatic shut-off.
- SPEED Button: Adjust fan speed between Low and High settings.
- LOCK Button: Press to lock the control panel buttons, preventing accidental changes. Press again to unlock.
7.2 Setting Desired Humidity
Press the HUMI button repeatedly to cycle through the desired humidity percentages (30% to 80%). The display will show the selected humidity. The unit will operate until the ambient humidity matches the set level, then pause. It will restart automatically if humidity rises above the set point.
7.3 Using the Timer Function
Press the TIMER button to set the desired operating time (from 1 to 24 hours). The unit will automatically turn off after the set time has elapsed.
8. Drainage Methods
The Spider Farmer Dehumidifier offers two convenient drainage options:
8.1 Water Tank Drainage
The unit collects condensed water in its internal 2.1-liter water tank. When the tank is full, the "full water" indicator will light up, and an alarm will sound. The dehumidifier will automatically stop operating to prevent overflow. To empty, carefully remove the water tank and pour out the collected water. Reinsert the tank firmly until it clicks into place; the unit will then resume operation.
8.2 Continuous Drainage
For continuous operation without needing to empty the water tank, connect the included drain pipe to the continuous drainage port on the back of the unit. Route the hose to a suitable drain or larger container, ensuring the hose is sloped downwards to allow gravity drainage. This method is ideal for long-term use.
Figure 8.1: Water Tank and Continuous Drain Setup
9. Maintenance
Regular maintenance ensures optimal performance and extends the lifespan of your dehumidifier.
9.1 Cleaning the Air Filter
The dehumidifier is equipped with a washable and reusable filter. It is recommended to clean the filter every two weeks or more frequently depending on usage and air quality.
- Unplug the dehumidifier from the power outlet.
- Locate and remove the air filter (typically on the back or side of the unit).
- Rinse the filter under running water to remove dust and debris. For heavy dirt, use a mild detergent and soft brush.
- Allow the filter to air dry completely before reinserting it into the unit. Do not use a dryer or direct heat.
9.2 Cleaning the Unit Exterior
Wipe the exterior of the dehumidifier with a soft, damp cloth. Do not use harsh chemicals, abrasives, or solvents, as these may damage the surface.
9.3 Long-Term Storage
If storing the unit for an extended period, ensure the water tank is empty and clean. Clean the air filter and allow the unit to dry completely before storing it in a cool, dry place, away from direct sunlight.
10. Troubleshooting
| Problem | Possible Cause | Solution |
|---|---|---|
| Dehumidifier does not turn on. | No power supply; Power cord not properly connected; Water tank full or not correctly inserted. | Check power outlet and connection; Empty and reinsert water tank securely. |
| Unit is running but not collecting water. | Ambient humidity is too low; Temperature is too low; Air filter is clogged; Unit is in fan-only mode. | Increase target humidity; Ensure room temperature is above 41°F (5°C); Clean air filter; Select a dehumidification mode (DEHU, DRY, CONT). |
| "Full Water" indicator is on, but tank is not full. | Water tank is not properly seated. | Remove and reinsert the water tank firmly until it clicks into place. |
| Unit is noisy. | Unit is not on a level surface; Air filter is clogged; Obstruction in fan. | Place unit on a flat, stable surface; Clean air filter; Check for and remove any obstructions. |
| Humidity reading seems inaccurate. | Sensor probe is improperly placed or obstructed. | Ensure sensor probe is placed correctly within the grow tent and is not obstructed or too close to the air outlet. |
11. Warranty and Support
Spider Farmer products are manufactured with high-quality materials and craftsmanship. For warranty information, technical support, or service inquiries, please refer to the warranty card included with your purchase or visit the official Spider Farmer website. Please retain your proof of purchase for warranty claims.
Contact Information: Please refer to the contact details provided on the product packaging or the official Spider Farmer website for the most up-to-date support information.