
AVATTO GDS16
AVATTO Smart WiFi Garage Door Opener Module
User Manual
Introduction
The AVATTO Smart WiFi Garage Door Opener Module is designed to integrate your existing garage door opener with smart home systems, allowing for remote control via smartphone app, voice commands through smart assistants like Alexa and Google Home, and scheduled operations. This module operates on 2.4GHz WiFi and does not require a separate hub. Its compact size allows for easy installation.

Image: The AVATTO Smart WiFi Garage Door Module shown alongside a smartphone displaying its control interface, illustrating remote operation capabilities.
Safety Information
Please read all safety warnings and instructions carefully before installation and operation to prevent injury or damage. Keep this manual for future reference.
- Electrical Safety: Installation should only be performed by a qualified electrician or a person with sufficient knowledge of electrical systems. Ensure power is disconnected at the circuit breaker before any wiring is done.
- Compatibility: This module supports 2.4GHz WiFi networks only. It is not compatible with 5GHz WiFi.
- Garage Door Operation: Always ensure the path of the garage door is clear before operating it remotely or via voice command. Keep children and pets away from the moving door.
- Indoor Use Only: This device is designed for indoor use. Do not expose it to moisture or extreme temperatures.
What's in the Box
Verify that all components are present before beginning installation:
- AVATTO Smart WiFi Garage Door Opener Module
- Door Sensor
- Sensor Cable (5 meters long)
- Instruction Manual
- Mounting Accessories (screws, wall plugs, mounting bracket, cable ties)

Image: A visual representation of all items included in the product package, such as the module, sensor, cables, and mounting hardware.
Setup and Installation
Follow these steps for proper installation of your AVATTO Smart WiFi Garage Door Opener Module.
1. Wiring the Module
Important: Disconnect power to your garage door opener at the circuit breaker before proceeding with any wiring.
- Connect the Live (L) and Neutral (N) wires from your power supply to the corresponding L and N terminals on the module.
- Connect the signal cable from your garage door opener's wall button terminals (or the opener's control board terminals for the wall button) to the S1 and S2 terminals on the module. This connection simulates a button press.
- Connect the door sensor cable to the S3 and S4 terminals on the module.

Image: A detailed diagram showing how to connect the module to the garage door opener, wall button, and power supply.

Image: An alternative wiring diagram providing another perspective on connecting the module to the garage door system.
2. Installing the Door Sensor
Mount the two parts of the door sensor on the garage door and the door frame, ensuring they are aligned and close enough to each other when the door is closed (typically within 1-2 cm). The sensor detects the open/closed status of the garage door.

Image: The AVATTO module displayed next to the magnetic door sensor, highlighting the two parts of the sensor.
3. App Installation and Pairing
- Download the "Smart Life" or "Tuya Smart" app from your smartphone's app store (iOS or Android).
- Register or log in to your account.
- Restore power to the garage door opener. The module should enter pairing mode (indicated by a blinking light).
- In the app, tap "+" to add a new device. Select "Garage Door Opener" or "Curtain Switch (Wi-Fi)".
- Follow the on-screen instructions to connect the module to your 2.4GHz WiFi network.
- Once connected, you can rename the device and configure settings.
Operating the Module
1. App Remote Control
After successful pairing, you can control your garage door from anywhere using the Smart Life or Tuya Smart app. The app displays the current status (open/closed) of your garage door.

Image: A person using a smartphone to remotely control a garage door, demonstrating the app's functionality.

Image: A woman relaxing on a couch, checking the status of her garage door on the Smart Life app, emphasizing convenience and peace of mind.
2. Voice Control
The module is compatible with Amazon Alexa and Google Assistant. Link your Smart Life/Tuya Smart account to your voice assistant app to enable voice commands.
- Example Commands:
- "Alexa, open the garage door."
- "Hey Google, close the garage."

Image: A person interacting with a smart speaker to control the garage door, illustrating the voice command feature.

Image: A driver using voice commands to open the garage door, showcasing convenience for hands-free operation.
3. Timing Function (Schedules)
Set schedules for your garage door to open or close automatically at specific times. This is useful for daily routines or security.
- In the app, navigate to the device settings and find the "Schedule" or "Timing" option.
- Add new schedules, specifying the time, action (open/close), and repetition (e.g., daily, weekdays).
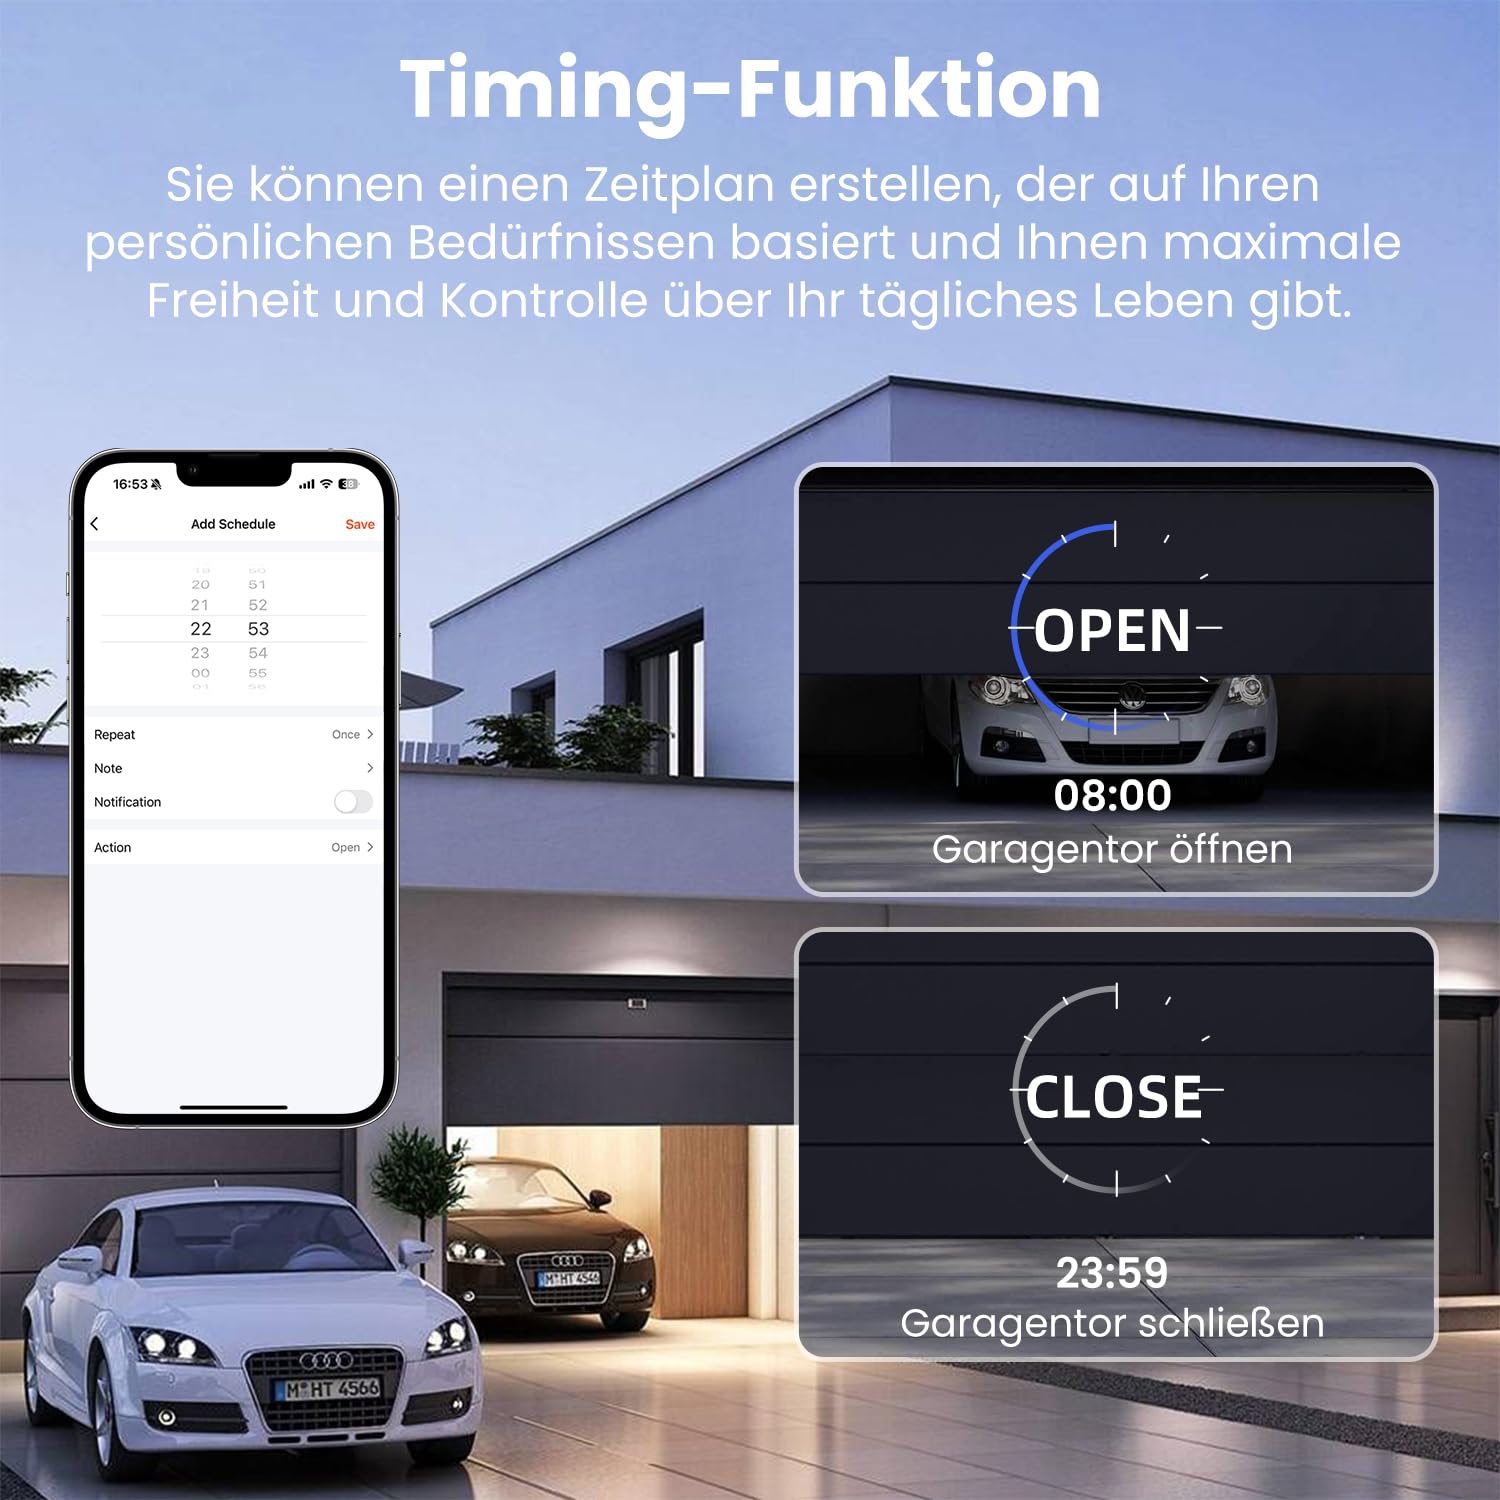
Image: A screenshot of the Smart Life app showing the interface for setting up timed schedules for garage door operation.

Image: An illustration depicting a garage door automatically opening in the morning and closing at night according to a pre-set schedule.
4. Historical Recording
The app keeps a record of all garage door open and close events, allowing you to review the history at any time.

Image: A smartphone screen displaying a log of past garage door opening and closing events, providing a history of operations.

Image: A person reviewing the historical log of garage door activity on their smartphone, emphasizing security and monitoring features.
5. Device Sharing
You can share control of the garage door module with family members or trusted individuals through the Smart Life/Tuya Smart app.

Image: An illustration showing how to share device control with multiple users through the app, enabling family access.
Maintenance
The AVATTO Smart WiFi Garage Door Opener Module requires minimal maintenance.
- Cleaning: Wipe the module with a dry, soft cloth. Do not use liquid cleaners or aerosols.
- Sensor Check: Periodically check the door sensor to ensure it is clean, properly aligned, and securely mounted.
- Firmware Updates: Keep the Smart Life/Tuya Smart app updated to receive the latest firmware for the module, which may include performance improvements and new features.
Troubleshooting
| Problem | Possible Cause | Solution |
|---|---|---|
| Module not connecting to WiFi. | Incorrect WiFi password; 5GHz WiFi network; module too far from router; router issues. | Ensure correct 2.4GHz WiFi password. Move module closer to router. Restart router. Try pairing again. |
| Garage door not responding to commands. | Incorrect wiring (S1/S2); power issue; app not connected to module. | Check S1/S2 wiring to garage door opener. Verify module has power. Ensure app shows module as online. |
| Door status (open/closed) is incorrect in app. | Door sensor misaligned or faulty; S3/S4 wiring issue. | Check door sensor alignment and ensure it's securely mounted. Verify S3/S4 wiring. |
| Voice control not working. | Smart Life/Tuya account not linked to voice assistant; incorrect device name; internet connectivity issues. | Ensure accounts are linked. Use the exact device name configured in the app. Check internet connection. |
Specifications
| Feature | Detail |
|---|---|
| Model Number | GDS16 |
| Input Voltage | AC100-240V, 50/60Hz |
| Wireless Protocol | WiFi IEEE 802.11 b/g/n (2.4GHz only) |
| Operating Frequency | 2.412 GHz - 2.484 GHz |
| Operating Temperature | -10°C to 40°C |
| Dimensions (L x W x H) | 39 x 39 x 19.4 mm (1.54 x 1.54 x 0.76 inches) |
| IP Protection | IP20 |
| Current Rating | 10 Ampere |
| Contact Type | Working Contact |
| Mounting Type | Panel Mounting |
| Actuator Type | Push Button |
| Contact Material | Copper |

Image: A diagram illustrating the precise dimensions of the AVATTO Smart WiFi Garage Door Module.
Warranty and Support
For warranty information and technical support, please refer to the official AVATTO website or contact their customer service directly. Keep your purchase receipt as proof of purchase.
AVATTO Official Store: Visit AVATTO Store on Amazon
Related documentsGDS16


Ask a question about this manual
Ask about setup, troubleshooting, compatibility, parts, safety, or missing instructions. Manuals+ will review the question and use this page’s manual context to help answer it.