Introduction
This user manual provides detailed instructions for the safe and effective operation, installation, and maintenance of your FirstPower Pro 2 Bank Marine Battery Charger 5X2. This 10A (5A/Bank) 12V waterproof onboard battery charger is designed for marine, boat, starter, and deep-cycle batteries, including SLA/AGM, Lithium (LiFePO4), and Calcium types. Please read this manual thoroughly before using the product.
Safety Information
Always prioritize safety when handling electrical equipment and batteries. Failure to follow these instructions may result in electric shock, fire, or serious injury.
- Ensure the charger is disconnected from the AC power outlet before making or breaking connections to the battery.
- Use the charger only for 12V lead-acid (SLA/AGM, Calcium) and 12V Lithium (LiFePO4) batteries. Do not use for other battery types.
- Operate in a well-ventilated area. Batteries can produce explosive gases.
- Avoid open flames or sparks near the battery during charging.
- Wear eye protection and gloves when working with batteries.
- If battery acid comes into contact with skin or eyes, flush immediately with water and seek medical attention.
- Do not immerse the charger in water beyond its IP68 rating. While waterproof, proper installation is crucial.
- Keep out of reach of children.
- Do not attempt to disassemble or repair the charger. Refer all servicing to qualified personnel.
Product Overview
The FirstPower Pro 5X2 Marine Battery Charger is a robust and intelligent charging solution designed for demanding marine environments. It features two independent charging banks, each delivering 5A, for a total output of 10A.
Key Features:
- Dual Bank Charging: Simultaneously charges and maintains two 12V batteries.
- Multi-Battery Compatibility: Supports 12V SLA/AGM, Lithium (LiFePO4), and Calcium batteries.
- IP68 Waterproof: Fully-sealed design for reliable operation in harsh marine conditions.
- 24/7 Onboard Charging: Designed to be continuously plugged in without overcharging.
- Force Mode: Capable of charging deeply discharged batteries (down to 0V).
- Auto Repair Mode: Automatically attempts to repair old, idle, damaged, stratified, or sulfated 12V batteries.
- Advanced Diagnostics: Provides indicators for Over Voltage, Bad Battery, Over Temperature, and Reverse Connection.
- Thermal Compensation: Adjusts charging parameters based on ambient temperature to prevent over- or under-charging.
- 5-Grid Power Display: Visual indication of battery charge level (20%, 40%, 60%, 80%, 100%).

Image: The FirstPower Pro 5X2 Marine Battery Charger, showcasing its compact and rugged design.
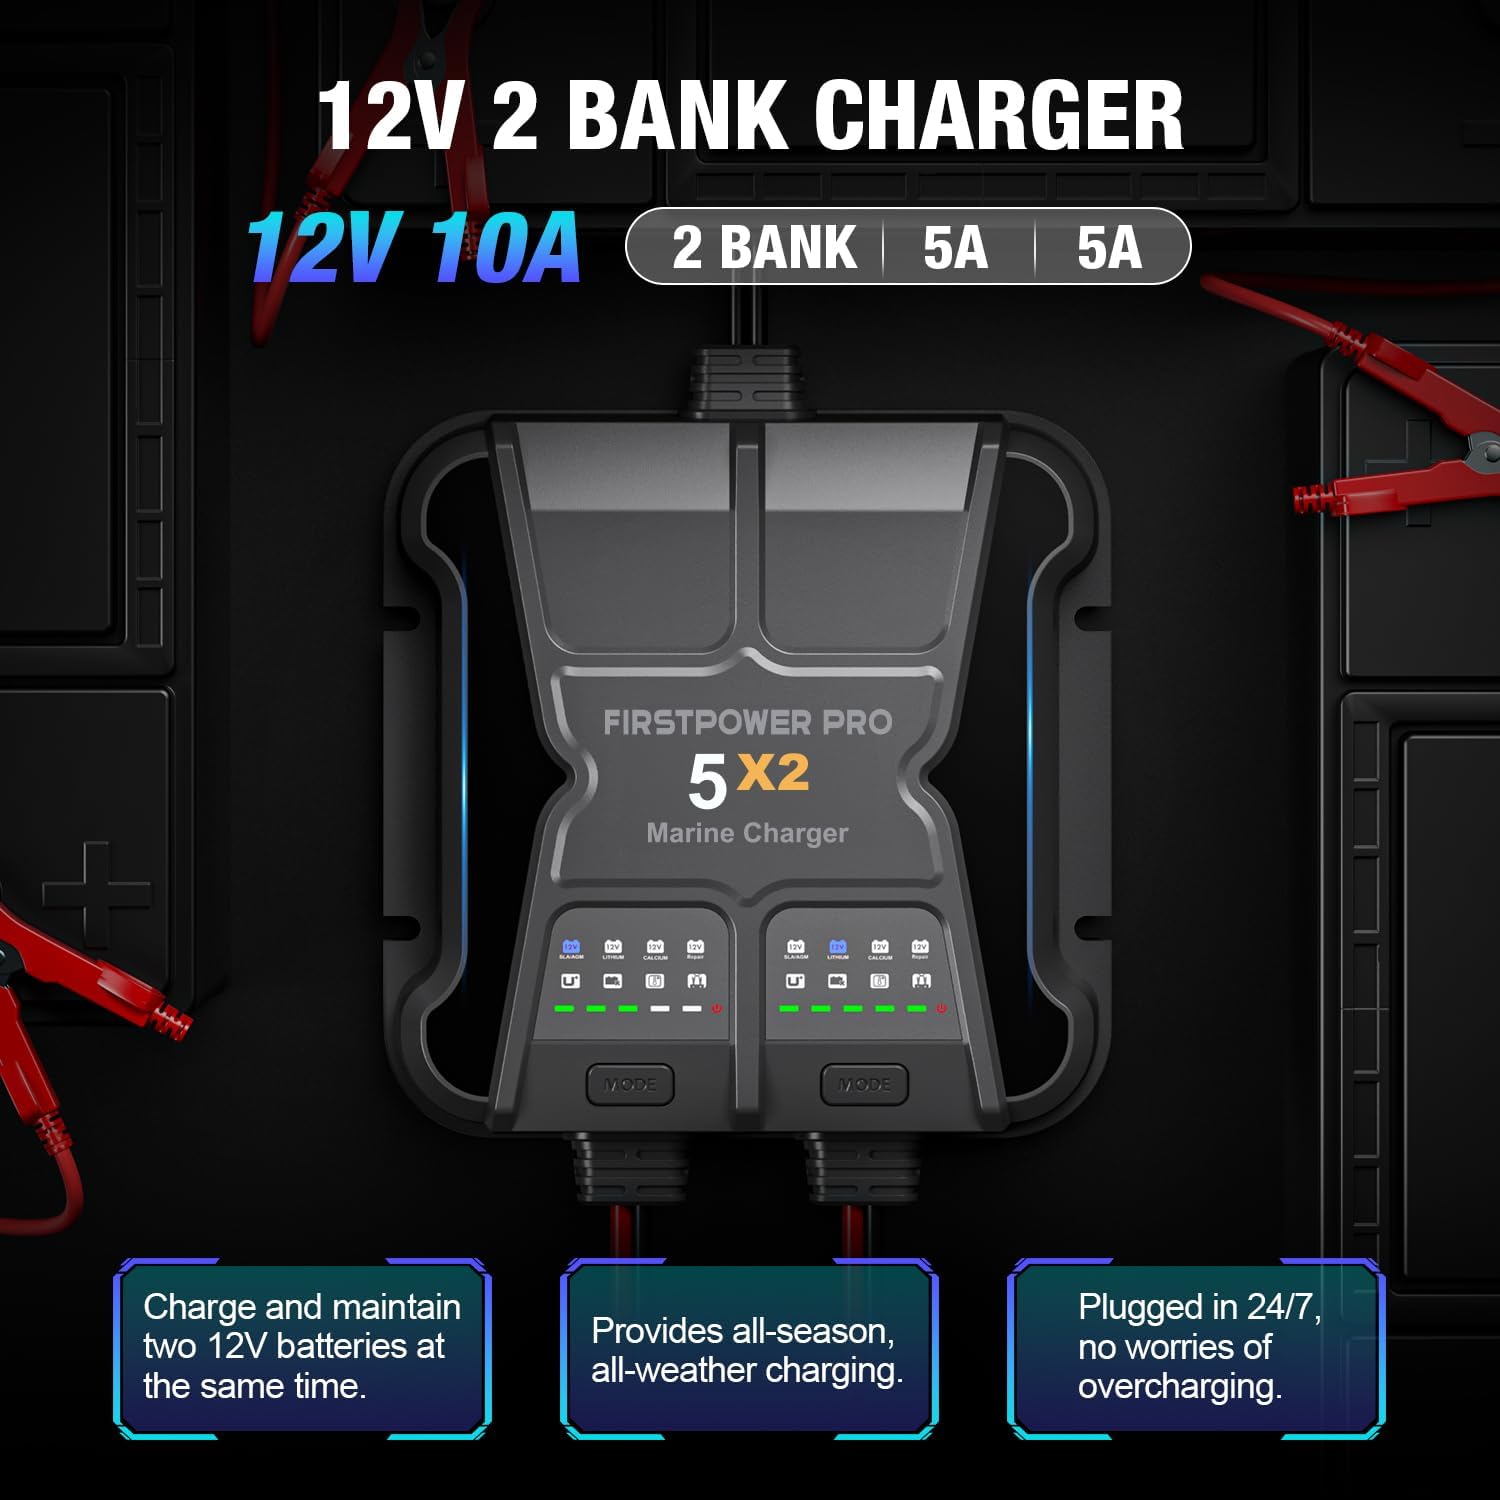
Image: Illustration of the 12V 2 Bank Charger, highlighting its 10A total output (5A per bank) and ability to charge two 12V batteries simultaneously.

Image: The charger partially submerged in water, illustrating its IP68 waterproof and fully-sealed design, suitable for marine environments.
Setup and Installation
Before installation, ensure you have all components as listed in the "What's in the Box" section. The charger is designed for permanent onboard installation.
What's in the Box:
- 1x FirstPower Pro 5X2 Marine Charger
- 2x Battery Clips
- 2x Battery Connectors
- 2x Spare Fuses
- 4x Screws (for mounting)
- 1x User Manual
- 1x Portable Bag

Image: A visual representation of all items included in the product packaging, including the charger, cables, clips, connectors, fuses, screws, manual, and bag.
Mounting the Charger:
Select a suitable, secure location for mounting the charger. Ensure it is away from direct heat sources and allows for proper cable routing. Use the provided screws to securely fasten the charger to a stable surface.
Connecting to Batteries:
Follow these steps carefully to connect the charger to your batteries:
- Plug the AC power plug into a standard wall socket. Ensure the socket is easily accessible.
- Connect the battery clips or connectors to your battery terminals. Ensure correct polarity: Red (+) to positive terminal, Black (-) to negative terminal.
- Select the suitable mode via the "MODE" button. The charger will automatically return to the last selected mode upon reconnection.
- Connect the battery to the charger via the appropriate cable.
Safety Warning: If you need to stop charging, always unplug the power plug from the AC socket before disconnecting the battery.
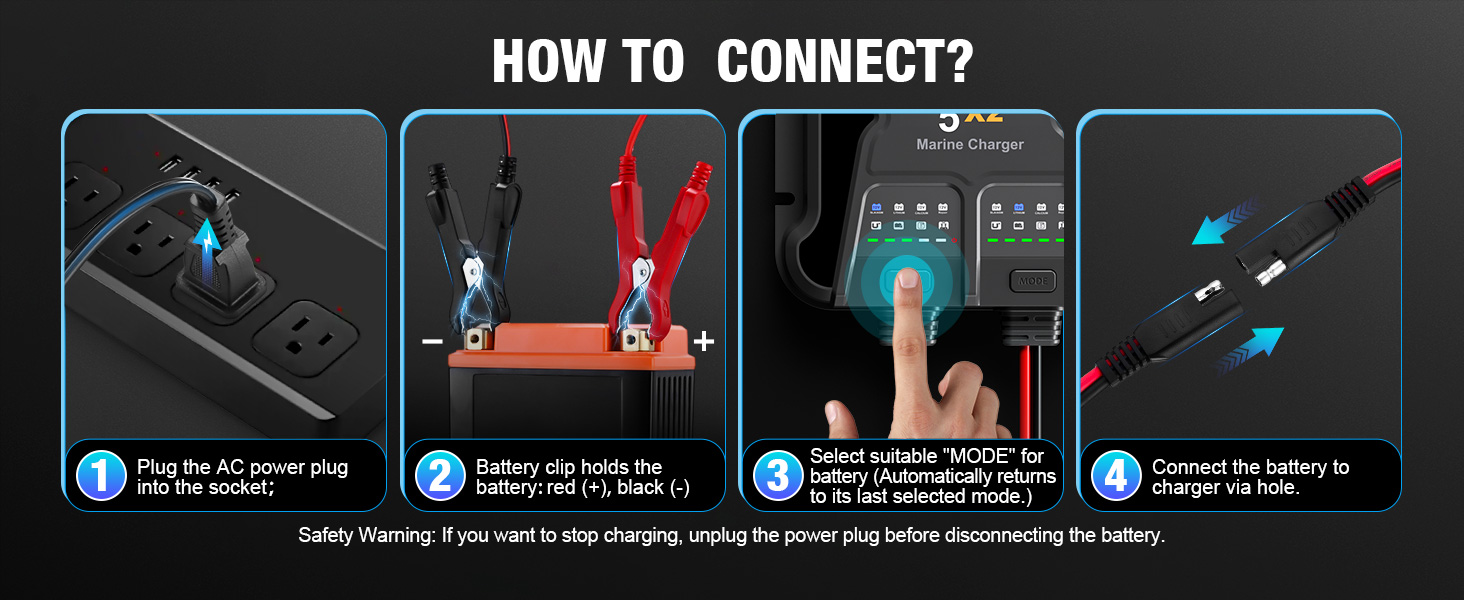
Image: A step-by-step visual guide on how to connect the charger to a battery and power source.
Operating Instructions
Once connected, the charger will begin its charging process. Each bank operates independently.
Charging Modes:
The charger supports three distinct charging modes. Press the "MODE" button on each bank to cycle through the available options:
- 12V SLA/AGM: For flooded, wet cell, gel, enhanced flooded, maintenance-free, and AGM batteries.
- 12V LITHIUM: Specifically for 12V Lithium-ion (LiFePO4) batteries.
- 12V CALCIUM: For 12V Calcium batteries.
The charger automatically remembers the last selected mode for each bank.

Image: Display of the three charging modes: 12V SLA/AGM, 12V LITHIUM, and 12V CALCIUM, with descriptions of their intended battery types.
Force Mode (Charging Dead Batteries):
If a battery is deeply discharged (below 1V), the charger may not automatically initiate charging. To manually begin charging a dead battery:
- Ensure the charger is connected to the battery and power.
- Press and hold the "MODE" button for 5 seconds on the respective bank. This will force the charger to attempt to charge the battery.

Image: A visual guide demonstrating how to activate Force Mode by pressing and holding the "MODE" button to charge batteries detected down to 0-Volt.
Auto Repair Mode & Advanced Diagnostics:
The charger features an automatic repair function and advanced diagnostic indicators:
- Auto Repair Mode: When the "12V Repair" light illuminates, the charger automatically initiates a repair cycle for old, idle, damaged, stratified, or sulfated 12V batteries. No user operation is required.
- Advanced Diagnostics: The charger provides visual feedback for potential issues:
- Over Voltage: Check if the battery is 12V and the charging mode is correct.
- Bad Battery: The battery may be shorted or not charging. Have the battery checked by a professional.
- Over Temperature: Charging will stop if the temperature reaches 100°C. Charging will automatically restart when the unit cools down.
- Reverse Connection: The positive and negative polarity of the battery clip are reversed. Correct Red (+) to positive, Black (-) to negative.
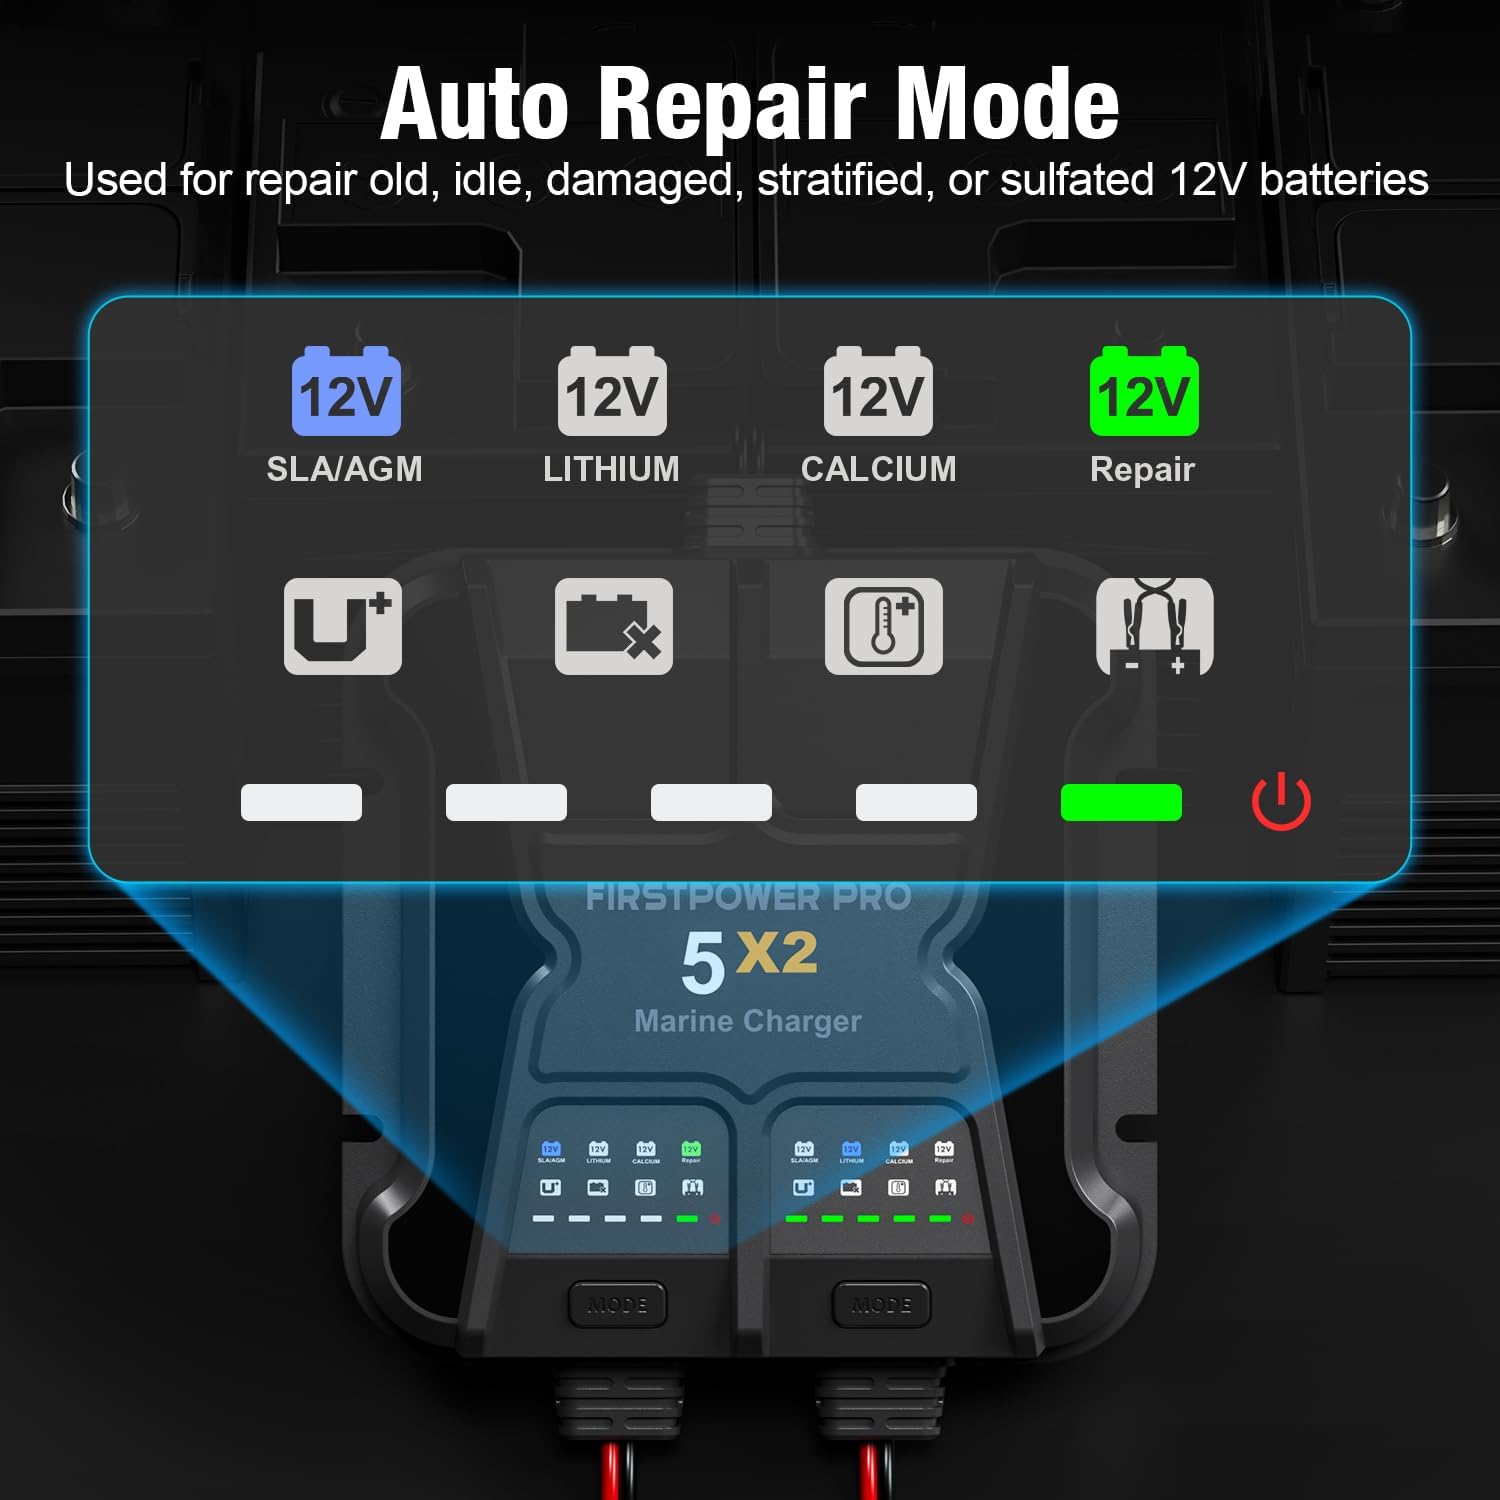
Image: Indicators for Auto Repair Mode, showing the 12V SLA/AGM, Lithium, Calcium, and Repair lights.

Image: Visual representation of the advanced diagnostic indicators for Over Voltage, Bad Battery, Over Temperature, and Reverse Connection, along with their meanings.
Maintenance
The FirstPower Pro 5X2 charger requires minimal maintenance due to its robust, sealed design. However, regular checks can ensure optimal performance and longevity.
- Cleaning: Periodically wipe the exterior of the charger with a soft, damp cloth. Do not use harsh chemicals or abrasive cleaners.
- Cable Inspection: Regularly inspect all cables and connectors for any signs of damage, fraying, or corrosion. Replace damaged components immediately.
- Terminal Maintenance: Ensure battery terminals are clean and free of corrosion for efficient charging.
- Storage: When not in use for extended periods, store the charger in a cool, dry place.
Troubleshooting
If you encounter issues with your charger, refer to the following common problems and solutions:
| Problem | Possible Cause | Solution |
|---|---|---|
| Charger not turning on/no lights | No AC power; Faulty power outlet; Internal fault. | Check AC power connection and outlet. Try a different outlet. If still no power, contact support. |
| Battery not charging | Incorrect mode selected; Poor battery connection; Battery too deeply discharged; Bad battery. | Verify correct charging mode. Check battery connections for secure contact and correct polarity. Use Force Mode for deeply discharged batteries. If "Bad Battery" indicator is on, have battery checked. |
| "Reverse Connection" indicator on | Battery clips/connectors are reversed. | Disconnect from AC power, then correct the battery connections: Red (+) to positive, Black (-) to negative. Reconnect AC power. |
| "Over Temperature" indicator on | Charger is overheating. | Ensure adequate ventilation around the charger. Charging will resume automatically once cooled. |
| "Over Voltage" indicator on | Battery voltage is too high for the selected mode or battery type. | Confirm the battery is a 12V battery and the correct charging mode is selected for its type. |
For issues not listed here, or if troubleshooting steps do not resolve the problem, please contact FirstPower Pro customer support.
Specifications
| Model Number | ICM5A |
| Input Voltage | Standard AC (not specified in input, common for chargers) |
| Output Voltage | 12 Volts DC |
| Output Current | 10A (5A per bank) |
| Battery Types Supported | 12V SLA/AGM, 12V Lithium (LiFePO4), 12V Calcium |
| Waterproof Rating | IP68 |
| Product Dimensions | 6.5 x 6.5 x 2 inches (165mm x 165mm x 55mm) |
| Item Weight | 4.6 pounds |
| Color | Gray |
| Manufacturer | FirstPower Pro |
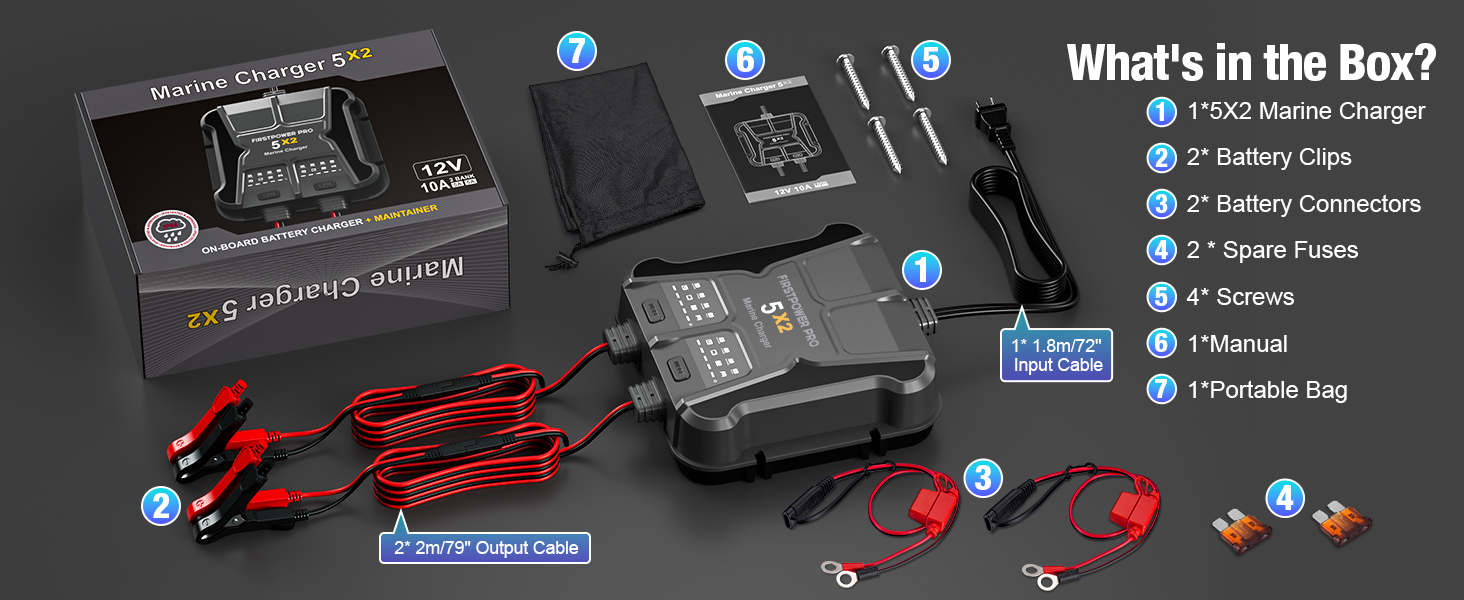
Image: A diagram illustrating the precise measurements of the FirstPower Pro 5X2 Marine Battery Charger.
Warranty and Support
Your FirstPower Pro 5X2 Marine Battery Charger is backed by a comprehensive warranty.
- Warranty Period: The charger comes with a 3-YEAR WARRANTY.
- Customer Support: For technical assistance, warranty claims, or any questions regarding your product, please contact FirstPower Pro customer service. Refer to the product packaging or the official FirstPower Pro website for contact details.
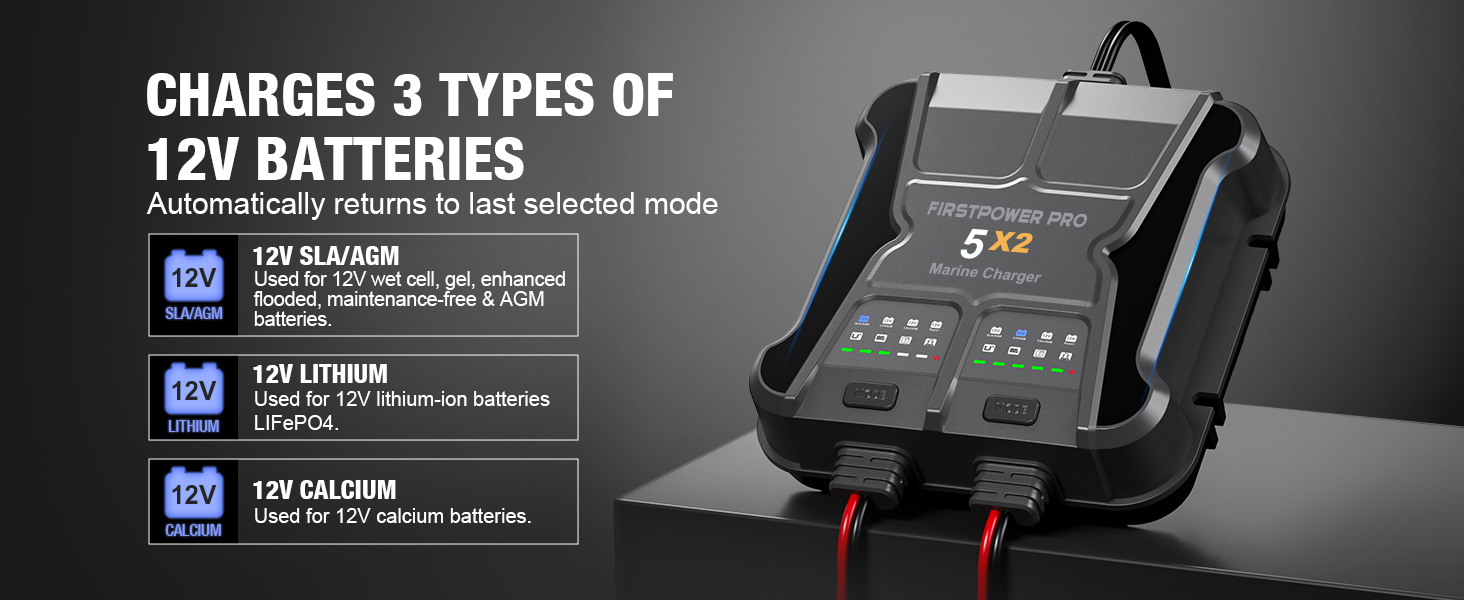
Image: A visual representation of the 3-Year Warranty provided for the charger.


