1. Introduction
This manual provides detailed instructions for the installation, operation, and maintenance of your Fookoo 2 Magnetic Solar Wireless Backup Camera System. Designed for ease of use and versatility, this system enhances driving safety by providing clear rear and side views for various vehicles, including cars, SUVs, RVs, trucks, and campers.

Overview of the Fookoo 7-inch Magnetic Solar Wireless Backup Camera System.
2. Product Features
- 1-Minute DIY Installation: Features a strong magnetic base and built-in battery for quick, drill-free attachment to metallic surfaces.
- Solar Panel & Rechargeable 9600mAh Battery: Offers extended operation time with solar-assisted charging and a high-capacity internal battery.
- Lower Consumption, Longer Working Time: Advanced technology for efficient power usage, including automatic sleep mode when the screen is off.
- 7-inch IPS Touchscreen Monitor: Provides a 1080P HD display with intuitive touch controls and a dual-split screen mode for simultaneous camera views.
- Dual-antenna & 2.4GHz Wireless Signal: Ensures stable, delay-free signal transmission up to 200ft in open areas, supporting speeds up to 102 mph.
- IP69 Waterproof Camera with Night Vision: Durable camera with a 130-degree viewing angle, equipped with 7 infrared lights for clear night vision.
- Loop Record & Parking Assistance: Supports video recording to an SD card (32-128GB, not included) and features adjustable parking lines for safer maneuvering.
- Versatile Mounting Options: Monitor can be mounted via windshield suction cup or U-shaped bracket.
3. What's in the Box
Verify that all components are present upon unboxing:
- 7" Monitor
- Solar Magnetic Camera (x2)
- Car Charger with USB Port
- Type-C Cable & Plug (x2)
- Installation Kit
- Sunshade
- Hardwired Power Cord
- Antenna (x4)
- Suction Cup Mount
- U-shaped Bracket
- Instructions Manual
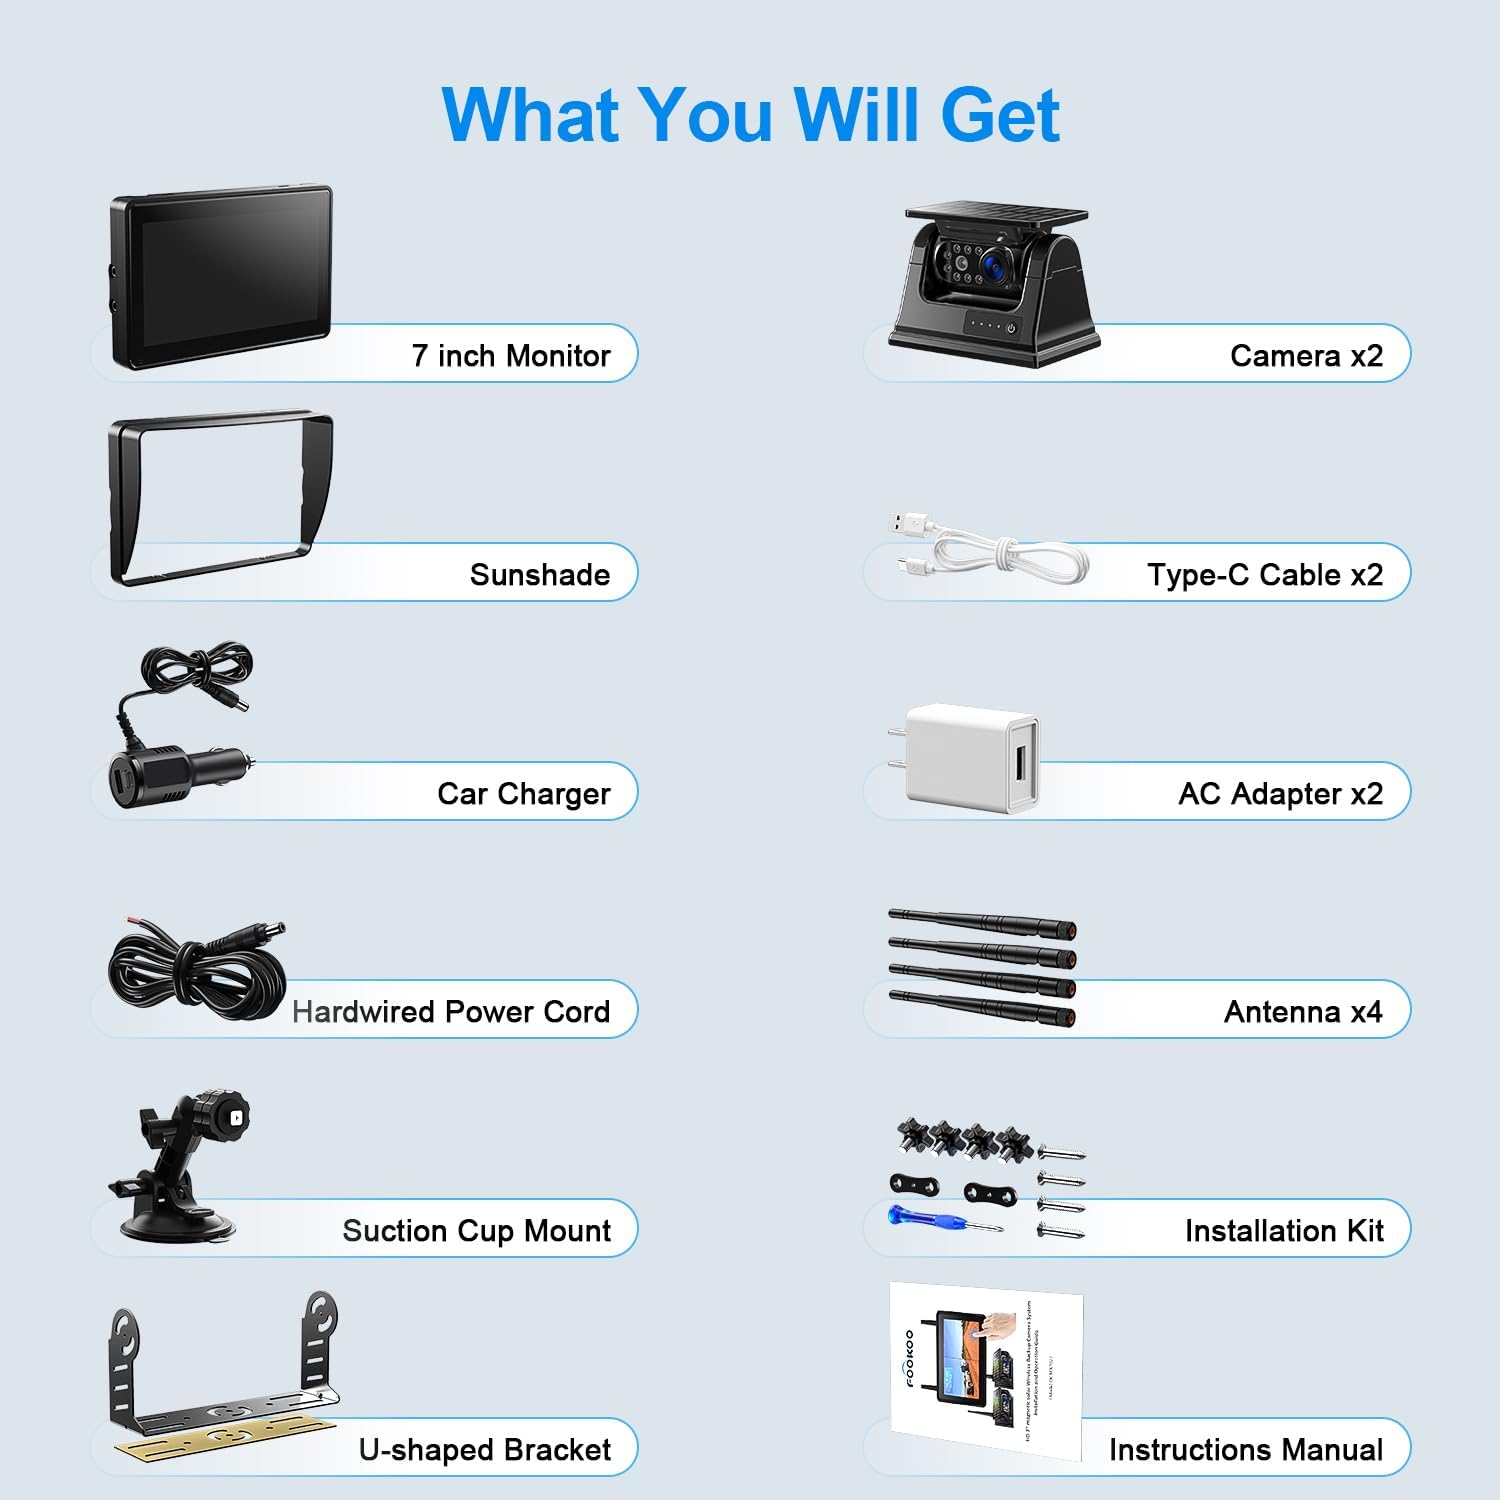
All components included in the Fookoo 2-Cam system package.
4. Setup & Installation
4.1 Camera Installation (1-Minute DIY)
- Charge the Camera: Before first use, fully charge the camera using the provided Type-C cable and charger.
- Power On Camera: Press the power button on the camera to turn it on.
- Magnetic Attachment: Place the camera on any metallic surface of your vehicle (e.g., rear bumper, trailer hitch, side panel). The strong magnetic base will secure it without drilling.
- Adjust Angle: The camera features an up-down adjustable and wide viewing angle (130 degrees). Adjust as needed for optimal view.

Simple three-step installation process for the magnetic solar camera.
4.2 Monitor Installation
The 7-inch IPS touchscreen monitor offers two primary mounting options:
- Suction Cup Mount: Attach the suction cup mount to your windshield or dashboard.
- U-shaped Bracket: Use the U-shaped bracket for a more permanent dashboard installation.
After mounting, plug the car charger into your vehicle's cigarette lighter socket. The monitor will automatically turn on and display the camera image.

Choose between suction cup or U-shaped bracket for monitor placement.
4.3 Initial Pairing (if needed)
The system is typically pre-paired. If the camera image does not appear, ensure both the camera and monitor are powered on. Refer to the included instruction manual for specific pairing steps if necessary.
5. Operating Instructions
5.1 Touchscreen Operation
The 7-inch IPS monitor features a sensitive touchscreen for easy navigation. Simply touch the screen to access functions and settings. One touch wakes up the system from sleep mode.

The 7-inch Full HD 1080P touchscreen monitor offers intuitive operation.
5.2 Dual-Split Screen Mode
The monitor supports a dual-split screen mode, allowing you to view feeds from two cameras simultaneously. This feature is particularly useful for reducing blind spots and monitoring different angles of your vehicle or trailer.

The monitor supports dual-split screen, parking assistance, loop recording, and image flip functions.
5.3 Night Vision
The camera is equipped with 7 infrared lights and a photoreceptor. In low ambient light conditions, the infrared lights automatically activate to provide clear night vision, ensuring visibility even in darkness.
5.4 Loop Recording & Parking Assistance
- Loop Recording: Insert a compatible SD card (32-128GB, sold separately) into the monitor to enable loop recording. This function continuously records driving conditions, overwriting the oldest footage when the card is full. Recorded videos can be played back directly on the monitor.
- Parking Lines: The system provides adjustable parking lines on the display to assist with safer and faster parking maneuvers.
5.5 Power Management
The camera features a low-power consumption design. When the monitor screen is turned off, the camera automatically enters sleep mode to conserve battery. When the monitor is turned back on, the camera automatically reactivates. This eliminates the need for manual power cycling of the camera.
6. Maintenance
- Charging: The camera's 9600mAh battery is primarily charged via the integrated solar panel. For faster or supplemental charging, use the provided Type-C cable and charger.
- Waterproof Rating: The camera has an IP69 waterproof rating, making it resistant to water and dust. No special precautions are needed for car washes or rain.
- Cleaning: Gently clean the camera lens and monitor screen with a soft, dry cloth. Avoid abrasive cleaners.
- Antennas: Ensure the dual antennas on both the camera and monitor are securely attached for optimal wireless signal performance.

The camera features a built-in 9600mAh battery and solar panel for extended operation.

Key features of the solar rechargeable camera, including its magnetic base and night vision capabilities.
7. Troubleshooting
| Problem | Possible Cause | Solution |
|---|---|---|
| No image on monitor | Camera or monitor not powered on; signal interference; camera out of range; not paired. | Ensure both devices are powered. Check antenna connections. Move camera closer to monitor. Re-pair devices if necessary (refer to full manual). |
| Image flickering or unstable | Weak signal; electromagnetic interference. | Adjust camera/monitor position for better line of sight. Avoid placing near strong electrical devices. |
| Camera battery drains quickly | Insufficient solar charging; frequent use in low light (night vision). | Ensure solar panel is clean and exposed to direct sunlight. Charge via Type-C cable more frequently. |
| Recording not working | SD card full or not inserted; incompatible SD card; card error. | Insert a compatible SD card (32-128GB). Format the SD card via monitor settings. Replace SD card if corrupted. |
For further assistance, please refer to the comprehensive instruction manual or contact Fookoo customer support.
8. Specifications
| Feature | Detail |
|---|---|
| Model | DCM702 7" 2-Cam |
| Monitor Screen Size | 7.1 Inches IPS Touchscreen |
| Video Capture Resolution | 1080p |
| Wireless Signal | 2.4GHz Dual-antenna |
| Camera Battery Capacity | 9600mAh |
| Camera Waterproof Rating | IP69 |
| Camera Viewing Angle | 130 degrees |
| Night Vision | 7 Infrared Lights |
| Supported SD Card | 32-128GB (not included) |
| Product Dimensions | 10.7 x 7.2 x 6.3 inches |
| Item Weight | 6.2 pounds |
| Manufacturer | Fookoo |
9. Warranty & Support
Fookoo offers a 24-month replacement support and lifetime after-sales service for this product. Customer satisfaction is our first priority.
If you encounter any issues, find anything defective, or require assistance, please do not hesitate to reach out to Fookoo customer service. We are online 24 hours a day to provide support.

Fookoo provides 24-month replacement support and lifetime after-sales service.
10. Official Product Video
Official product video demonstrating the Fookoo HD 1080P Magnetic Solar Wireless Backup Camera System in various applications. This video highlights the easy installation, magnetic attachment, and use cases for campers, SUVs, and trucks.
