1. Introduction
Thank you for choosing the Auxmir 20X LED Magnifying Mirror. This manual provides essential information for the safe and effective operation, installation, and maintenance of your new mirror. Please read these instructions thoroughly before use and retain them for future reference.

Image 1.1: Auxmir 20X LED Magnifying Mirror with included tweezers.
2. Safety Information
- Do not expose the mirror to direct sunlight, as reflected sunlight can cause fire.
- Keep out of reach of children.
- Do not immerse the mirror in water or other liquids.
- Use only the specified battery type (3 AAA batteries).
- Remove batteries if the mirror will not be used for an extended period.
- Avoid dropping the mirror or subjecting it to strong impacts.
3. Package Contents
- 1 x Auxmir 20X LED Magnifying Mirror
- 1 x Tweezers (may be included depending on package)
- 1 x User Manual
4. Product Features
- 20X Magnification: Provides extreme detail for precise tasks such as applying makeup, inserting contact lenses, or shaving.
- 3 Lighting Modes: Features white, natural, and warm yellow light to suit various environments and makeup needs.
- Stepless Dimming: Adjustable brightness for optimal illumination in any setting.
- 360° Rotation: Allows for free adjustment to any desired viewing angle.
- Powerful Suction Cup: Securely attaches to smooth, clean, and flat surfaces like ceramic tiles or large mirrors.
- Portable and Compact: Lightweight design (approximately 270g) makes it ideal for travel and small spaces.
- Battery Operated: Requires 3 AAA batteries (not included) for convenient cordless use.

Image 4.1: Internal components and light technology of the mirror.
5. Setup
5.1 Battery Installation
- Locate the battery compartment on the back of the mirror.
- Open the compartment cover.
- Insert 3 AAA batteries, ensuring correct polarity (+/-).
- Close the battery compartment cover securely.
5.2 Mounting the Mirror (Suction Cup)
The mirror can be mounted on any smooth, clean, and flat surface such as ceramic tiles, glass, or stainless steel.
- Clean the Surface: Ensure the desired mounting surface is clean and dry. Use a dry cloth for optimal preparation.
- Attach the Suction Cup: Press the suction cup firmly against the surface. Avoid adding water to the suction cup for optimal adhesion.
- Secure the Mirror: Twist the base clockwise until you hear a "CLICK" to lock the suction cup in place.
- Remove the Mirror: To remove, twist the base counter-clockwise, then pull the release tab on the suction cup.

Image 5.1: Instructions for using the powerful suction cup and 360° rotation.
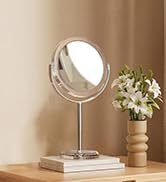
Image 5.2: Step-by-step guide for easy installation and removal.
6. Operating Instructions
6.1 Powering On/Off and Changing Light Modes
- Locate the touch sensor button on the mirror surface.
- Short Press: Press the touch sensor briefly to turn the light on/off and to cycle through the three light colors (white, natural, warm yellow).

Image 6.1: Overview of the 3 color lighting modes.
6.2 Adjusting Brightness (Stepless Dimming)
- Long Press: When the light is on, press and hold the touch sensor to continuously adjust the brightness level. Release when the desired brightness is achieved.

Image 6.2: Instructions for stepless dimming and power-saving features.
6.3 Using 20X Magnification
- For a clear, undistorted image, position your face approximately 10 cm (4 inches) from the mirror.
- Moving too far from the mirror (e.g., beyond 30 cm or 12 inches) may result in a blurry or inverted image due to the high magnification.

Image 6.3: Demonstrating 20X magnification and its applications.
7. Maintenance
- Clean the mirror surface with a soft, dry, lint-free cloth.
- Do not use abrasive cleaners or chemical solvents, as these can damage the mirror or its finish.
- Ensure the mirror is dry before storing or using.
8. Troubleshooting
- Lights not turning on: Check if batteries are correctly installed and not depleted. Replace batteries if necessary.
- Image is blurry or inverted: Ensure you are within the optimal viewing distance of approximately 10 cm (4 inches) from the mirror. High magnification requires close proximity for a clear image.
- Suction cup not holding: Ensure the mounting surface is clean, dry, smooth, and flat. Twist the base clockwise firmly to secure.
9. Specifications
| Feature | Specification |
|---|---|
| Brand | Auxmir |
| Model Number | BM-1410 |
| Color | White |
| Magnification | 20X |
| Diameter | 13 Centimeters |
| Material | Plastic |
| Special Features | 360 Degree Rotation, 20X Magnifying, LED Lights (3 Modes) |
| Item Weight | 270 g |
| Power Source | 3 x AAA Batteries (not included) |
| Product Dimensions (L x W x H) | 17 x 7 x 20.5 cm |
| Country of Origin | China |
For detailed energy efficiency information, please refer to the EPREL database: https://eprel.ec.europa.eu/qr/2182856

Image 9.1: Energy Efficiency Label for Model BM-1410.
10. Warranty and Support
Auxmir products are designed for quality and durability. This product comes with a 3-year warranty. For any issues or support needs, please contact Auxmir customer service. We offer lifetime assistance and 24/7 customer service.

Image 10.1: Auxmir Warranty and Support Information.
11. Disposal Information
Please dispose of the product and its batteries responsibly according to local regulations. Do not dispose of electrical appliances or batteries as unsorted municipal waste. Contact your local authority for information regarding available collection systems.


