
1. Introduction
This manual provides detailed instructions for the installation, operation, and maintenance of your WATERWICH 3-3/8" (85mm) GPS Speedometer and Tachometer 2-in-1 Gauge. This instrument is designed for various vehicles including boats, cars, trucks, motorcycles, and tractors, offering both speed and engine RPM readings in a single unit. Please read this manual thoroughly before installation and use to ensure proper function and safety.
2. Safety Information
- Always disconnect the vehicle's battery before performing any electrical work to prevent short circuits and electrical shock.
- Ensure all wiring connections are secure and properly insulated to prevent damage to the gauge or vehicle's electrical system.
- Do not attempt to modify the gauge. Unauthorized modifications may void the warranty and pose safety risks.
- Consult a qualified technician if you are unsure about any installation or wiring procedures.
3. Product Overview
The WATERWICH 2-in-1 Gauge combines a GPS speedometer and an engine tachometer into a single 85mm (3-3/8") unit. It features a clear display with red LED backlighting for excellent visibility in all lighting conditions, including night driving. The gauge is constructed from durable ABS plastic and stainless steel, offering IP67 waterproof, dustproof, and fogproof protection, along with reverse polarity protection.
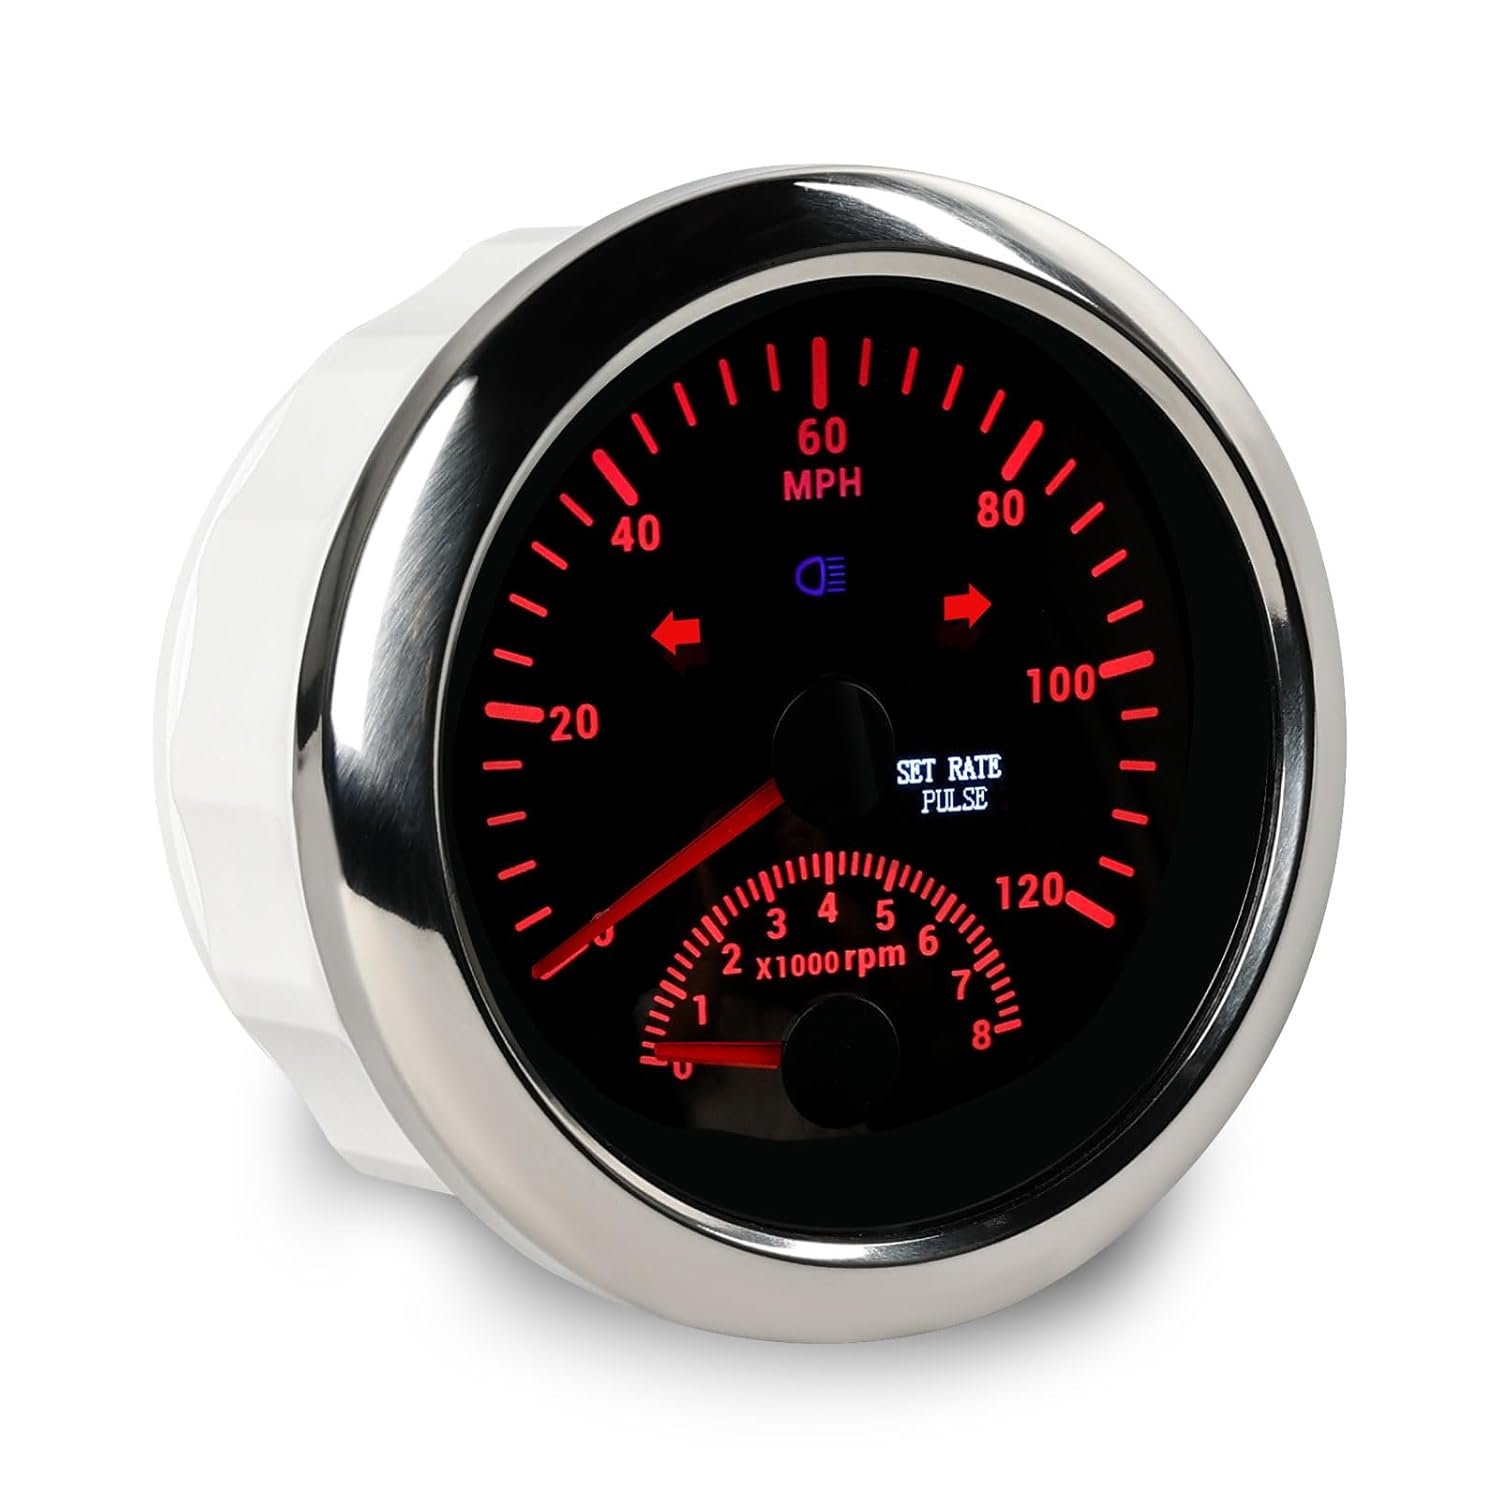
Figure 3.1: Front view of the WATERWICH 3-3/8" 2-in-1 GPS Speedometer and Tachometer Gauge. This image shows the gauge face with speed (MPH) and RPM scales, along with indicator lights.

Figure 3.2: Illustration of the gauge's night visibility. The image displays the gauge in 'Power On', 'Visible Light at Night', and 'Power Off' states, highlighting the clear red LED illumination for easy reading in low-light conditions.
Key Features:
- GPS Speedometer: Displays speed from 0-120 MPH.
- Tachometer: Displays engine RPM from 0-8000 RPM.
- Operating Voltage: 9-32V DC.
- Protection: IP67 waterproof, dustproof, fogproof, and reverse polarity protection.
- Material: ABS plastic and stainless steel bezel.
- Backlight: Red LED for clear night visibility.
- Stepper Motor: Utilizes a high-accuracy stepper motor for precise readings and long life.
4. Installation
4.1 Mounting
- Choose a suitable location on your dashboard or panel with sufficient space for the 85mm (3-3/8") diameter gauge.
- Cut a mounting hole with a diameter of 85mm (3-3/8").
- Insert the gauge into the mounting hole.
- Secure the gauge from the rear using the provided mounting bracket and nuts.
4.2 Wiring Diagram
Refer to the wiring diagram below for correct electrical connections. Ensure all connections are tight and insulated.

Figure 4.1: Rear view of the gauge showing wiring connections and display modes. The image details the 10-pin wiring harness and the button for mode selection.
| Pin No. | Wire Color | Function |
|---|---|---|
| 1 | Black | Ground (-) |
| 2 | Red | 9-32VDC Power (+) |
| 3 | Blue | RPM Signal Input |
| 4 | Yellow | Backlight Control |
| 5 | White | High Beam Indicator |
| 6 | Brown | Buzzer Alarm (-) |
| 7 | Green | Buzzer Alarm (+) |
| 8 | Yellow | Left Turn Indicator |
| 9 | Gray | Right Turn Indicator |
| 10 | White | External Button (for settings) |
Note: The external button (Pin 10) can be used to access and adjust settings. If not using an external button, the small button on the back of the gauge must be used for configuration.
5. Operating Instructions
5.1 Power On/Off
Connect the Red wire to a 9-32V DC power source and the Black wire to ground. The gauge will power on automatically when power is supplied.
5.2 GPS Speedometer Function
Upon power-up, the gauge will display "SEARCH GPS..." as it attempts to acquire a GPS signal. Once a signal is acquired, it will display your current speed in MPH. If no GPS signal is found, it will display "NO GPS SIGNAL".

Figure 5.1: The gauge displaying both GPS speed (0-120 MPH) and engine rotation speed (0-8000 RPM) simultaneously.
5.3 Tachometer Function
Connect the Blue wire to the RPM signal output of your engine. The gauge will display the engine's rotation speed in RPM.
5.4 Setting Parameters (Pulse Ratio, Speed Alarm)
The gauge features a small button on the back (or an external button if connected to Pin 10) for accessing and adjusting settings. Press and hold this button to enter the setting mode. The display will show various options such as "SET RATE PULSE" and "SET SPD ALARM".
- SET RATE PULSE: This setting adjusts the tachometer's pulse ratio to match your engine type (e.g., 2 for 4-cylinder, 3.5 for some older carbureted engines). Incorrect settings can lead to inaccurate RPM readings. Refer to your vehicle's specifications for the correct pulse ratio.
- SET SPD ALARM: This allows you to set a customizable speed alarm value. When the vehicle's speed exceeds this set value, an alarm may sound (if buzzer is connected).
Important: Adjusting settings requires access to the button on the back of the gauge. It is recommended to make all necessary adjustments before permanently securing the gauge in a location where the button is inaccessible.
6. Maintenance
- Clean the gauge face with a soft, damp cloth. Do not use abrasive cleaners or solvents.
- Regularly check wiring connections for corrosion or looseness, especially in marine environments.
- Ensure the gauge's mounting remains secure to prevent vibration damage.
7. Troubleshooting
| Problem | Possible Cause | Solution |
|---|---|---|
| Gauge does not power on | No power supply; incorrect wiring; blown fuse. | Check power (Red wire) and ground (Black wire) connections. Verify fuse in power line. |
| "NO GPS SIGNAL" displayed | Poor GPS reception; obstructed view of sky. | Move to an open area with a clear view of the sky. Ensure no metallic objects are blocking the signal path to the internal GPS antenna. |
| Inaccurate Tachometer reading | Incorrect pulse ratio setting; weak RPM signal. | Adjust the "SET RATE PULSE" setting to match your engine's specifications. Ensure the RPM signal wire (Blue) has a strong, clean signal. For older vehicles, signal conditioning may be required. |
| Backlight not working | Backlight wire (Yellow) not connected or faulty. | Check the connection of the Yellow wire. |
8. Specifications
- Product Dimensions: 4.72 x 4.72 x 3.15 inches (120 x 120 x 80 mm)
- Item Weight: 11.85 ounces (336 Grams)
- Mounting Diameter: 85mm (3-3/8")
- Operating Voltage: 9-32V DC
- Speedometer Range: 0-120 MPH
- Tachometer Range: 0-8000 RPM
- Material: Acrylonitrile Butadiene Styrene (ABS), Stainless Steel
- Waterproof Rating: IP67
- Manufacturer: WATERWICH

Figure 8.1: The gauge highlighting its IP67 waterproof, dustproof, fogproof, and reverse polarity protection features, indicating suitability for harsh environments.

Figure 8.2: This image illustrates the construction of the gauge, emphasizing its ABS plastic and stainless steel components, along with the use of a high-quality stepper motor for accuracy and longevity.
9. Warranty and Support
For warranty information or technical support, please contact WATERWICH customer service through the retailer where the product was purchased or visit the official WATERWICH website. Please have your product model and purchase details available when contacting support.
10. Wide Application
This versatile 2-in-1 gauge is suitable for a broad range of applications, including marine vessels, automobiles, SUVs, trucks, motorcycles, and agricultural tractors, providing essential speed and RPM data.

Figure 10.1: An example of the WATERWICH gauge integrated into a vehicle's dashboard, demonstrating its wide application compatibility.