
EZVALO TL-01
Contents
EZVALO Picture Lights for Wall - Model TL-01 Instruction Manual
Your guide to installation, operation, and maintenance.
1. Introduction
Thank you for choosing the EZVALO Picture Lights. This manual provides essential information for the safe and efficient use of your new lighting system. Please read it thoroughly before installation and operation, and retain it for future reference.
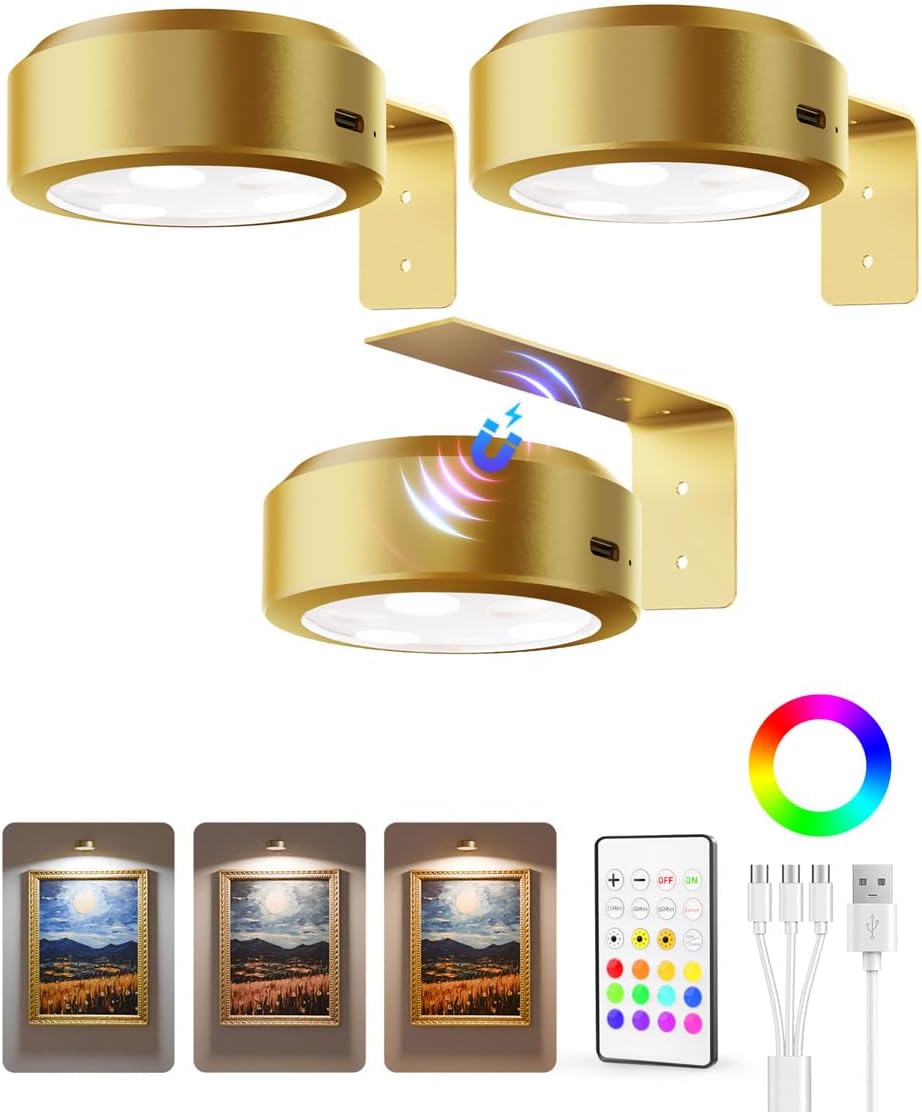
Image 1.1: Overview of EZVALO Picture Lights, showing three lights, a remote control, and a multi-charging cable.
2. Package Contents
Verify that all items are present in your package:
- 3 x Rechargeable Picture Lights
- 3 x Mounting Brackets
- 1 x Remote Control
- 1 x 3-in-1 USB-C Charging Cable
- 6 x Screws
- 3 x Adhesive Tapes
- 1 x User Manual (this document)
3. Specifications
| Feature | Specification |
|---|---|
| Brand | EZVALO |
| Model Number | TL-01 |
| Color | Gold |
| Material | Aluminum, Plastic |
| Product Dimensions | 2.95"L x 2.95"W x 1.18"H |
| Item Weight | 0.48 Kilograms (1.06 pounds) |
| Power Source | Battery Powered (2000mAh Lithium Ion) |
| Voltage | 5 Volts |
| Light Source Type | LED |
| Brightness | 80 Lumens |
| Color Temperatures | 3000K (Warm White), 4200K (Natural White), 6500K (Cool White) |
| RGB Colors | 12 RGB Colors |
| Control Method | Remote Control, Touch Control |
| Special Features | Color Changing, Rechargeable, Timer (15/30/60 min) |
| Installation Type | Semi Flush Mount (Adhesive or Screw) |
| Indoor/Outdoor Usage | Indoor |
4. Charging the Lights
The EZVALO Picture Lights are equipped with a 2000mAh rechargeable battery. Ensure the lights are fully charged before first use.
- Charging Time: Approximately 2.5 hours for a full charge.
- Battery Life: Up to 13.5 hours at maximum brightness, and up to 134 hours at minimum brightness.
Use the provided 3-in-1 USB-C charging cable to charge the lights. Connect the USB-C end to the light's charging port and the USB-A end to a compatible USB power adapter (not included).
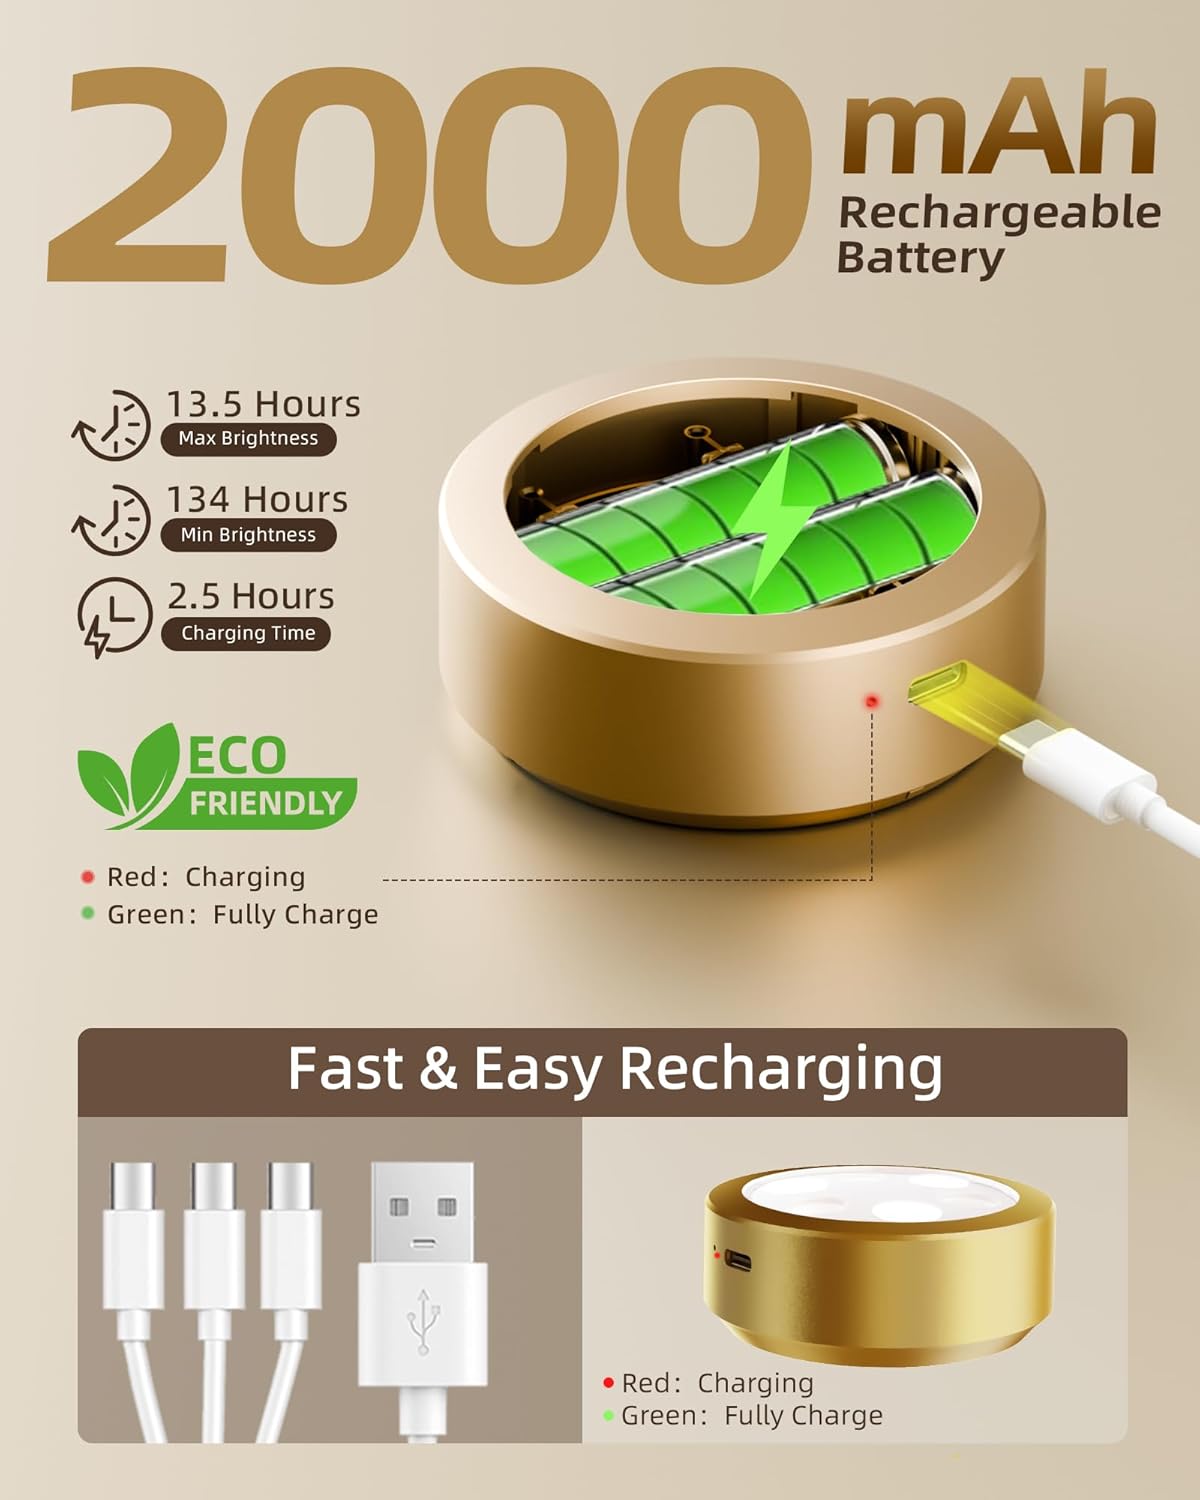
Image 4.1: Visual representation of the 2000mAh rechargeable battery, indicating charging times and battery life at different brightness levels. It also shows the Type-C charging cable.
A red indicator light signifies charging, and a green light indicates a full charge.
5. Installation
The EZVALO Picture Lights offer flexible installation options using either adhesive tape or screws. The light unit attaches magnetically to the installed bracket.

Image 5.1: Detailed steps for both adhesive and screw installation methods, including dimensions of the light and bracket.
Method 1: Adhesive Installation (for Smooth Walls)
- Clean the wall surface thoroughly. Ensure it is dry, flat, and smooth. Any residue may weaken the adhesive bond.
- Remove the protective film from the double-sided adhesive tape on the lamp bracket.
- Stick the lamp bracket firmly to the desired position on the wall. Apply pressure for a few seconds.
- Allow 24 hours for proper adhesion before attaching the light unit.
- Attach the light body magnetically to the installed lamp bracket.
Method 2: Screw Installation (for Rough Walls or Picture Frames)
- Prepare the screws and the lamp bracket.
- Position the lamp bracket at the desired location. Mark the screw holes.
- Use two screws to fix the lamp bracket securely in place.
- Attach the light body magnetically to the installed lamp bracket.
Note: Screw mounting provides the most secure hold but may cause minor damage to the wall or frame. For wall installation, ensure no concealed electrical wires or water pipes are behind the drilling location. For picture frame installation, check your frame material before drilling.
6. Operation
The EZVALO Picture Lights can be controlled via the included remote control or by tapping the light unit.
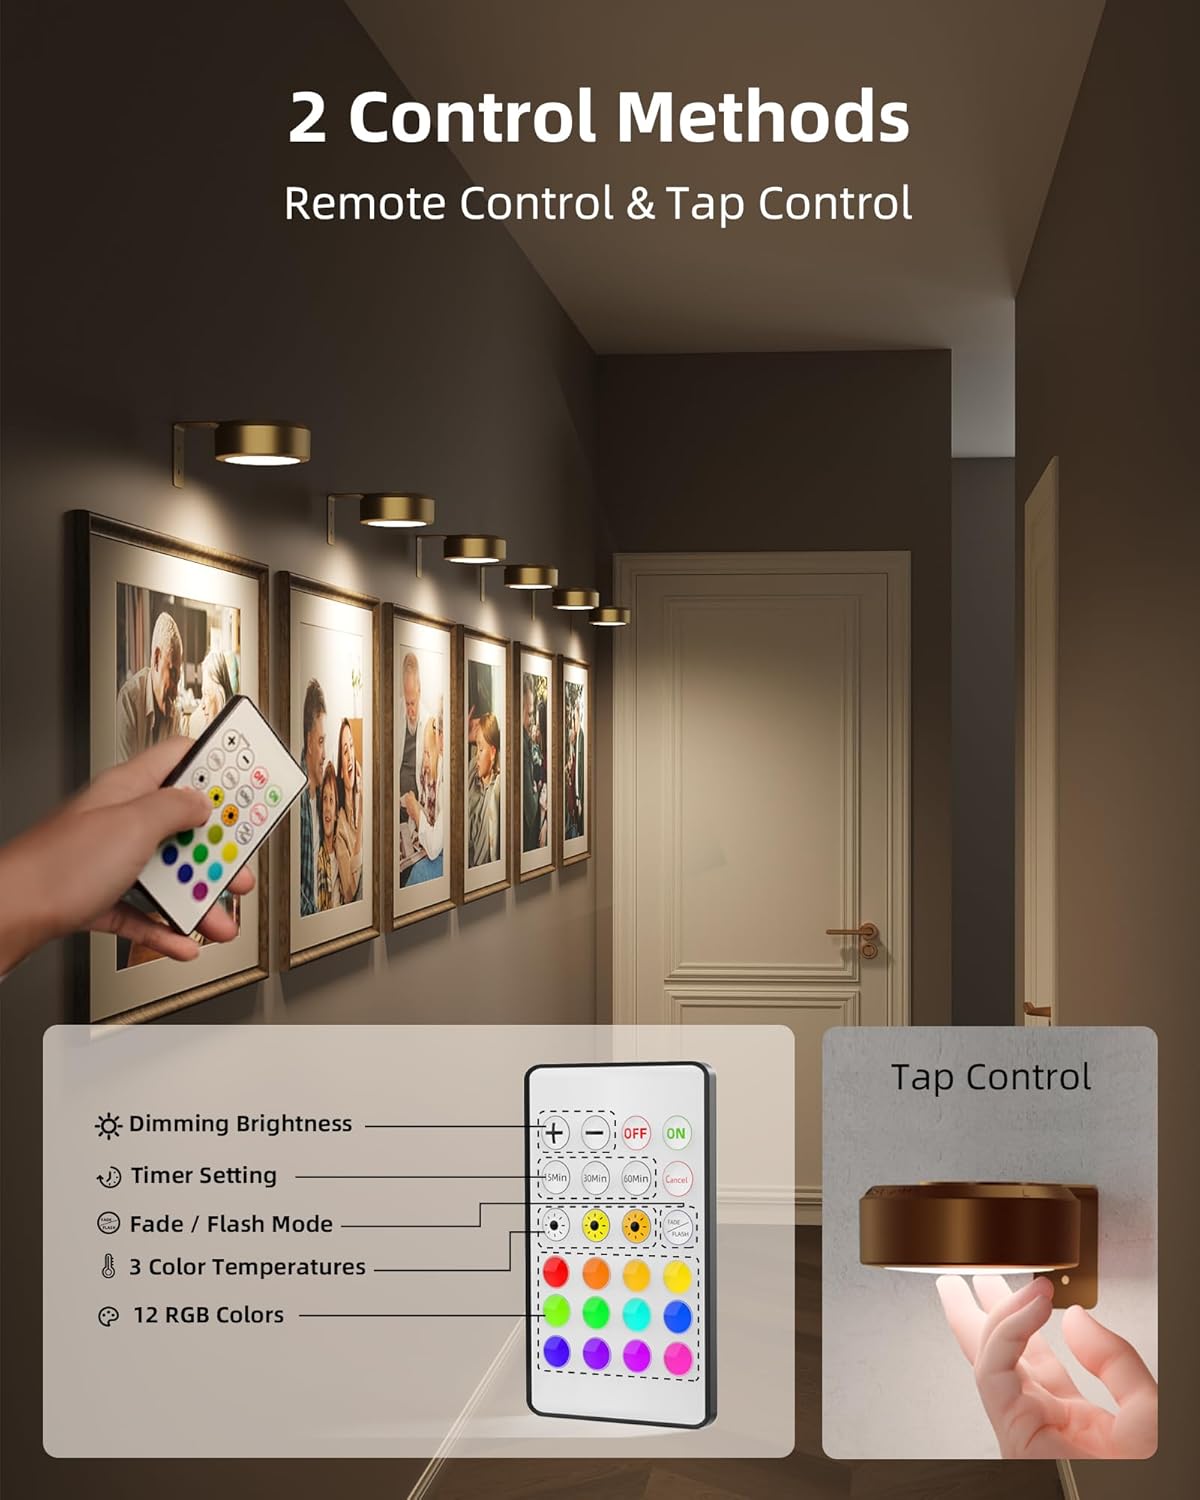
Image 6.1: Remote control layout with buttons for dimming, timer, fade/flash modes, color temperatures, and 12 RGB colors. Also shows a hand tapping the light for control.
6.1 Remote Control Functions
Point the remote control towards the light unit to operate. The remote has a range of approximately 11 feet.
- ON/OFF: Press the ON or OFF button.
- Brightness Adjustment: Use the + and - buttons to adjust brightness from 10% to 100%.
- Color Temperature Selection: Choose between 3000K (Warm White), 4200K (Natural White), and 6500K (Cool White) using the dedicated buttons.
- RGB Colors: Select from 12 distinct RGB colors using the color palette buttons.
- Dynamic Modes:
- Flash Mode: Cycles quickly through the 12 RGB colors.
- Fade Mode: Smoothly transitions between colors and brightness levels.
- Timer Function: Set the light to turn off automatically after 15 minutes, 30 minutes, or 60 minutes using the 15min, 30min, or 60min buttons.
6.2 Tap Control
For basic control, gently tap the lampshade to:
- Turn the light ON/OFF.
- Cycle through different color settings (specific sequence may vary).

Image 6.2: Example of adjustable brightness, showing artwork illuminated at various intensity levels.
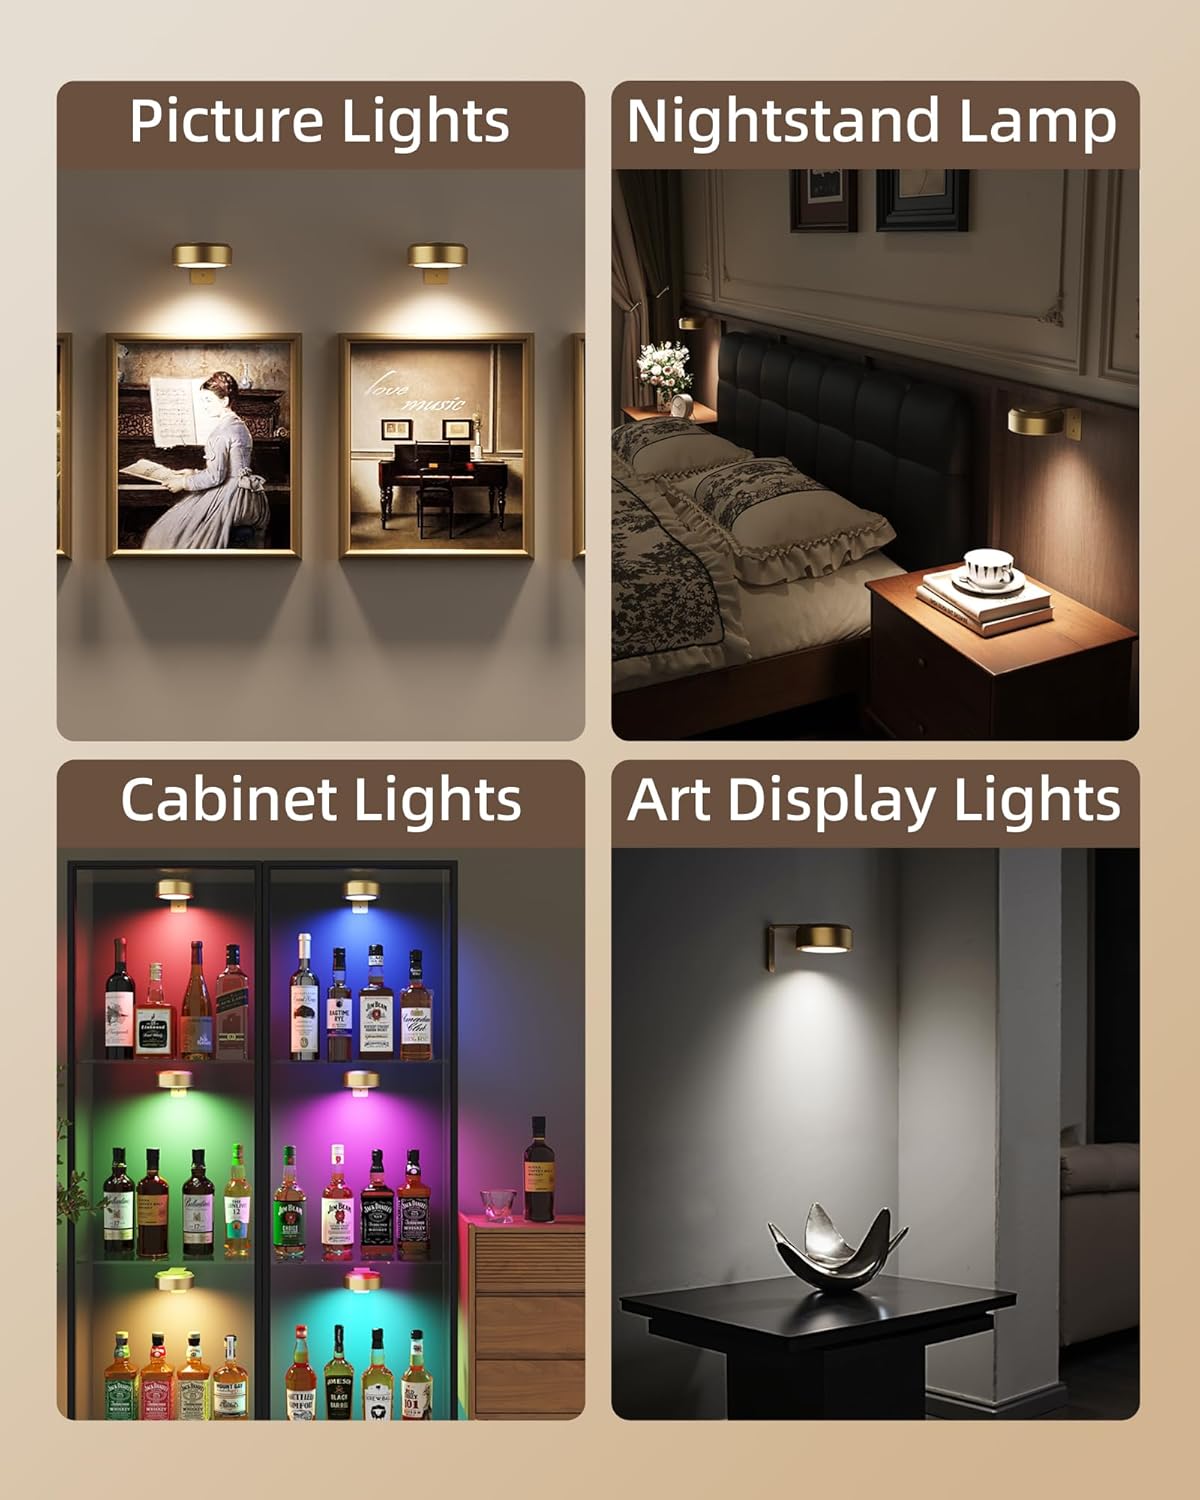
Image 6.3: Examples of product application, including illuminating pictures, serving as a nightstand lamp, cabinet lighting, and general art display lighting.
7. Maintenance
- Cleaning: Wipe the lights with a soft, dry cloth. Do not use abrasive cleaners or solvents.
- Charging: Recharge the lights regularly to maintain battery health, especially if not used for extended periods.
- Storage: Store the lights in a cool, dry place when not in use.
- Water Resistance: These lights are designed for indoor use only and are not water-resistant. Avoid exposure to moisture.
8. Troubleshooting
- Light not turning on: Ensure the battery is charged. If using the remote, check the remote battery and ensure it is pointed directly at the light.
- Remote not responding: Replace the remote control battery. Ensure there are no obstructions between the remote and the light.
- Light falling off: If using adhesive installation, ensure the surface was clean and dry, and sufficient curing time was allowed. For a more secure hold, consider screw installation.
- Inconsistent brightness/color: Fully charge the light. If the issue persists, contact customer support.
9. Safety Information
- Do not disassemble or modify the product.
- Keep out of reach of children.
- Do not expose to extreme temperatures or direct sunlight.
- Use only the provided charging cable or a certified equivalent.
- Dispose of batteries according to local regulations.
10. Warranty and Support
EZVALO products come with a standard manufacturer's warranty. For warranty details, technical support, or any inquiries, please refer to the contact information provided on the product packaging or visit the official EZVALO website.
For further assistance, you may also contact the seller directly through your purchase platform.
Ask a question about this manual
Ask about setup, troubleshooting, compatibility, parts, safety, or missing instructions. Manuals+ will review the question and use this page’s manual context to help answer it.