
Introduction
This manual provides comprehensive instructions for the setup, operation, and maintenance of your Peakeep Projection Alarm Clock, Model MHP6050. Please read this guide thoroughly to ensure proper use and to maximize the features of your device.

Image: Front view of the Peakeep Projection Alarm Clock MHP6050, showing the time 12:59 AM on the main display and projected onto a surface, with a phone charging via USB.
Product Overview
Components
- Main Display: 5.5-inch LED screen with large digits.
- Projection Lens: Projects time onto a ceiling or wall.
- Nightlight: RGB color-changing light bar.
- USB Charging Port: For charging external devices.
- Control Buttons: Located on the back for various settings.
- Focus Wheel: Adjusts projection clarity.
- Power Input: For AC/DC adapter.
- Battery Compartment: For backup batteries.
Controls and Ports

Image: Rear view of the alarm clock, showing the control buttons (DIMMER, TIME SET, 12/24HR, VOLUME, ALARM SET ON/OFF, NIGHTLIGHT ON/OFF, PROJECTION DIMMER, PROJECTION ON/FLIP/OFF), USB ports, and focus wheel.
- DIMMER: Adjusts the brightness of the main LED display.
- TIME SET: Enters time setting mode.
- 12/24HR: Toggles between 12-hour and 24-hour time format.
- VOLUME: Adjusts alarm volume.
- ALARM SET ON/OFF: Enters alarm setting mode and toggles alarm on/off.
- NIGHTLIGHT ON/OFF: Toggles the RGB nightlight on/off.
- PROJECTION DIMMER: Adjusts the brightness of the projected time.
- PROJECTION ON/FLIP/OFF: Toggles projection on/off and flips the projection orientation.
- FOCUS: Wheel to sharpen the projected image.
- 5V IN: Power input port.
- USB OUT: USB charging output port.
Setup
Power Connection
- Connect the provided AC/DC adapter to the "5V IN" port on the back of the clock.
- Plug the adapter into a standard electrical outlet. The clock display will illuminate.
Battery Backup Installation
For backup functionality during power outages, install 2 AAA batteries (not included) into the battery compartment on the back of the clock. This will preserve time and alarm settings and allow the alarm to sound in case of power loss.

Image: Illustration showing the USB charging port in use and the battery backup feature, indicating where AAA batteries are inserted.
Operating Instructions
Setting the Time
- Press and hold the TIME SET button. The hour digits will begin to flash.
- Use the VOLUME buttons (up/down) to adjust the hour.
- Press TIME SET again to confirm the hour and move to minute setting. The minute digits will flash.
- Use the VOLUME buttons to adjust the minutes.
- Press TIME SET once more to save the time and exit setting mode.
- To switch between 12-hour and 24-hour format, press the 12/24HR button.
Setting the Alarm
- Press and hold the ALARM SET ON/OFF button. The alarm hour digits will flash.
- Use the VOLUME buttons to adjust the alarm hour.
- Press ALARM SET ON/OFF again to confirm the alarm hour and move to minute setting. The alarm minute digits will flash.
- Use the VOLUME buttons to adjust the alarm minutes.
- Press ALARM SET ON/OFF once more to save the alarm time.
- To activate or deactivate the alarm, press the ALARM SET ON/OFF button briefly. An alarm icon will appear/disappear on the display.

Image: Depicts a person covering their ears, illustrating the loud alarm feature, with five volume levels (V01-V05) ranging from 55dB to 105dB.
Adjusting Alarm Volume
- While the alarm is sounding or during alarm setting, press the VOLUME buttons to cycle through 5 alarm volume levels (60-108 dB).
Snooze Function
- When the alarm sounds, press the large SNOOZE button on top of the clock to temporarily silence the alarm for 9 minutes.
- The alarm will sound again after the snooze period.
- To turn off the alarm completely, press any other button on the back of the clock.
Projection Feature
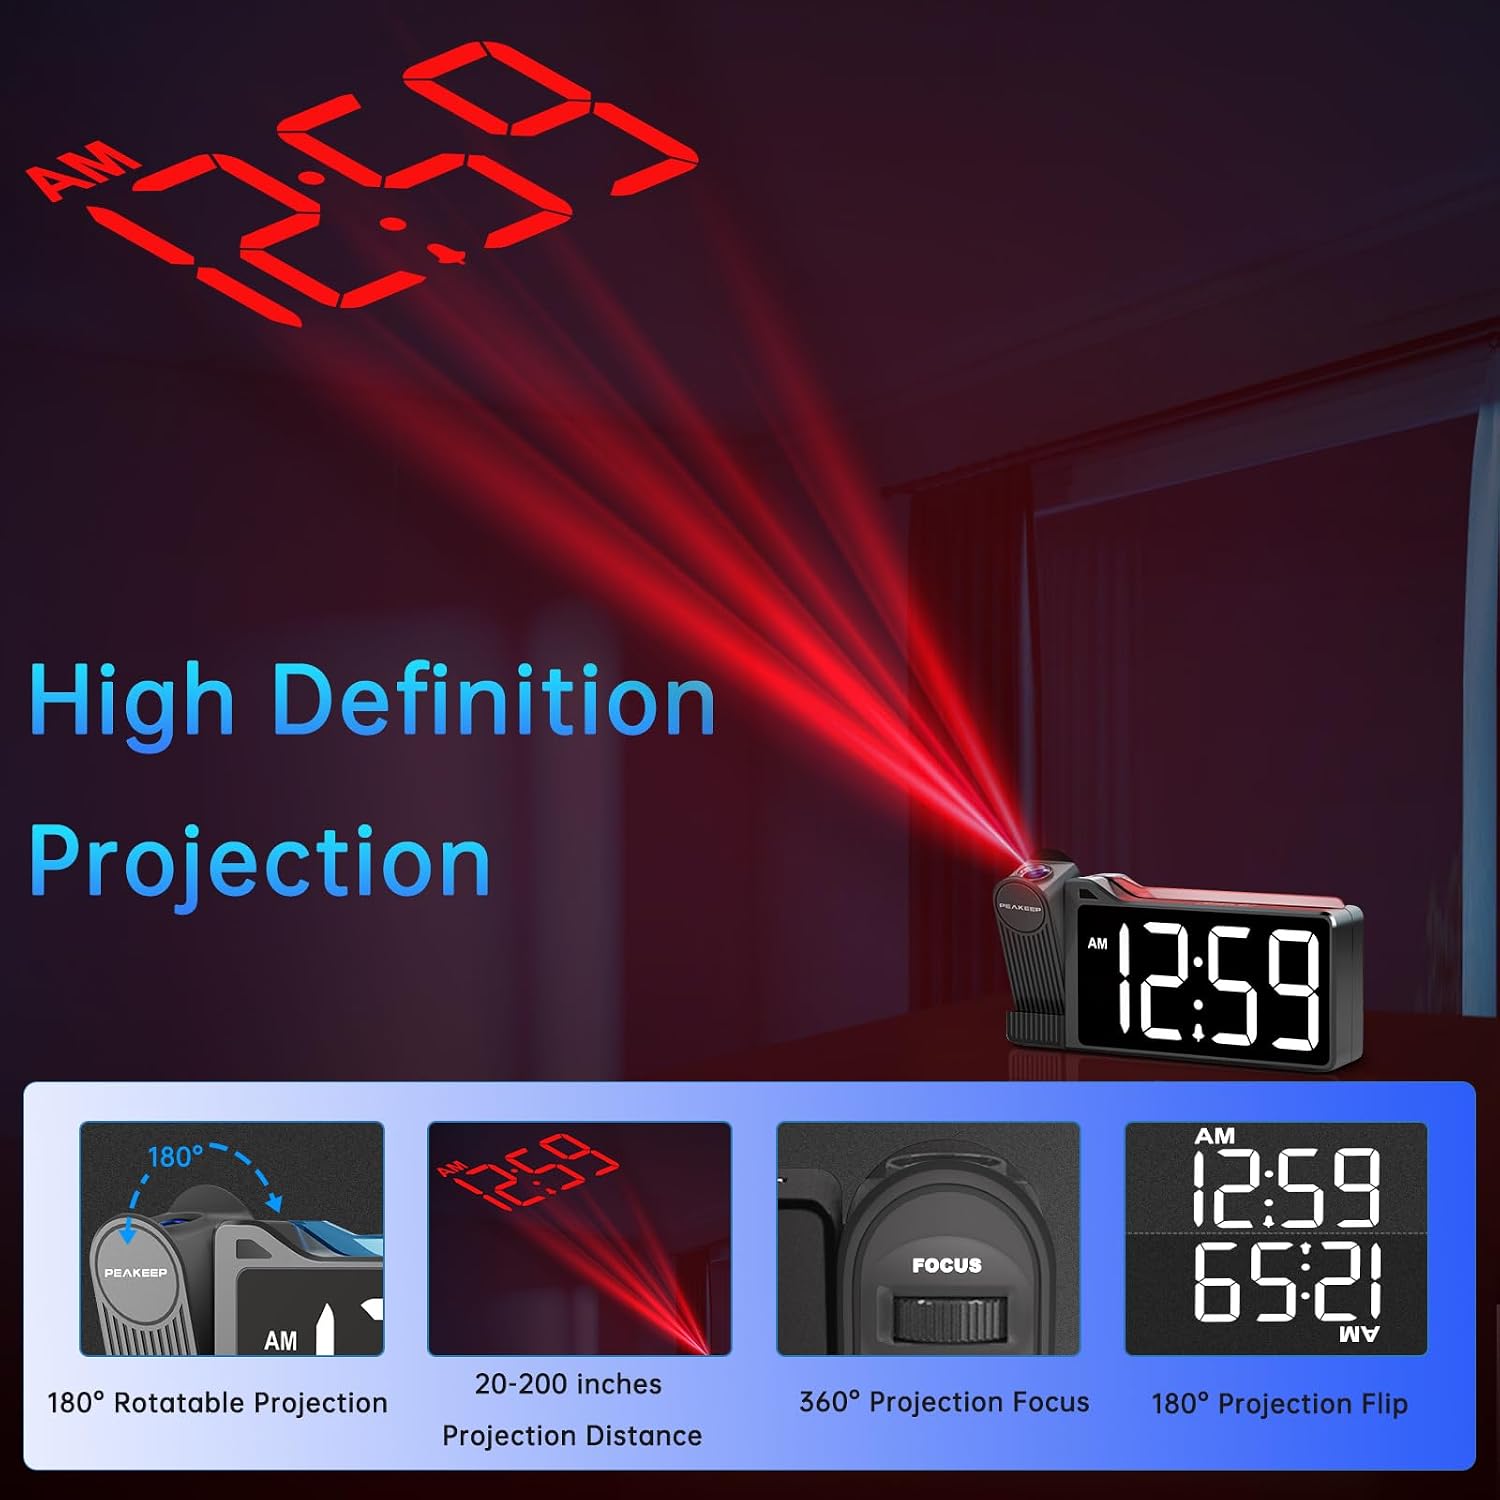
Image: Illustrates the high-definition projection, highlighting 180° rotatable projection, 20-200 inches projection distance, 360° projection focus, and 180° projection flip.
- Activate/Deactivate Projection: Press the PROJECTION ON/FLIP/OFF button to turn the projection on or off.
- Adjust Projection Angle: The projection lens can be rotated 180 degrees to direct the time display onto your ceiling or wall.
- Flip Projection: If the projected time appears upside down, press and hold the PROJECTION ON/FLIP/OFF button to flip its orientation 180 degrees.
- Adjust Projection Brightness: Press the PROJECTION DIMMER button to cycle through 5 brightness levels for the projected time.
- Adjust Projection Focus: Use the FOCUS wheel on the side of the projection arm to sharpen the projected image for optimal clarity. The projection distance ranges from 20 to 200 inches.

Image: Shows the alarm clock projecting time at five different brightness levels (L01-L05) against a starry background.
Main Display Brightness

Image: Displays the alarm clock's main screen brightness at five levels (L1-L5) and an 'OFF' state, demonstrating adjustable display intensity.
- Press the DIMMER button to cycle through 6 levels of brightness for the main LED display, including an 'OFF' setting.
Colorful Nightlight

Image: The alarm clock with its RGB color-changing nightlight illuminated, showing various color options and an ON/OFF switch.
- Press the NIGHTLIGHT ON/OFF button to turn the colorful RGB nightlight on or off.
- The nightlight provides a soft glow for ambiance or as a guiding light.
USB Charging Port
- Connect your smartphone or other USB-powered device to the USB OUT port on the back of the clock using a compatible USB cable (not included).
- The clock will provide power to charge your device.
Maintenance
- Clean the clock's exterior with a soft, dry cloth. Do not use abrasive cleaners or solvents.
- Keep the projection lens free of dust and fingerprints for optimal clarity.
- Ensure the clock is placed on a stable, flat surface.
- Avoid exposing the clock to extreme temperatures, direct sunlight, or high humidity.
Troubleshooting
| Problem | Solution |
|---|---|
| Clock display is off or not working. | Ensure the AC/DC adapter is securely plugged into both the clock and a working power outlet. Check if the main display brightness is set to 'OFF' using the DIMMER button. |
| Projection is blurry. | Adjust the FOCUS wheel on the side of the projection arm until the image is clear. Ensure the projection surface is within the 20-200 inch range. |
| Projected time is upside down. | Press and hold the PROJECTION ON/FLIP/OFF button to flip the projection orientation. |
| Alarm does not sound during a power outage. | Ensure 2 AAA backup batteries are correctly installed in the battery compartment. Batteries are required for alarm function during power loss. |
| USB charging port is not working. | Verify the clock is powered by the AC/DC adapter. The USB charging port requires main power to function. Ensure your USB cable is functional. |
Specifications
| Feature | Detail |
|---|---|
| Model Number | MHP6050 |
| Display Type | Digital LED (5.5-inch) |
| Projection | 180° Rotatable, 5 Brightness Levels, 20-200 inch distance, Adjustable Focus |
| Nightlight | RGB Color-changing |
| Main Display Brightness | 6 Levels (including OFF) |
| Alarm Volume | 5 Levels (60-108 dB) |
| Power Source | Corded Electric (AC/DC adapter included) |
| Battery Backup | 2 x AAA batteries (not included) for settings and alarm during power outage |
| USB Charging Port | 1 x USB-A (5V OUT) |
| Product Dimensions | 6.9" W x 3.5" H |
| Material | Plastic |
| Item Weight | 8.8 ounces |
Warranty and Support
For warranty information or technical support, please refer to the contact details provided with your product packaging or visit the official Peakeep website. Keep your purchase receipt for warranty claims.