1. Introduction
This manual provides detailed instructions for the eletechsup KC13A08 8-Button Push Button Module. It covers the module's features, setup, operation, and technical specifications. This module is designed for integration with various microcontrollers (MCUs) such as Arduino, Raspberry Pi, STM32, AVR, PIC, and more, serving as a versatile input device for your electronic projects.
2. Product Overview
The eletechsup KC13A08 is an 8-button push button module available in both high-level and low-level output configurations. When a button is pressed, the module outputs a specific voltage level (either high or low) depending on its configuration. It is ideal for use with development boards like Arduino Uno, Mega2560, Due, Breadboard, Raspberry Pi, Banana Pi, and can also be used to control LED indicator lights or other digital inputs.
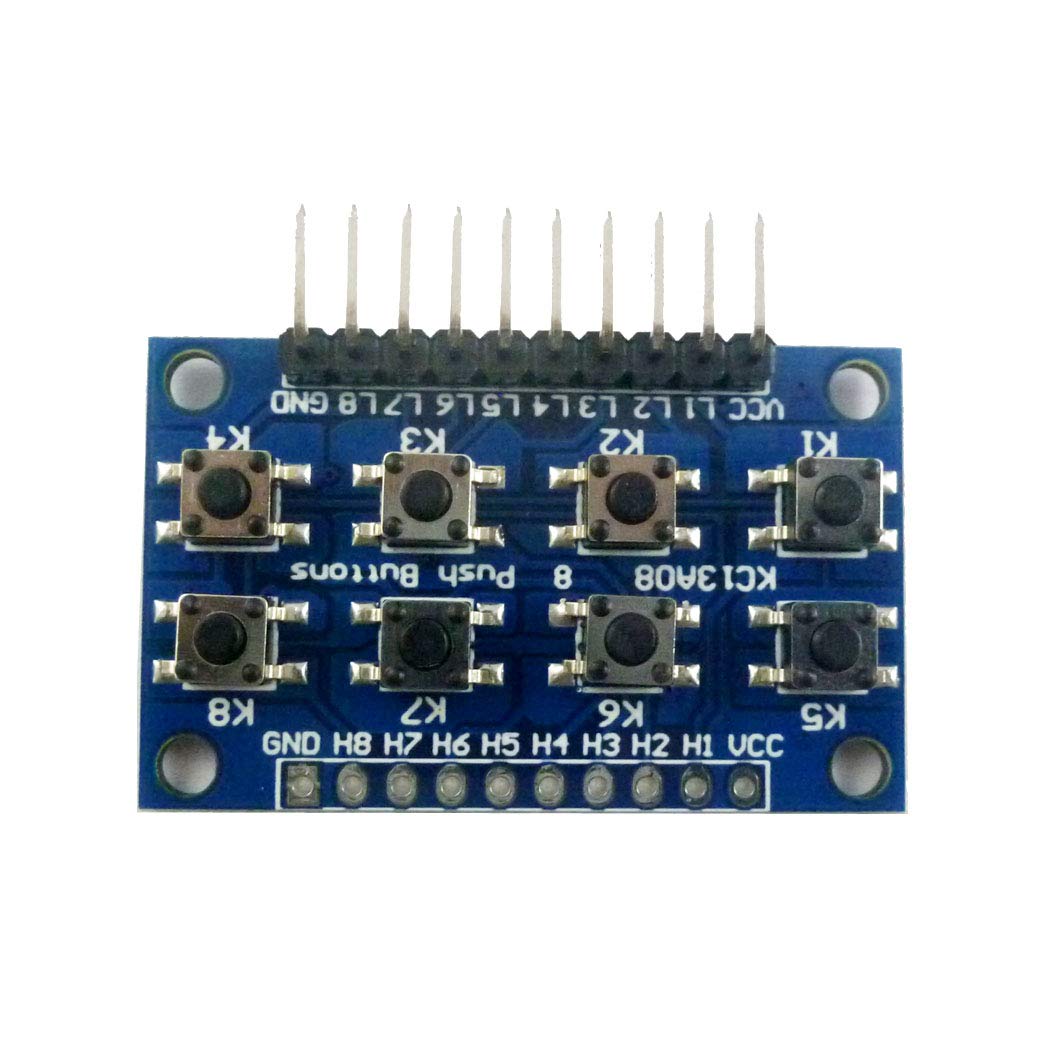
Figure 2.1: Top view of the eletechsup KC13A08 8-Button Push Button Module.
3. Features
- 8-Button Configuration: Provides eight independent push buttons for multiple input controls.
- Dual Output Modes: Available in both High-level output and Low-level output versions.
- High-level Output Module: Default state is low level (0V). When a button (H1-H8) is triggered, the corresponding output goes high (3-12V).
- Low-level Output Module: Default state is high level (3-12V). When a button (L1-L8) is triggered, the corresponding output goes low (0V).
- Wide Operating Voltage: Supports DC 3-12V (compatible with 3.3V and 5V systems).
- Standard Pin Pitch: Features 2.54mm pitch pins for easy breadboard and PCB integration.
- Broad Compatibility: Suitable for Arduino, Raspberry Pi, STM32, AVR, PIC, C51, NRF24LE1, CC2530, MSP430, STM8, FPGA, CPLD, and other MCU platforms.
4. Setup
Proper setup involves connecting the module to your microcontroller or development board. Ensure correct power supply and signal pin connections based on the module type (High-level or Low-level output).
4.1 Pinout Description
- GND: Ground connection.
- VCC: Power supply input (DC 3-12V).
- H1-H8 (High-level Output Module): Output pins for buttons 1 through 8.
- L1-L8 (Low-level Output Module): Output pins for buttons 1 through 8.
4.2 Wiring Diagram (Low-level Output Example)
The following diagram illustrates a typical wiring setup for a Low-level output module connected to an MCU I/O or LED indicator light. The VCC connection is optional if the MCU provides power to the module via its I/O pins, but a direct VCC connection ensures stable operation.

Figure 4.1: Wiring diagram for a Low-level output module. The default state is high level, and pressing a button outputs a low level.
4.3 Module Variants
The KC13A08 module is available in several variants, differing in output logic (High-level or Low-level) and physical configuration (with or without pins). Ensure you have the correct variant for your application.

Figure 4.2: Various configurations of the KC13A08 module, including High-level and Low-level output types, with and without pre-soldered pins.
5. Operating Instructions
Operating the eletechsup KC13A08 module involves reading the digital state of its output pins using your microcontroller. The behavior of the output pins depends on whether you have a High-level or Low-level output module.
5.1 High-level Output Module Operation
- Default State: When no button is pressed, the output pins (H1-H8) are at a low voltage level (approximately 0V).
- Button Press: When any button (e.g., H1) is pressed, the corresponding output pin (H1) will switch to a high voltage level (equal to the VCC supply, typically 3-12V).
- Release: Upon releasing the button, the output pin returns to its low voltage level.
5.2 Low-level Output Module Operation
- Default State: When no button is pressed, the output pins (L1-L8) are at a high voltage level (equal to the VCC supply, typically 3-12V).
- Button Press: When any button (e.g., L1) is pressed, the corresponding output pin (L1) will switch to a low voltage level (approximately 0V).
- Release: Upon releasing the button, the output pin returns to its high voltage level.
To integrate with your MCU, configure the corresponding MCU pins as digital inputs. You can then read the state of these pins to detect button presses. For example, in Arduino, you would use `digitalRead()` to check the pin status.
6. Maintenance
The eletechsup KC13A08 module is designed for durability and requires minimal maintenance. Follow these general guidelines to ensure its longevity:
- Keep Clean: Regularly clean the module with a soft, dry cloth to remove dust and debris. Avoid using liquids or harsh chemicals.
- Avoid Extreme Conditions: Do not expose the module to extreme temperatures, high humidity, or corrosive environments.
- Handle with Care: Avoid applying excessive force to the buttons or pins during installation and use.
- Proper Storage: When not in use, store the module in an anti-static bag in a dry, cool place.
7. Troubleshooting
If you encounter issues with your eletechsup KC13A08 module, consider the following troubleshooting steps:
- No Output/Incorrect Output:
- Verify all wiring connections (GND, VCC, and output pins) are secure and correct.
- Ensure the module is receiving the correct operating voltage (3-12V).
- Confirm you are using the correct type of module (High-level or Low-level output) for your application and that your code is configured accordingly.
- Check for any short circuits or damaged components on the module.
- Intermittent Button Response:
- Inspect the physical buttons for any obstructions or damage.
- Ensure the module is firmly seated in the breadboard or PCB.
- Consider adding debounce logic in your microcontroller code if you are experiencing multiple readings for a single button press.
- Module Not Powering On:
- Double-check the VCC and GND connections for correct polarity and continuity.
- Test your power supply to ensure it is providing the expected voltage.
8. Specifications
| Specification | Value |
|---|---|
| Model Number | KC13A08 |
| Number of Buttons | 8 |
| Output Type | High-level or Low-level (variant dependent) |
| Working Voltage | DC 3-12V (3.3V, 5V compatible) |
| Pin Pitch | 2.54mm |
| Module Dimensions (approx.) | 40 x 25 x 5.5mm (excluding pins) |
| Weight (with pins) | 5.0g |
| Weight (no pins) | 4.2g |
9. Warranty and Support
For warranty information and technical support regarding your eletechsup KC13A08 8-Button Push Button Module, please contact the seller or manufacturer directly. Retain your proof of purchase for any warranty claims.
For general inquiries or further assistance, you may refer to the eletechsup official website or contact their customer service channels.


