1. Introduction
Thank you for choosing the HOMCOM Dual Zone Air Fryer. This appliance is designed to provide a healthier way to cook your favorite foods, using little to no oil. With its dual independent cooking zones and advanced features, you can prepare multiple dishes simultaneously with ease. Please read this manual thoroughly before use to ensure safe and optimal operation.

Image 1: HOMCOM Dual Zone Air Fryer, front view.
2. Safety Instructions
Always follow basic safety precautions when using electrical appliances to reduce the risk of fire, electric shock, and injury.
- Read all instructions before operating the appliance.
- Do not immerse the main unit in water or other liquids.
- Ensure the voltage indicated on the appliance corresponds to your local mains voltage.
- Keep the appliance and its cord out of reach of children.
- Do not operate the appliance if the plug, power cord, or the appliance itself is damaged.
- Always unplug the appliance after use and before cleaning.
- Do not place the appliance against a wall or other appliances. Leave at least 10 cm free space on the back and sides and 10 cm free space above the appliance.
- Hot air is released through the air outlet openings. Keep your hands and face at a safe distance from the openings.
- Do not cover the air inlet and outlet openings while the appliance is operating.
- Never fill the baskets with oil, as this may cause a fire hazard.
- Use only original accessories provided by the manufacturer.
3. Product Overview
The HOMCOM Dual Zone Air Fryer features two independent cooking baskets, allowing for versatile meal preparation. The intuitive LED touch screen provides easy control over cooking settings.
Components:
- Main Unit with Control Panel
- Left Cooking Basket (5.2L)
- Right Cooking Basket (3.3L)
- Removable Non-stick Crisper Plates for each basket
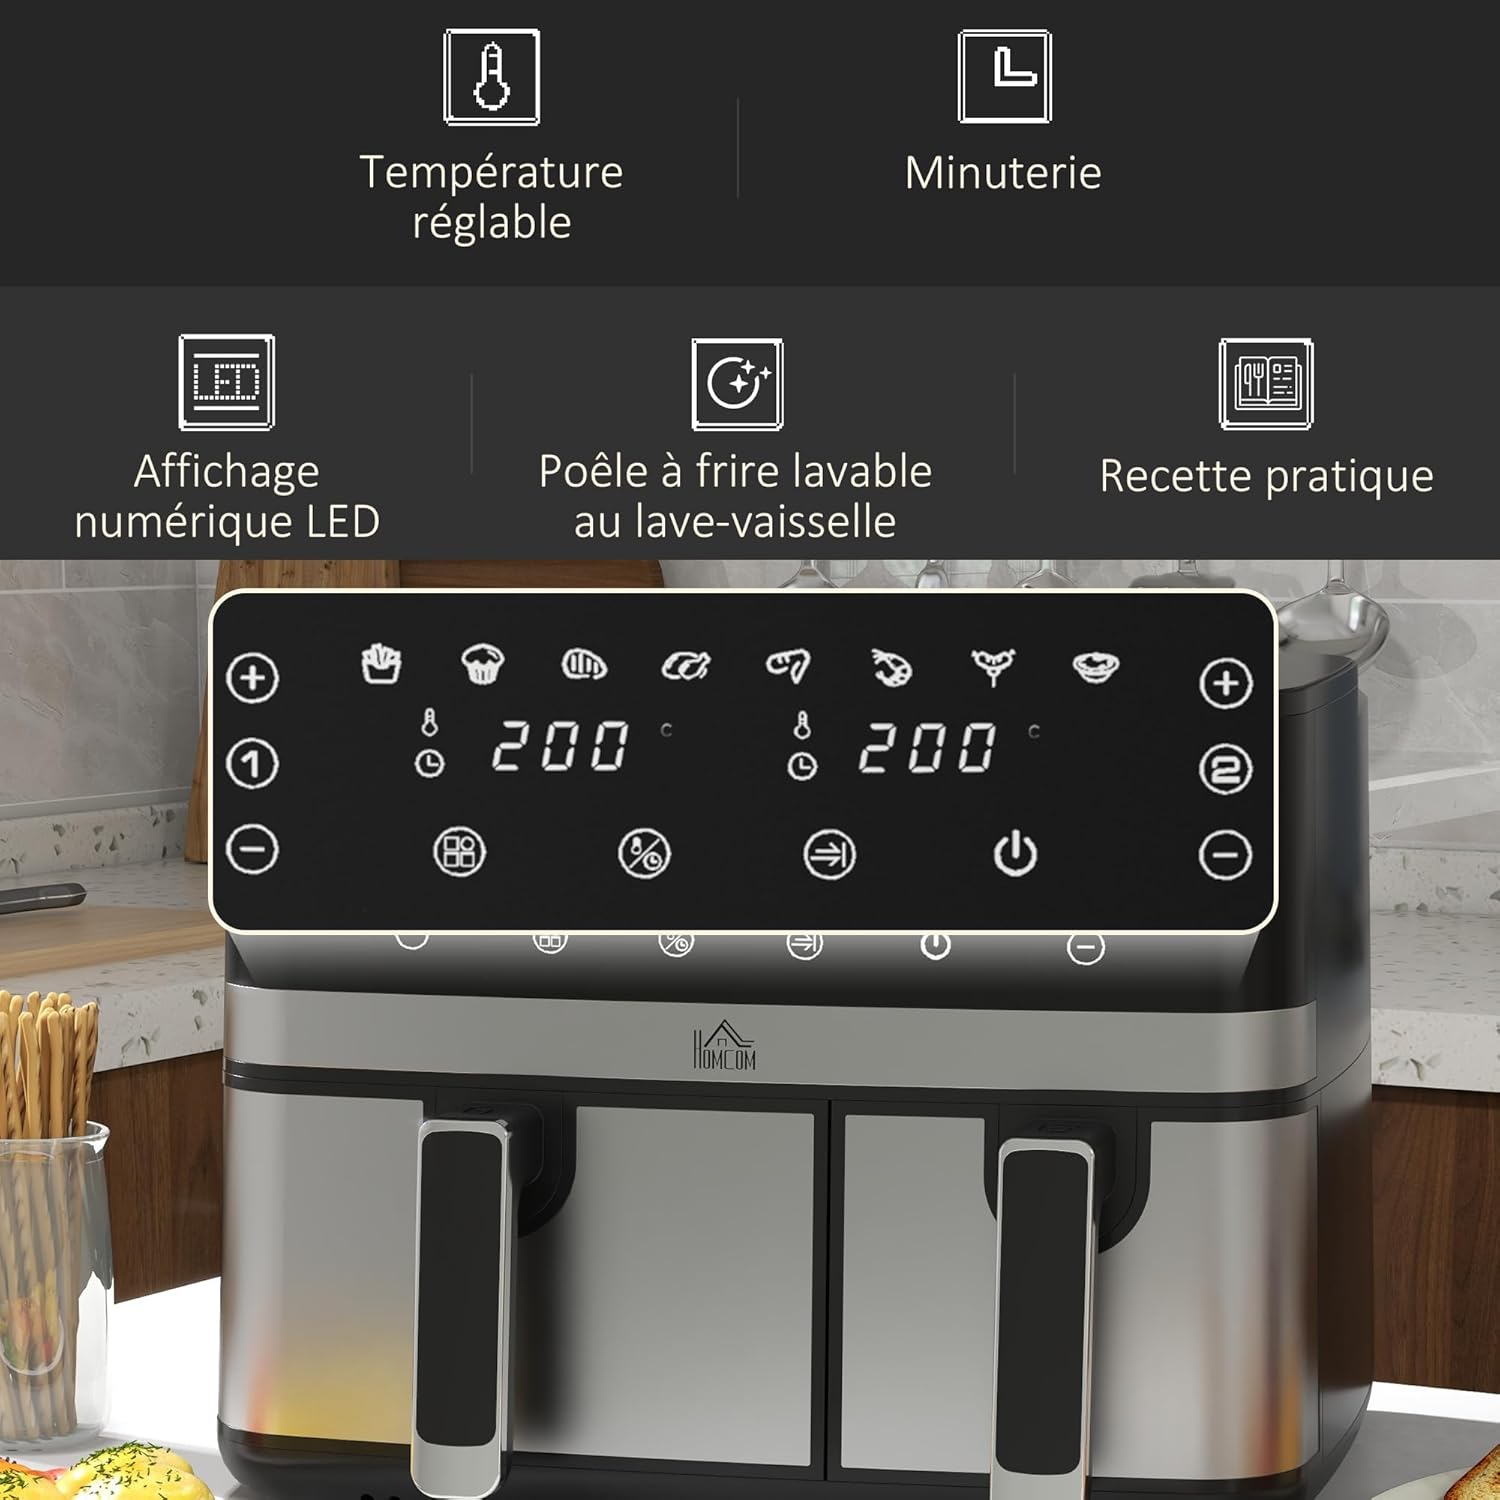
Image 2: Detailed view of the control panel, highlighting temperature, timer, LED display, dishwasher-safe pan, and recipe guide features.

Image 3: Removable non-stick crisper plates for the air fryer baskets.
4. Setup
- Unpack the air fryer and remove all packaging materials.
- Wipe the main unit with a damp cloth.
- Clean the baskets and crisper plates with hot water, dish soap, and a non-abrasive sponge. Rinse thoroughly and dry.
- Place the crisper plates into the baskets.
- Insert the baskets back into the main unit.
- Place the air fryer on a stable, heat-resistant surface, away from walls and other appliances.
- Plug the power cord into a grounded wall outlet.
First Use:
During the first few uses, a slight odor may be present. This is normal and will dissipate. It is recommended to run the air fryer empty for about 10-15 minutes at 180°C (356°F) to burn off any manufacturing residues.
5. Operating Instructions
5.1. Basic Operation (Single Basket)
- Place food into one of the baskets. Do not overfill.
- Insert the basket firmly into the air fryer.
- Press the power button to turn on the appliance.
- Select the desired basket (1 or 2) on the touch screen.
- Choose a preset program or manually set the temperature (80-200°C) and time (up to 60 minutes).
- Press the Start/Pause button to begin cooking.
- The air fryer will beep when cooking is complete. Carefully remove the basket and transfer food to a serving dish.
5.2. Dual Zone Cooking (Different Settings)
This function allows you to cook two different foods with different settings simultaneously.
- Place food into both baskets.
- Insert both baskets firmly into the air fryer.
- Press the power button.
- Select Basket 1, then choose its preset or manually set temperature and time. Press Start/Pause.
- Select Basket 2, then choose its preset or manually set temperature and time. Press Start/Pause.
- Both baskets will cook according to their individual settings.
5.3. Sync Finish Function
The Sync Finish function ensures both baskets complete cooking at the same time, even if they have different cooking times.
- Place food into both baskets.
- Insert both baskets firmly into the air fryer.
- Press the power button.
- Select Basket 1, choose its preset or manually set temperature and time.
- Select Basket 2, choose its preset or manually set temperature and time.
- Press the 'Sync Finish' button. The air fryer will automatically adjust the start time for the basket with the shorter cooking duration.
- Press Start/Pause to begin cooking. Both baskets will finish at the same time.

Image 4: The 8 preset cooking programs available on the air fryer's touch screen.

Image 5: Close-up of the dual baskets, illustrating the Sync Finish function for simultaneous cooking completion.
5.4. Official Product Videos
Watch these videos for visual guidance on using your dual zone air fryer:
Video: Multifunctional Air Fryer
This video demonstrates the general functionality and versatility of a multifunctional air fryer, including preparing various dishes.
Video: WELLENT Dual Air Fryer 4+7L – Video Guide
A video guide showcasing the use of a dual air fryer, including single basket cooking, dual cooking with same settings, dual cooking with different settings, and the Sync Finish function.
Video: Uten Dual Air Fryer, 8 L
This video illustrates various cooking applications with a dual air fryer, demonstrating how to prepare different food items simultaneously.
6. Cooking Guide
The air fryer uses rapid air circulation to cook food, resulting in crispy exteriors and tender interiors with significantly less oil. Refer to the included recipe guide for specific cooking suggestions.
General Guidelines:
- Preheating: While not always necessary, preheating for 3-5 minutes can improve results for some foods.
- Temperature Range: 80°C to 200°C (175°F to 400°F).
- Timer: Up to 60 minutes.
- Shaking: For even cooking, shake the baskets halfway through the cooking time for smaller items like fries or nuggets.
- Oil Usage: A small amount of oil (1 tablespoon or less) can be added to some foods for extra crispiness, but it is often not required.

Image 6: Illustration of healthy cooking, emphasizing up to 90% less oil usage with the air fryer.
7. Maintenance and Cleaning
Regular cleaning ensures optimal performance and extends the lifespan of your air fryer.
- Always unplug the air fryer and allow it to cool completely before cleaning.
- Wipe the exterior of the appliance with a damp cloth. Do not use abrasive cleaners.
- Remove the cooking baskets and crisper plates. They are dishwasher-safe for easy cleaning.
- For stubborn residue, soak the baskets and crisper plates in warm, soapy water for about 10 minutes before cleaning.
- Clean the interior of the air fryer with a non-abrasive sponge and warm, soapy water. Ensure no water enters the heating element.
- Dry all parts thoroughly before reassembling and storing the appliance.
8. Troubleshooting
| Problem | Possible Cause | Solution |
|---|---|---|
| Air fryer does not turn on. | Appliance not plugged in; power outlet not working. | Ensure the power cord is securely plugged in. Check the power outlet with another appliance. |
| Food is not cooked evenly. | Baskets are overfilled; food not shaken. | Do not overfill baskets. Shake smaller food items halfway through cooking. |
| White smoke coming from the appliance. | Grease residue from previous use; fatty ingredients. | Clean the baskets and crisper plates thoroughly after each use. Remove excess fat from ingredients. |
| Food is not crispy. | Too much moisture in food; insufficient cooking time/temperature. | Pat food dry before air frying. Increase cooking time or temperature slightly. |
9. Specifications
- Brand: HOMCOM
- Model: 800-193V90BK
- Total Capacity: 8.5 Litres (5.2L + 3.3L)
- Power: 2700W
- Voltage: Standard (check product label for specific voltage)
- Temperature Range: 80-200°C
- Timer: Up to 60 minutes
- Material: Steel
- Dimensions (L x W x H): 41.8 cm x 39.2 cm x 31.1 cm

Image 7: Diagram showing the dimensions of the HOMCOM Dual Zone Air Fryer.
10. Warranty and Support
For warranty information, please refer to the warranty card included with your purchase or contact HOMCOM customer support directly. Keep your proof of purchase for any warranty claims.
For technical support, troubleshooting assistance, or spare parts, please visit the official HOMCOM website or contact their customer service department. Contact details can typically be found on the product packaging or the brand's official website.


