
1. Introduction
This manual provides detailed instructions for the DIYmalls Nextion Intelligent 4.3" Display (model NX4827P043-011C) and the accompanying 4x4 Membrane Switch Keypad. It covers product overview, package contents, setup procedures, operating instructions, maintenance, troubleshooting, and technical specifications to ensure proper and efficient use of your devices.
2. Package Contents
Please verify that all items listed below are included in your package:
- 1 x Nextion Intelligent 4.3" Display (NX4827P043-011C) with accessories
- 5 x 4x4 Membrane Switch Keypad
3. Product Overview
3.1 Nextion Intelligent 4.3" Display (NX4827P043-011C)
The Nextion Intelligent 4.3" Display is a Human Machine Interface (HMI) solution designed for various applications, including household appliances, beauty equipment, smart home systems, instrumentation, and 3D printers. It features a 4.3-inch LCD screen with a glossy surface and offers a user-friendly interface for controlling and monitoring devices.

Figure 3.1: Front view of the Nextion Intelligent 4.3" Display.
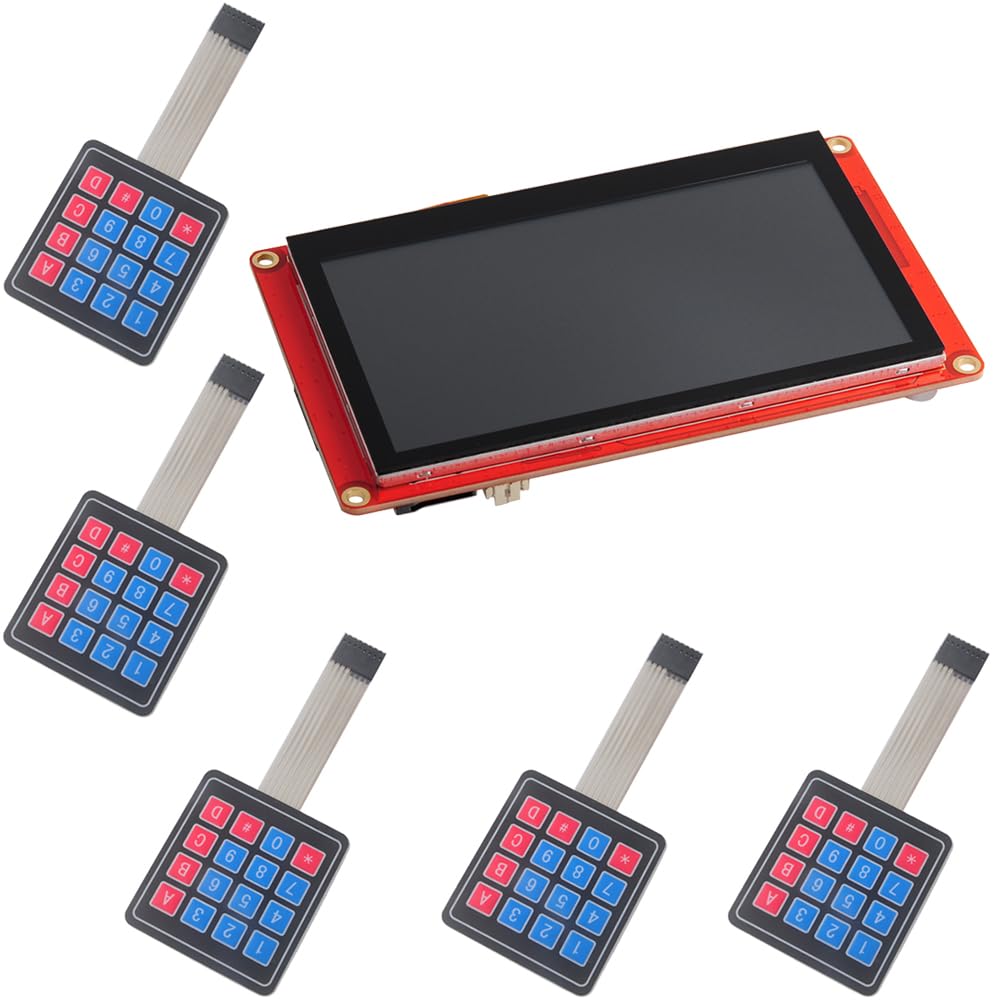
Figure 3.2: Examples of applications for the Nextion Intelligent Display, including household appliances, beauty equipment, smart home devices, instrumentation, and 3D printers.
3.2 4x4 Membrane Switch Keypad
The 4x4 Membrane Switch Keypad is a compact input device featuring 16 buttons arranged in a 4x4 grid. It is commonly used for data entry, control, and navigation in various electronic projects and systems.

Figure 3.3: Front and back views of the 4x4 Membrane Switch Keypad, showing the button layout and the ribbon cable connector.
4. Setup Instructions
4.1 Nextion Display Power Connection
To power the Nextion display, use a stable 5V 1A power supply. A small connector and a 4-wire cable are provided to help test the power supply. It is crucial to ensure sufficient power to prevent damage to the device.
Caution: Insufficient Power Supply
Working under insufficient power supply conditions will damage the Nextion model easily. Blurred screens or flashing may indicate power shortages. Power off at the first possible moment. Do not repeat attempts to power the device with an inadequate supply.
A small connector is included in the package. Try to power the Nextion with your phone charger through the connector to check if Nextion works well. A high-quality USB cable is required for reliable operation.

Figure 4.1: Diagram illustrating the power connection for the Nextion Display using a 5V 1A phone charger and a Micro USB cable connected to a USB to 2-pin connector.
4.2 Nextion Editor Software Installation
The Nextion Editor software is essential for designing and programming the graphical user interface (GUI) for your Nextion display. Download the latest version from the official Nextion website:
- Nextion Editor Software: https://nextion.tech/nextion-editor/
4.3 4x4 Membrane Switch Keypad Connection
The 4x4 membrane keypad typically connects to a microcontroller (e.g., Arduino) using its ribbon cable. Consult your microcontroller's documentation for specific wiring instructions. The keypad has 8 pins (4 rows, 4 columns) that need to be connected to digital input pins on your microcontroller.
5. Operating Instructions
5.1 Using the Nextion Editor Software
The Nextion Editor is a free and easy-to-use HMI software that allows you to design your display's interface. Key features include:
- Drag-and-Drop Components: Easily add and arrange GUI elements for design and interaction.
- User Event Code Pane: For GUI interaction and peripheral MCU communication.
- ASCII Text-Based Instructions: For display side coding.
- Built-in Debugger: For HMI project simulation.
- Assignable Attribute Values: Components can have their attributes changed at runtime.
- Resource Support: Supports Audio, Video, and Animation resources.
- Image Support: Supports PNG picture resources.
- Component Transparency: Allows for transparent elements.
- Component and Page Loading Effect: Enhances user experience.
- Component Move and Drag in Runtime: Dynamic interaction.
- Anti-aliasing Gauge: For smoother graphics.
- New Components: Includes ComboBox, SLText, Gmov, Video, Switch, EXPicture.

Figure 5.1: Screenshot of the Nextion Editor Software, showing the interface for designing HMI projects with various components and a debugger for simulation.
For detailed guidance on using the Nextion Editor, refer to the official documentation:
- Editor Guide, Instruction, Datasheet: https://nextion.tech/
- Nextion compatible with Arduino: https://randomnerdtutorials.com/nextion-display-with-arduino-getting-started/
- Video Link (General Nextion HMI): https://www.youtube.com/results?search_query=Nextion+HMI
5.2 Using the 4x4 Membrane Switch Keypad
Once connected to a microcontroller, the 4x4 membrane keypad can be programmed to detect button presses. Each button corresponds to a unique row and column intersection. Your microcontroller code will scan these rows and columns to determine which button is pressed, allowing for input such as numerical data, commands, or navigation.
6. Maintenance
To ensure the longevity and optimal performance of your Nextion display and membrane keypad:
- Cleaning: Gently wipe the display screen with a soft, dry, lint-free cloth. Avoid using harsh chemicals or abrasive materials.
- Storage: Store the devices in a cool, dry environment, away from direct sunlight and extreme temperatures.
- Handling: Avoid dropping or subjecting the devices to strong impacts. Do not apply excessive force to the membrane keypad.
- Power Supply: Always use a stable and appropriate power supply (5V 1A for the Nextion display) to prevent damage.
7. Troubleshooting
- Display is blank or flashing: This often indicates an insufficient power supply. Ensure you are using a stable 5V 1A power source. Refer to Section 4.1 for power connection details and caution regarding power supply.
- Display shows garbled characters: Verify that the firmware is correctly uploaded to the Nextion display using the Nextion Editor software. Check communication settings if connected to an external microcontroller.
- Keypad buttons are unresponsive: Check the physical connections of the ribbon cable to your microcontroller. Ensure your microcontroller code is correctly configured to read the keypad matrix.
- Nextion Editor software issues: Ensure you have downloaded the correct version of the software from the official website. Consult the Nextion documentation and community forums for specific software-related problems.
8. Specifications
8.1 Nextion Intelligent 4.3" Display (NX4827P043-011C)
| Feature | Specification |
|---|---|
| ASIN | B0D4QJPXMT |
| Standing Screen Display Size | 4.3 Inches |
| Brand | DIYmalls |
| Screen Size | 4.3 Inches |
| Screen Surface Description | Glossy |
| Total HDMI Ports | 1 |
| Display Technology | LCD |
| Date First Available | May 21, 2024 |
8.2 4x4 Membrane Switch Keypad
| Feature | Specification |
|---|---|
| Type | Membrane Switch Keypad |
| Layout | 4x4 (16 buttons) |
| Interface | 8-pin ribbon cable |
| Material | Flexible membrane |
9. Warranty and Support
For warranty information and technical support, please refer to the DIYmalls official website or contact their customer service directly. Specific warranty terms may vary. For additional resources and community support related to Nextion products, please visit the official Nextion website and forums.