Introduction
This manual provides detailed instructions for the installation, operation, and maintenance of your Walfront MPPT Solar Controller EL-MD200SP. This device is designed for efficient charging of various battery types using solar panels, featuring real-time tracking and adjustable output voltage.
Safety Information
- Ensure all connections are correct before powering on the device.
- Do not expose the controller to water or excessive moisture unless specified. The device has an IP66 rating, indicating protection against dust and powerful water jets, but not submersion.
- Avoid short circuits at the battery terminals.
- Operate within specified voltage and current limits to prevent damage.
- Keep out of reach of children.
- Disconnect power before performing any maintenance or wiring changes.
Product Overview
The Walfront MPPT Solar Controller EL-MD200SP is a high-efficiency solar charge controller designed to optimize power extraction from solar panels to charge batteries. It features an LED display for monitoring voltage and current, and buttons for output voltage adjustment.
Key Features:
- High-efficiency MPPT (Maximum Power Point Tracking) function.
- Adjustable output voltage (10-30V) for various battery types.
- LED screen display for input/output voltage and current.
- Protection against short circuit, over temperature, and under voltage.
- Durable aluminum construction with IP66 waterproof, dustproof, and shockproof rating.
Component Identification:
Refer to the image below for a visual guide to the controller's components.

Image 1: Front view of the Walfront MPPT Solar Controller, showing the input and output terminals, LED displays for voltage and current, and buttons for output voltage adjustment. The model number EL-MD200SP is visible at the top.
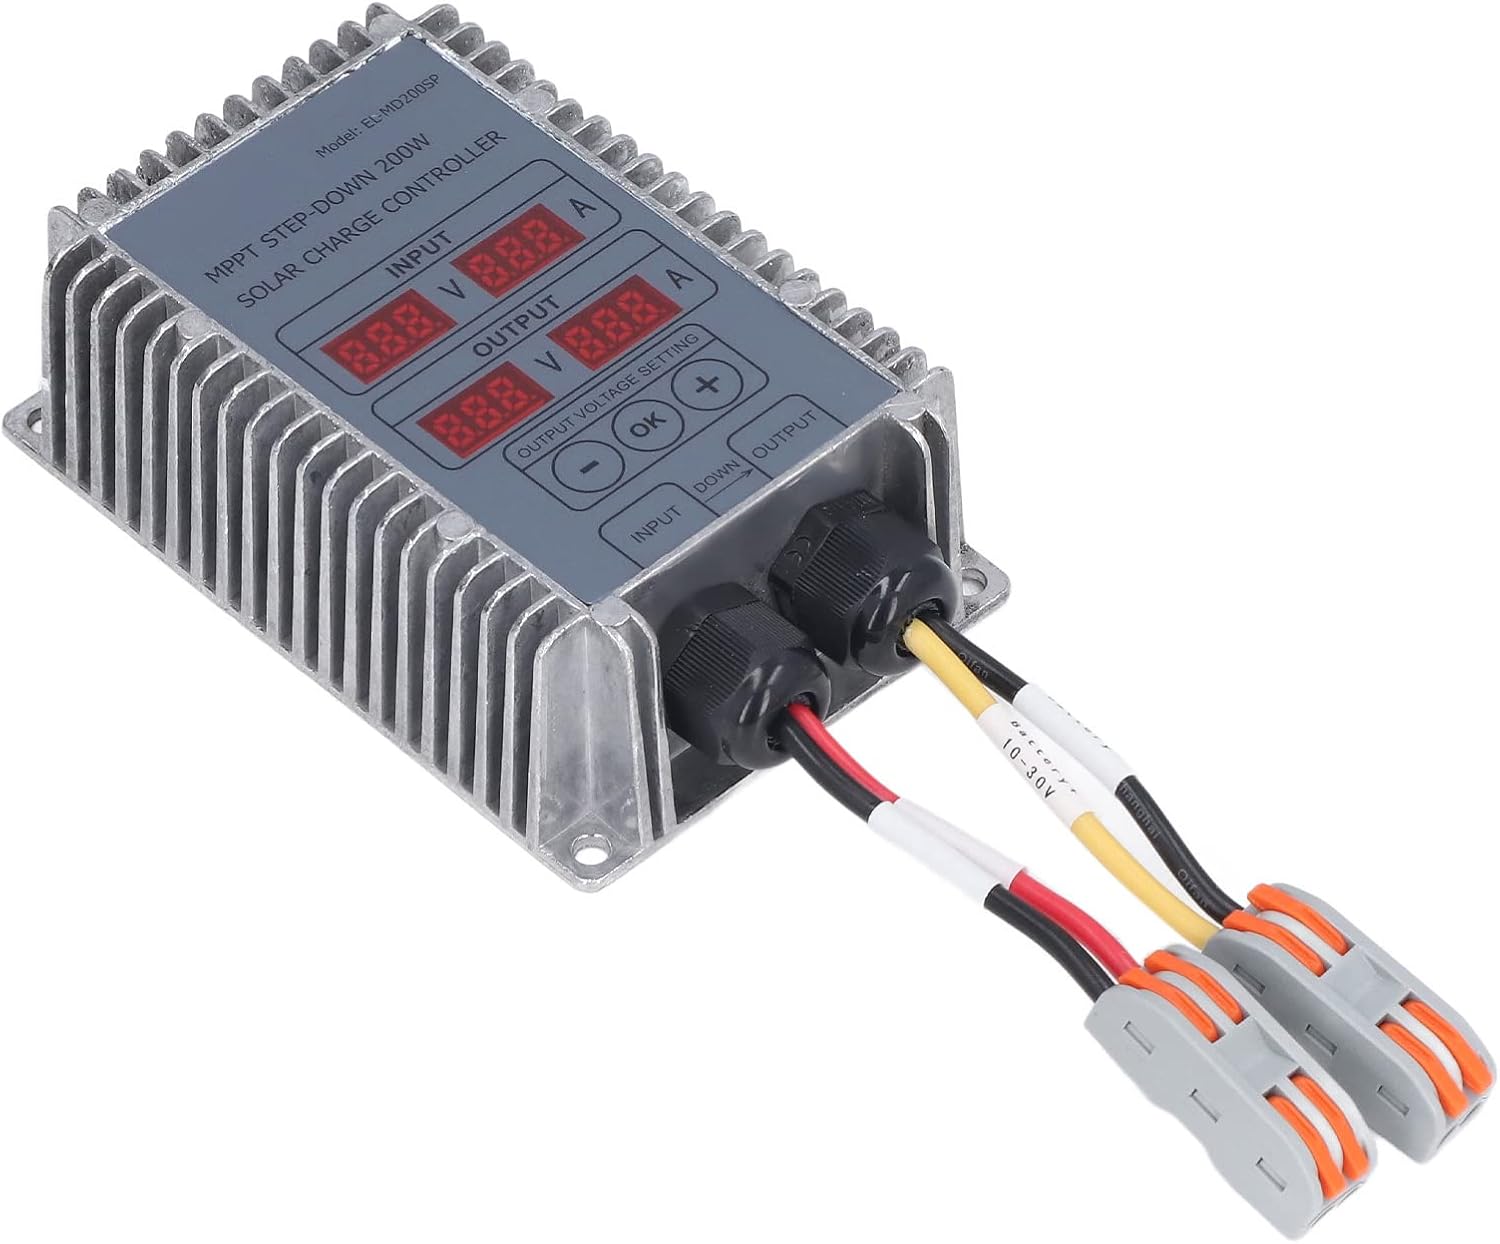
Image 2: Angled view of the Walfront MPPT Solar Controller, highlighting the heat sink fins on the side and the robust construction. Input and output cables are connected.
Specifications
| Parameter | Value |
|---|---|
| Material | Aluminum |
| Product Size | Approx. 120 x 80 x 40mm / 4.72 x 3.15 x 1.57in |
| Efficiency | ≥95% |
| Applicable PV Panel Voltage | 18V-55V |
| Maximum Power Voltage (PV) | 17V-55V |
| PV Input Starting Voltage | 18V-55V |
| PV Input Tracking Voltage | 17V-55V |
| Output to Battery Voltage | 10-30V (Adjustable) |
| Output to Battery Current | Max. 25A |
| Load Loss | 0.35W |
| Voltage Regulation | 1% |
| Load Regulation | 1% |
| Protection Class | IP66 |
| Working Temperature | -40℃ ~ +65℃ |
| Weight | Approx. 482 g / 17 oz (1.06 pounds) |
Setup and Installation
- Mounting: Securely mount the controller in a well-ventilated area, away from direct sunlight and excessive heat sources. The aluminum casing acts as a heat sink.
- Wiring Sequence:
- Connect the battery to the controller's output terminals first. Ensure correct polarity (red for positive, black for negative). The output voltage is adjustable between 10-30V.
- Connect the solar panel(s) to the controller's input terminals. Ensure correct polarity. The PV input voltage should be between 18V-55V.
- Initial Power-On: Once all connections are secure, the controller will power on. The LED display will show input and output voltage/current. The controller starts working when the input voltage is higher than 17V.
- Output Voltage Adjustment: Use the "OK", "+", and "-" buttons on the controller to set the desired output voltage for your battery type. Refer to your battery's specifications for the correct charging voltage.

Image 3: Close-up view of the Walfront MPPT Solar Controller's input and output ports with connected cables, illustrating the wiring connections.

Image 4: Examples of applications for the Walfront MPPT Solar Controller, including solar street lights, household solar panels, and solar-powered vehicles.
Operating Instructions
The controller operates automatically once properly connected and configured. It will track the maximum power point of the solar panel to ensure efficient charging.
Monitoring:
The LED display shows real-time input voltage (V) and current (A) from the solar panel, and output voltage (V) and current (A) to the battery.
Adjusting Output Voltage:
To adjust the output voltage:
- Press the "OK" button to enter voltage adjustment mode.
- Use the "+" and "-" buttons to increase or decrease the target output voltage.
- Press "OK" again to confirm and save the setting.
The controller will automatically stop charging if the input voltage drops below 1.1 times the rated output voltage and the charging current is below the cut-off current.
Maintenance
- Regular Inspection: Periodically check all wiring connections for tightness and corrosion.
- Cleaning: Keep the controller's exterior clean and free of dust. Use a dry cloth for cleaning. Do not use harsh chemicals or abrasive cleaners.
- Ventilation: Ensure the area around the controller remains clear to allow for proper heat dissipation from the heat sink fins.
- Environmental Conditions: While the device is IP66 rated, prolonged exposure to extreme conditions outside its operating temperature range (-40℃ to +65℃) should be avoided.
Troubleshooting
- No display or power:
- Check battery connections and ensure they are secure and have sufficient voltage.
- Verify solar panel connections and ensure adequate sunlight for power generation (input voltage > 17V).
- Battery not charging:
- Confirm solar panel input voltage is within the 18V-55V range.
- Check output voltage setting to ensure it matches the battery's charging requirements.
- Inspect all wiring for loose connections or damage.
- Ensure the charging current is not below the cut-off current, which would cause the system to turn off charging.
- Overheating Protection:
If the internal temperature exceeds 100°C, the controller will reduce output power. If it reaches 110°C, it will automatically shut off. Allow the unit to cool down. Ensure proper ventilation and ambient temperature.
- Short Circuit Protection:
In case of an output short circuit, the controller will automatically turn off the output. It will resume normal operation once the short circuit is removed.
Warranty and Support
Specific warranty information for this product is not provided in the available documentation. For warranty claims or technical support, please contact your retailer or the Walfront customer service department with your purchase details.
You may also visit the Walfront Store on Amazon for additional product information and contact options.


