
1. Introduction
Thank you for purchasing the Pisichen 8-inch Touch Panel Mobile HD Mini Monitor. This compact and versatile display is designed to enhance your productivity and entertainment experience across various devices. Featuring a responsive 5-point capacitive touch screen and multiple connectivity options, it offers a seamless and immersive visual interface.

Figure 1.1: Pisichen 8-inch Touch Panel Mobile HD Mini Monitor
This monitor is equipped with:
- 5-Point Capacitive Touch: For intuitive and precise interaction.
- HD 800x480 Resolution: Delivering clear and vivid visuals.
- Diverse Connectivity: Two HDMI ports and one USB-C port for broad compatibility.
- Multiple Display Modes: Supports duplicate, extended, and second screen modes.
- HDR Mode & Built-in Speakers: Enhances visual depth and provides integrated audio.
2. Package Contents
Please check the package for the following items:
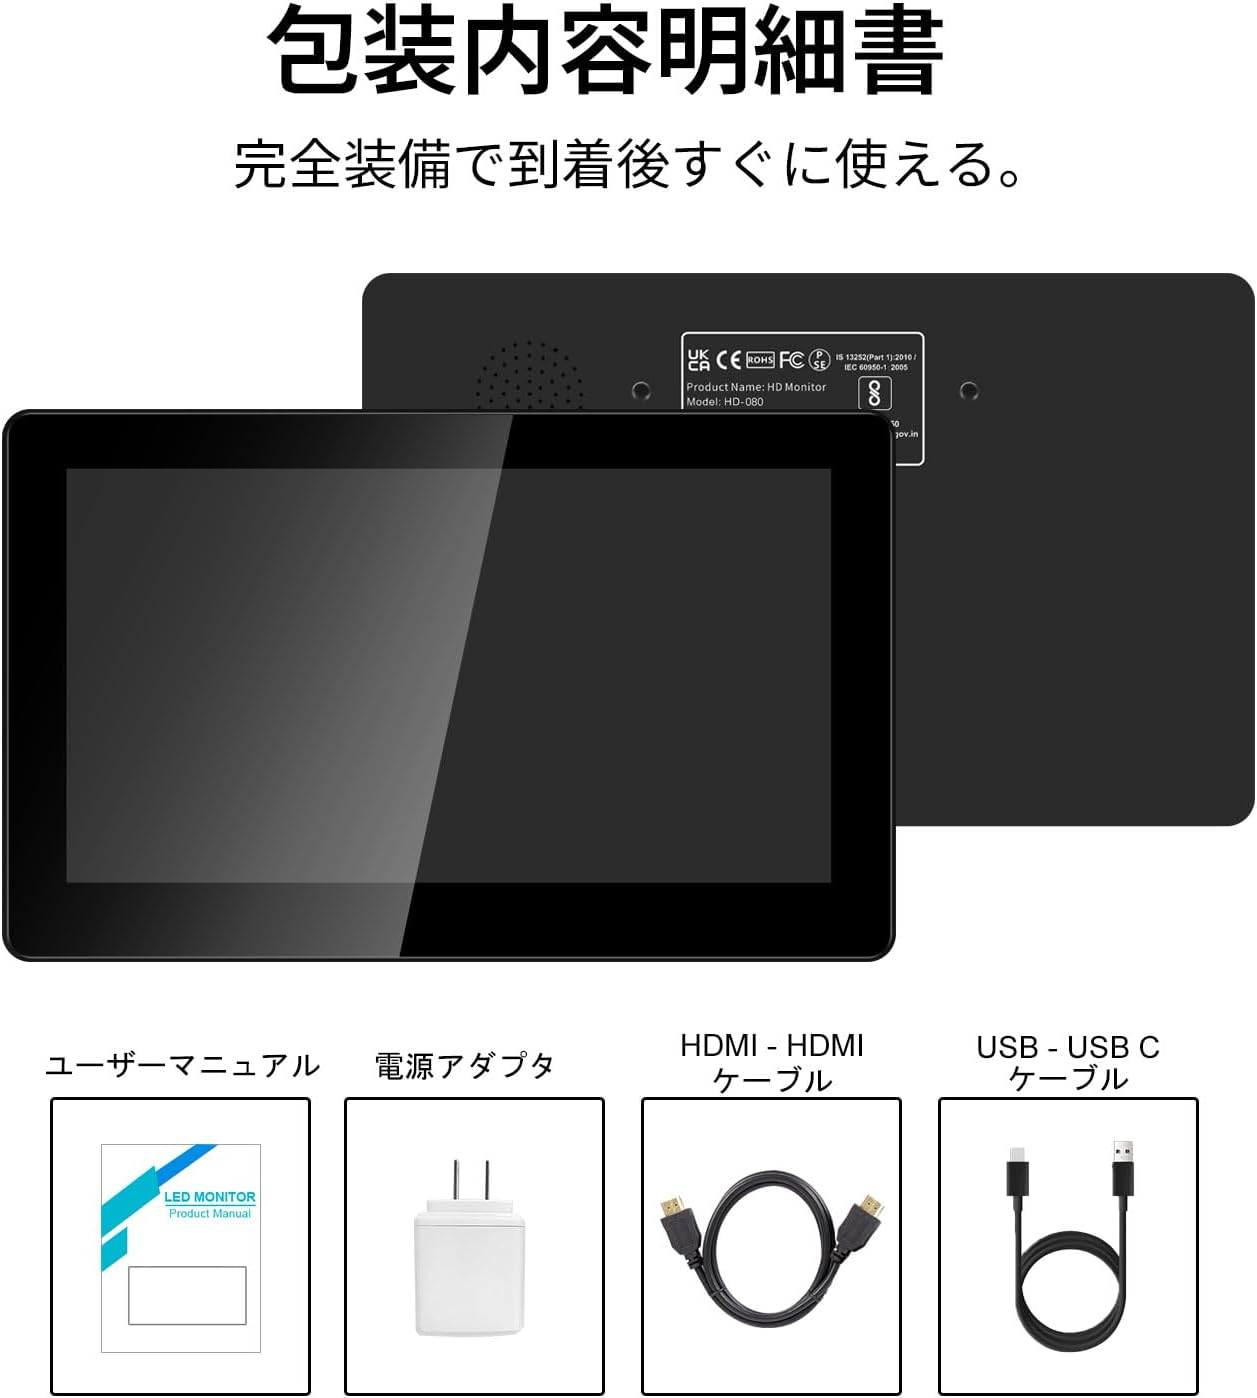
Figure 2.1: Package Contents
- Pisichen 8-inch Touch Panel Mobile HD Mini Monitor
- User Manual
- Power Adapter
- HDMI to HDMI Cable
- USB-A to USB-C Cable (for power and touch functionality)
3. Setup Instructions
Follow these steps to set up your Pisichen mini monitor:
3.1 Connecting the Monitor
- Power Connection: Connect the provided power adapter to the monitor's power port and plug it into a power outlet. Alternatively, use the USB-C port for power by connecting it to a compatible USB power source.
- Video Input:
- For HDMI devices (PC, laptop, game console): Use the HDMI to HDMI cable to connect your device's HDMI output to one of the monitor's HDMI ports (HDMI 1 or HDMI 2).
- For USB-C devices (with DisplayPort Alternate Mode support): Connect a USB-C to USB-C cable (not included) from your device to the monitor's USB-C port. This single cable can provide both video and power/touch.
- Touch Functionality (for HDMI connections): If using an HDMI connection and requiring touch functionality, connect the provided USB-A to USB-C cable from your source device's USB-A port to the monitor's USB-C port. This enables touch input.
- Audio Output: If you prefer external audio, connect headphones or external speakers to the 3.5mm audio jack on the monitor.

Figure 3.1: Monitor Ports and Connections
3.2 Initial Power On
Once connected, press the ON/OFF button on the side of the monitor to power it on. The monitor should automatically detect the input signal. If not, use the menu buttons to select the correct input source.
4. Operating Instructions
4.1 Basic Controls
The monitor features several buttons on its side for control:
- ON/OFF Button: Powers the monitor on or off.
- Volume Down / Brightness Up: Adjusts volume or increases brightness.
- Volume Up / Brightness Down: Adjusts volume or decreases brightness.
- Signal Switch / Return: Switches between input signals or acts as a 'back' button in menus.
- Menu / OK: Opens the OSD (On-Screen Display) menu or confirms a selection.
4.2 Touch Panel Operation
The 5-point capacitive touch panel allows for intuitive interaction:
- Tap: Select items or activate functions.
- Swipe: Scroll through content or navigate interfaces.
- Pinch-to-Zoom: Enlarge or reduce content (e.g., images, maps).
- Multi-finger Gestures: Supported for specific operating systems and applications.

Figure 4.1: 5-Point Touch Panel Gestures
Note: Touch functionality may require specific driver installation on some operating systems or devices. Ensure your device supports touch input over the chosen connection method.
4.3 Display Modes
The monitor supports various display modes when connected to a computer:
- Duplicate Mode: Displays the same content on both your primary screen and the mini monitor.
- Extended Mode: Extends your desktop across both screens, allowing for more workspace.
- Second Screen Mode: Uses only the mini monitor as the display.
- Portrait Mode: The monitor can be rotated for vertical display, useful for specific applications.
These modes can typically be configured through your operating system's display settings.

Figure 4.2: Multiple Display Modes
4.4 HDR Mode
The monitor supports HDR (High Dynamic Range) mode, which can be enabled via the OSD menu or your connected device's display settings. HDR provides a wider range of colors and contrasts, resulting in a more vibrant and realistic image.
5. Maintenance
To ensure the longevity and optimal performance of your Pisichen mini monitor, follow these maintenance guidelines:
- Cleaning the Screen: Use a soft, lint-free cloth slightly dampened with water or a screen-cleaning solution. Avoid harsh chemicals, abrasive materials, or excessive moisture.
- Cleaning the Casing: Wipe the monitor's casing with a soft, dry cloth.
- Storage: When not in use for extended periods, store the monitor in a cool, dry place away from direct sunlight and extreme temperatures.
- Handling: Avoid dropping the monitor or subjecting it to strong impacts. Do not place heavy objects on top of it.
- Ventilation: Ensure the monitor's vents are not blocked to prevent overheating.
6. Troubleshooting
If you encounter issues with your monitor, refer to the following common problems and solutions:
- No Display / Black Screen:
- Ensure the power adapter is securely connected and the monitor is powered on.
- Verify that the video cable (HDMI or USB-C) is properly connected to both the monitor and the source device.
- Check if the correct input source is selected using the monitor's menu buttons.
- Test with a different video cable or source device if possible.
- No Touch Functionality:
- If using HDMI, ensure the USB-A to USB-C cable is connected from your source device to the monitor's USB-C port.
- For USB-C connections, ensure your device supports touch input over USB-C.
- Check your operating system's settings for touch screen calibration or driver status.
- No Audio:
- Increase the monitor's volume using the side buttons.
- Check your source device's audio output settings to ensure audio is being sent to the monitor.
- If using external speakers/headphones, ensure they are properly connected to the 3.5mm audio jack.
- Image Quality Issues (e.g., lines on screen, distorted colors):
- Check the video cable for damage or loose connections.
- Adjust the monitor's display settings (brightness, contrast, color temperature) via the OSD menu.
- Ensure your source device's display resolution and refresh rate are compatible with the monitor's specifications.
- If persistent, try connecting to a different source device or using a different cable.
7. Specifications
| Brand | Pisichen |
| Model Number | HD-8TS-800P |
| Screen Size | 8 inches |
| Resolution | 800 x 480 pixels |
| Aspect Ratio | 16:9 |
| Touch Panel | 5-point Capacitive Touch |
| Connectivity | 2x HDMI, 1x USB-C (Power/Touch), 1x 3.5mm Audio Jack |
| Color | Black |
| Product Dimensions (W x H x D) | 206 x 130 x 20 mm (approx.) |
| Product Weight | 910 g |
| Features | HDR Mode, Built-in Dual Stereo Speakers |
8. Warranty and Support
Pisichen is committed to providing reliable and high-quality products. While specific warranty details are not provided in this manual, please retain your proof of purchase for any warranty claims. For technical support, troubleshooting assistance, or inquiries regarding your product, please contact Pisichen customer service through the retailer where you purchased the product or visit the official Pisichen brand store online.
We strive for continuous innovation, product content updates, and ongoing improvement in product quality. Our goal is to be a company loved and trusted by our customers.