
1. Introduction
This manual provides detailed instructions for the safe and effective operation of your Radtel RT-730 10W Tri-Band Ham Radio. Please read this manual thoroughly before using the device to ensure proper functionality and to prevent damage.
2. Included Components
Verify that all items listed below are present in your package:
- 1x Radtel RT-730 Ham Radio
- 1x Programming Cable
- 1x 2500mAh Li-ion Battery Pack
- 1x Standard Long Antenna
- 1x Desktop Charger
- 1x Belt Clip
- 1x User Manual (this document)

Image: Radtel RT-730 radio with its complete set of accessories, including the radio unit, battery, antenna, desktop charger, programming cable, and belt clip.
3. Setup
3.1. Battery Installation and Charging
- Align the 2500mAh Li-ion battery pack with the battery compartment on the back of the radio.
- Slide the battery into place until it clicks securely.
- To charge, connect the desktop charger to a power outlet. Place the radio (with battery installed) into the charging cradle. The indicator light on the charger will show charging status.
- Alternatively, the battery can be charged directly using a USB-C cable connected to the radio. This allows charging via a laptop, power bank, or car charger.
3.2. Antenna Attachment
Screw the standard long antenna clockwise onto the antenna connector at the top of the radio until it is finger-tight. Do not overtighten.
3.3. Programming
The Radtel RT-730 can be programmed using PC software or CHIRP. A programming cable is included for this purpose. Refer to the software documentation for detailed programming instructions. The software is compatible with PC operating systems only, not Mac.
4. Operating Instructions
4.1. Controls Overview
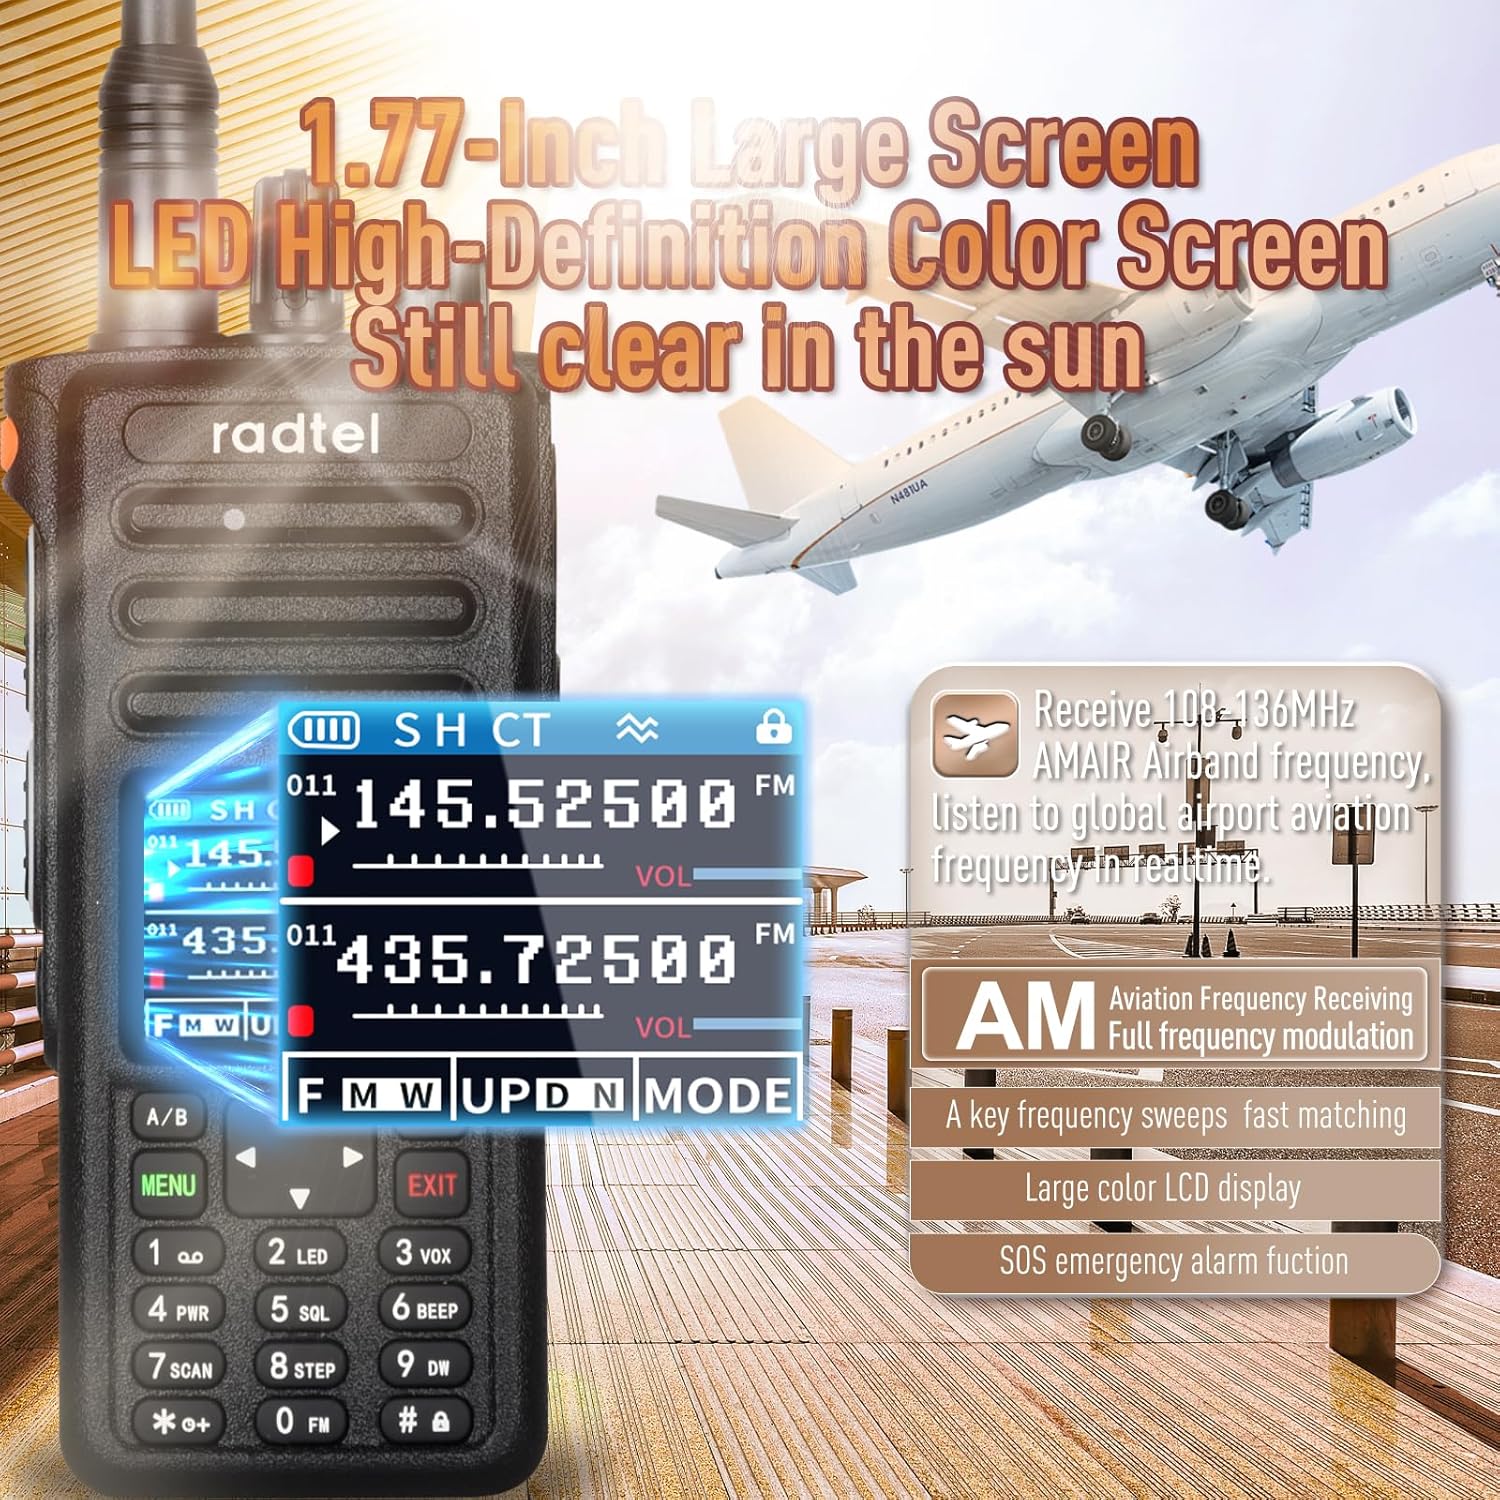
Image: Detailed view of the Radtel RT-730's front panel, highlighting the 1.77-inch large screen, keypad, and various control buttons such as PTT, Menu, A/B switch, and navigation keys.
- Channel Knob: Located at the top, used for channel selection.
- Volume/Switch Knob: Located at the top, controls power on/off and volume.
- Speaker: Front-facing for audio output.
- Screen: 1.77-inch large color screen displays frequency, channel, and status.
- SOS Key: Dedicated button for emergency alarm function.
- PTT1 Key (Upper): Push-to-Talk button for VHF transmission.
- PTT2 Key (Lower): Push-to-Talk button for UHF transmission.
- A/B Switch Key: Toggles between main and sub-band display.
- MENU Key: Accesses the radio's menu system.
- Navigation Keys (Up/Down/Left/Right): Used for menu navigation and frequency adjustment.
- V/M Key: Switches between VFO (Frequency) mode and Memory (Channel) mode.
- EXIT Key: Exits menu or current function.
- Keypad: Numeric and function keys for direct input and feature access.
- Type-C Interface: For direct charging.
4.2. Power On/Off and Volume
Rotate the Volume/Switch knob clockwise to power on the radio. Continue rotating clockwise to increase volume. Rotate counter-clockwise to decrease volume, and fully counter-clockwise to power off.
4.3. Channel and Frequency Selection
- In Memory Mode (MR), use the Channel Knob or Up/Down navigation keys to select a stored channel.
- In VFO Mode (Frequency Mode), use the Up/Down navigation keys to adjust the frequency. You can also directly input frequencies using the keypad.
- Press the A/B key to switch between the main (upper) and sub (lower) frequency displays.
4.4. Transmitting and Receiving
- To transmit on the VHF band, press and hold the PTT1 Key (Upper). Speak clearly into the microphone. Release the key to receive.
- To transmit on the UHF band, press and hold the PTT2 Key (Lower). Speak clearly into the microphone. Release the key to receive.
- The VOX function allows hands-free transmission. When enabled, the radio will transmit automatically when it detects your voice. Activate and adjust VOX sensitivity through the menu.
4.5. One-Key Frequency Copy
The RT-730 features a one-key copying function to duplicate frequencies and subtones from nearby radios. This enables quick setup for communication with other compatible devices.

Image: Two Radtel RT-730 radios side-by-side, illustrating the one-key frequency copy feature for quick synchronization.
4.6. Special Receiving Functions
- NOAA Weather Channel: The radio can receive NOAA weather channels to keep you informed of weather alerts. Access this function through the menu.
- AM Aviation Band: The RT-730 supports receiving on the AM aviation band (108-136MHz), allowing you to listen to air traffic communications.
4.7. Adjusting Power Output
The radio offers adjustable power output (High, Middle, Low) to conserve battery life or maximize range. This setting can be changed via the radio's menu.
5. Maintenance
5.1. Battery Care
- Fully charge the battery before initial use.
- Avoid overcharging or completely draining the battery to prolong its lifespan.
- Store the battery in a cool, dry place when not in use for extended periods.
5.2. Cleaning
Wipe the radio's exterior with a soft, damp cloth. Do not use harsh chemicals or abrasive cleaners. Ensure the USB-C port cover is securely closed to maintain water resistance.
5.3. General Care
- Protect the radio from extreme temperatures, direct sunlight, and moisture.
- Avoid dropping the radio or subjecting it to strong impacts.
- Ensure the antenna is properly attached before operation.
6. Troubleshooting
| Problem | Possible Cause | Solution |
|---|---|---|
| Radio does not power on | Low or dead battery; improperly installed battery | Charge the battery; ensure battery is correctly installed. |
| Cannot transmit or receive | Incorrect frequency/channel; antenna not connected; low power setting; PTT not pressed | Verify frequency/channel; attach antenna; increase power setting; press PTT firmly. |
| Poor audio quality | Low signal strength; incorrect squelch setting; damaged speaker/microphone | Move to an area with better signal; adjust squelch level; contact support if hardware is damaged. |
| Battery drains quickly | High power transmission; frequent use; aging battery | Use lower power settings when possible; reduce transmission time; consider replacing battery if old. |
7. Specifications
| Feature | Detail |
|---|---|
| Model Number | RT-730 |
| Item Weight | 1.41 pounds |
| Package Dimensions | 8.43 x 6.06 x 3.54 inches |
| Batteries | 1 Lithium Ion battery required (included) |
| Number of Channels | 199 |
| Frequency Range (TX/RX) | 144-148MHz / 420-450MHz |
| Frequency Range (RX Only) | 16-630MHz (Full band: AM/FM/Air/CB/Ham/NOAA/Short Wave) |
| Talking Range Maximum | 8 Kilometers |
| Voltage | 7.4 Volts |
| Water Resistance Level | Waterproof |
| Manufacturer | Xiamen Radtel Electronics Co.,Ltd |
8. Warranty Information
The Radtel RT-730 comes with a 1-Year Warranty from the date of purchase. This warranty covers manufacturing defects and malfunctions under normal use. Please retain your proof of purchase for warranty claims. For detailed warranty terms and conditions, refer to the official Radtel website or contact customer support.
9. Support
For technical assistance, troubleshooting beyond this manual, or warranty inquiries, please contact Radtel customer support. You can find contact information on the official Radtel website or through your point of purchase.


