Introduction
This instruction manual provides detailed guidance for assembling and operating your PEMENOL DIY Globe Planetary Motion Soldering Practice Kit. This kit is designed to enhance soldering skills and understanding of basic electronic circuits, culminating in a functional, rotating planetary model with adjustable lights and music. Please read all instructions carefully before beginning assembly.
Safety Information
- Always work in a well-ventilated area when soldering.
- Use appropriate safety gear, including safety glasses, to protect your eyes from solder splatter.
- Ensure your soldering iron is properly grounded and handle it with care to prevent burns.
- Keep small components out of reach of young children to prevent choking hazards.
- Disconnect power before performing any maintenance or adjustments to the assembled kit.
- Do not touch heated components immediately after soldering. Allow them to cool.
Package Contents
Verify that all components listed below are present in your kit before starting assembly.

Image: Overview of all components included in the kit, laid out on a white surface.
- Printed Circuit Boards (PCBs): Main base, globe, and ring PCBs.
- LEDs: Blue LEDs for globe and ring illumination.
- Motor: For 360-degree rotation.
- Switches: On/Off switch for rotation, music control switch.
- Potentiometer: For brightness adjustment.
- Resistors, Capacitors, Diodes, Integrated Circuits.
- Speaker: For music playback.
- Power Cable: USB power cable.
- Mounting Hardware: Screws, nuts, standoffs, springs.
- Printed Instruction Manual.
Setup and Assembly Instructions
Follow these steps carefully to assemble your planetary motion kit. Refer to the included paper guide for detailed diagrams.
- Prepare Components: Unpack all components and organize them. Identify the different PCBs (base, globe, ring) and electronic parts.
- Solder LEDs to Globe and Ring PCBs: Carefully solder the blue LEDs onto the designated pads on the globe and ring PCBs. Ensure correct polarity (longer leg to square pad).
- Assemble Base Circuitry: Solder the motor, switches, potentiometer, speaker, and other electronic components (resistors, capacitors, ICs) onto the main base PCB according to the circuit diagram in your paper manual. Pay close attention to component values and orientation.
- Mount Motor: Secure the motor to the base PCB using the provided screws.
- Connect Globe and Ring: Attach the globe PCB to the central shaft and secure the LED ring around it. Ensure electrical connections are made as per the instructions, often involving small springs or wires.
- Assemble Layers: Mount the assembled globe and ring structure onto the base using the standoffs and screws, creating the multi-layered planetary model.
- Final Connections: Connect the USB power cable to the designated power input on the base PCB.

Image: A fully assembled PEMENOL DIY Globe Planetary Motion Soldering Practice Kit, showcasing the illuminated blue LEDs and rotating structure.
Operating Instructions
Once assembled, your planetary motion kit offers several interactive features.

Image: Visual representation of the kit's main functions, including music, rotation, and adjustable brightness.
Power On/Off
- Connect the USB power cable to a 5V power source (e.g., USB adapter, computer USB port).
- Locate the main power switch on the base of the unit. Flip it to the 'ON' position to power the device.

Image: Close-up of the DC power input jack on the kit's base.
Adjusting LED Brightness
- The kit features a potentiometer (a small knob or screw-adjustable component) on the circular PCB.
- Use a small screwdriver (if screw-adjustable) or turn the knob to increase or decrease the brightness of the blue LEDs.
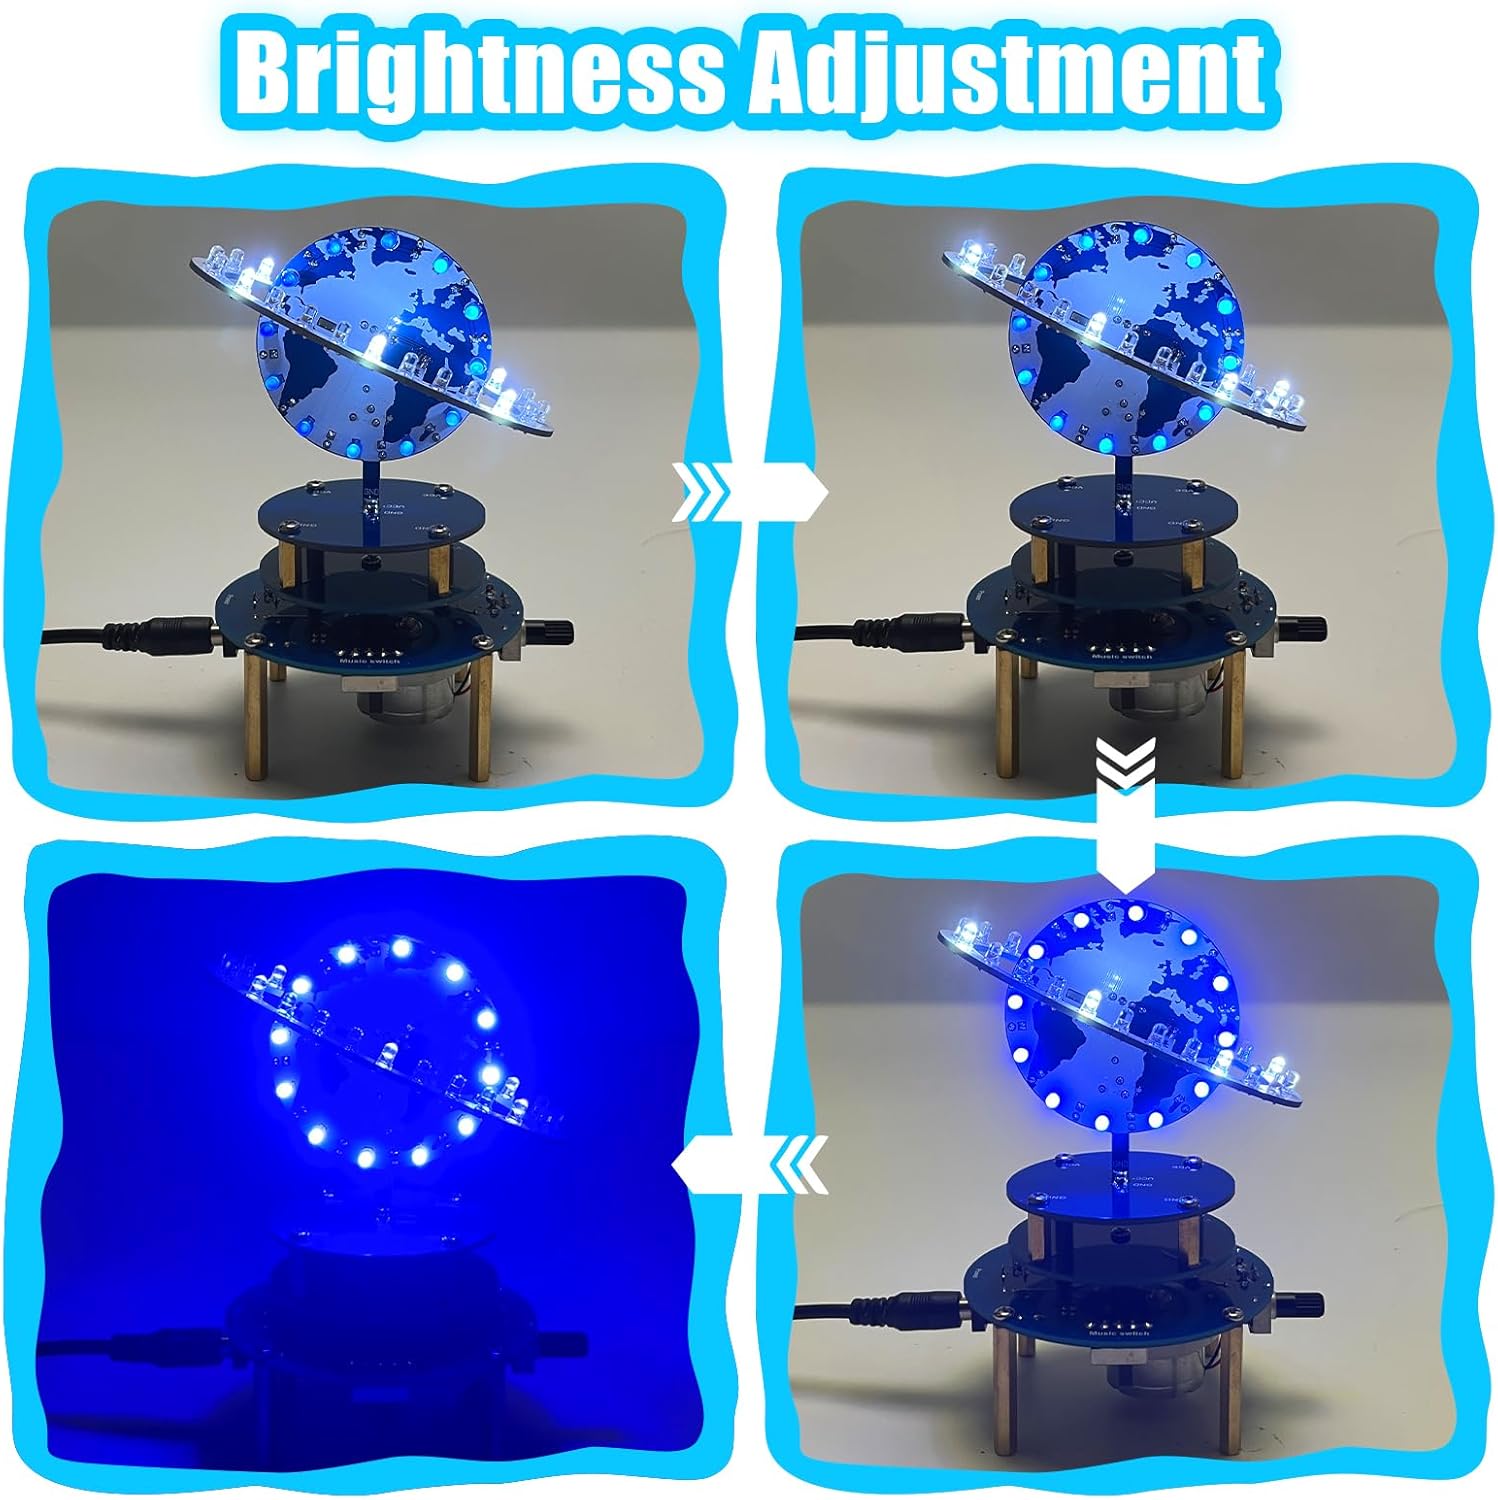
Image: A sequence of images illustrating the LED brightness adjustment from darkest to brightest.

Image: Close-up of the potentiometer used to adjust the blue LED brightness.
Controlling Rotation Speed
- The base includes a motor that enables 360-degree rotation of the globe.
- Locate the rotation speed adjustment knob or switch on the base. Turn it to modify the rotation speed.

Image: Close-up of the switch controlling the motor's rotation.
Music Playback
- The kit has built-in sci-fi inspired music tracks.
- Use the dedicated music control switch to turn the music on or off.

Image: Close-up of the switch for turning the music feature on or off.
Demonstration Videos
Video: This video demonstrates the light effects and rotation of the assembled planetary globe kit, showcasing its visual appeal.
Video: This video illustrates the various functions of the DIY Globe Planet Soldering Kit, including adjustments for rotation speed, music, and LED brightness.
Maintenance
- Cleaning: Use a soft, dry cloth to gently wipe the surface of the kit. Avoid using abrasive cleaners or solvents.
- Storage: Store the kit in a dry, dust-free environment when not in use.
- Component Check: Periodically inspect solder joints for any signs of cracking or corrosion. Re-solder if necessary.
Troubleshooting
| Problem | Possible Cause | Solution |
|---|---|---|
| LEDs do not light up. | Incorrect LED polarity, poor solder joint, faulty LED, no power. | Check LED orientation, inspect and re-solder connections, verify power supply. |
| Motor does not rotate. | Poor motor connection, faulty motor, rotation switch off. | Check motor wiring, ensure rotation switch is on, inspect solder joints. |
| Music does not play. | Music switch off, poor speaker connection, faulty speaker/IC. | Ensure music switch is on, check speaker wiring, inspect solder joints. |
| Brightness adjustment not working. | Faulty potentiometer, poor connection to potentiometer. | Inspect potentiometer wiring and solder joints. |
Specifications
- Model Number: GY21381
- Brand: PEMENOL
- Package Dimensions: 6.1 x 4.09 x 1.65 inches
- Item Weight: 5.9 ounces
- Power Input: 5V DC (via USB cable)
- Features: 360° Rotating Planets, Adjustable LED Brightness, Built-in Music, Adjustable Rotation Speed.
- Recommended Age: 24 months and up (Note: Soldering requires adult supervision for younger users).
Warranty and Support
For warranty information and technical support, please refer to the documentation included with your product packaging or contact PEMENOL customer service directly. Contact details are typically available on the product box or the manufacturer's official website.


