
1. Introduction
This manual provides essential information for the safe and effective operation of your ARCCAPTAIN iControl MIG145 Pro 145A Flux Core MIG Welder. Please read all instructions carefully before use to ensure proper setup, operation, and maintenance. This welder supports Flux Core MIG, MMA (Stick), and Lift TIG welding processes.

Image 1.1: The ARCCAPTAIN iControl MIG145 Pro Welder shown with included accessories such as the MIG torch, ground clamp, electrode holder, flux core wire, and contact tips.
2. Safety Information
Always prioritize safety when operating welding equipment. Failure to follow safety guidelines can result in serious injury or death.
- Wear appropriate personal protective equipment (PPE), including a welding helmet with proper shade, welding gloves, protective clothing, and safety shoes.
- Ensure adequate ventilation to avoid inhaling welding fumes.
- Keep a fire extinguisher nearby.
- Do not weld near flammable materials.
- Ensure the welding machine is properly grounded.
- Disconnect power before performing any maintenance or changing accessories.
3. Package Contents
Verify that all items are present in the package:
- 1 x ARCCAPTAIN MIG145 Pro Welder
- 1 x 6.5FT MIG Torch
- 1 x 10FT Ground Clamp
- 1 x 10FT Electrode Holder
- 1 x K.030-.035 Wire Feed Roller
- 1 x Nozzle
- 3 x Contact Tips
- 1 x .035"/2lbs Flux Core Wire
- 1 x Dust Cover for Welder
- 1 x Shoulder Strap
- 1 x Brush & Hammer

Image 3.1: All components included with the ARCCAPTAIN MIG145 Pro Welder, ready for setup.
4. Setup
4.1 Power Connection
The ARCCAPTAIN MIG145 Pro operates on a 120V AC power source. Ensure your power outlet can provide sufficient amperage (minimum 20A, 30A recommended for optimal performance) to prevent circuit overload.
4.2 Connecting Welding Accessories
- Ground Clamp: Connect the ground clamp cable to the appropriate terminal on the welder. Secure the clamp to the workpiece or welding table, ensuring good electrical contact.
- MIG Torch: Connect the MIG torch to the designated MIG output terminal. Ensure it is securely fastened.
- Electrode Holder (for MMA/Stick welding): If performing MMA welding, connect the electrode holder cable to the positive (+) terminal.
- Lift TIG Torch (optional, not included): For Lift TIG welding, a separate Lift TIG torch is required. Connect it to the appropriate terminal as per the torch's instructions.
4.3 Wire Installation (Flux Core MIG)
- Open the wire feed compartment.
- Install the flux core wire spool onto the spindle, ensuring it rotates freely.
- Thread the wire through the wire feed mechanism and into the MIG torch liner.
- Adjust the wire tension to prevent slipping or crushing.
- Ensure the correct wire feed roller (.030-.035) is installed for the wire diameter being used.
4.4 App Control Setup
The ARCCAPTAIN iControl MIG145 Pro features smartphone app control. Download the official ARCCAPTAIN app from your device's app store. Follow the in-app instructions to pair your welder via Bluetooth. This allows for remote adjustment of settings and saving preferred configurations.
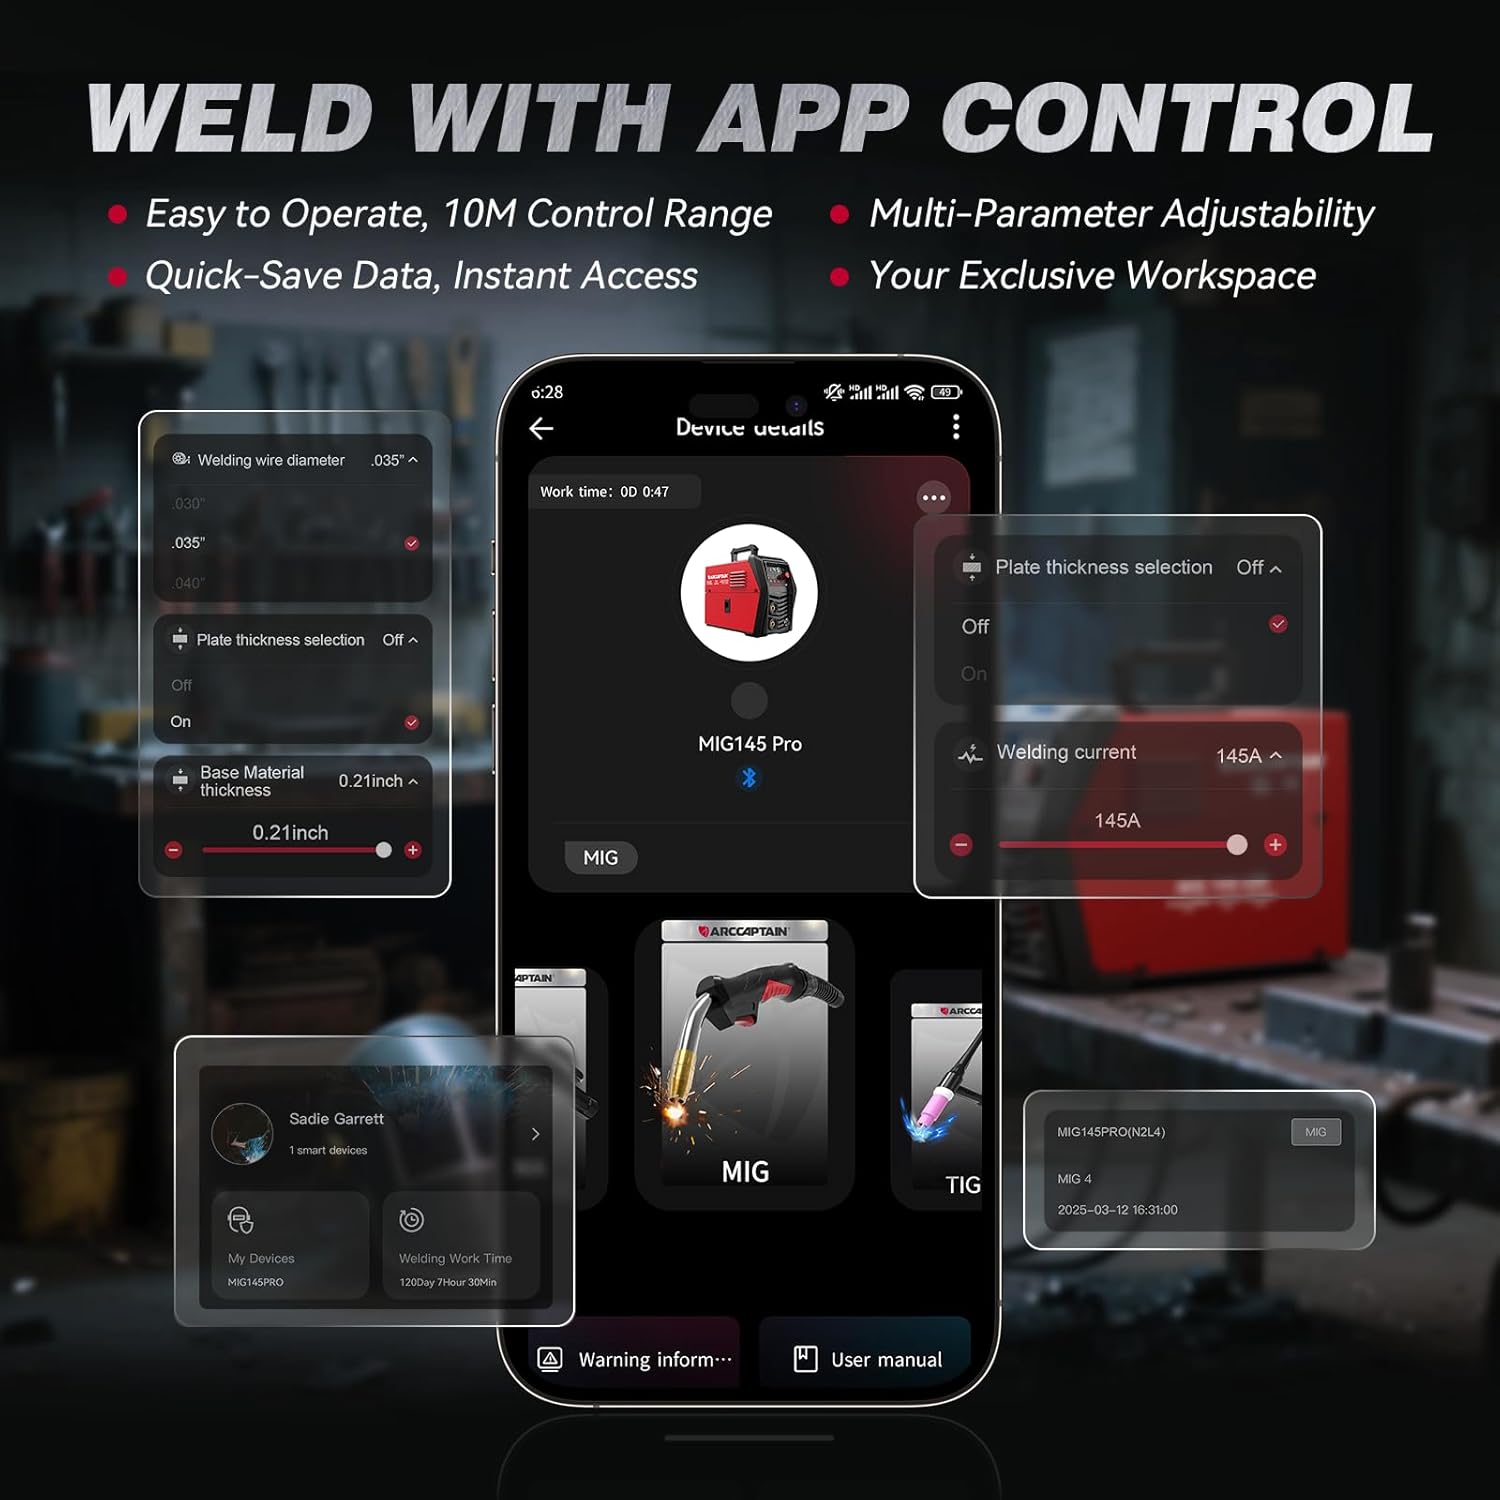
Image 4.1: The ARCCAPTAIN app interface, demonstrating remote control capabilities for welding parameters.
5. Operating Instructions
5.1 Powering On and Mode Selection
Turn on the welder using the main power switch. The large LED display will illuminate, showing current settings. Use the mode button to select between Flux Core MIG, MMA (Stick), or Lift TIG welding processes.

Image 5.1: The large LED display provides clear, easy-to-read information for setting modes and adjusting parameters.
5.2 Synergic Control (Flux Core MIG)
For Flux Core MIG welding, the synergic control feature simplifies setup. Once you select the wire diameter and material thickness, the welder automatically adjusts the current and wire feed speed to recommended settings. This feature is beneficial for beginners.

Image 5.2: The synergic setting automatically matches wire feed speed and voltage, simplifying operation.
5.3 Manual Parameter Adjustment
For experienced users, parameters can be manually adjusted using the control knob and buttons on the welder's front panel or via the smartphone app. The large LED display provides real-time feedback on adjustments.
5.4 Welding Process Overview
The ARCCAPTAIN MIG145 Pro supports three welding processes:
- Flux Core MIG: Gasless welding suitable for outdoor use and various materials.
- MMA (Stick): Versatile for different rod types and conditions.
- Lift TIG: Provides precise welds, requires a separate TIG torch and shielding gas.

Image 5.3: Visual representation of the three welding processes supported by the machine: Flux Core, Stick, and Lift TIG.
5.5 Welding Parameter Guidelines
The following tables provide general guidelines for welding parameters. Actual settings may vary based on material, wire type, and specific application.
| Wire Type | Shielding Gas | Material Thickness | Recommended Current (A) |
|---|---|---|---|
| Flux E71T-GS | No Gas | 0.030" (0.8mm) | 40-50 |
| Flux E71T-GS | No Gas | 0.040" (1.0mm) | 45-55 |
| Flux E71T-GS | No Gas | 0.060" (1.5mm) | 65-75 |
| Flux E71T-GS | No Gas | 0.079" (2.0mm) | 90-100 |
| Flux E71T-GS | No Gas | 0.098" (2.5mm) | 110-120 |
| Flux E71T-GS | No Gas | 0.118" (3.0mm) | 130-145 |
| Electrode | Material Thickness | Recommended Current (A) |
|---|---|---|
| 2.5mm (3/32") | 0.060" (1.5mm) | 75 |
| 2.5mm (3/32") | 0.078" (2.0mm) | 105 |
| 2.5mm (3/32") | 0.118" (3.0mm) | 115 |
| 3.2mm (1/8") | 0.078" (2.0mm) | 105 |
| 3.2mm (1/8") | 0.118" (3.0mm) | 115 |
| 3.2mm (1/8") | 0.157" (4.0mm) | 145 |
| Shielding Gas | Tungsten | Material Thickness | Recommended Current (A) |
|---|---|---|---|
| 99.9% Ar | 1.6mm (1/16") | 0.023" (0.6mm) | 45 |
| 99.9% Ar | 1.6mm (1/16") | 0.030" (0.8mm) | 65 |
| 99.9% Ar | 1.6mm (1/16") | 0.040" (1.0mm) | 75 |
| 99.9% Ar | 2.4mm (3/32") | 0.040" (1.0mm) | 75 |
| 99.9% Ar | 2.4mm (3/32") | 0.050" (1.25mm) | 105 |
| 99.9% Ar | 2.4mm (3/32") | 0.060" (1.5mm) | 115 |
| 99.9% Ar | 2.4mm (3/32") | 0.078" (2.0mm) | 125 |
| 99.9% Ar | 2.4mm (3/32") | 0.118" (3.0mm) | 145 |
6. Maintenance
Regular maintenance ensures the longevity and optimal performance of your welder.
- Cleaning: Periodically clean the welder's exterior with a dry cloth. Use compressed air to clear dust from ventilation openings. The smart fan design helps reduce dust accumulation.
- Wire Feed Mechanism: Inspect the wire feed rollers and liner for wear or blockages. Clean or replace as necessary to ensure smooth wire feeding.
- Torch and Cables: Check all cables and the welding torch for damage. Replace any worn or damaged components immediately.
- Storage: When not in use, store the welder in a clean, dry environment. Use the provided dust cover to protect it from dust and debris.
7. Troubleshooting
If you encounter issues with your welder, consider the following common troubleshooting steps:
- No Power: Check the power cord connection, wall outlet, and circuit breaker. Ensure the welder's power switch is in the 'ON' position.
- Poor Arc Start/Stability: Verify proper grounding of the workpiece. Check for correct wire feed speed and voltage settings. Ensure contact tip and nozzle are clean and free from spatter. For MMA, check electrode condition.
- Wire Feeding Issues: Inspect the wire spool for tangles. Check wire tension and ensure the correct wire feed roller is installed and clean.
- Overheating: The welder has a smart fan for cooling. If an overheat warning appears, allow the machine to cool down. Ensure ventilation openings are not blocked.
- App Connectivity Issues: Ensure Bluetooth is enabled on your smartphone and the welder. Restart both devices if connection fails.
For persistent issues, refer to the comprehensive troubleshooting section in the full product manual or contact ARCCAPTAIN customer support.
8. Specifications
| Feature | Detail |
|---|---|
| Model Number | MIG145-PRO |
| Manufacturer | ARCCAPTAIN |
| Input Voltage | 110 Volts AC |
| Welding Processes | Flux Core MIG, MMA (Stick), Lift TIG |
| Max Output Current | 145A |
| Item Weight | 10 pounds |
| Product Dimensions | 14.9 x 5.3 x 9.7 inches |
| Material | ABS+Metal |
| Control Features | Synergic Control, APP Control, Large LED Display |

Image 8.1: The compact size and light weight (9.5 lbs) of the ARCCAPTAIN MIG145 Pro, making it portable.
9. Warranty and Support
For detailed warranty information, please refer to the official documentation included with your product or visit the ARCCAPTAIN official website. For technical support, service, or parts inquiries, please contact ARCCAPTAIN customer service through their official channels.


