1. Introduction
This manual provides detailed instructions for the operation and maintenance of your Raddy RF206 Digital AM/FM/Shortwave Portable Radio. Please read this manual thoroughly before using the device to ensure proper function and to maximize your listening experience.
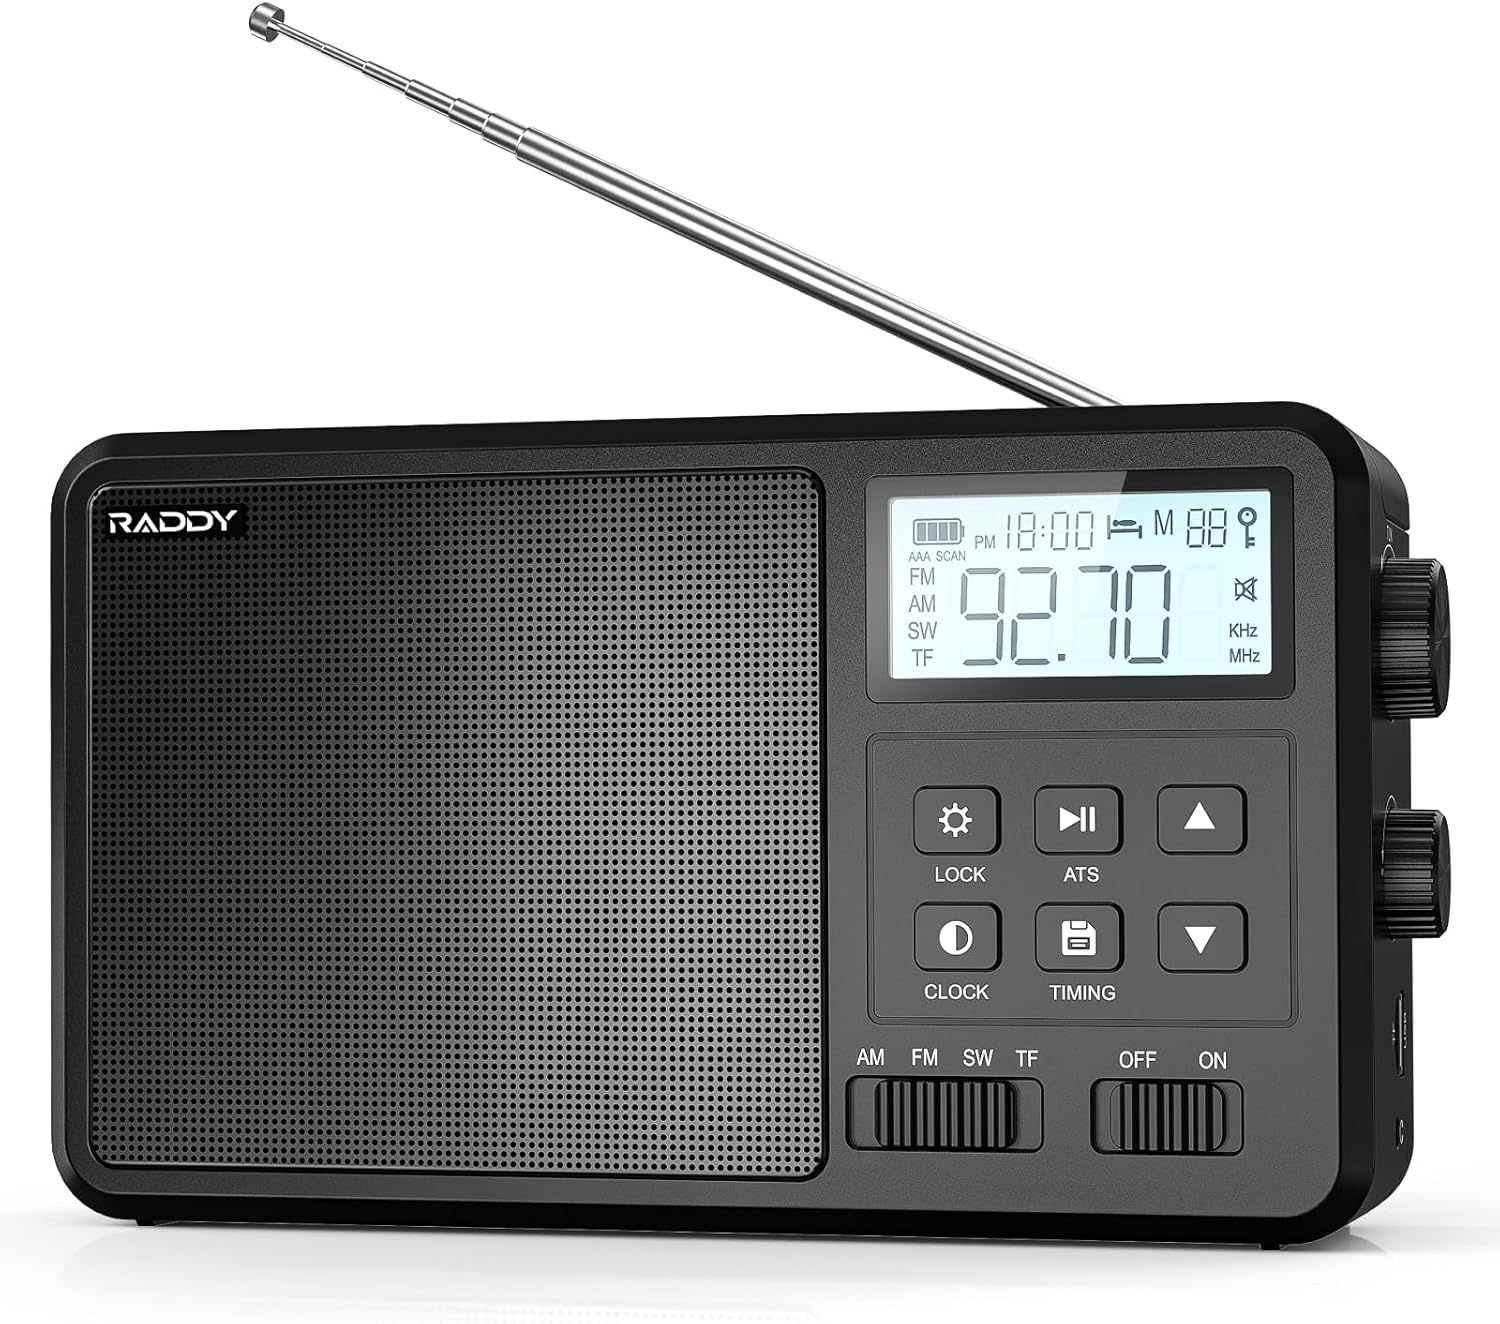
Image 1.1: Front view of the Raddy RF206 Digital Portable Radio, showing the speaker grille, LCD display, and control buttons.
2. Product Features
- Broad Band Coverage: Receives AM, FM, and Shortwave (SW: 2.3000-23.000MHZ) frequencies.
- Versatile Audio Options: Supports Bluetooth, TF card, and USB playback.
- High-Quality Audio: Features an 8W high-power speaker for clear sound. Supports FLAC lossless audio format via USB and TF card.
- Station Management: Automatic and manual station saving with digital scanning and tuning. Stores up to 110 stations.
- User-Friendly Design: Large LCD with backlight, large buttons, volume and tuning knobs, and a portable handle.
- Multiple Power Modes: Operates on AC power or 4x AA batteries.
- Connectivity: Includes a 3.5mm headphone jack and an external antenna jack.

Image 2.1: Illustration highlighting the powerful 8W speaker of the Raddy RF206, emphasizing its audio output capabilities.
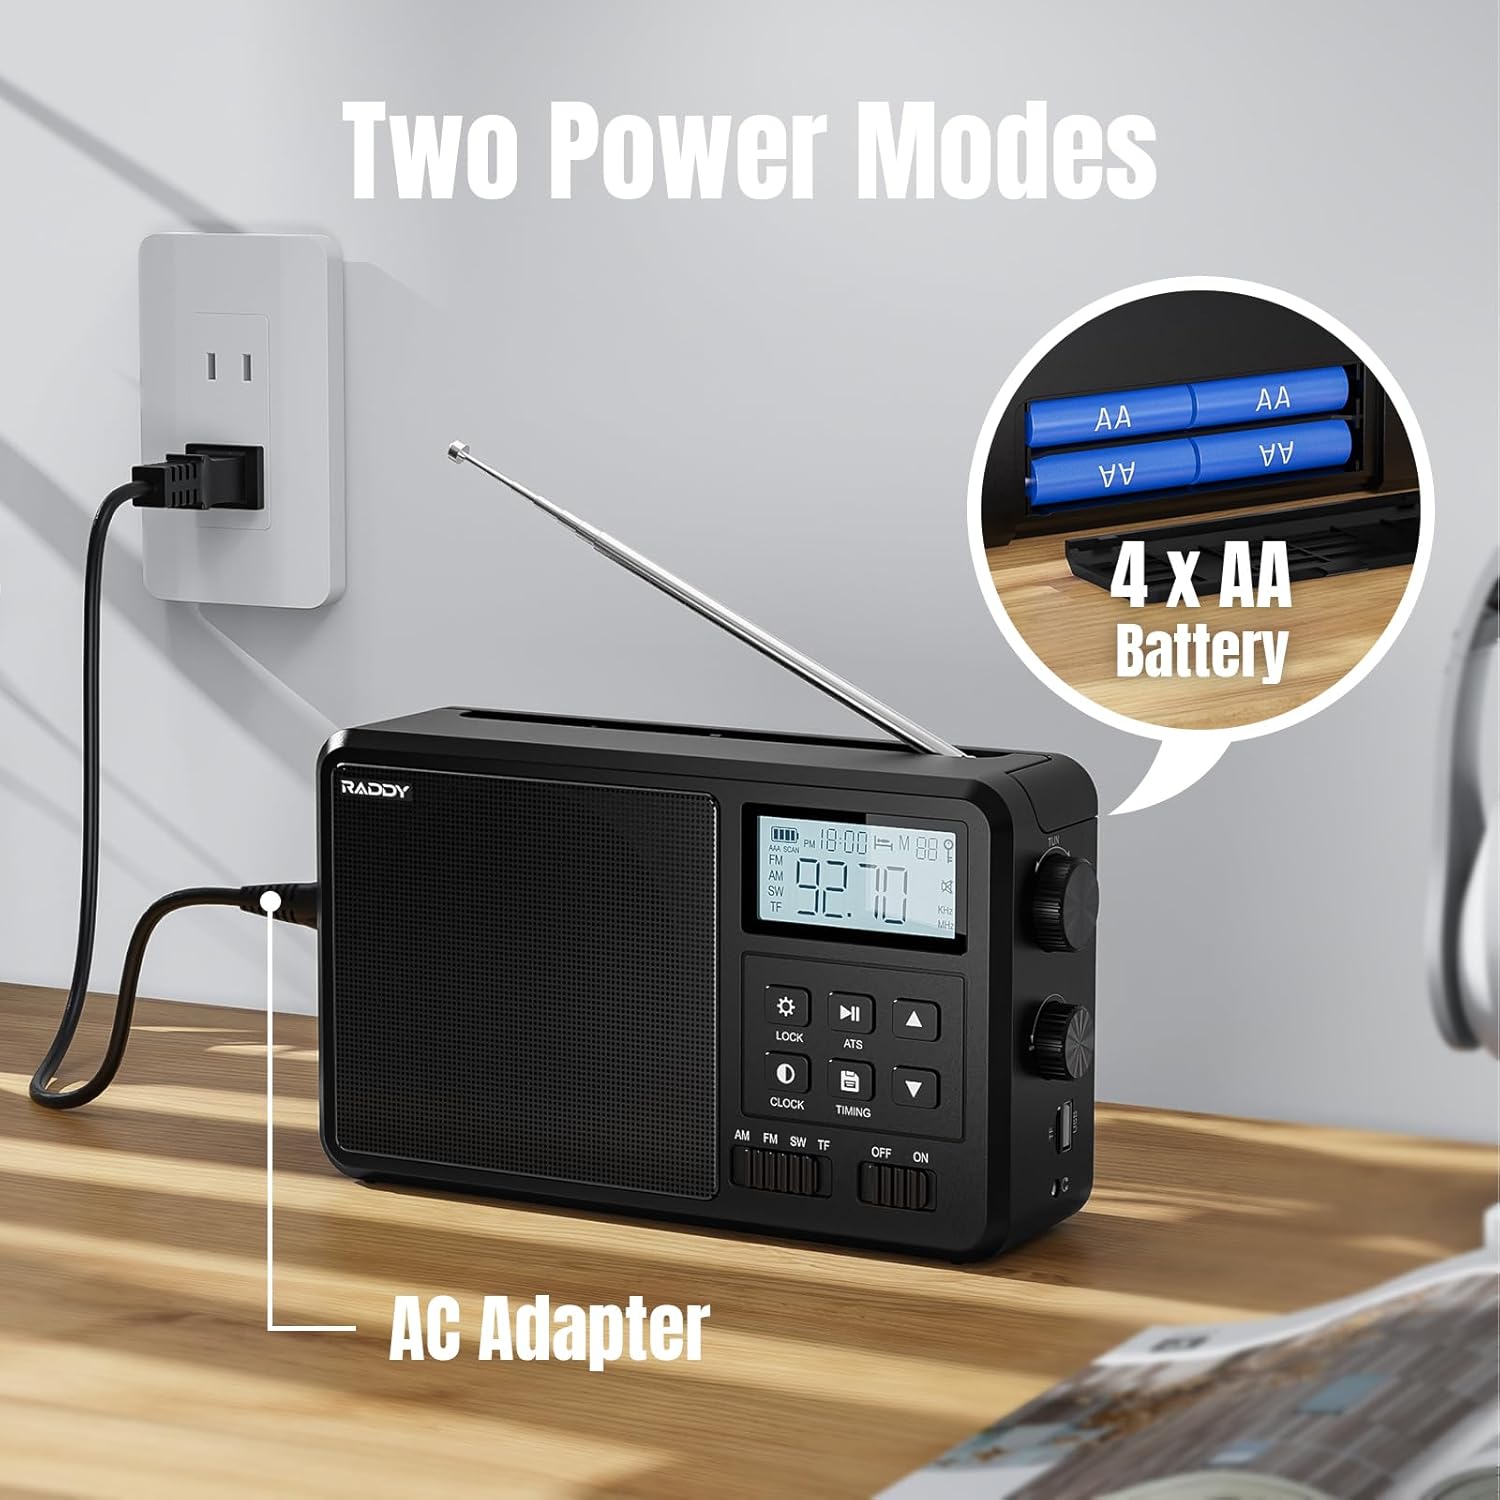
Image 2.2: The Raddy RF206 radio displayed alongside a smartphone, illustrating its four versatile audio modes: Bluetooth, TF Card, USB, and FM/AM/SW Radio.
3. Setup
3.1 Powering the Radio
The Raddy RF206 can be powered by either an AC adapter or four AA batteries.
3.1.1 AC Power Connection
- Locate the AC adapter cable provided with your radio.
- Insert the small end of the AC adapter into the 'AC IN' port on the side of the radio.
- Plug the other end of the AC adapter into a standard wall outlet (110V-240V).
3.1.2 Battery Installation
- Open the battery compartment cover located on the back of the radio.
- Insert four (4) AA batteries, ensuring correct polarity (+/-) as indicated inside the compartment.
- Close the battery compartment cover securely.

Image 3.1: The Raddy RF206 radio demonstrating its two power options: connected to an AC wall outlet and powered by four AA batteries.
3.2 Antenna Extension
For optimal reception, especially for FM and Shortwave bands, fully extend the telescopic antenna. For AM reception, the radio has a built-in antenna, but adjusting the radio's orientation may improve signal quality.

Image 3.2: The Raddy RF206 radio with its telescopic antenna extended, illustrating its capability for 360-degree signal reception across AM, FM, and SW bands.
4. Operating Instructions
4.1 Power On/Off
Slide the 'OFF/ON' switch located on the front panel to the 'ON' position to power on the radio. Slide it to 'OFF' to power off.
4.2 Band Selection
Use the 'AM/FM/SW/TF' slide switch on the front panel to select your desired listening mode:
- AM: Amplitude Modulation band.
- FM: Frequency Modulation band.
- SW: Shortwave band.
- TF: For playing audio from a TF (MicroSD) card or USB drive (the radio automatically detects the source).
4.3 Tuning and Station Management
4.3.1 Manual Tuning
Rotate the large tuning knob on the right side of the radio to manually adjust the frequency. The selected frequency will be displayed on the LCD screen.
4.3.2 Automatic Scan (ATS)
Press the 'ATS' button to initiate an automatic scan for available stations. The radio will scan and save strong signals into memory. This function is available for AM, FM, and SW bands.
4.3.3 Saving Stations Manually
- Tune to your desired station using manual tuning.
- Press and hold the 'SAVE' button (often indicated by a disk icon) until the display confirms the station is saved.
- Use the up/down arrow buttons to select a memory slot, then press 'SAVE' again to confirm.
4.3.4 Recalling Saved Stations
Press the 'M' (Memory) button, then use the up/down arrow buttons to navigate through your saved stations.
4.4 Volume Control
Rotate the volume knob, typically located on the right side of the radio, to adjust the audio output level.
4.5 Bluetooth Playback
- Switch the band selector to 'TF' mode. The radio will automatically enter Bluetooth pairing mode if no TF card or USB drive is detected, or if Bluetooth is selected via a mode button.
- On your mobile device, enable Bluetooth and search for 'Raddy RF206'.
- Select the radio to pair. Once connected, you can play audio from your device through the radio.
4.6 TF Card / USB Playback
- Insert a TF (MicroSD) card or USB drive containing audio files into the respective slot.
- Switch the band selector to 'TF' mode. The radio will automatically detect and begin playing audio files.
- Use the 'Play/Pause', 'Next Track', and 'Previous Track' buttons to control playback.
4.7 Headphone Use
Plug 3.5mm headphones into the headphone jack for private listening. The radio's internal speaker will automatically mute when headphones are connected.

Image 4.1: A user wearing headphones connected to the Raddy RF206, highlighting the 3.5mm earphone jack and the external antenna jack for enhanced reception.
4.8 Clock and Timing Functions
The radio features a clock display and may include alarm and sleep timer functions. Refer to the specific buttons labeled 'CLOCK' and 'TIMING' for setting these features. Typically, pressing 'CLOCK' allows time adjustment, and 'TIMING' activates sleep or alarm settings.

Image 4.2: The Raddy RF206 radio on a bedside table, illustrating its alarm and sleep timer functionalities for user convenience.
4.9 Keypad Lock
Press the 'LOCK' button to prevent accidental button presses. Press it again to unlock the keypad.

Image 4.3: A detailed view of the Raddy RF206's user interface, highlighting the large volume and tuning knobs, the clear LCD display with backlight, the keypad lock function, and the integrated portable handle.
5. Maintenance
- Cleaning: Use a soft, dry cloth to clean the radio's exterior. Do not use abrasive cleaners or solvents.
- Storage: If storing the radio for an extended period, remove the AA batteries to prevent leakage. Store in a cool, dry place.
- Antenna Care: Handle the telescopic antenna gently to avoid bending or breaking.
6. Troubleshooting
| Problem | Possible Cause | Solution |
|---|---|---|
| No power | Batteries are dead or incorrectly inserted; AC adapter not connected or faulty. | Replace batteries, check polarity; ensure AC adapter is securely plugged in. |
| Poor radio reception | Antenna not extended; weak signal area; interference. | Fully extend antenna; reposition radio; try an external antenna (if applicable). |
| Bluetooth not connecting | Radio not in pairing mode; device too far; previously paired device connected. | Ensure radio is in Bluetooth mode; move device closer; disconnect from other devices. |
| TF card/USB not playing | Incorrect file format; card/drive not inserted correctly; corrupted files. | Ensure files are supported (e.g., FLAC); reinsert card/drive; try different files. |
| Keypad unresponsive | Keypad lock is active. | Press the 'LOCK' button to deactivate the keypad lock. |
7. Specifications
| Feature | Detail |
|---|---|
| Model Number | RF206 |
| Product Dimensions | 3.94"L x 1.97"W x 5.91"H (10 x 5 x 15 cm) |
| Item Weight | 1.8 pounds (0.82 kg) |
| Tuner Technology | FM, AM, SW |
| Connectivity Technology | Bluetooth |
| Special Features | Built-In AM Antenna, Portable, Rechargeable (via AC adapter) |
| Power Source | Battery Powered (4x AA), AC Powered |
| Included Components | Owner's Manual, AC Adapter |

Image 7.1: The Raddy RF206 radio with its compact dimensions clearly labeled in both millimeters and inches, highlighting its portable design.
8. Warranty and Support
For warranty information and customer support, please refer to the documentation included with your purchase or visit the official Raddy website. Keep your purchase receipt as proof of purchase for any warranty claims.
For further assistance, you may contact Raddy customer service through their official channels.


