1. Introduction
This manual provides detailed instructions for the installation, configuration, and operation of your Binardat 6-Port 2.5G/10G Managed Network Switch. This device is designed to enhance your network's performance with high-speed connectivity and flexible management options. Please read this manual thoroughly before using the product to ensure proper setup and functionality.
2. Product Overview
2.1 Key Features
- High-Speed Connectivity: Features 4 x 2.5G RJ-45 Base-T ports and 2 x 10G RJ-45 ports for versatile network expansion.
- Flexible Management: Supports both unmanaged and web-managed modes, selectable via a DIP switch.
- Silent Operation: Fanless metal casing design ensures quiet operation and efficient heat dissipation.
- Layer 2 Features: Includes VLAN, QoS, security, multicast, MAC address table management, and diagnostic tools in web-managed mode.
- Easy Installation: Plug-and-play functionality with auto MDI/MDIX and auto-negotiation for simple setup.
- Versatile Placement: Compact design suitable for desktop or wall-mount installations.
2.2 Package Contents
Verify the following items are included in your package:
- Binardat 6-Port 2.5G/10G Managed Network Switch
- Power Adapter (12V/1.0A Max 10W)
- User Manual (this document)
2.3 Physical Description

Image: Front view of the Binardat 6-Port 2.5G/10G Managed Network Switch, showing the six RJ-45 ports and LED indicators.
The switch features a durable metal casing with a fanless design for silent operation. The front panel includes:
- Ports 1-4: 2.5G RJ-45 Ethernet ports (compatible with 100Mbps/1Gbps).
- Ports 5-6: 10G RJ-45 Ethernet ports (compatible with 1G/2.5G/5G/10G).
- PWR LED: Power indicator.
- U/M DIP Switch: Selects between Unmanaged (U) and Web Managed (M) modes.
- Reset Button: Used to restart the device or restore factory settings.

Image: Detailed diagram of the switch's front panel, illustrating the 2.5G and 10G ports, PWR LED, U/M switch, and Reset button, along with their functions.
3. Setup
3.1 Initial Placement
Place the switch on a stable, flat surface or mount it to a wall using appropriate hardware (not included). Ensure adequate ventilation around the device. The fanless design relies on natural convection for cooling.
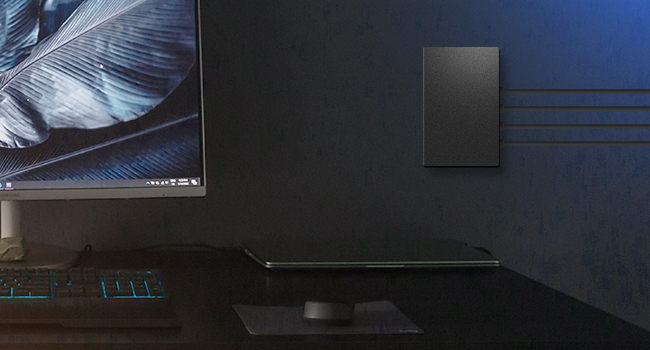
Image: Illustration demonstrating the wall-mountable design of the Binardat network switch, showing it affixed to a wall next to a monitor.
3.2 Power Connection
- Connect the provided power adapter to the DC input port on the rear of the switch.
- Plug the power adapter into a standard electrical outlet.
- The PWR LED on the front panel will illuminate, indicating the switch is powered on.
3.3 Network Connections
- Connect your network devices (e.g., computers, NAS, Wi-Fi 6 APs) to ports 1-4 using Cat5e or better Ethernet cables for 2.5G speeds.
- For 10G connectivity, use Cat6a or Cat7 Ethernet cables for ports 5-6. These ports are ideal for connecting to a server, high-speed NAS, or another 10G switch.
- The Link/Act LEDs for each connected port will illuminate when a valid connection is established and flash during data activity.
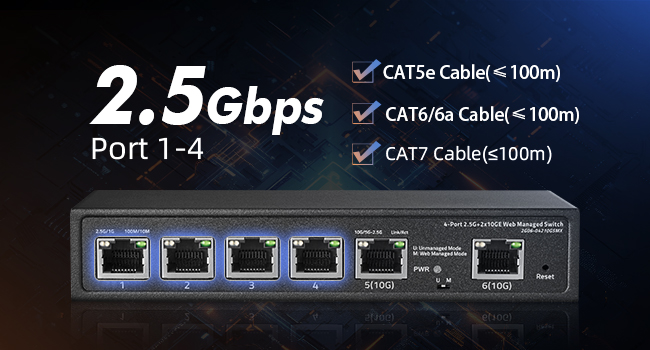
Image: Diagram showing recommended cable types for 2.5G ports (Cat5e, Cat6/6a, Cat7 up to 100m).
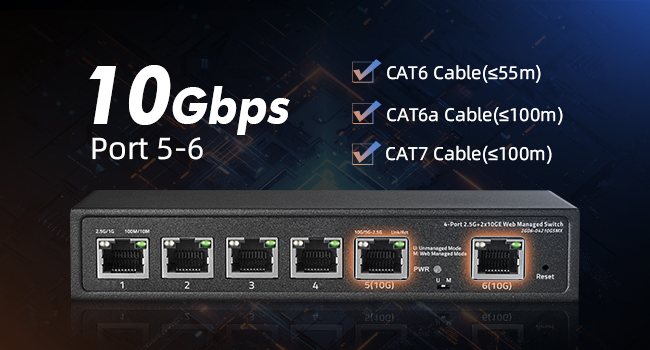
Image: Diagram showing recommended cable types for 10G ports (Cat6 up to 55m, Cat6a, Cat7 up to 100m).
3.4 Managed/Unmanaged Mode Selection
The switch supports two operational modes, selected via the U/M DIP switch on the front panel:
- U (Unmanaged Mode): The switch operates as a standard plug-and-play device with no configuration required. All ports function automatically.
- M (Web Managed Mode): Enables access to the web-based management interface for advanced configuration options.
To change modes:
- Disconnect the power adapter from the switch.
- Set the U/M DIP switch to the desired position (U for Unmanaged, M for Web Managed).
- Reconnect the power adapter. The switch will boot into the selected mode.
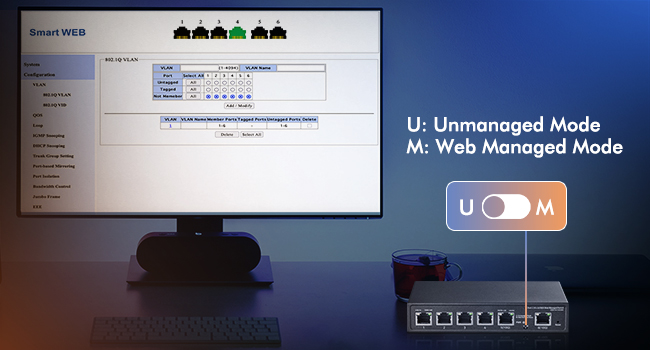
Image: Illustration showing the U/M DIP switch on the switch and its function to toggle between Unmanaged and Web Managed modes.
4. Operating the Switch
4.1 LED Indicators
The LEDs on the front panel provide real-time status information:
- PWR LED:
- On: Device is powered on.
- Off: Device is powered off.
- Link/Act LEDs (per port):
- Solid Green (Ports 1-4): 2.5G link established.
- Solid Yellow (Ports 1-4): 100Mbps/1G link established.
- Solid Green (Ports 5-6): 10G link established.
- Solid Yellow (Ports 5-6): 1G/2.5G/5G link established.
- Flashing: Data transmission activity.
- Off: No link or device is powered off.
4.2 Web Management Interface (Managed Mode Only)
When the switch is in Web Managed Mode (M), you can access its configuration interface via a web browser.
- Ensure your computer is connected to one of the switch's ports.
- Open a web browser and enter the default IP address: 192.168.2.1
- Enter the default login credentials:
- Username: admin
- Password: admin
- Upon successful login, you can configure various Layer 2 features such as VLAN, QoS, port isolation, link aggregation, and more.
Important: For security, it is highly recommended to change the default login password immediately after your first login.
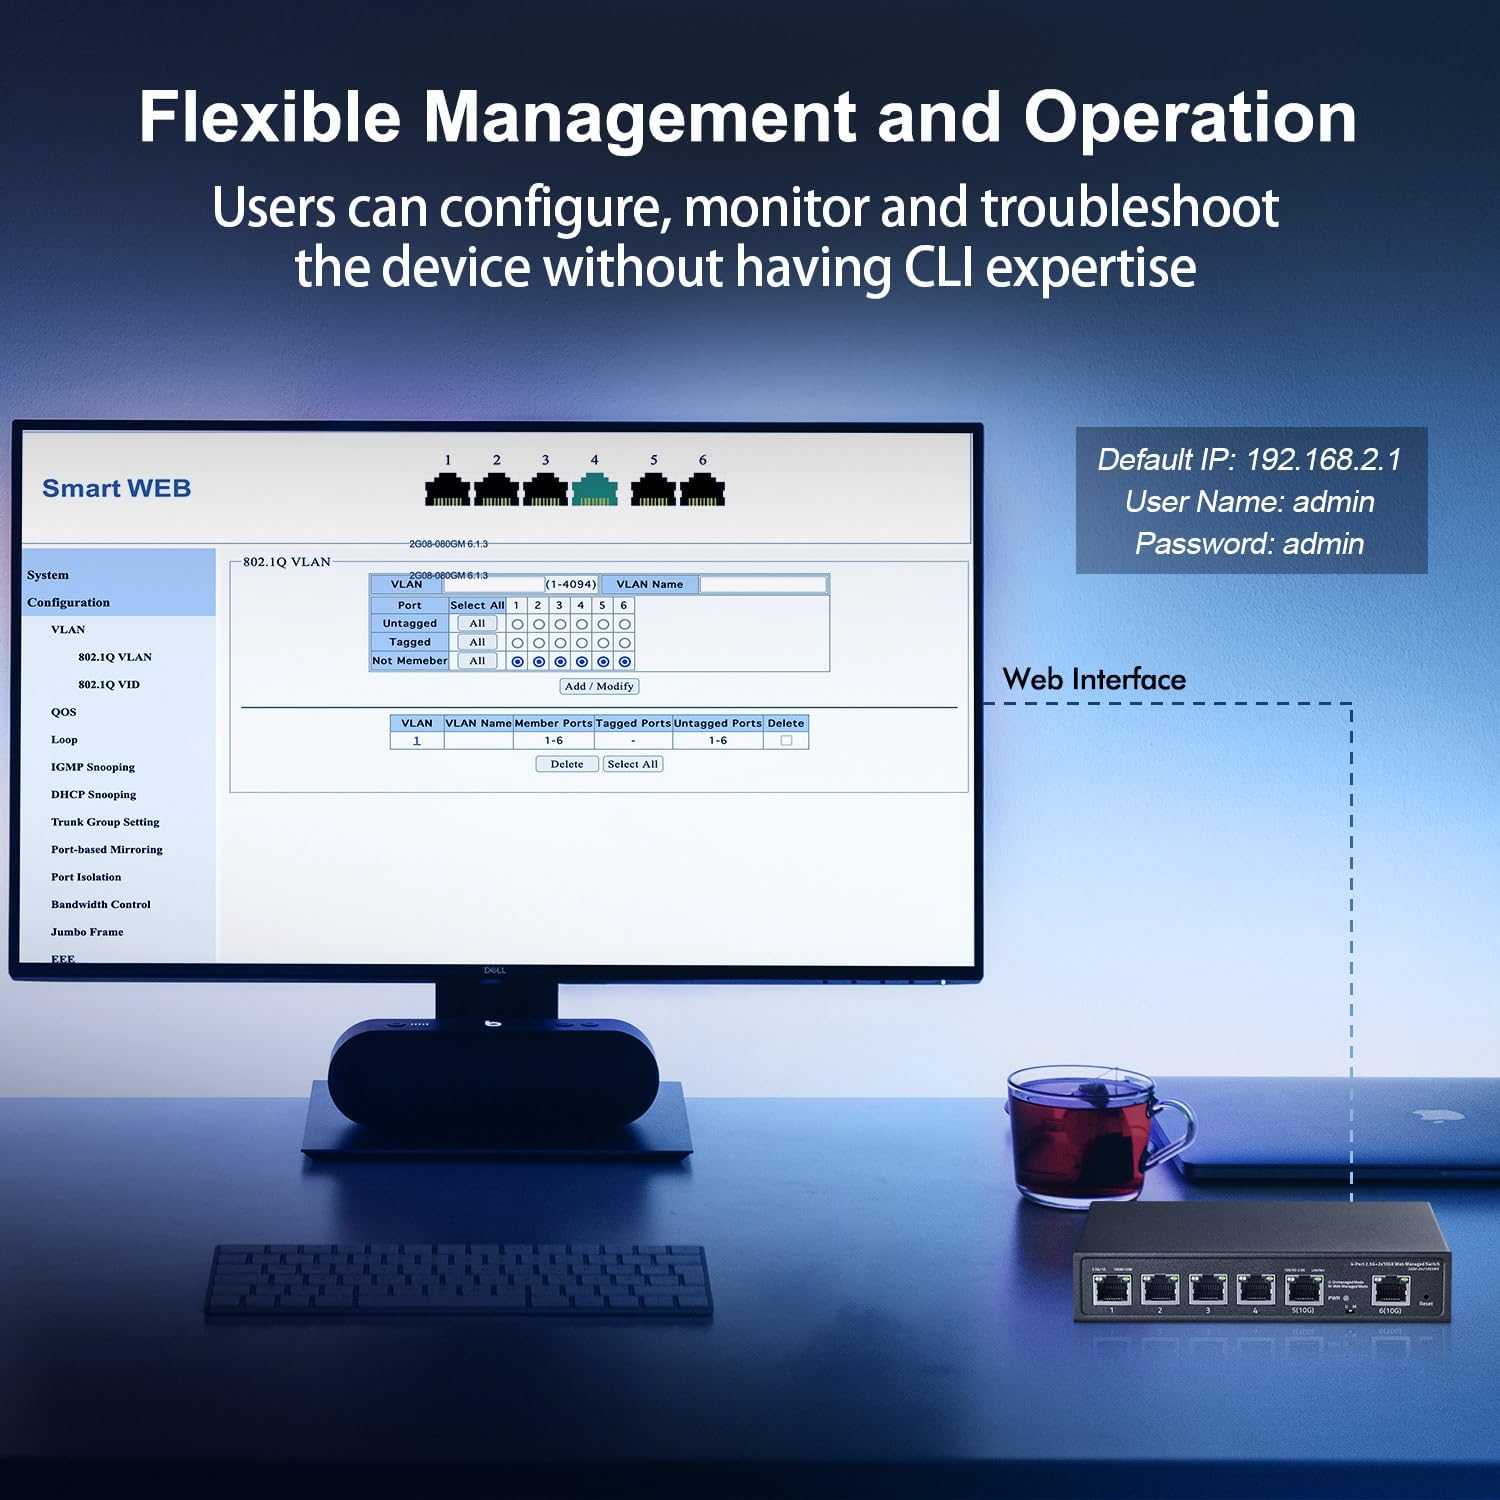
Image: Screenshot of the Binardat switch's web management interface, showing VLAN configuration options and default login credentials.
4.3 Advanced Features Overview
The web management interface provides access to advanced Layer 2 features:
- VLAN (Virtual Local Area Network): Segment your network for improved security and performance.
- QoS (Quality of Service): Prioritize network traffic for critical applications (e.g., video streaming, VoIP).
- Link Aggregation (LAG): Combine multiple physical links into a single logical link for increased bandwidth and redundancy.
- Port Isolation: Isolate ports to prevent communication between specific devices, enhancing security.
- Storm Control: Prevent network performance degradation caused by broadcast, multicast, or unknown unicast storms.
- Jumbo Frame Support: Allows for larger Ethernet frames, improving efficiency for large data transfers.
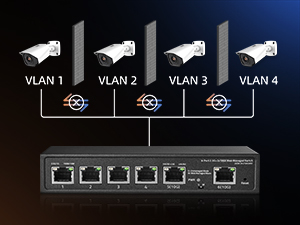

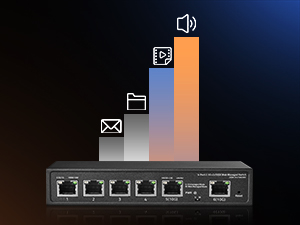
Image: Illustrations depicting VLAN for network segmentation, Link Aggregation for increased bandwidth, and QoS for traffic prioritization.
5. Maintenance
5.1 Cleaning
To maintain optimal performance and longevity, keep the switch clean:
- Power off the device and disconnect the power adapter before cleaning.
- Use a soft, dry cloth to wipe the exterior of the switch.
- Do not use liquid or aerosol cleaners, as they may damage the device.
5.2 Environmental Considerations
Ensure the switch is operated within its specified environmental conditions:
- Avoid placing the switch in direct sunlight or near heat sources.
- Keep the device away from moisture and excessive humidity.
- Ensure proper airflow around the switch, especially if wall-mounted, to facilitate passive cooling.
5.3 Firmware Updates
Periodically check the Binardat official website for available firmware updates. Firmware updates can provide new features, performance improvements, and security enhancements. Follow the instructions provided with the firmware update package carefully.
6. Troubleshooting
If you encounter issues with your Binardat switch, refer to the following common problems and solutions:
| Problem | Possible Cause | Solution |
|---|---|---|
| No power (PWR LED off) | Power adapter not connected or faulty; power outlet issue. | Verify power adapter connection. Test the power outlet with another device. Replace power adapter if necessary. |
| No link on a port (Link/Act LED off) | Ethernet cable faulty or disconnected; connected device is off or faulty; incorrect cable type. | Check cable connections. Try a different Ethernet cable. Ensure the connected device is powered on and functioning. Verify cable type meets speed requirements. |
| Slow network speed | Cable quality or length; network congestion; duplex mismatch; connected device limitation. | Ensure high-quality Ethernet cables (Cat5e for 2.5G, Cat6a/7 for 10G) are used and within length limits. Check for other high-bandwidth activities. Verify duplex settings on connected devices (if configurable). |
| Cannot access web management interface | Switch in Unmanaged mode; incorrect IP address; IP address conflict; browser issues. | Ensure the U/M DIP switch is set to 'M' (Managed). Verify you are using the default IP 192.168.2.1. Check your computer's IP settings. Try a different browser. |
6.1 Factory Reset
If the switch is not functioning correctly or you have forgotten the login credentials for the web management interface, you can restore it to factory default settings.
- With the switch powered on, use a paperclip or a similar pointed object to press and hold the Reset button for approximately 5 seconds.
- Release the button when the LEDs flash, indicating the reset process has begun.
- The switch will restart with all settings restored to their factory defaults.
7. Specifications
| Feature | Description |
|---|---|
| Brand | Binardat |
| Model Number | 4x2.5G+2x10G Managed |
| Interface Type | RJ45 |
| Number of Ports | 6 (4 x 2.5G, 2 x 10G) |
| Data Transfer Rate | 60 Gigabits Per Second (Switching Capacity) |
| Management | Web Managed / Unmanaged (DIP Switch) |
| Fanless Design | Yes |
| Case Material | Metal |
| Color | Black |
| Item Weight | 1.79 pounds |
| Package Dimensions | 10.59 x 8.7 x 2.72 inches |
| Included Components | 2.5G Switch, Power Adapter |
8. Warranty and Support
Binardat products are designed for reliability and performance. For warranty information and technical support, please refer to the official Binardat website or contact their customer service directly. Keep your purchase receipt for warranty claims.


