
1. Introduction
Thank you for choosing the BLACK+DECKER BFLD80ME Electric Dryer. This manual provides essential information for the safe and efficient operation, installation, and maintenance of your new appliance. Please read all instructions carefully before use and retain this manual for future reference.
2. Safety Information
Always follow basic safety precautions when using electrical appliances to reduce the risk of fire, electric shock, or injury to persons.
- Electrical Requirements: Ensure the dryer is connected to a properly grounded 240V electrical outlet as specified in the installation instructions.
- Ventilation: Proper ventilation is crucial. Do not operate the dryer without the lint filter in place and ensure the exhaust duct is clear and unobstructed.
- Flammable Materials: Do not dry items that have been soiled with cooking oils, gasoline, dry-cleaning solvents, or other flammable or explosive substances.
- Children and Pets: Keep children and pets away from the dryer during operation. Never allow them to play on or in the appliance.
- Maintenance: Disconnect power before performing any service or cleaning. Only qualified personnel should perform repairs.
3. Product Overview
The BLACK+DECKER BFLD80ME is an 8.0 cubic feet electric dryer designed for efficient and convenient laundry care. Key features include a front-load design, an aluminized alloy steel drum, and advanced drying technologies.

Figure 3.1: Front view of the BLACK+DECKER BFLD80ME Electric Dryer, showcasing its sleek design and large door.
3.1 Capacity and Design
This dryer offers an ample 8.0 cubic feet capacity, suitable for large loads, reducing the number of cycles required. Its front-load design allows for easy loading and unloading of laundry.

Figure 3.2: Illustration highlighting the 8.0 cubic feet capacity and the Wrinkle Care feature of the dryer.
3.2 Control Panel and Display
The dryer features an intuitive LED Digital Display that shows time remaining and cycle selections, making it easy to monitor and control your drying process.

Figure 3.3: Close-up of the LED Digital Display and control knob, showing various cycle and option selections.
3.3 Sensor Dry Technology
Equipped with Sensor Dry Technology, the dryer automatically measures moisture levels and adjusts drying time and heat to prevent over-drying and protect your garments, ensuring more efficient performance.

Figure 3.4: Visual representation of Sensor Dry Technology, showing how moisture is detected and heat is adjusted for optimal drying.
3.4 Reversible Door
The dryer features a reversible door, allowing for flexible placement of the unit in your laundry area to best suit your space and convenience.

Figure 3.5: Diagram illustrating the reversible door functionality, showing the door opening to either the left or right.
3.5 Dimensions
Understanding the dimensions of your dryer is crucial for proper installation and placement.
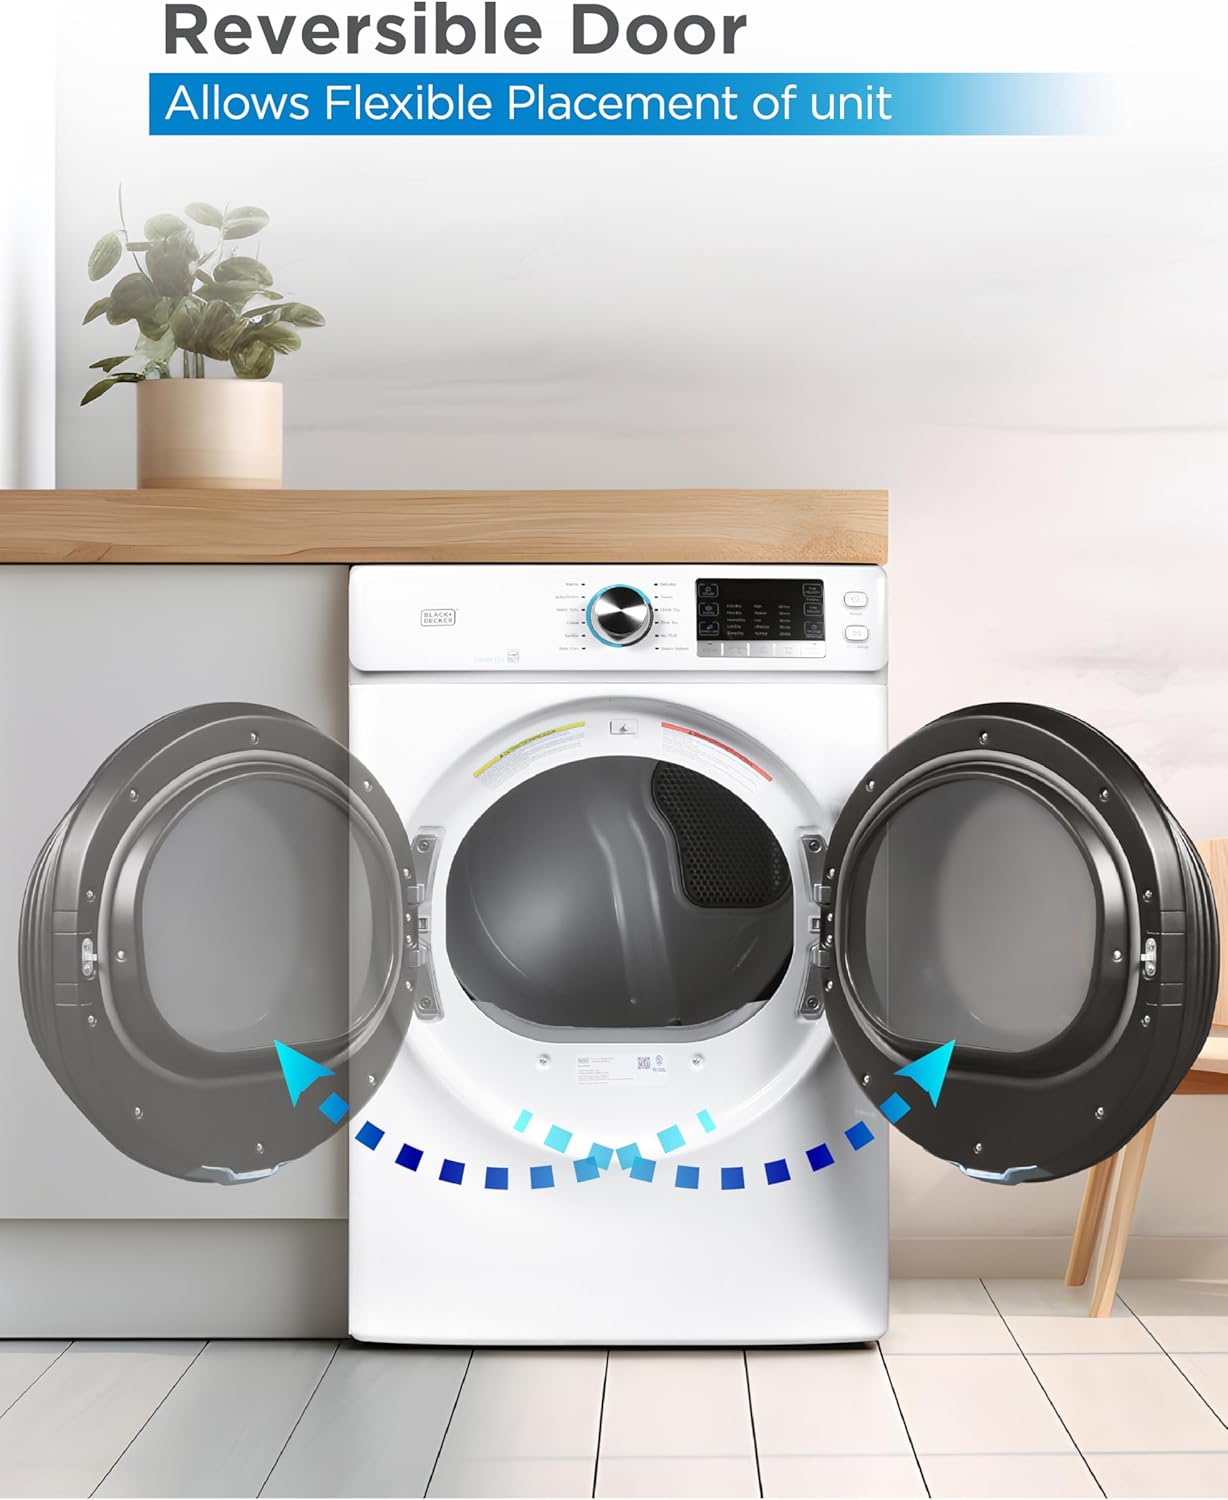
Figure 3.6: Dimensional drawing of the dryer, indicating a width of 27 inches, depth of 33.8 inches, and height of 39.8 inches.
4. Setup and Installation
Proper installation is vital for the safe and efficient operation of your dryer. It is recommended that installation be performed by a qualified technician.
- Location: Place the dryer on a level floor in an area with adequate ventilation. Avoid installing in areas where it may be exposed to water or extreme temperatures.
- Leveling: Use the adjustable leveling legs to ensure the dryer is perfectly level. This prevents vibration and excessive noise during operation.
- Ventilation System: Connect the dryer to an approved exhaust duct system. Ensure the duct is short, straight, and free of kinks to maximize airflow and prevent lint buildup.
- Electrical Connection: Connect the dryer to a dedicated 240V, 30A electrical circuit with a proper ground. Refer to local electrical codes for specific requirements.
5. Operating Instructions
Familiarize yourself with the control panel and available drying cycles to achieve the best results for your laundry.
5.1 Control Panel Overview
The control panel features a central dial for cycle selection and an LED digital display for monitoring. Additional buttons allow for customization of drying options.
5.2 Cycle Selection
Your dryer offers 12 distinct drying cycles, including both sensor-based and timed options, to cater to various fabric types and drying needs.

Figure 5.1: Detailed view of the control panel highlighting the 12 cycle selections and additional drying options.
Available Cycles:
- Normal: For everyday cottons and mixed loads.
- Bulky/Sheets: Ideal for large items like blankets, comforters, and sheets.
- Heavy Duty: For sturdy fabrics such as work clothes and jeans.
- Casual: For permanent press and synthetic items.
- Sanitize: Uses high heat to sanitize items.
- Baby Care: Gentle drying for baby clothes and delicate items.
- Delicates: Low heat drying for fragile garments.
- Towels: Optimized for drying towels thoroughly.
- Quick Dry: For small loads that need to dry quickly.
- Time Dry: Allows manual setting of drying time.
- Air Fluff: No heat cycle for fluffing items or removing dust.
- Steam Refresh: Reduces wrinkles and refreshes clothes using steam.
5.3 Starting a Cycle
- Load the dryer with items, ensuring not to overload.
- Close the dryer door securely.
- Select the desired drying cycle using the control dial.
- Adjust any additional options (e.g., dryness level, temperature) if available for the selected cycle.
- Press the Start/Pause button to begin the cycle.
6. Maintenance
Regular maintenance helps ensure the longevity and optimal performance of your dryer.
- Clean the Lint Filter: Clean the lint filter before or after every load. Pull the filter out and remove any accumulated lint.
- Clean the Exhaust Vent: Periodically check and clean the exhaust vent system to prevent lint buildup, which can be a fire hazard and reduce drying efficiency. This should be done at least once a year.
- Clean the Dryer Interior: Wipe the drum interior with a damp cloth if needed. Do not use abrasive cleaners.
- Clean the Dryer Exterior: Wipe the exterior surfaces with a soft, damp cloth.
7. Troubleshooting
Refer to this section for solutions to common issues you might encounter with your dryer.
| Problem | Possible Cause | Solution |
|---|---|---|
| Dryer does not start | Power cord unplugged; circuit breaker tripped; door not closed properly. | Check power connection; reset circuit breaker; ensure door is latched. |
| Clothes not drying | Lint filter clogged; exhaust vent blocked; overloaded dryer; incorrect cycle selection. | Clean lint filter; check and clear vent; reduce load size; select appropriate cycle. |
| Excessive noise | Dryer not level; foreign objects in drum; worn components. | Level the dryer; check drum for objects; contact service if noise persists. |
| Wrinkled clothes | Overloaded dryer; clothes left in dryer too long after cycle; no Wrinkle Care selected. | Reduce load size; remove clothes promptly; use Wrinkle Care option. |
8. Specifications
Detailed technical specifications for the BLACK+DECKER BFLD80ME Electric Dryer.
| Feature | Specification |
|---|---|
| Brand | BLACK+DECKER |
| Model Number | BFLD80ME |
| Capacity | 8.0 Cubic Feet |
| Access Location | Front Load |
| Product Dimensions (D x W x H) | 85.9D x 68.6W x 101.1H Centimetres (approx. 33.8"D x 27"W x 39.8"H) |
| Item Weight | 62.87 kg (approx. 138.6 lbs) |
| Colour | White |
| Material | Alloy Steel Plastic |
| Voltage | 240 Volts |
| Certification | Energy Star |
| Special Features | LED Display, Wrinkle Care, Sensor Dry Technology, Reversible Door |
| Included Components | Hose |
| UPC | 810064696794 |
| ASIN | B0D429M95D |
9. Warranty and Support
For warranty information and customer support, please refer to the warranty card included with your product or visit the official BLACK+DECKER website. Keep your proof of purchase for any warranty claims.
If you require technical assistance or have questions not covered in this manual, please contact BLACK+DECKER customer service.


