1. Overview
The SZFZMZ ZWS566 Weather Station is a versatile device designed to provide comprehensive weather and environmental data for your home. It features a vibrant VA color display and comes with three wireless outdoor sensors, allowing you to monitor temperature and humidity in multiple locations. This manual provides detailed instructions for setting up, operating, and maintaining your weather station.
2. Package Contents
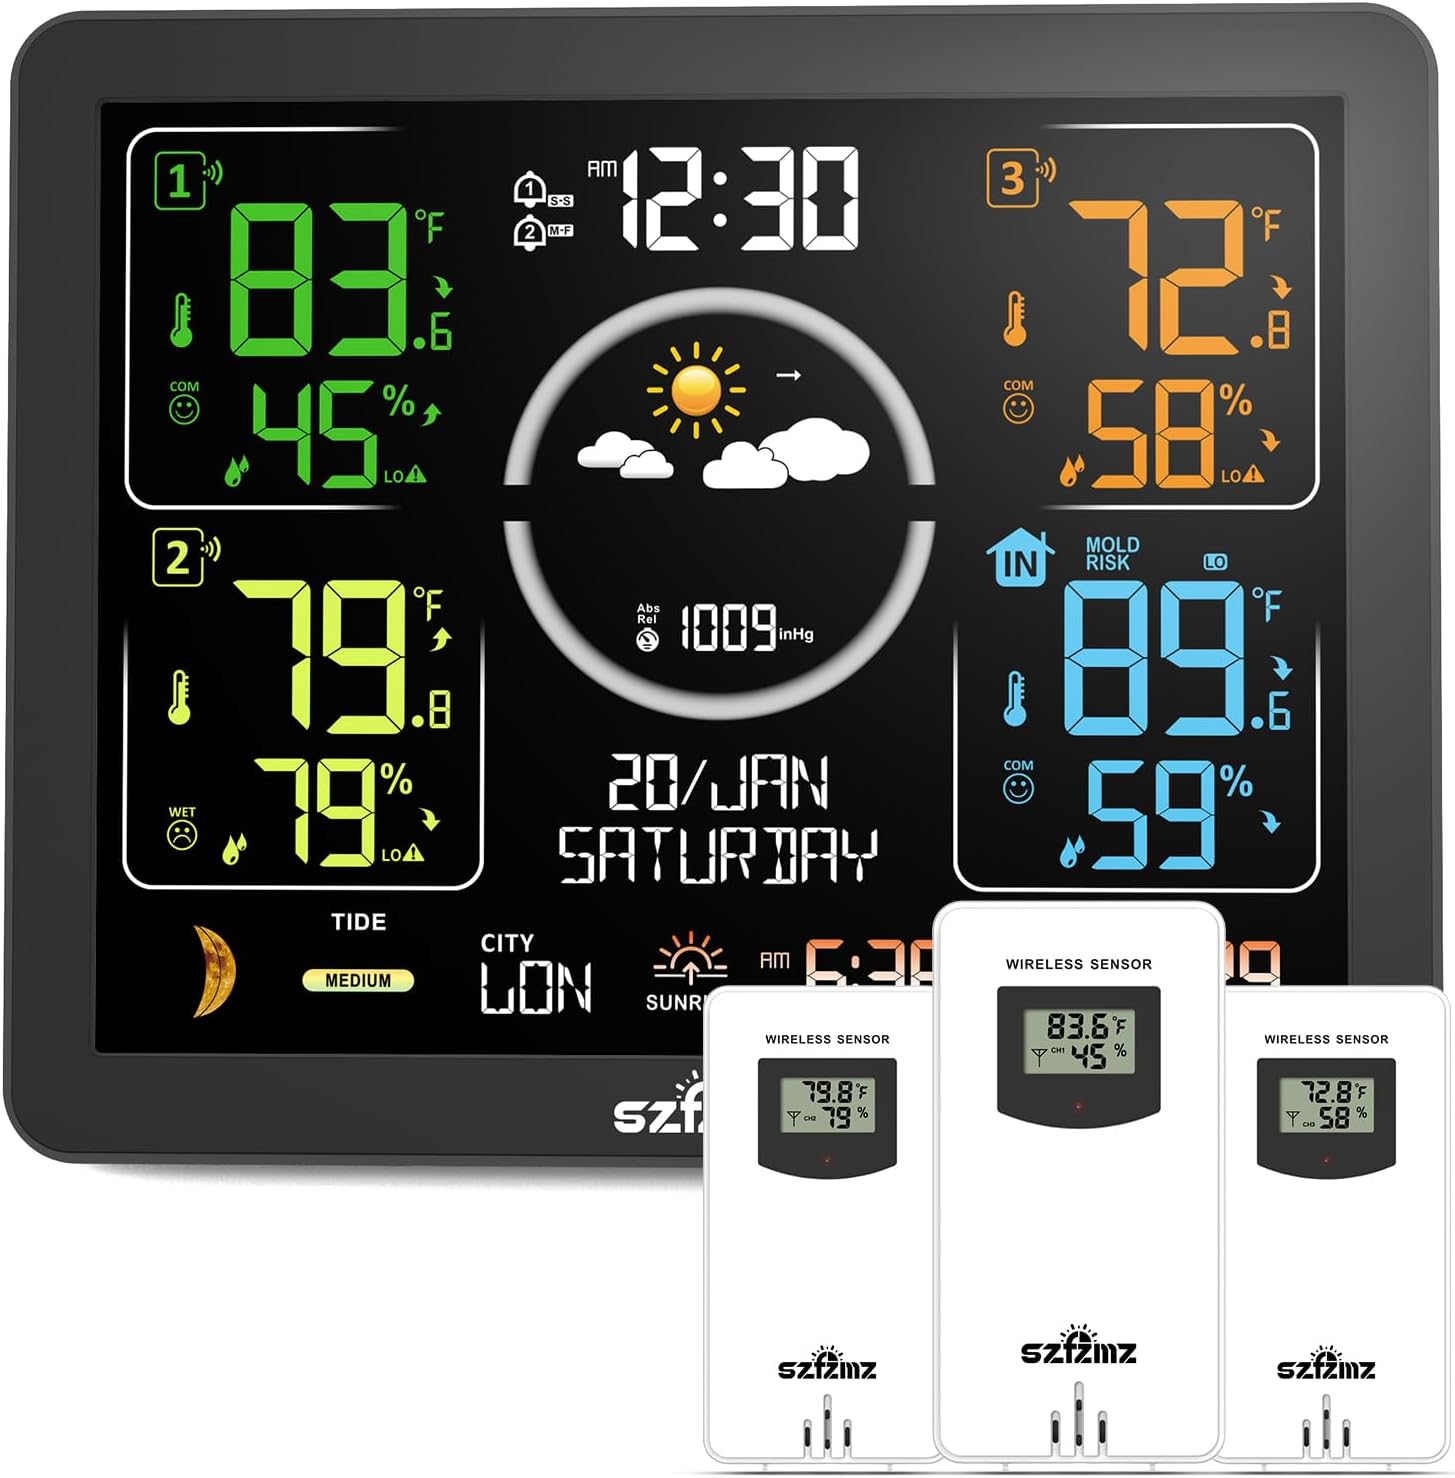
- 1 x SZFZMZ ZWS566 Main Display Unit
- 3 x Wireless Outdoor Sensors
- 1 x DC Power Adapter
- 1 x User Manual
3. Product Features
The SZFZMZ ZWS566 Weather Station offers a wide array of functions to keep you informed about your environment:
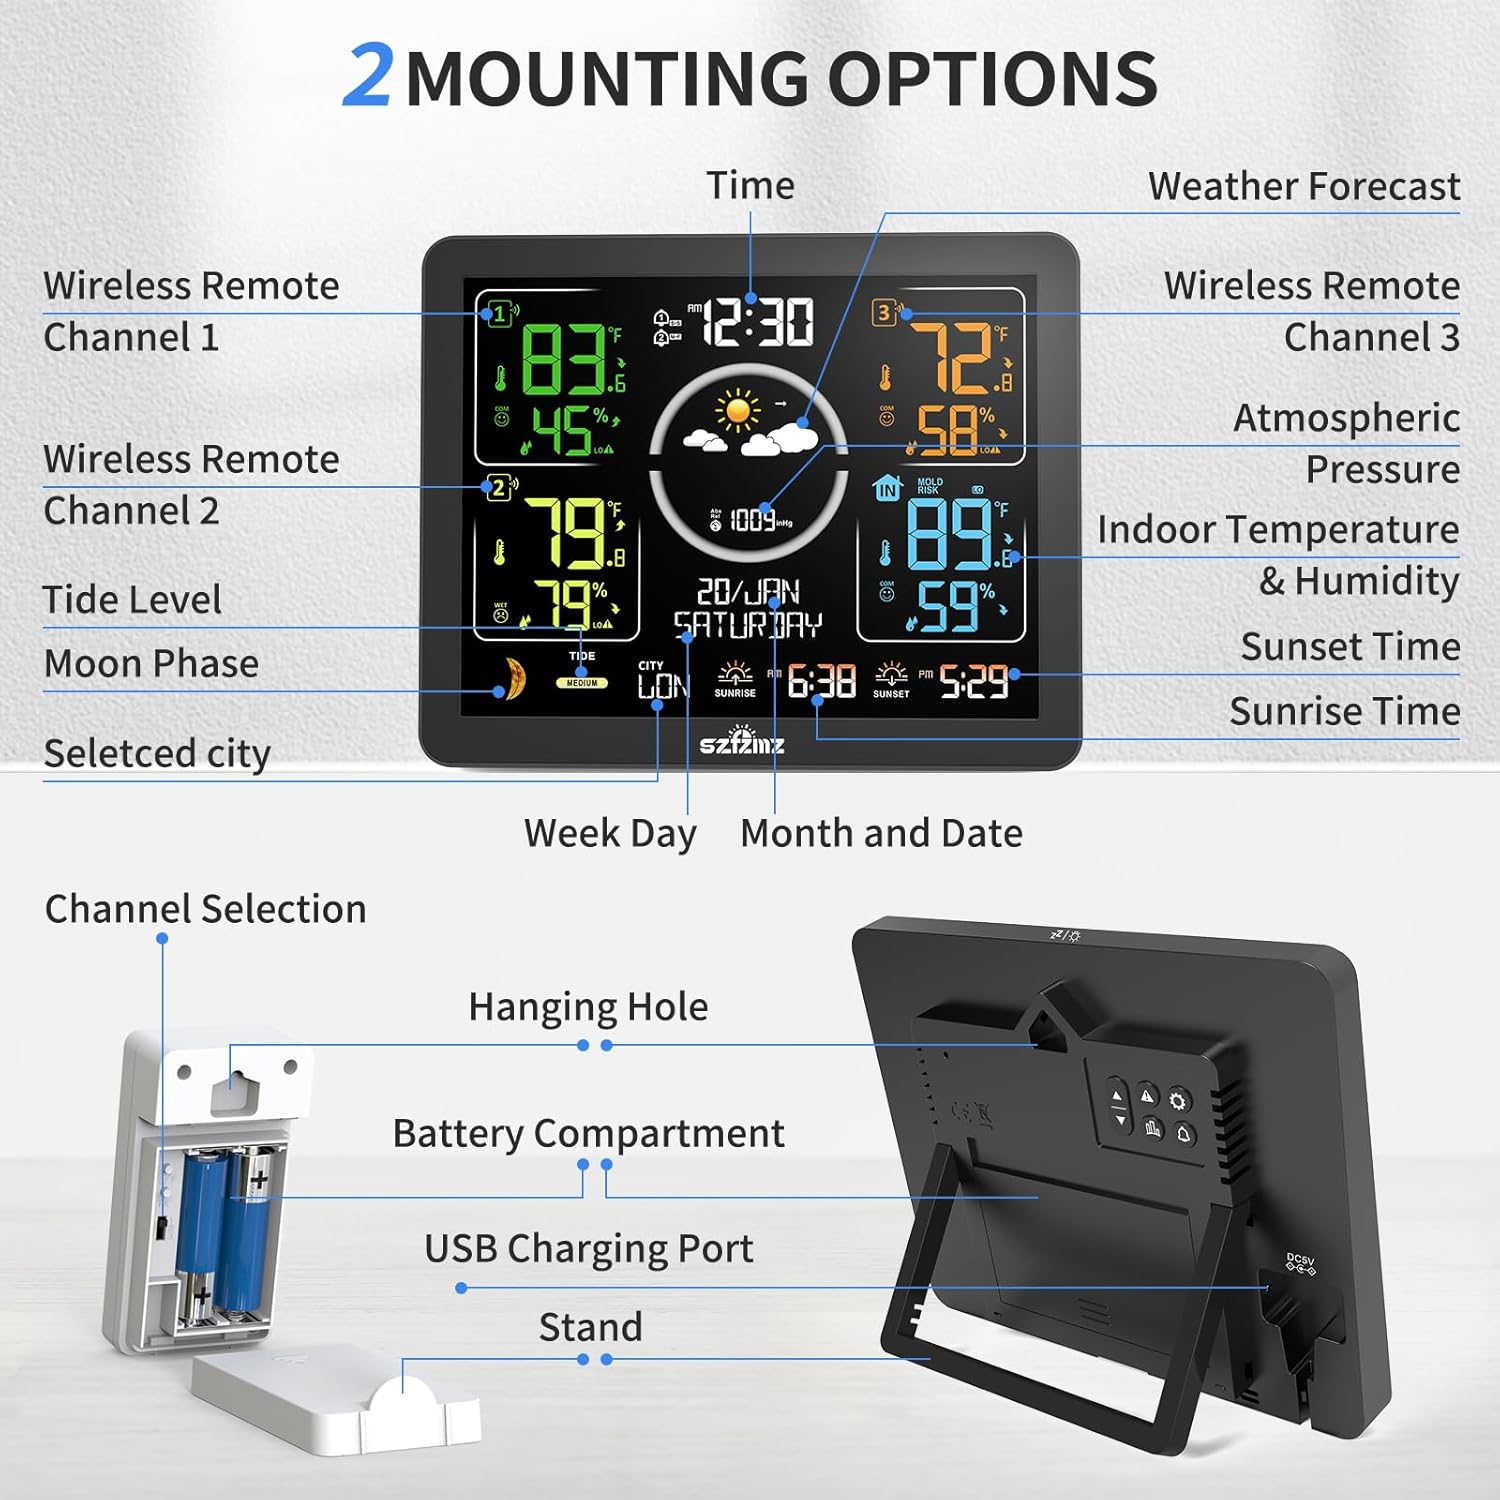
- 14-in-1 Multifunctionality: Atomic time, time setting, calendar, 3-sensor temperature and humidity display, max/min temperature/humidity records, temperature and humidity alerts, frost warning, moon phases, tide indicator, 7 time zones, weather forecast, two alarm clocks with snooze, 4-level adjustable backlight, comfort indicator, barometric pressure reading and trend display, and low battery indication.
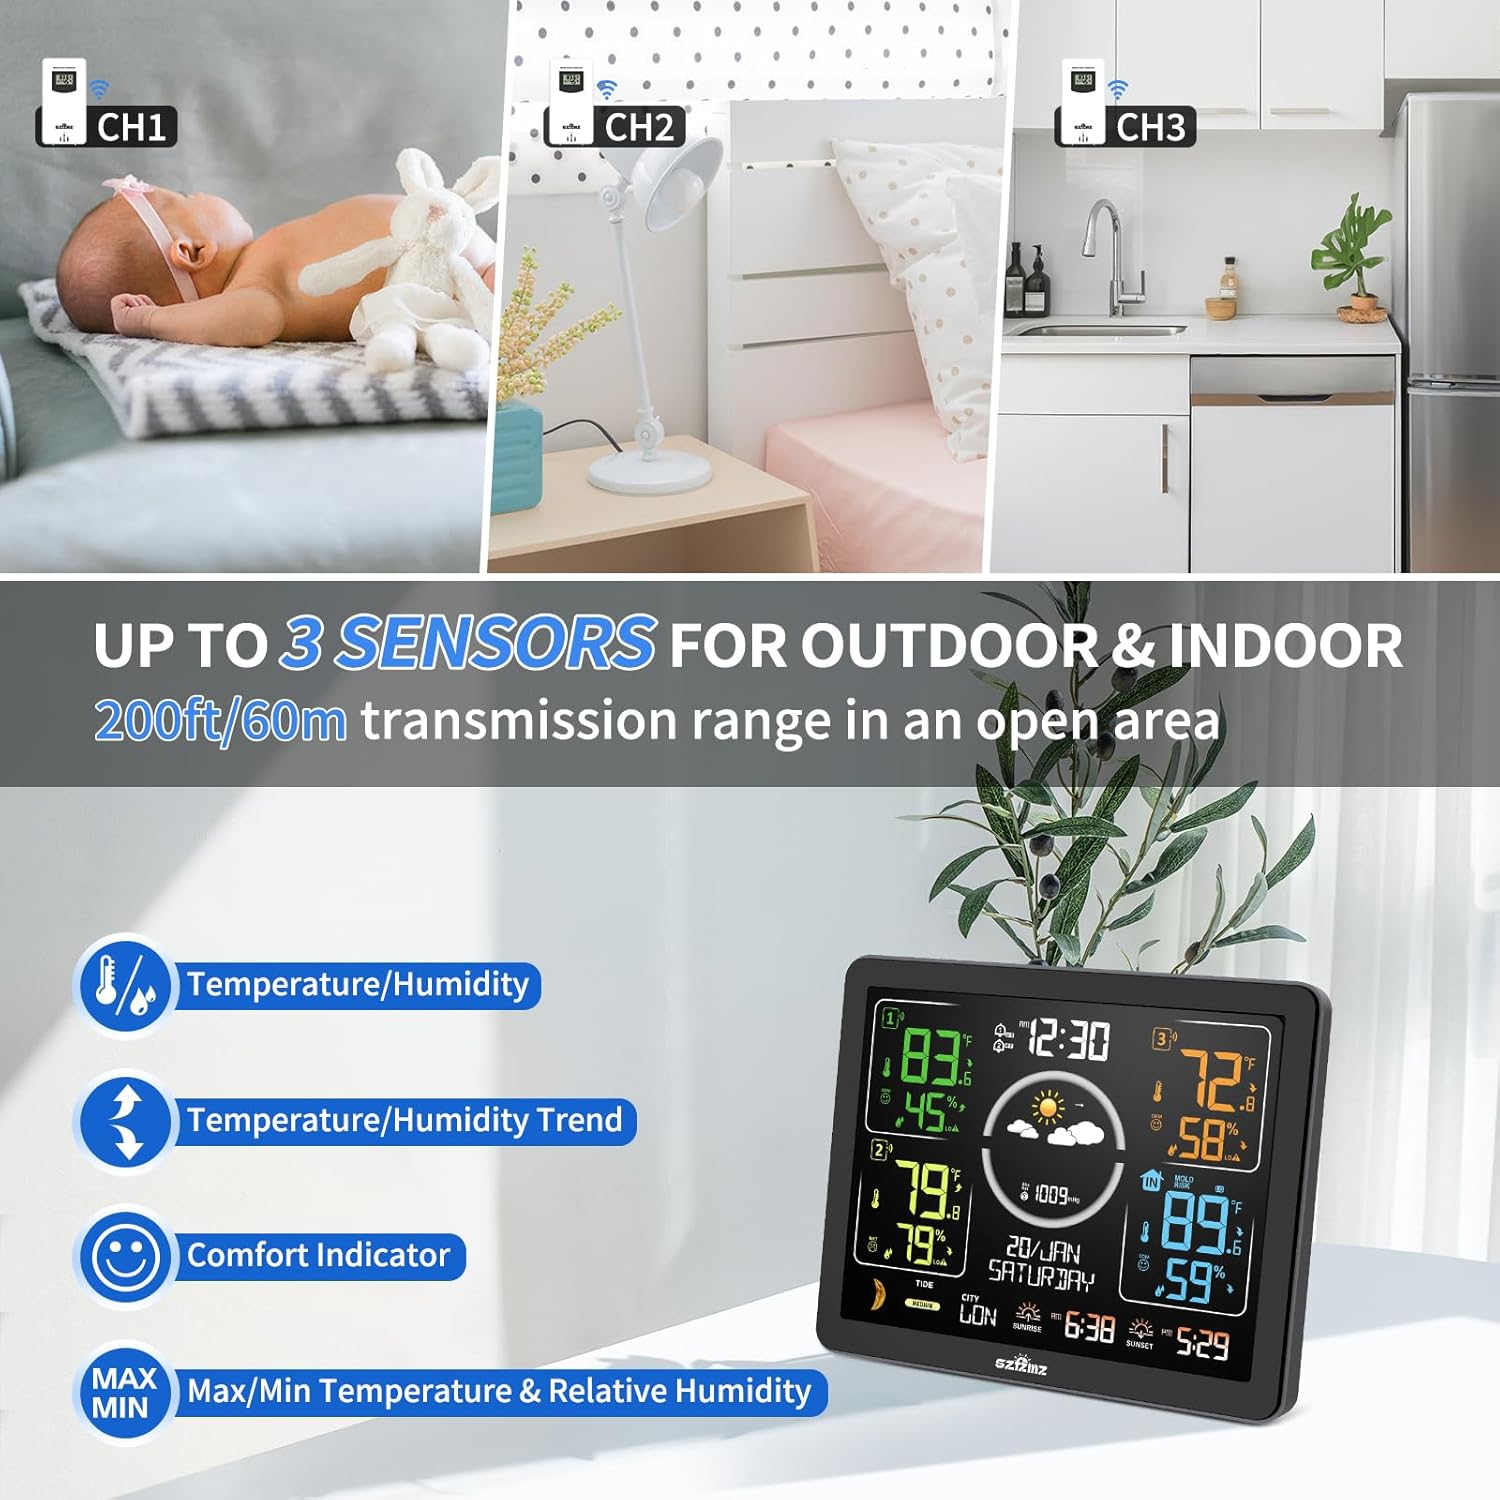
- Wireless Multi-Sensor Monitoring: Equipped with three outdoor sensors providing a long-range transmission of up to 200 feet (60 meters) in open areas. Monitor up to four locations (including the main unit's indoor sensor).
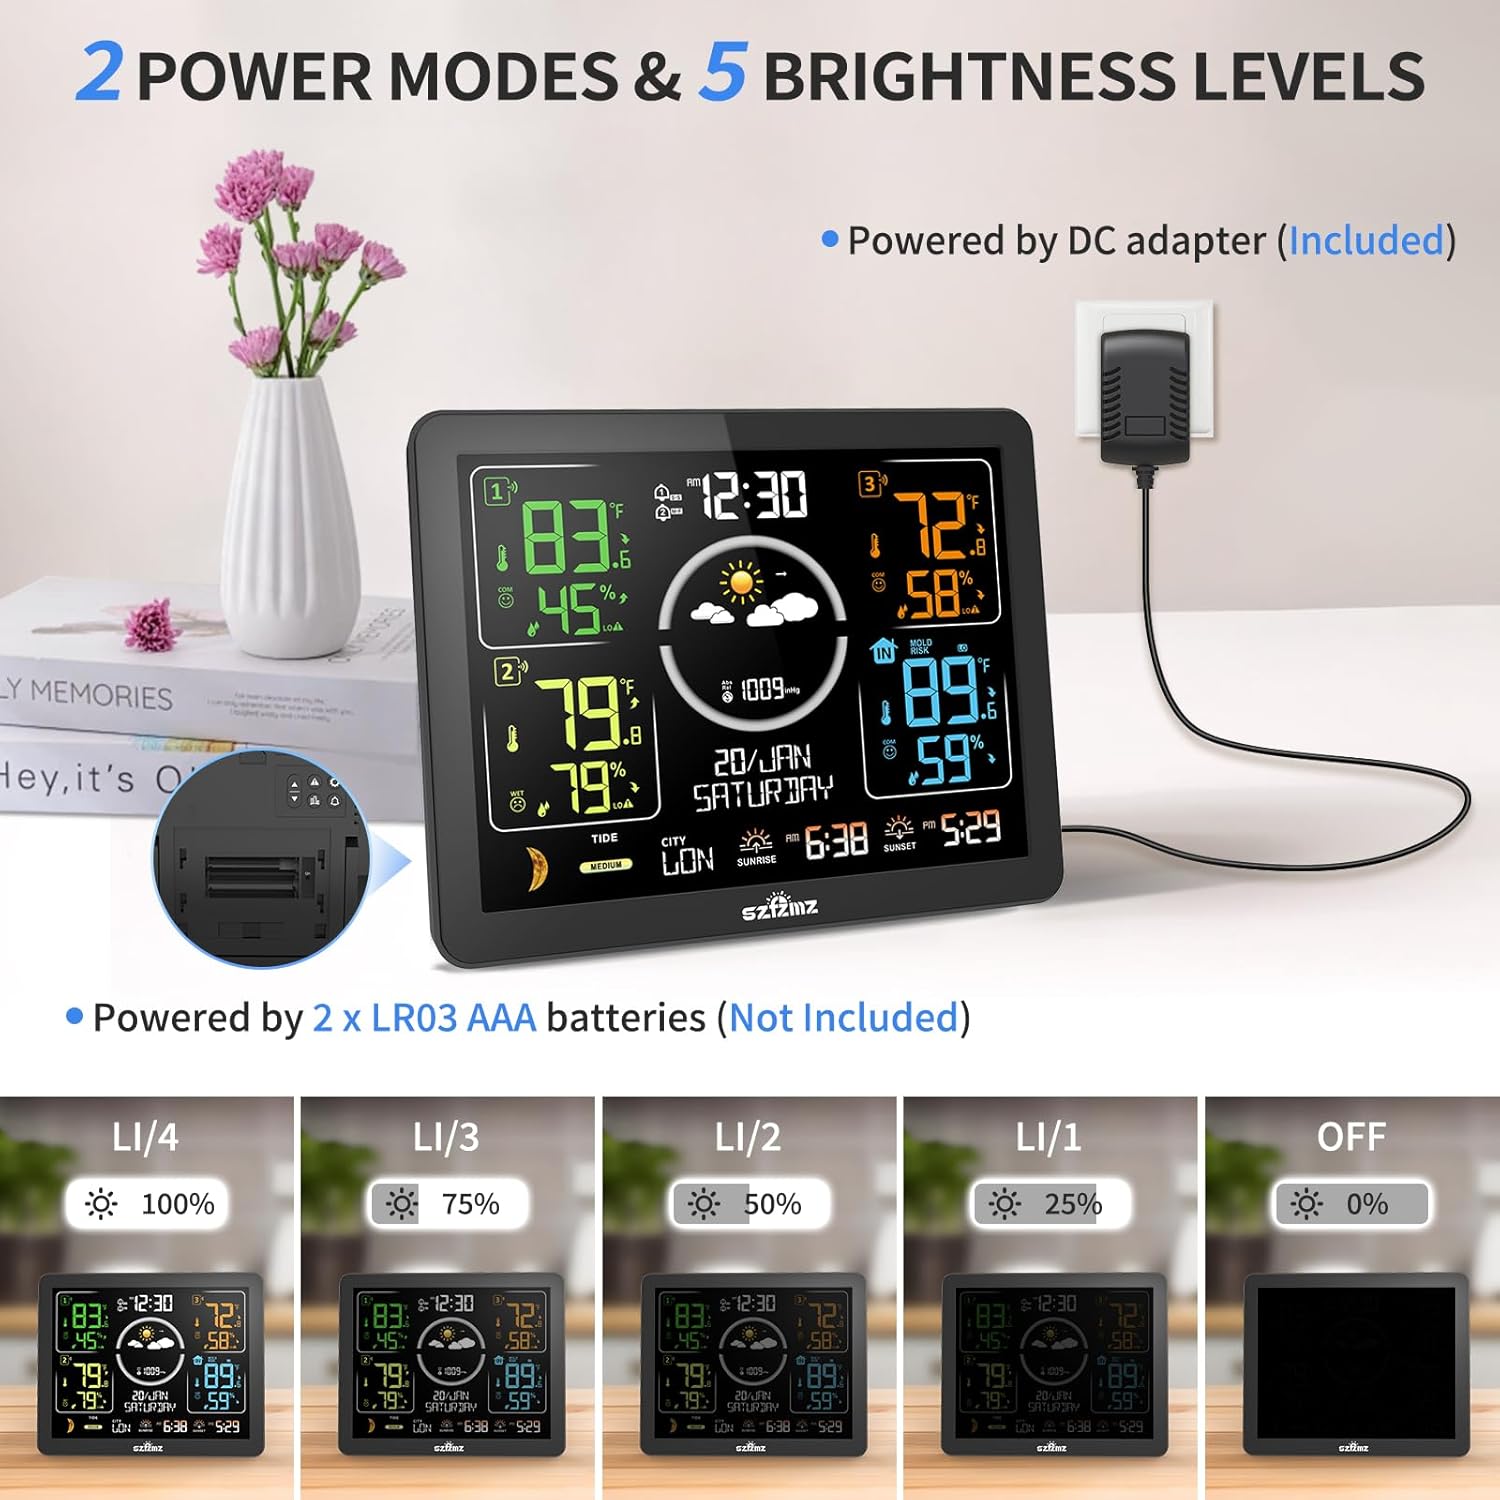
- Dual Power Supply Modes: Operates via DC adapter (included) for constant backlight or 2 x AAA batteries (not included) for portable use with a 15-second backlight on touch.
- Atomic Clock Function: Automatically or manually searches for WWVB signals to calibrate time. Supports 7 time zones (AST, EST, CST, MST, PST, AKT, HST, HAT).
- 7.5" VA Color Display: Provides clear, vibrant readings with deeper black levels and better overall contrast compared to standard LCDs.
- 12-Hour Weather Forecast: Calculates future weather based on barometric pressure trends, displayed with six intuitive icons (sunny, slightly cloudy, cloudy, rainy, heavy rainy, snowy).
- Comfort Indicator: Displays 3 facial icons (Dry, Comfort, Wet) to indicate indoor comfort levels.


4. Setup Guide
4.1 Powering the Main Unit
- Using DC Adapter (Recommended): Connect the included DC power adapter to the main unit's power input port and plug it into a standard electrical outlet. The display will light up constantly.
- Using Batteries (Backup/Portable): Open the battery compartment on the back of the main unit. Insert 2 x AAA batteries (not included), ensuring correct polarity. When powered by batteries, the screen will light up for 15 seconds upon touching the top and then automatically turn off to conserve power.
4.2 Installing Batteries in Wireless Sensors
Each wireless sensor requires 2 x AAA batteries (not included). Open the battery compartment on the back of each sensor and insert the batteries, observing polarity.
4.3 Pairing Sensors with Main Unit
For optimal connection, ensure the main unit and sensors are within range (up to 200ft/60m in open areas) and follow these steps:
- On the back of each wireless sensor, select a unique channel (Channel 1, Channel 2, or Channel 3) using the channel switch.
- The main unit will automatically search for and connect to the sensors. This may take a few minutes. Ensure all sensors are powered on.
- Once connected, the temperature and humidity readings from each sensor will appear on the main display.
4.4 Placement and Mounting
The main unit can be placed on a flat surface using its integrated stand or mounted on a wall using the hanging hole. Position the wireless sensors in desired indoor or outdoor locations, ensuring they are protected from direct rain and sunlight for accurate readings.
5. Operating Instructions
5.1 Time and Date Settings
The weather station features an atomic clock that automatically calibrates time via WWVB signals. If manual adjustment is needed or for initial setup:
- Press the SET button to enter time setting mode.
- Use the UP/DOWN buttons to adjust values.
- Press SET again to confirm and move to the next setting (e.g., Time Zone, 12/24 hour format, Year, Month, Day).
- Ensure the correct time zone is selected for your location (AST, EST, CST, MST, PST, AKT, HST, HAT).
5.2 Display Brightness Adjustment
When powered by the DC adapter, the backlight can be adjusted to 4 levels of brightness or turned off completely.
- Press the LIGHT button (often represented by a sun icon) on the main unit to cycle through brightness levels (100%, 75%, 50%, 25%, 0%).
5.3 Weather Forecast
The weather station analyzes barometric pressure trends to predict the weather for the next 12 hours. The forecast is displayed using six distinct icons:
- Sunny
- Slightly Cloudy
- Cloudy
- Rainy
- Heavy Rainy
- Snowy

5.4 Max/Min Temperature & Humidity Records
The unit records the maximum and minimum temperature and humidity values for all monitored locations.
- Press the MAX/MIN button once to display maximum values.
- Press the MAX/MIN button a second time to display minimum values.
- Press the MAX/MIN button a third time to return to current readings.
5.5 Temperature and Humidity Alerts
Set customizable alerts for extreme temperature and humidity levels.
- Refer to the detailed instructions in the full user manual for setting specific alert thresholds.
- The station will notify you if readings exceed or fall below your set limits.
5.6 Alarm Clock Function
The weather station includes two daily alarm settings with a snooze function.
- Press the ALARM button to set and activate alarms.
- Use the SNOOZE button to temporarily silence the alarm.
6. Maintenance
- Cleaning: Wipe the display unit and sensors with a soft, dry cloth. Do not use abrasive cleaners or immerse in water.
- Battery Replacement: Replace batteries in sensors and the main unit (if using battery power) when the low battery indicator appears on the display.
- Sensor Placement: For outdoor sensors, ensure they are placed in a shaded, well-ventilated area, away from direct sunlight and precipitation, to ensure accurate readings and prolong battery life.
7. Troubleshooting
| Problem | Possible Cause | Solution |
|---|---|---|
| No display on main unit | No power; batteries dead or adapter unplugged. | Check power adapter connection or replace batteries. |
| Sensor readings not appearing | Sensors not paired; out of range; dead batteries. | Ensure sensors have fresh batteries and are within 200ft of the main unit. Re-pair if necessary (refer to Section 4.3). |
| Inaccurate temperature/humidity | Sensor exposed to direct sunlight/rain; main unit heat. | Relocate sensors to a shaded, protected area. Note that the main unit's internal circuitry may slightly affect its own readings; this is normal. Allow 3 hours for readings to stabilize if units are moved. |
| Atomic clock not setting time | Weak WWVB signal; incorrect time zone. | Ensure the unit is placed away from electronic interference. Manually set time zone. The backlight turns off during WWVB signal reception. |
8. Specifications
- Model: ZWS566
- Brand: SZFZMZ
- Power Source: DC Adapter (Included) or 2 x AAA Batteries (Not Included) for Main Unit; 2 x AAA Batteries (Not Included) for each Sensor.
- Material: Plastic
- Connectivity Technology: Wireless (RF technology)
- Frequency: 433.92 MHz
- Product Dimensions (Main Unit): 1.57"D x 5.51"W x 6.89"H
- Temperature Accuracy: ±1 °C (±1.8 °F)
- Humidity Accuracy: ±5%
- Upper Temperature Rating: 122 °F
- Wireless Transmission Range: Up to 200 feet (60 meters) in open areas
9. Warranty & Support
For warranty information and customer support, please refer to the contact details provided on the product packaging or visit the official SZFZMZ website. Keep your purchase receipt for warranty claims.
SZFZMZ Official Store: Visit the SZFZMZ Store on Amazon

