Introduction
This manual provides detailed instructions for the safe and effective use of your TREND KWJ700/PRO Professional Kitchen Countertop Jig. This jig is designed for creating precise mason miter joints on kitchen countertops, accommodating widths from 600mm to 700mm (23-5/8 to 27-1/2 inches). Please read this manual thoroughly before operation to ensure optimal performance and safety.
Safety Instructions
Always adhere to the following safety guidelines when using the countertop jig:
- Wear appropriate personal protective equipment (PPE), including safety glasses, hearing protection, and a dust mask.
- Ensure the work area is well-lit, clean, and free from obstructions.
- Securely clamp the jig and the worktop to a stable workbench to prevent movement during routing.
- Always use a router with a sharp, appropriate cutter for the material being worked on.
- Follow the manufacturer's safety instructions for your router.
- Keep hands and fingers clear of the router bit during operation.
- Disconnect the router from the power supply before making any adjustments or changing bits.
- Do not force the router; allow the tool to cut at its own pace.
Package Contents
Verify that all components are present upon unpacking:
- 1 x TREND KWJ700/PRO Professional Kitchen Worktop Jig
- Alignment Pins (various sizes)
- Front Edge Alignment Blocks (red)
- Inset Gauges (clear)

Image: The complete TREND KWJ700/PRO Professional Kitchen Countertop Jig with its included alignment pins, front edge alignment blocks, and inset gauges.

Image: A close-up view of the red front edge alignment block, used for precise positioning of the jig.
Setup
Worktop Preparation
- Ensure the worktop is clean, dry, and free from debris.
- Measure and mark the desired joint line on the worktop.
- Support the worktop adequately to prevent sagging or movement during routing.

Image: A person using a square and pencil to mark a precise line on a worktop, demonstrating proper preparation.
Jig Placement and Clamping
- Position the jig on the worktop, aligning it with your marked joint line.
- Utilize the front edge alignment feature for precise positioning. This system replaces traditional pins, allowing for quick and accurate setup, especially on scribed or uneven worktops.
- Secure the jig firmly to the worktop using appropriate clamps. Ensure the clamps do not obstruct the router's path.
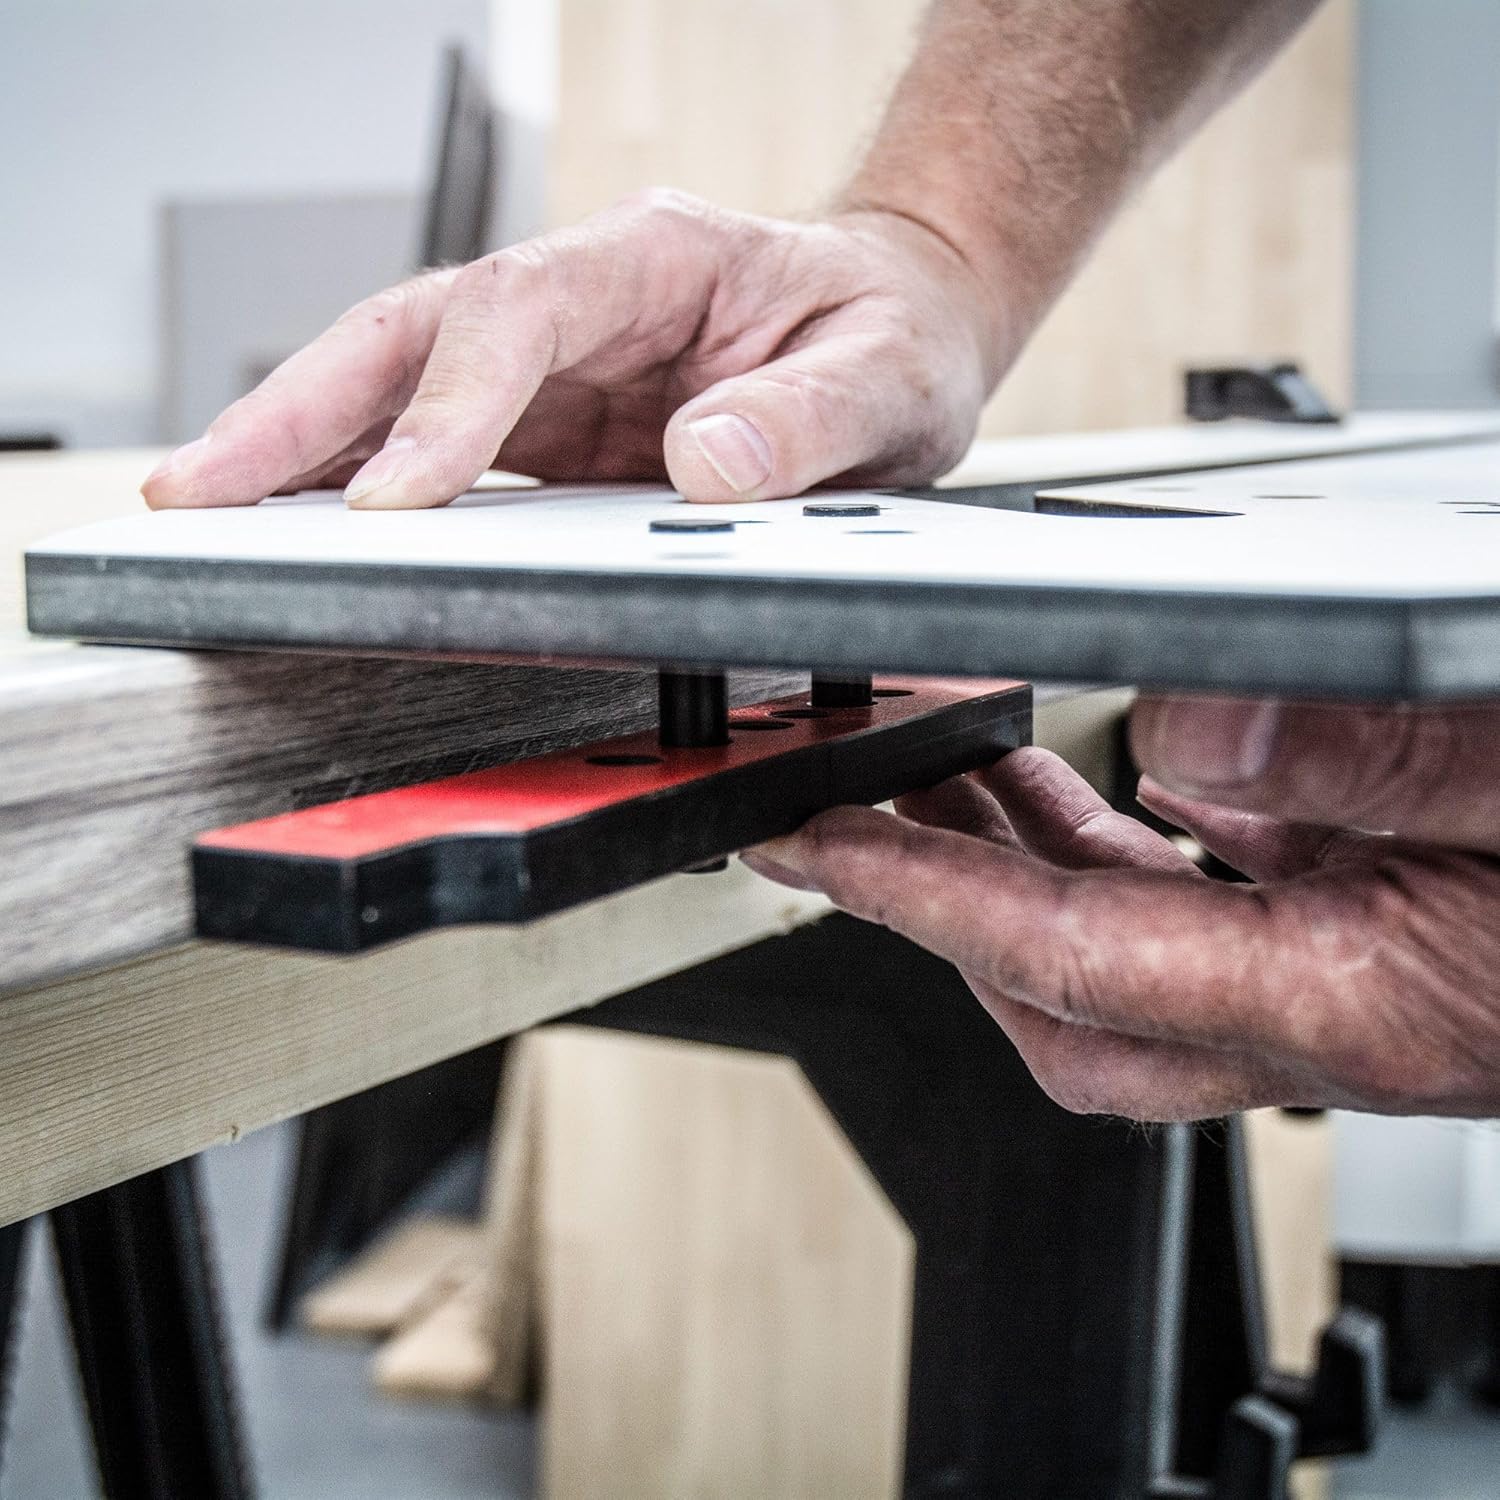
Image: Hands carefully positioning the TREND KWJ700/PRO jig onto a worktop, preparing for clamping.

Image: The countertop jig is shown securely clamped to the worktop, ensuring stability during the routing process.
Operating Instructions
Cutting Female Joints
- Select the appropriate template slot on the jig for your desired female joint.
- Insert the router with the correct guide bush and cutter (typically 1/2 inch or 12.7mm diameter).
- Set the router depth according to the worktop thickness, ensuring multiple shallow passes rather than one deep cut.
- Carefully guide the router along the template, maintaining constant pressure against the jig's edge.

Image: A router in operation, precisely cutting a female joint into a worktop, guided by the jig.
Cutting Male Joints
- Position the jig for the male joint cut, utilizing the integrated male cut-line guides. These guides account for the 8.65mm cutter-to-bush offset, ensuring accuracy.
- Follow the same routing procedure as for female joints, making multiple passes.

Image: A router is shown cutting along the jig's template to form a male joint, with dust extraction in use.
Inset System Usage
The built-in inset system allows for fast 3mm and 10mm insets. These are crucial for reducing tool wear and improving the aesthetic of square-edge or bullnose countertops.
- Place the appropriate clear inset gauge into the designated slot on the jig.
- Route the inset depth before making the main joint cut.

Image: A close-up view of the clear inset gauge positioned within the jig, ready for routing a precise inset.
Connector Bolt Slots
The jig features pre-set connector slots compatible with all standard worktop bolt styles, including Zipbolt and Slimline. These slots ensure fast and clean assembly of your worktops.
Radius and Corner Cuts
The jig also supports various radius and corner cuts for finishing worktops.
- Align the jig to the desired radius or corner profile on the worktop.
- Securely clamp the jig.
- Route carefully, following the jig's curve.

Image: The jig is placed on a worktop, demonstrating its use for creating a smooth, rounded radius cut.

Image: A perfectly executed radius cut on a wooden worktop, showcasing the precision achievable with the jig.
Maintenance
- After each use, clean the jig thoroughly to remove any dust, debris, or adhesive residue. Use a soft cloth and a mild cleaning solution if necessary.
- Inspect the jig for any signs of wear or damage. Replace any worn or damaged components immediately.
- Store the jig in a dry, protected environment to prevent warping or damage.
Troubleshooting
| Problem | Possible Cause | Solution |
|---|---|---|
| Inaccurate cuts | Jig not securely clamped; incorrect router bit/guide bush; worn cutter. | Ensure jig is clamped tightly; verify correct bit and bush; replace worn cutter. |
| Rough cut edges | Dull router bit; too fast feed rate; incorrect router speed. | Replace or sharpen bit; reduce feed rate; adjust router speed for material. |
| Jig movement during routing | Insufficient clamping pressure; unstable work surface. | Increase clamping pressure; ensure worktop and workbench are stable. |
Specifications
| Feature | Detail |
|---|---|
| Model Number | KWJ700/PRO |
| Worktop Width Capacity | 600mm – 700mm (23-5/8 – 27-1/2 inches) |
| Material | CNC-Machined Compact Grade HPL |
| Front Edge Alignment | Yes |
| Built-in Inset System | 3mm and 10mm |
| Male Cut-Line Guides Offset | 8.65mm cutter-to-bush distance |
| Connector Slots | Pre-set for standard worktop bolts (e.g., Zipbolt, Slimline) |
| Item Weight | 12.41 pounds |
| Package Dimensions | 39.37 x 13.39 x 0.87 inches |
Warranty and Support
For warranty information, technical support, or to purchase replacement parts, please refer to the official TREND website or contact their customer service department. Keep your proof of purchase for warranty claims.


