
Introduction
This manual provides comprehensive instructions for the safe and effective operation of your Gbnryg Metal Detector, model X55Z. Designed for both adults and children, this high-precision metal detector features an IP68 waterproof search coil, advanced DSP chip technology, and multiple detection modes, making it suitable for various treasure hunting environments. Please read this manual thoroughly before use to ensure optimal performance and longevity of your device.
Package Contents
Upon opening the package, verify that all components listed below are present and in good condition.
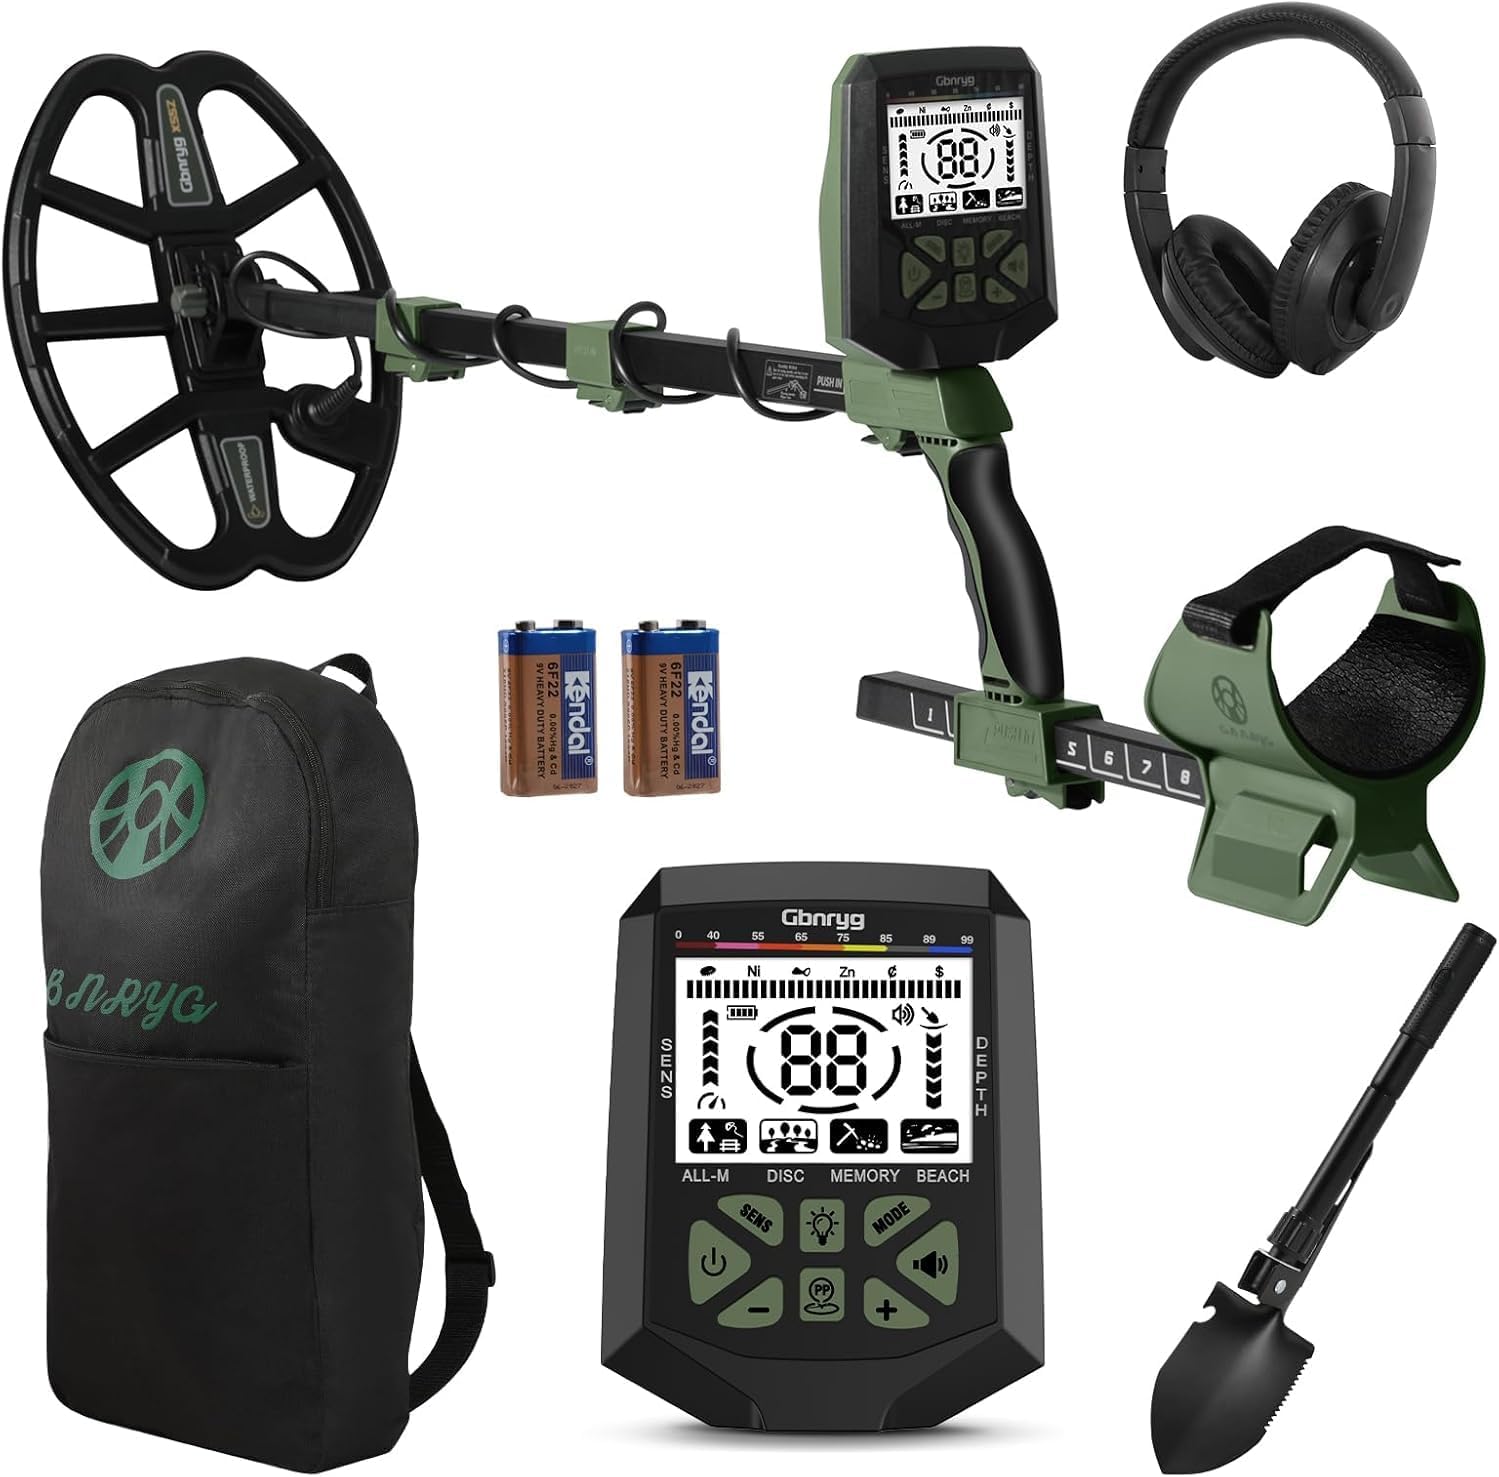
Image: All components of the Gbnryg Metal Detector kit, including the main unit, search coil, headphones, backpack, batteries, and digging tool.
- Gbnryg Metal Detector Main Unit (Control Box and Handle)
- 12-inch IP68 Waterproof Search Coil
- Adjustable Stem
- Over-ear Headphones with Adjustable Volume
- Manganese Steel Digger
- Large Capacity Backpack
- 2 x AA Batteries (included)
- User Manual (this document)

Image: A diagram illustrating the various accessories included with the metal detector, such as structural components, waterproof controller, headphones, search coil, matching shovel, portable backpack, and screw/nut.
Assembly Instructions
The Gbnryg Metal Detector features an upgraded collapsible cam lock design and screw-less main head for easy assembly.
- Attach the Search Coil: Connect the 12-inch IP68 waterproof search coil to the lower stem. Ensure the connection is secure.
- Connect the Stems: Slide the lower stem into the middle stem, and then connect the middle stem to the upper stem (which includes the control box and handle). Use the cam locks to secure the sections.
- Adjust Length: Adjust the overall length of the detector from 27 to 56 inches using the adjustable stem, suitable for various user heights. The handle can also be adjusted from 0 to 8 inches for ergonomic comfort.
- Install Batteries: Open the battery compartment on the control box and insert the two included AA batteries, observing polarity.
- Connect Headphones: Plug the headphones into the designated port on the control box.

Image: A visual guide demonstrating the three main steps for assembling the metal detector, showing how the components fit together.

Image: A diagram illustrating the retractable rod folding design, showing the minimum (35.6 inches) and maximum (52 inches) lengths for storage and use.
Operating Instructions
Your Gbnryg Metal Detector is equipped with an intuitive LCD backlit display and various modes for efficient metal detection.
Control Panel Overview
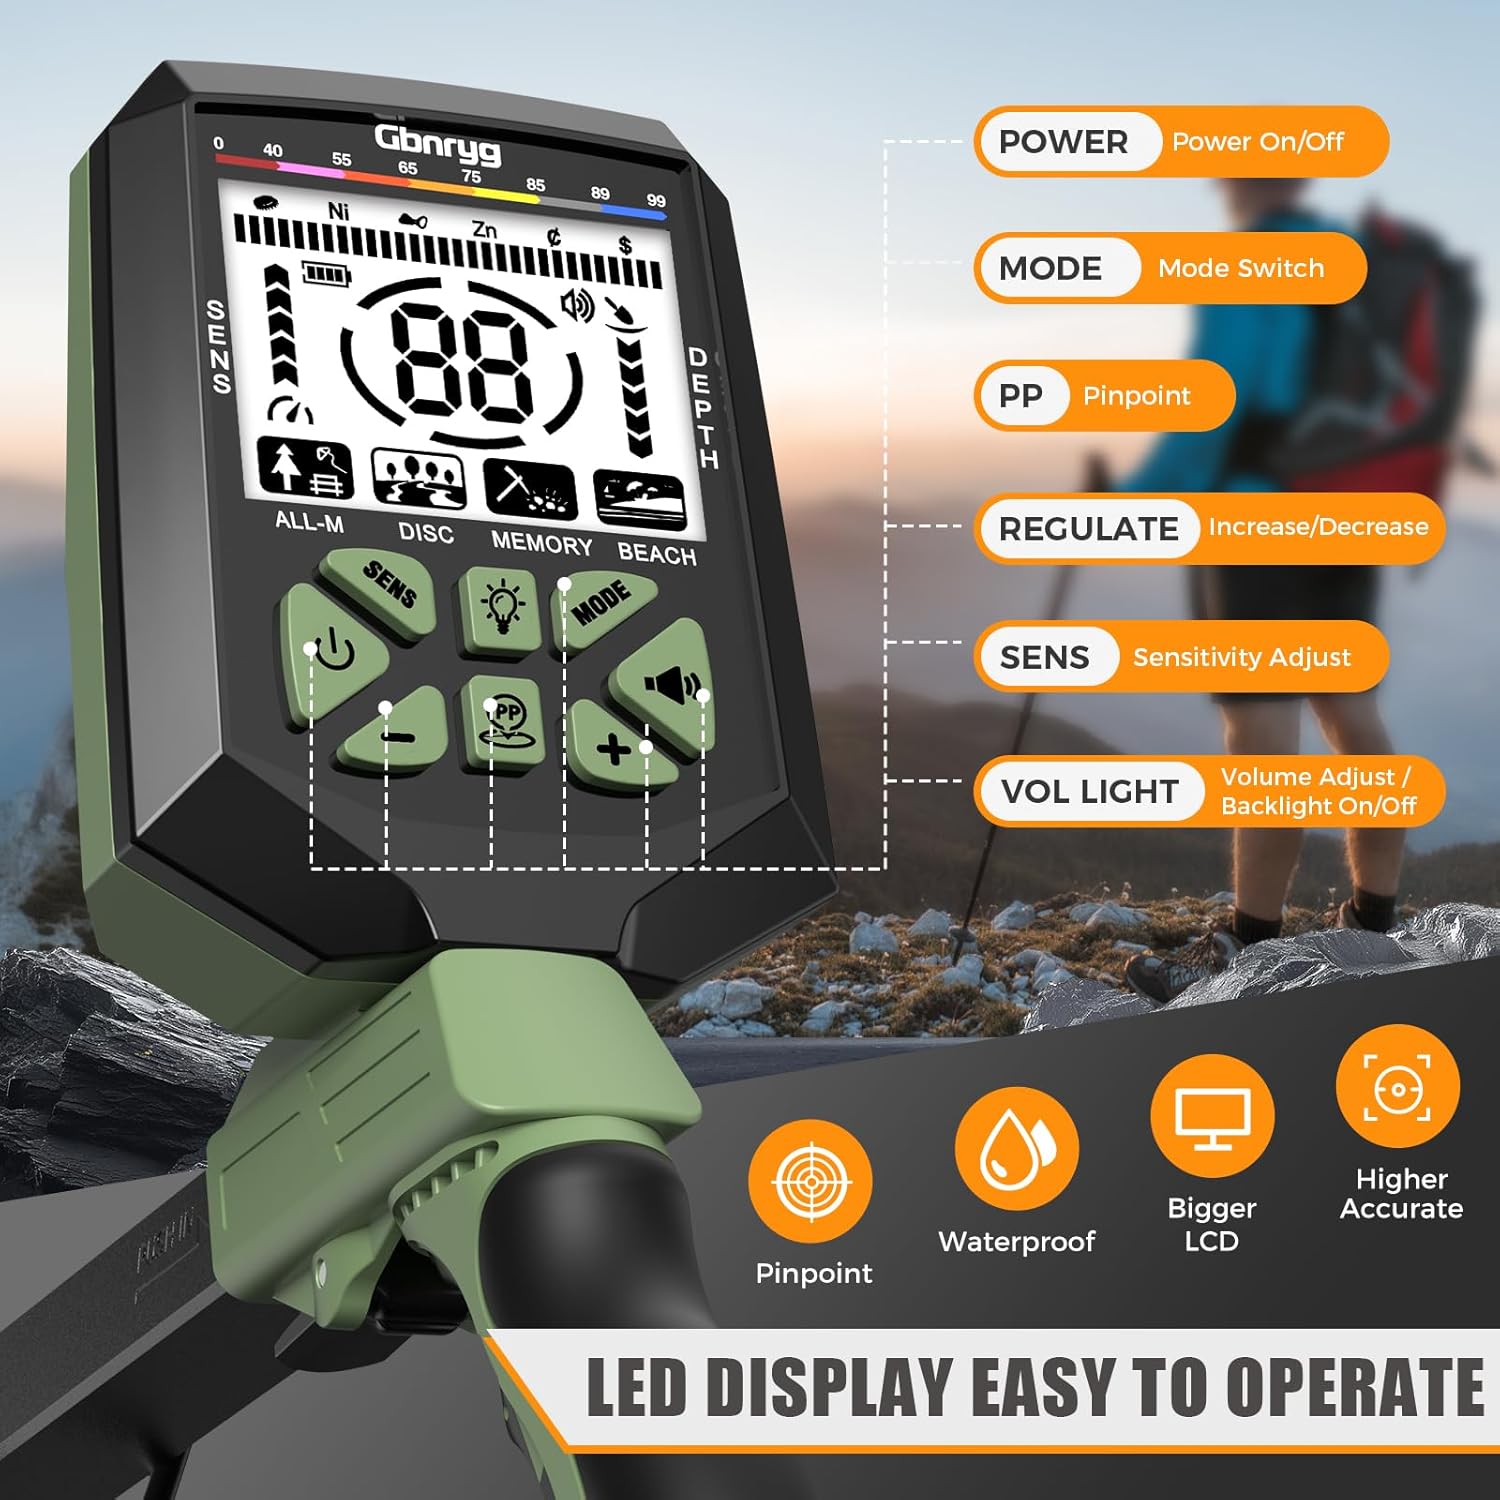
Image: A detailed view of the metal detector's control panel, highlighting the LCD screen and various buttons for power, mode selection, pinpoint, sensitivity, volume, and backlight.
- Power Button: Press to turn the detector On/Off. The built-in on/off memory function retains your last settings.
- Mode Button: Cycles through the 5 detection modes.
- PP (Pinpoint) Button: Activates the pinpoint function to precisely locate a detected target.
- +/- Buttons (Regulate): Adjusts sensitivity, volume, or other settings depending on the active function.
- SENS (Sensitivity) Button: Allows adjustment of detection sensitivity (5 levels) to reduce false signals.
- VOL/LIGHT Button: Controls volume levels (3 levels) and turns the LCD backlight On/Off.

Image: An illustration detailing the intuitive controls on the metal detector's display, including target group filters, target sensitivity control, and depth indicator.
Detection Modes
The detector offers 5 professional detection modes to optimize your search for various metal types.

Image: Visual representations of the five distinct search modes: All Metal, Disc, Memory, Beach, and Pinpoint (PP) modes.
- All Metal Mode: Detects all types of metal. This mode is ideal for general searching when you want to find any metallic object.
- Disc (Discrimination) Mode: Allows you to distinguish between different metal types and ignore unwanted items (e.g., iron trash).
- Memory Mode: An innovative mode that allows you to focus on a single metal type, remembering specific target IDs.
- Jewelry Mode: Specifically tuned to help find jewelry.
- PP (Pinpoint) Mode: Used after a target is detected to narrow down its exact location, saving digging time.
Using the Detector
- Power On: Press the Power button to turn on the detector.
- Select Mode: Press the Mode button to choose your desired detection mode based on what you are searching for and the environment.
- Adjust Sensitivity: Use the SENS button and +/- buttons to adjust sensitivity. Start with a lower sensitivity in areas with high interference, and increase it in clear areas for deeper detection.
- Adjust Volume: Use the VOL/LIGHT button to set the audio volume to a comfortable level.
- Sweep the Coil: Hold the detector with the search coil parallel to the ground, about 1-2 inches above the surface. Sweep the coil slowly from side to side in overlapping motions.
- Target Indication: When a metal object is detected, the detector will emit an audio tone, and the LCD display will show information about the potential target, including its type and approximate depth.
- Pinpointing: Once a target is indicated, press the PP button. Move the coil slowly over the area until the strongest signal is heard, indicating the center of the target.

Image: An illustration demonstrating the metal detector's ability to detect objects up to 10 inches deep underground using its 12-inch search coil.
Environmental Considerations
The Gbnryg Metal Detector is designed for use in various outdoor environments.
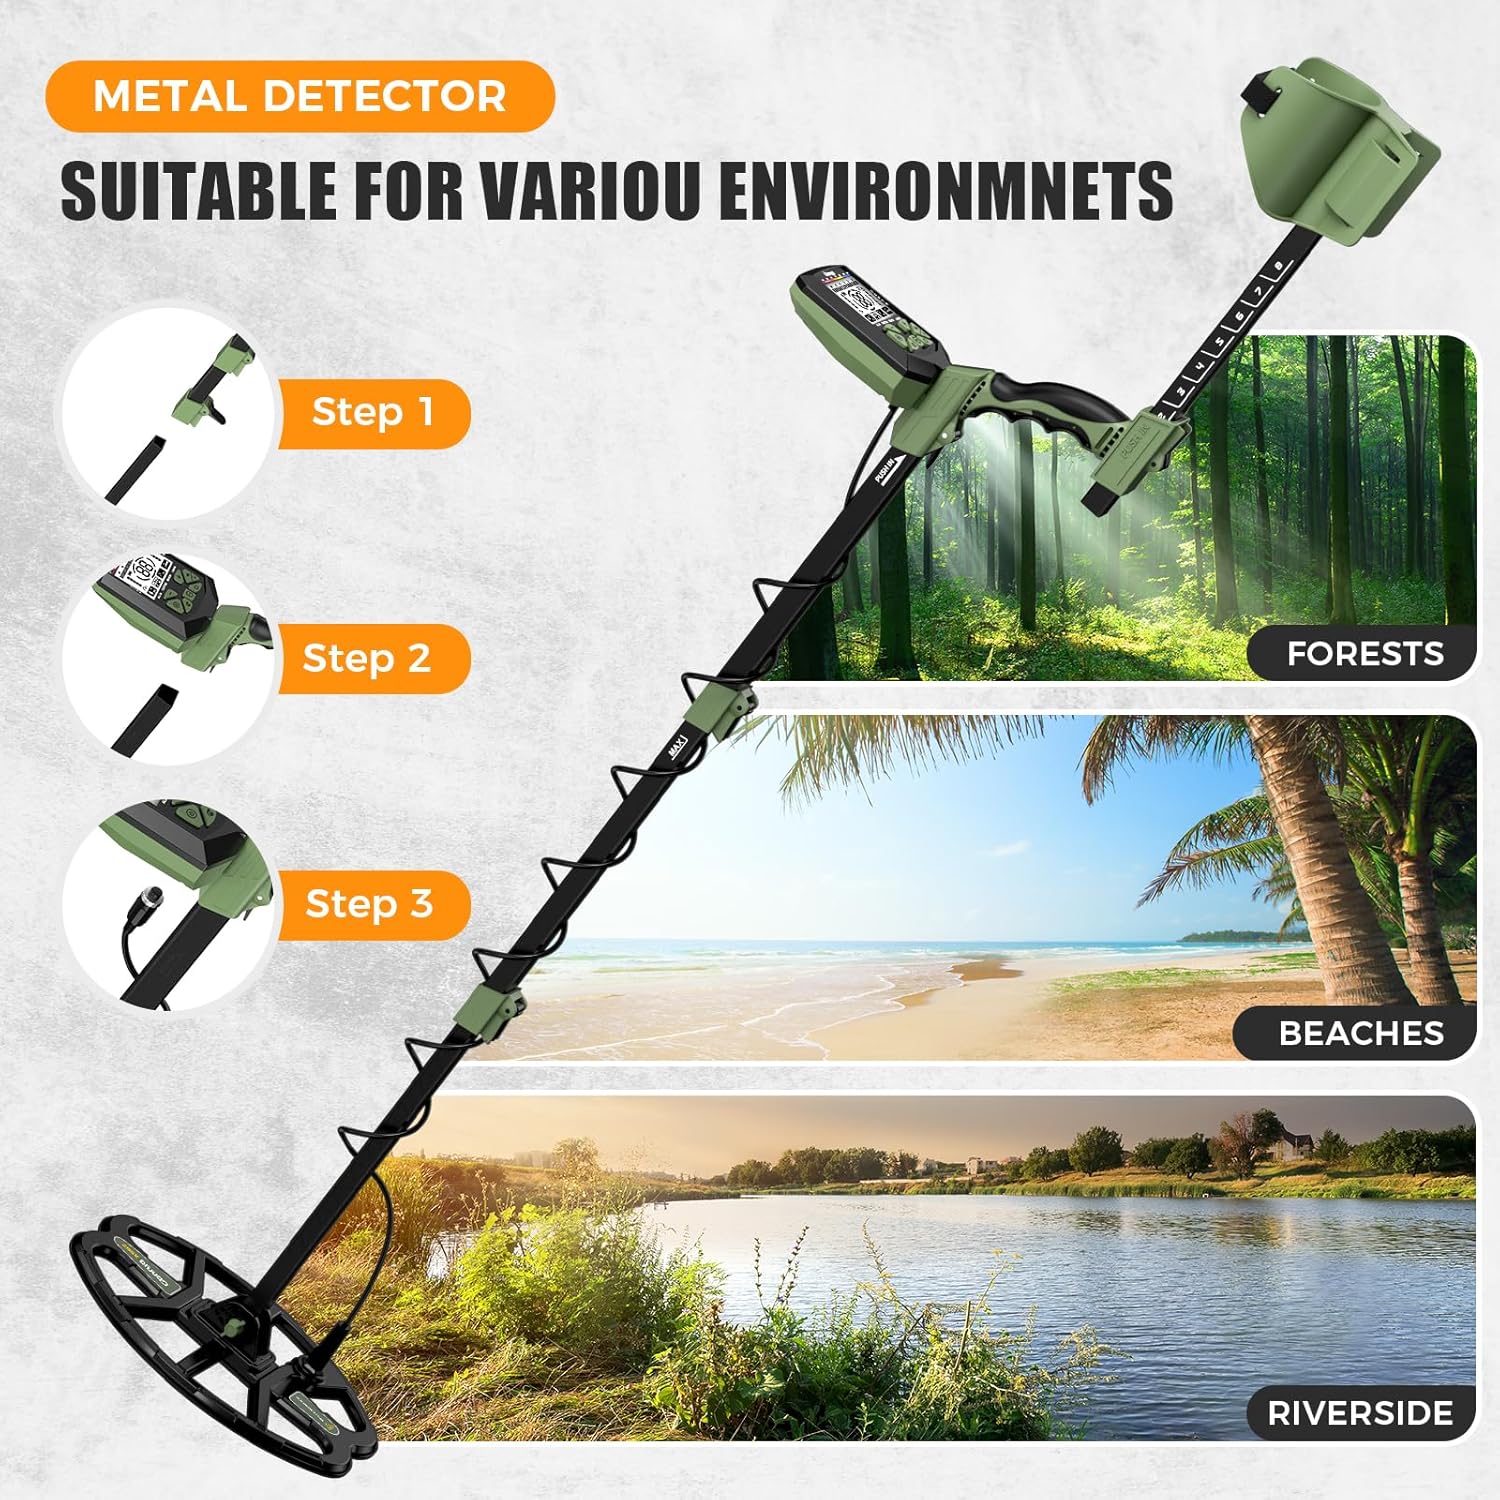
Image: A collage of images showing the metal detector being used in forests, on beaches, and by a riverside, indicating its versatility.
- Waterproof Search Coil: The 12-inch search coil has an IP68 waterproof rating, allowing for exploration in shallow water and wet environments like beaches and riverbanks. Note: The control unit is NOT waterproof and must be kept dry.
- Land Use: Suitable for use in forests, grasslands, parks, and other dry land areas.

Image: A person using the metal detector with its 12-inch wide IP68 waterproof search coil in shallow water near a shoreline, demonstrating its water-resistant capability.
Maintenance and Care
Proper maintenance ensures the longevity and optimal performance of your metal detector.
- Cleaning: After each use, especially in sandy or muddy conditions, wipe down the search coil and stem with a damp cloth. Ensure the control unit remains dry.
- Storage: Store the detector in a cool, dry place when not in use. If storing for extended periods, remove the batteries to prevent leakage.
- Battery Care: Use high-quality batteries. Replace batteries when the low battery indicator appears on the display.
- Avoid Extreme Temperatures: Do not expose the detector to extreme hot or cold temperatures, as this can damage electronic components.
- Protect the Control Unit: The control unit is not waterproof. Protect it from rain, splashes, and submersion.
Troubleshooting
If you encounter issues with your metal detector, refer to the table below for common problems and solutions.
| Problem | Possible Cause | Solution |
|---|---|---|
| Detector does not power on. | Low or dead batteries; incorrect battery installation. | Replace batteries with fresh ones. Ensure batteries are inserted with correct polarity. |
| Inconsistent or no beep sound. | Low sensitivity setting; headphones not connected or faulty; target too deep or too small; ground mineralization. | Increase sensitivity. Check headphone connection. Test with a known metal object. Try different detection modes. |
| False signals or erratic behavior. | High sensitivity setting; electromagnetic interference; highly mineralized ground; nearby metal objects. | Reduce sensitivity. Move away from power lines, cell phones, or other electronic devices. Try a different location or adjust ground balance if available (not explicitly stated as a feature, so keep it general). |
| Difficulty pinpointing targets. | Incorrect pinpointing technique; target too small. | Practice pinpointing with known objects. Ensure slow, precise movements over the target area. |
Specifications
Key technical specifications for the Gbnryg Metal Detector (Model: X55Z).
- Brand: Gbnryg
- Model Number: X55Z
- Search Coil Size: 12 inches
- Waterproof Rating (Search Coil): IP68
- Detection Depth: Up to 12 inches (for a quarter coin)
- Detection Modes: 5 (All Metal, Disc, Memory, Jewelry, Pinpoint)
- Sensitivity Levels: 5 adjustable levels
- Volume Levels: 3 adjustable levels
- Display: LCD Backlit Display
- Adjustable Length: 27 to 56 inches
- Handle Adjustment: 0 to 8 inches
- Power Source: Battery Powered (2 x AA batteries included)
- Material: Metal, Plastic
- Item Weight: 2.8 Pounds
- Product Dimensions: 17"L x 11"W x 5.9"H (packaged)
Note: Specifications are subject to change without notice for product improvement.
Safety Information
Adhere to the following safety guidelines to prevent injury and damage to the device.
- Always obtain permission before metal detecting on private property.
- Be aware of local laws and regulations regarding metal detecting, especially in historical sites or protected areas.
- Exercise caution when digging to avoid damaging underground utilities (pipes, cables).
- Do not use the detector near live electrical wires or in areas with potential explosive hazards.
- Keep the control unit dry at all times. It is not waterproof.
- Do not attempt to modify or disassemble the detector, as this will void the warranty and may cause damage.
- Keep batteries away from children and dispose of them properly.
Warranty and Support
Information regarding product warranty and customer support was not available in the provided data. Please refer to the product packaging or the manufacturer's official website for the most up-to-date warranty terms and contact information for support.