1. Introduction and Overview
The Yosoo Health Gear Vacuum Sealer is designed to simplify food preservation, extending the freshness of your food by reducing oxidation. This compact and efficient machine offers fully automatic vacuuming and sealing, making meal planning easier and reducing food waste. It features a user-friendly interface suitable for all users.
Key Features:
- Effortless Operation: Simple one-button intelligent vacuum sealing.
- Extended Freshness: Reduces food oxidation, extending freshness up to 8 times longer.
- Compact and Portable: Small size and lightweight design for easy storage and movement.
- Rapid and Efficient: Vacuuming and sealing completed within 20 seconds, with separate air extraction and sealing modes.
- Versatile Functionality: Supports vacuum packaging and automatic sealing for various food types.
2. Product Components
Upon unboxing, please ensure all the following components are present:
- 1 x Vacuum Sealing Machine
- 10 x Vacuum Bags
- 1 x Power Cord

Image: The vacuum sealer machine, along with the included vacuum bags and power cord.
3. Setup Instructions
Follow these steps to set up your vacuum sealer for first use:
- Unpack: Carefully remove the vacuum sealer and all accessories from the packaging.
- Placement: Place the machine on a flat, stable, and dry surface.
- Connect Power: Insert the power cord into the power port on the back of the vacuum sealer and then plug the other end into a standard US 100~240V electrical outlet.
- Prepare for Use: Ensure the machine is closed and latched. If it's open, gently press down on both sides until you hear a click, indicating it's securely closed.
Video: A demonstration of unboxing the vacuum sealer, connecting the power cord, and preparing a vacuum bag for sealing.
4. Operating Instructions
The Yosoo Health Gear Vacuum Sealer offers both vacuum sealing and seal-only functions.
4.1. Vacuum Sealing Food
- Prepare Bag: Place the food item into a vacuum sealer bag, ensuring that the open end of the bag is clean and dry. Leave at least 2-3 inches of space between the food and the top edge of the bag.
- Position Bag: Open the vacuum sealer by pressing the "PUSH" buttons on both sides. Place the open end of the bag flat across the sealing bar, ensuring it is within the vacuum chamber.
- Close and Latch: Close the lid firmly by pressing down on both sides until the latches click into place.
- Start Vacuum & Seal: Press the "Vacuum & Seal" button (often labeled with a vacuum icon and a seal icon). The machine will automatically remove air from the bag and then seal it. This process typically takes about 20 seconds.
- Release and Open: Once the sealing process is complete, press the "Releasing Valve" button (a small circular button near the controls) to release the vacuum pressure. Then, press the "PUSH" buttons on the sides to open the lid and remove your sealed bag.
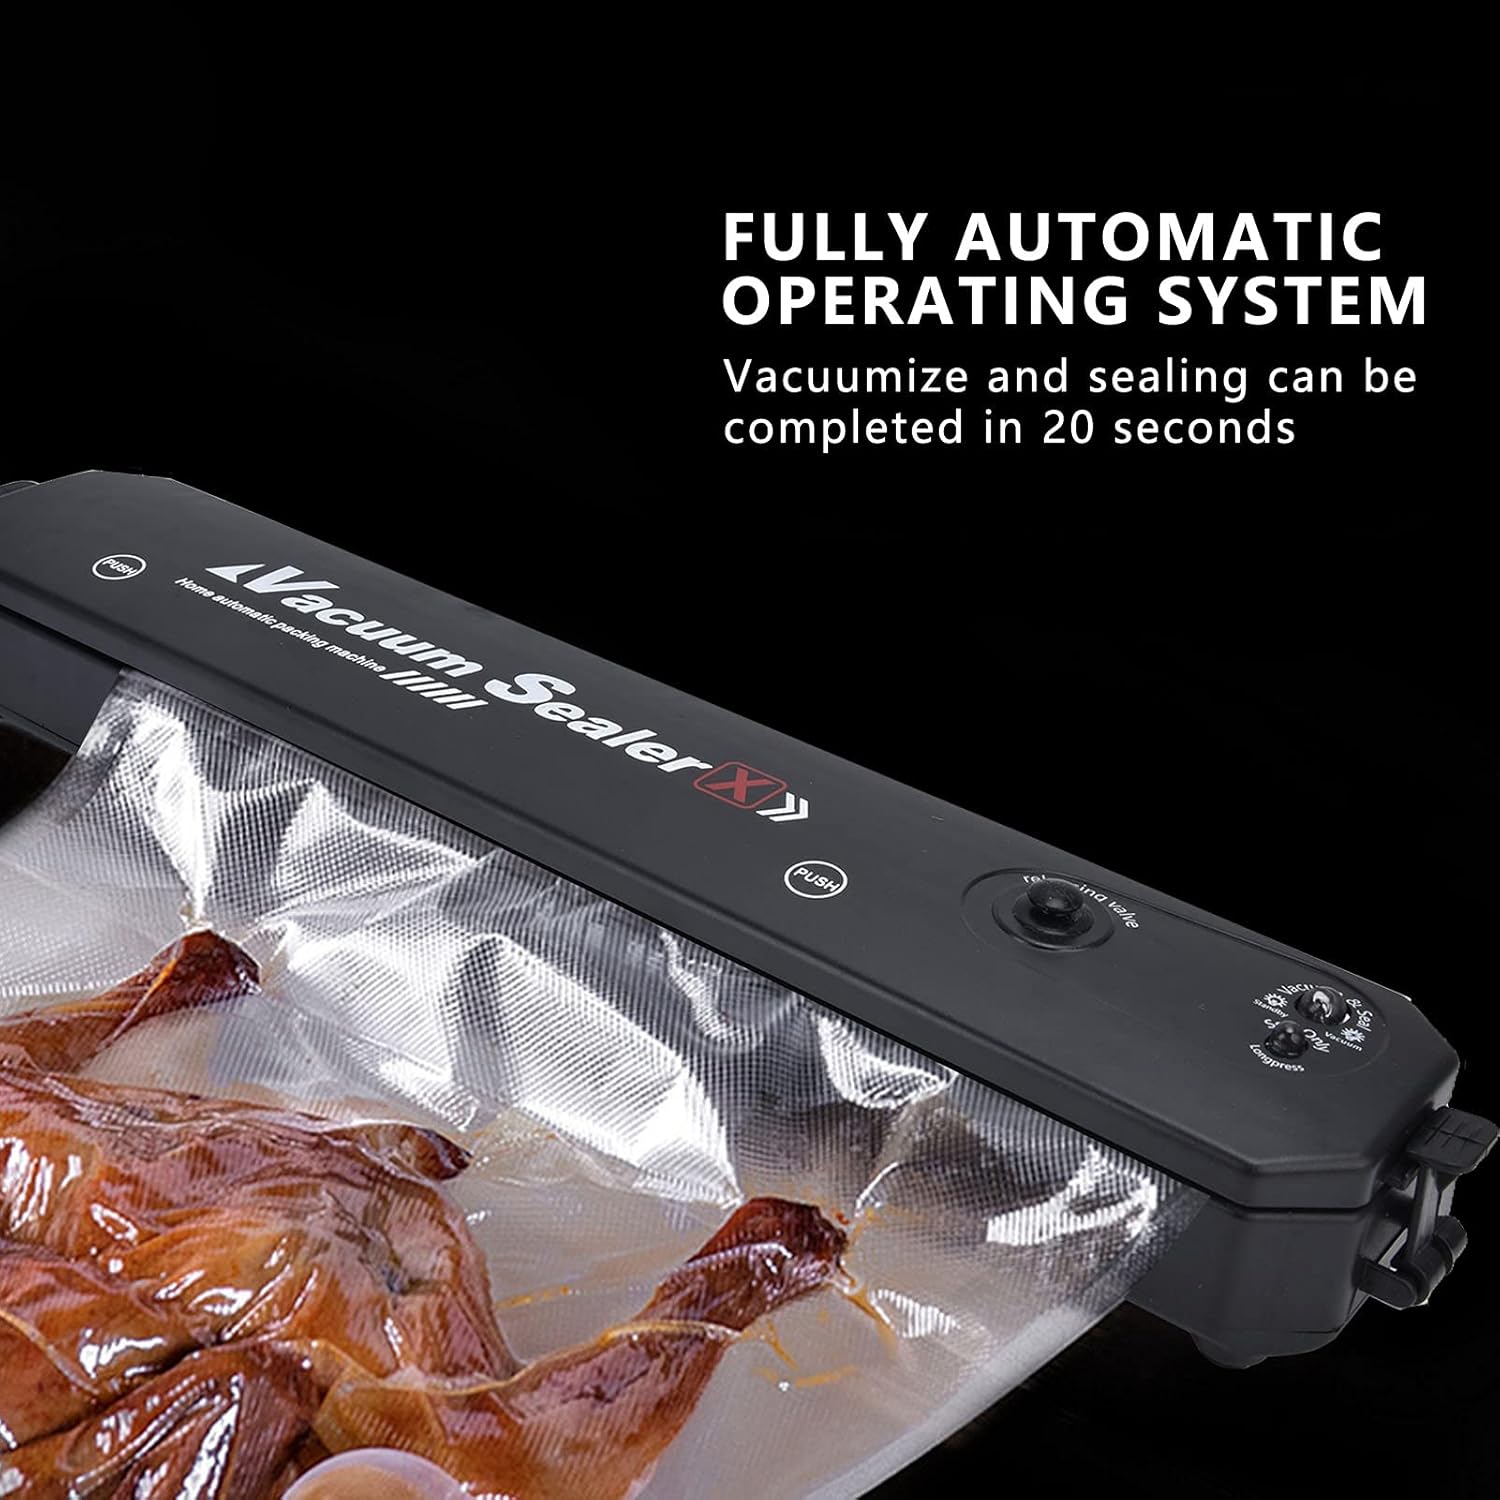
Image: The vacuum sealer actively removing air and sealing a bag containing food.

Image: Detailed view of the control buttons on the vacuum sealer, showing the "Vacuum + sealed button", "Vacuum button", and "Seal button".
4.2. Sealing Only (No Vacuum)
- Prepare Bag: Place the item into a vacuum sealer bag.
- Position Bag: Open the vacuum sealer and place the open end of the bag directly over the sealing bar, ensuring it does not enter the vacuum chamber.
- Close and Latch: Close the lid firmly until the latches click.
- Start Sealing: Press the "Seal Only" button (often labeled "Seal Only" or with a seal icon). The machine will heat the sealing bar and create a seal.
- Release and Open: Once the sealing process is complete, press the "PUSH" buttons on the sides to open the lid and remove your sealed bag.

Image: An internal view of the vacuum sealer, illustrating the air exhaust channels and the sealing bar mechanism.
5. Maintenance and Care
Proper maintenance ensures the longevity and optimal performance of your vacuum sealer.
- Cleaning: After each use, especially if sealing moist foods, wipe down the vacuum chamber and sealing bar with a damp cloth. Ensure no food particles or liquids remain. Do not immerse the unit in water.
- Drying: Allow all parts to air dry completely before closing the lid or storing the machine.
- Separator Paper: When the machine is not in use, or between sealing cycles (especially after 40 seconds of continuous use), it is recommended to place the provided separator paper between the upper and lower shells. This helps protect the sealing strip and prolong its life. The recommended use interval between seals is 1 to 2 minutes.
- Storage: Store the vacuum sealer in a cool, dry place, away from direct sunlight and extreme temperatures.

Image: The vacuum sealer with its lid open, revealing the sealing bar and the area where the vacuum bag is placed.
6. Troubleshooting
If you encounter issues with your vacuum sealer, refer to the following common problems and solutions:
| Problem | Possible Cause | Solution |
|---|---|---|
| Machine does not turn on. | No power supply. | Ensure the power cord is securely plugged into both the machine and a working electrical outlet. |
| Bag does not vacuum properly. | Bag not positioned correctly; air leakage; bag too full. | Ensure the open end of the bag is flat and fully inside the vacuum chamber. Check for wrinkles or creases in the bag. Do not overfill the bag. |
| Bag does not seal. | Sealing strip dirty or wet; machine overheated. | Clean the sealing strip and ensure it is dry. Allow the machine to cool down for 1-2 minutes between uses if performing multiple seals. |
| Vacuum is weak. | Lid not properly latched; gasket dirty or damaged. | Press down firmly on both sides of the lid until it clicks. Clean the gasket around the vacuum chamber. If damaged, contact support. |
7. Specifications
| Feature | Detail |
|---|---|
| Brand | Yosoo Health Gear |
| Model Number | Yosoo Health Gear0tr5cm6iep |
| Material | Acrylonitrile Butadiene Styrene (ABS) |
| Item Weight | 1.28 pounds (Approx. 579g / 20.4oz) |
| Operation Mode | Automatic |
| Wattage | 90 watts |
| Voltage | AC100-240V / 50-60HZ (US) |
| Vacuum Degree | -60Kpa |
| Warm Up Time | About 30 seconds |
| Use Interval | About 1~2 minutes |
| Max Bag Sealing Width | 26 cm |
| Package Dimensions | 14.96 x 3.54 x 2.76 inches |
| Country of Origin | China |
| Date First Available | May 10, 2024 |
8. Warranty and Support
For warranty information or technical support, please contact Yosoo Health Gear customer service through the retailer where the product was purchased. Please have your model number (Yosoo Health Gear0tr5cm6iep) and purchase date available when contacting support.
You can also visit the official Yosoo Health Gear store on Amazon for more information: Yosoo Health Gear Store.


