
1. Introduction
This manual provides detailed instructions for the installation, operation, and maintenance of your KERDE 2-Inch Automatic Toilet Flusher Dual Flush Valve, Model 2F-29CM. This product is designed to enhance hygiene and water efficiency in your bathroom by providing touchless, automatic flushing and dual flush options. Please read this manual thoroughly before installation and use to ensure proper function and longevity of the product.
2. Safety Information
- Always turn off the water supply to the toilet before beginning any installation or maintenance.
- Wear appropriate personal protective equipment, such as gloves and eye protection, during installation.
- Ensure all connections are secure to prevent leaks.
- Do not use abrasive cleaners or harsh chemicals on any part of the flush valve system.
- Keep batteries out of reach of children. Dispose of used batteries responsibly.
3. Package Contents
Please verify that all components are present before proceeding with installation:
- Automatic Dual Flush Valve Assembly
- Sensor Module
- Mounting Hardware
- User Manual (this document)
Note: The product description mentions a 'bidet hose'. This item is not typically included with a flush valve and may be a generic listing error. Please refer to the actual contents of your package.
4. Compatibility
This KERDE Automatic Toilet Flusher is specifically designed for use with two-piece toilets. It is not compatible with one-piece toilets where the tank and bowl are integrated.

Image: This diagram illustrates the difference between a two-piece toilet (compatible) and a one-piece toilet (incompatible). The two-piece toilet has a clearly separate tank and bowl, while the one-piece toilet has them joined.
Ensure your toilet has a 2-inch drain outlet for proper fitment. The flush valve is adjustable for tank heights between approximately 10.7 inches and 12.7 inches.
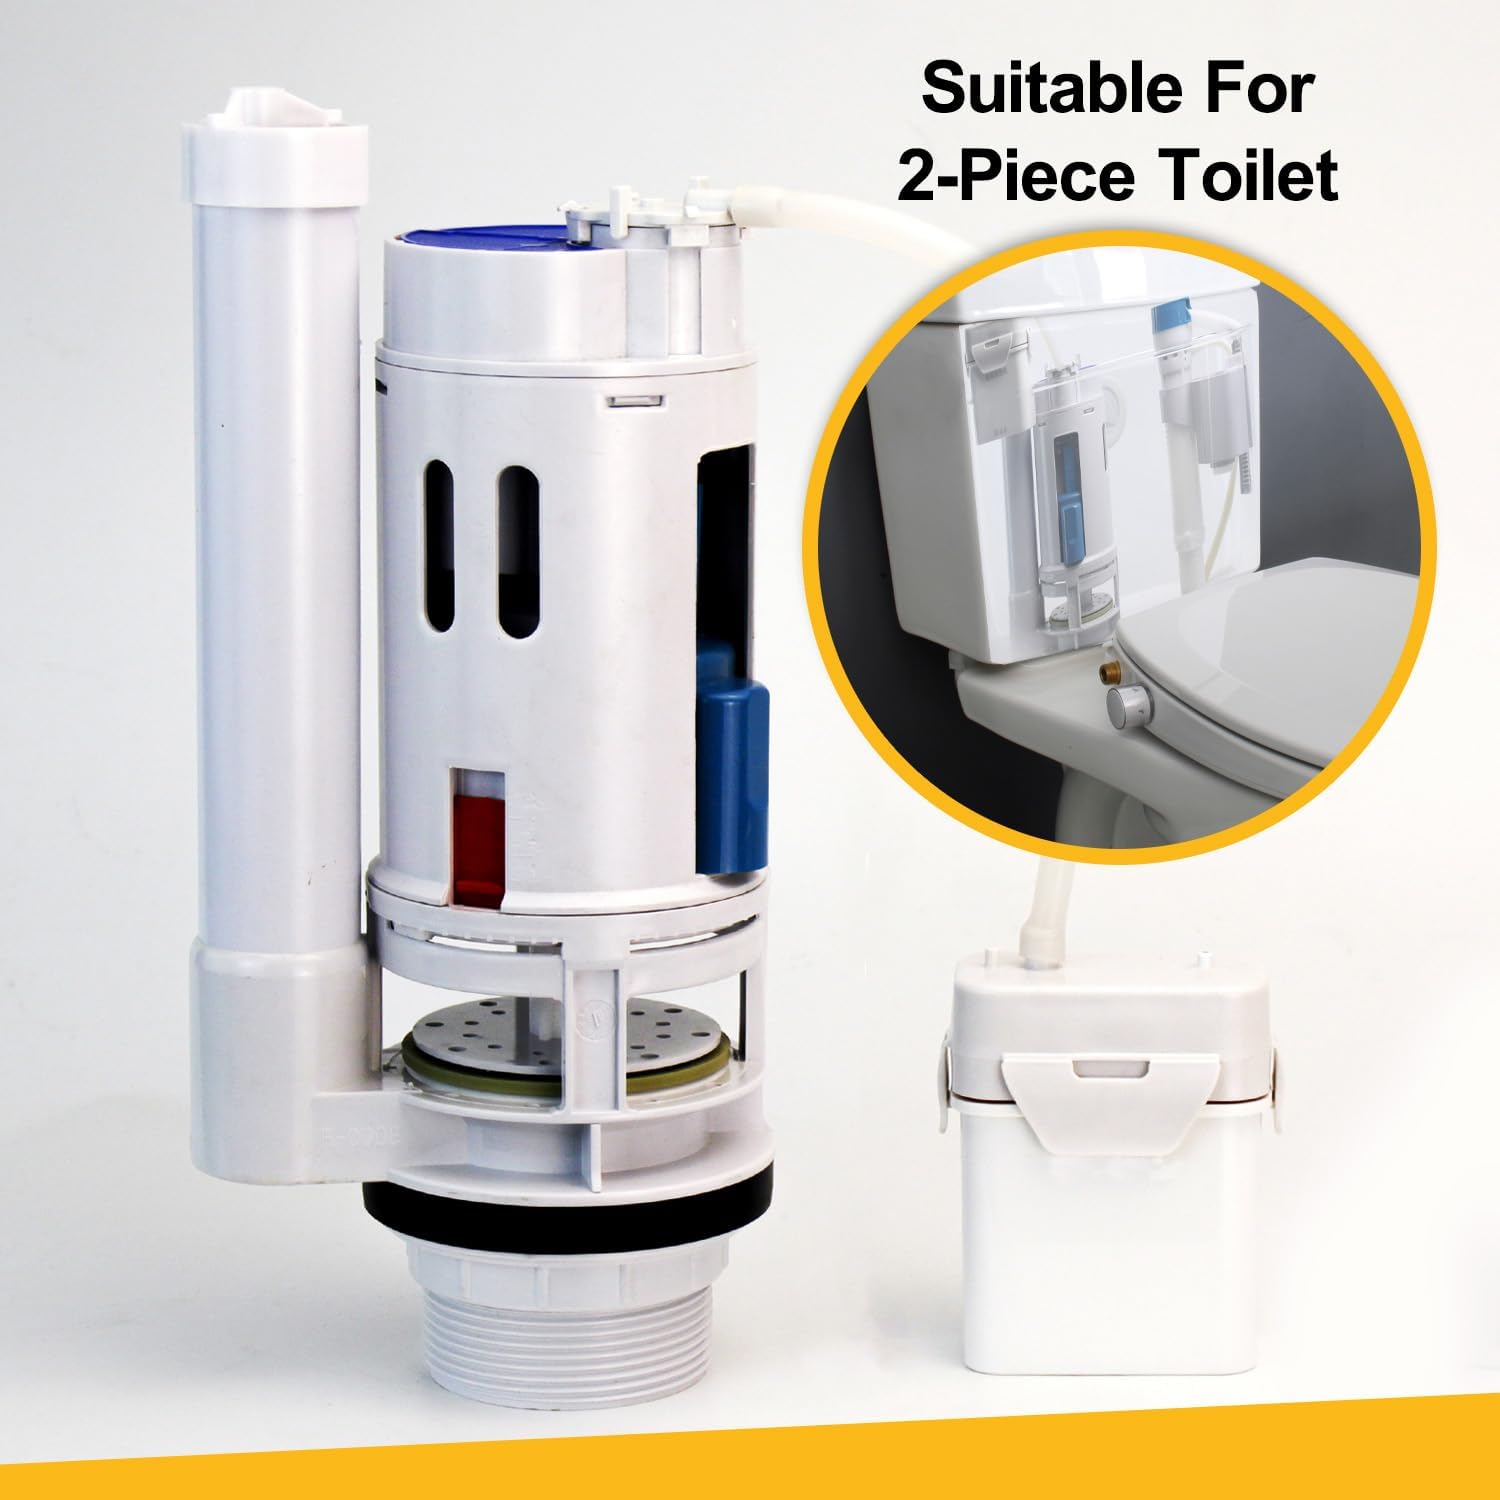
Image: The KERDE flush valve assembly is shown, highlighting its design for 2-piece toilet compatibility.
5. Setup and Installation
Follow these steps carefully for installation. For visual guidance, please refer to the installation video provided below.
- Prepare the Toilet: Turn off the water supply to the toilet and flush to empty the tank. Remove the toilet tank lid.
- Remove Old Flush Valve: Disconnect any existing flush mechanism. Unscrew and remove the old flush valve from the bottom of the tank. Clean the area thoroughly.
- Measure Toilet Dimensions: Before installing, confirm your toilet's drain outlet diameter and tank height. The drain outlet should be approximately 2.3 to 3.0 inches, and the flush valve is designed for tank heights between 10.7 and 12.7 inches.

Image: This guide illustrates how to measure your toilet's drain outlet and the original drainage valve height to ensure proper fit for the new flush valve.
- Install New Flush Valve: Insert the new KERDE flush valve into the tank's drain hole. Secure it from underneath the tank using the provided mounting hardware, ensuring a tight, leak-free seal.
- Connect Water Supply: Reconnect the water supply line to the fill valve.
- Install Sensor Module: Attach the sensor module to the desired location on the toilet tank or lid, ensuring it has a clear line of sight for detection. Follow the specific instructions for sensor placement to optimize detection.
- Restore Water Supply: Slowly turn on the water supply and check for any leaks. Allow the tank to fill.
- Test Functionality: Test the automatic flush and dual flush features as described in the Operating Instructions section.
Installation Video Guide
Video: This official KERDE installation video demonstrates the steps for installing the 2-Inch Automatic Toilet Flusher. It provides a visual guide to complement the written instructions.
6. Operating Instructions
The KERDE Automatic Toilet Flusher offers touchless operation and dual flush functionality.
Automatic Flushing
The integrated sensor detects user presence. After a user leaves the toilet area, the system will automatically initiate a flush. This touchless feature promotes hygiene by eliminating the need to touch flush handles or buttons.

Image: This graphic shows the sequence of automatic flushing: user approaches, uses the toilet, and upon leaving, the sensor triggers an automatic flush.
Dual Flush Functionality
The system supports dual flushing, allowing for water conservation. Depending on the model, this may be activated by a short press for a partial flush or a longer press for a full flush on the manual button, or automatically by the sensor based on detection duration (if applicable). Refer to the specific button on your unit for manual dual flush options.
Various Flushing Methods
Your KERDE automatic flusher may support multiple activation methods:
- Sensor Flush: Automatic activation upon user departure.
- Remote Control Flush: If your model includes a remote, use it to manually activate flushing.
- Foot Feel Flush: Some models may have a foot-activated sensor.
- Close Cover Flush: Flushing may be triggered by closing the toilet lid.
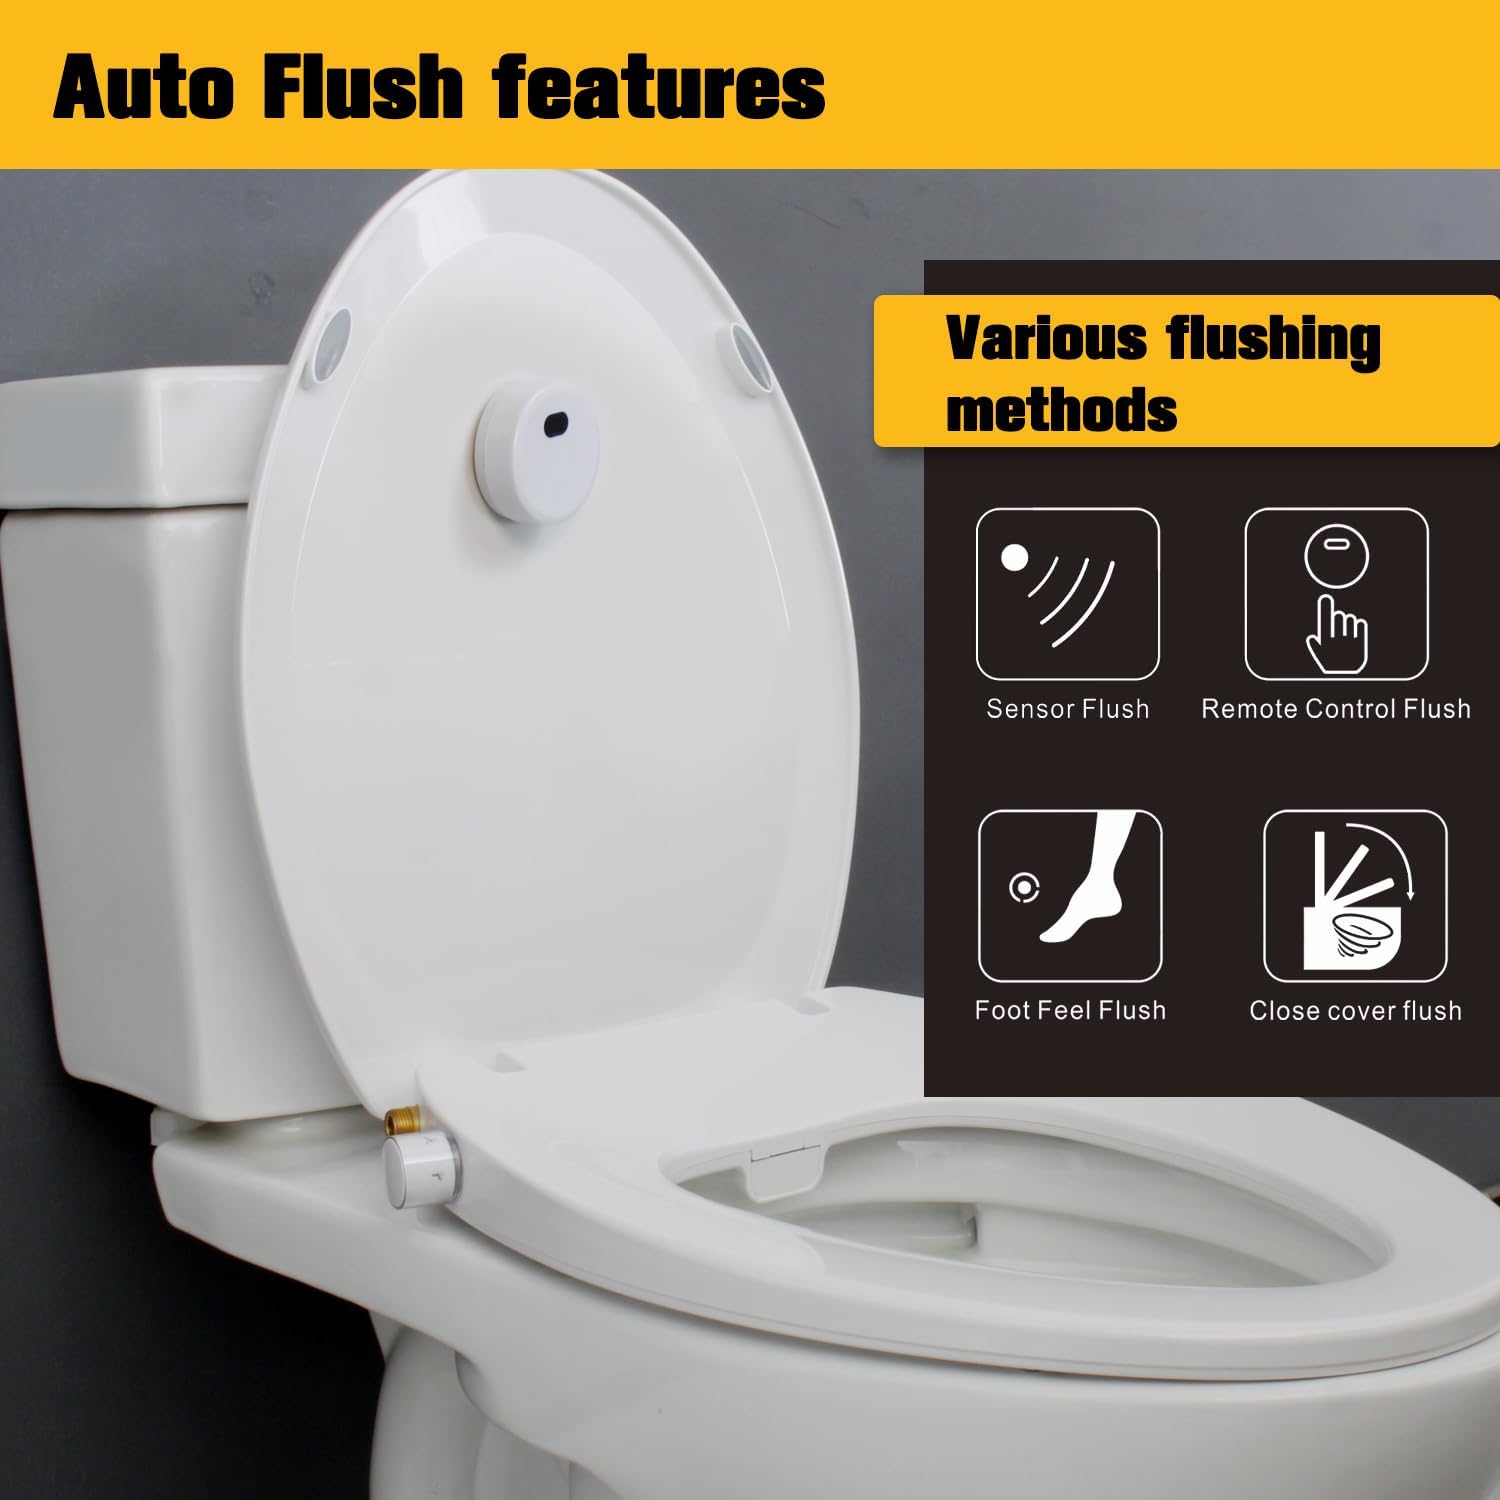
Image: This graphic illustrates different ways the automatic flush can be activated, including sensor, remote control, foot sensor, and lid closure.
7. Maintenance
Cleaning
- Clean the exterior of the flush valve and sensor module with a soft, damp cloth.
- Do not use abrasive cleaners, solvents, or harsh chemicals, as these can damage the finish and internal components.
- Periodically inspect the flush valve for mineral buildup, especially in hard water areas. Clean with a mild descaling solution if necessary, following the solution's instructions.
Battery Replacement
The unit is battery-powered. When the battery level is low, the indicator light on the sensor module may flash or the unit may cease to function automatically. To replace batteries:
- Locate the battery compartment on the sensor module.
- Open the compartment cover.
- Remove old batteries and insert new ones, ensuring correct polarity.
- Close the battery compartment securely.
- Dispose of old batteries according to local regulations.
8. Troubleshooting
| Problem | Possible Cause | Solution |
|---|---|---|
| No automatic flush | Low or dead batteries Sensor obstructed or dirty Sensor misaligned | Replace batteries Clean sensor lens Adjust sensor position |
| Weak flush | Water level too low Flush valve obstructed Water supply partially closed | Adjust fill valve to increase water level Inspect flush valve for debris Ensure water supply valve is fully open |
| Continuous running water | Flush valve not sealing properly Fill valve issue | Check for debris under the flush valve seal; clean or replace seal if damaged Inspect fill valve for proper shut-off |
| Leaks from tank base | Improperly seated flush valve gasket Loose mounting nuts | Turn off water, drain tank, re-seat gasket, tighten mounting nuts evenly |
9. Specifications
- Model Number: 2F-29CM
- Material: Brass (internal components), ABS Plastic (external housing)
- Inlet Connection Size: 2 inches
- Outlet Connection Size: 2 inches
- Compatible Toilet Type: 2-Piece Toilets
- Adjustable Tank Height: Approximately 10.7 inches - 12.7 inches
- Item Dimensions (L x W x H): 6 x 4 x 11 inches (approximate, for main valve assembly)
- Power Source: Battery-powered
- Valve Type: Diaphragm Valve

Image: This diagram provides detailed measurements for the flush valve assembly and the separate sensor unit, including height, width, and diameter.
10. Warranty and Support
KERDE products are manufactured to high-quality standards. For specific warranty details, please refer to the warranty card included with your purchase or contact KERDE customer support directly.
If you encounter any issues or have questions regarding your KERDE Automatic Toilet Flusher, please contact our customer support team for assistance. Contact information can typically be found on the product packaging or the official KERDE website.
