
1. Safety Information
Important: Assembly may require multiple people and proper safety precautions. Always ensure the gazebo is installed on a level surface.
Keep curtains and netting away from heat sources to prevent fire hazards. Ensure curtains and netting are securely fastened to prevent entanglement, especially in windy conditions.
Do not hang heavy objects from the gazebo frame. Regularly inspect all connections and fasteners to ensure they remain tight and secure.
2. Product Overview
The Aoxun 10'x10' Single Polycarbonate Top Gazebo is designed to provide a comfortable and protected outdoor space. It features a durable polycarbonate roof, a sturdy aluminum frame, and includes removable curtains and netting for enhanced versatility.

Image: The Aoxun 10'x10' Gazebo providing a shaded area with outdoor furniture.

Image: Visual representation of the gazebo's year-round weather protection capabilities.
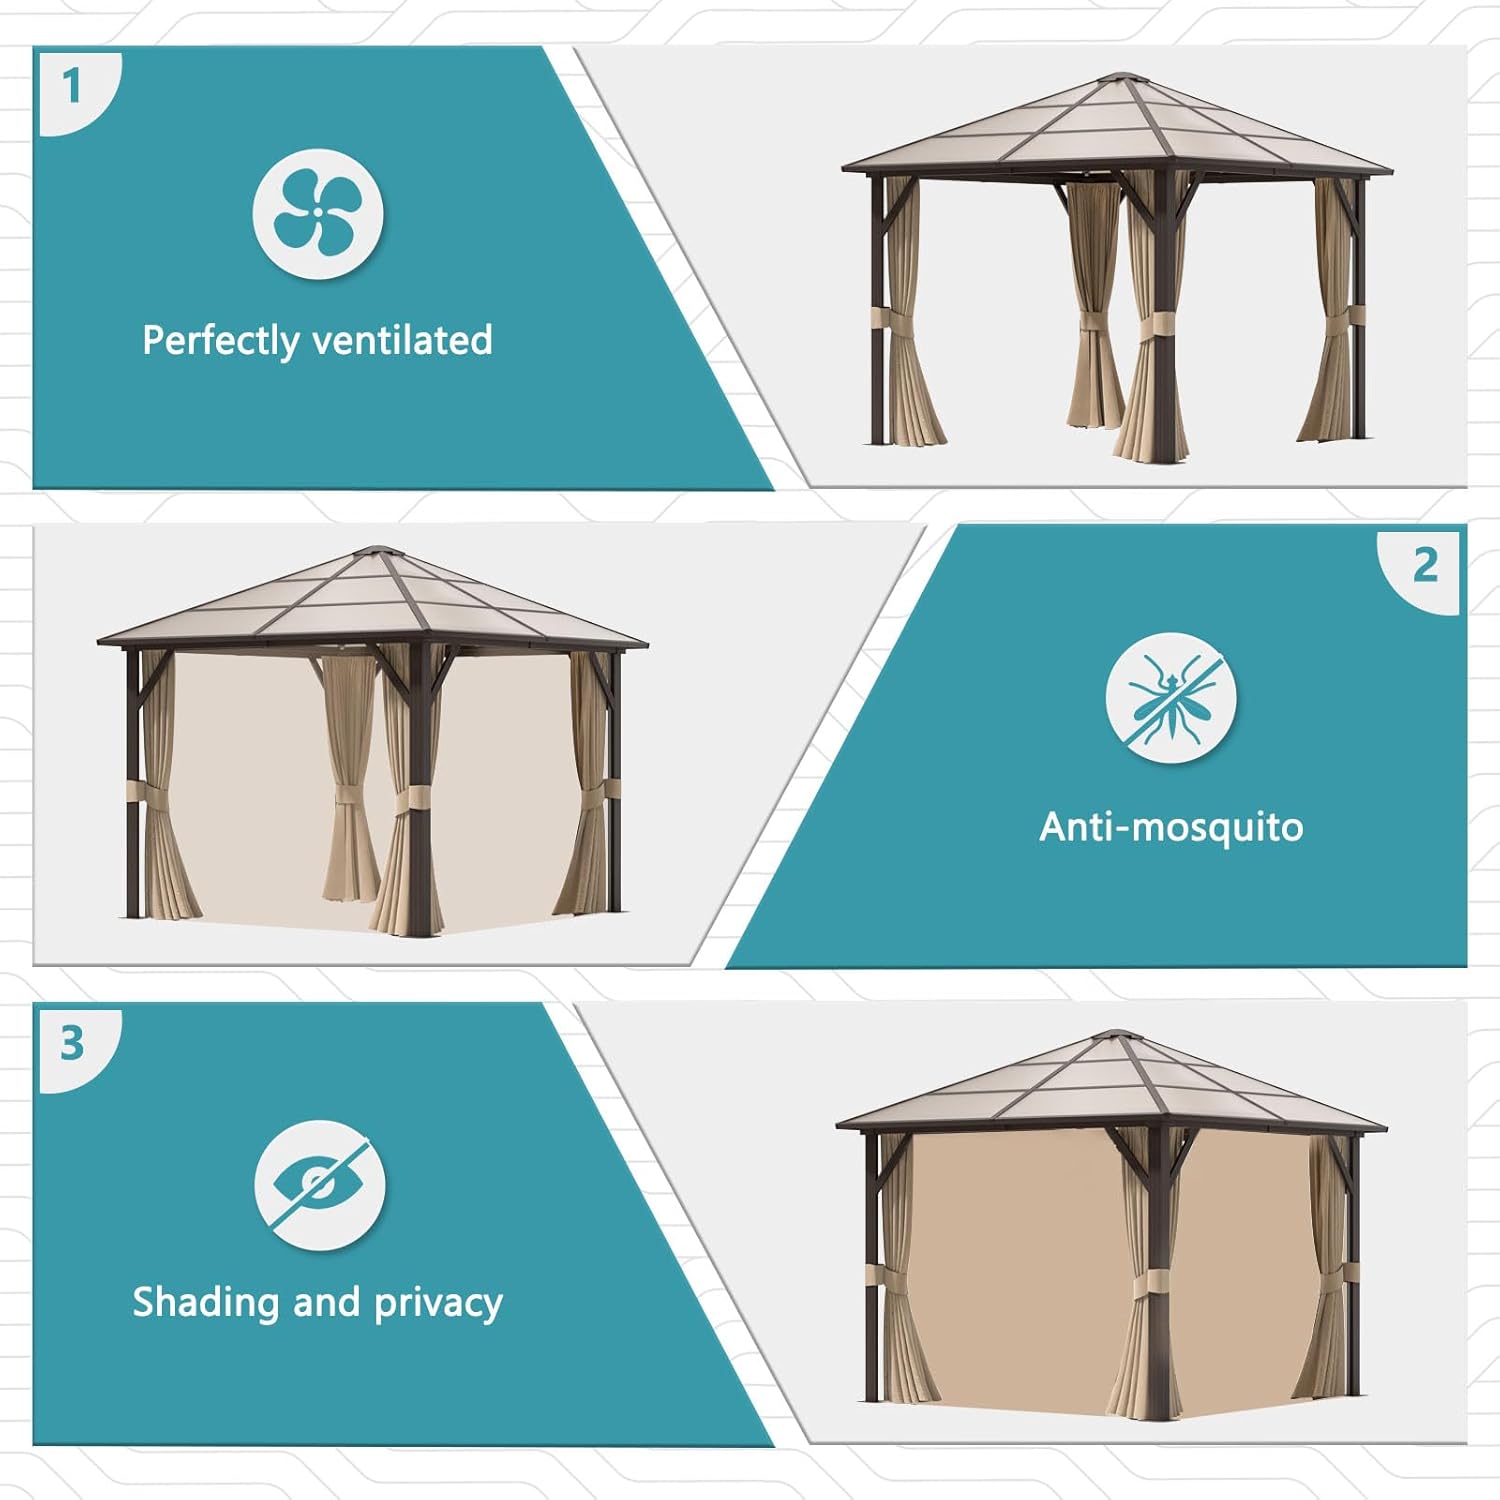
Image: Key features of the gazebo including ventilation, mosquito protection, and privacy.

Image: Detailed product dimensions for the Aoxun Gazebo.

Image: Features of the polycarbonate roof, including UV protection and weather resistance.
3. Assembly Instructions
Assembly typically requires 3-4 people and takes 2-4 hours. Please follow the steps carefully. An installation video is provided for visual guidance.
Video: Detailed assembly guide for the Aoxun 10'x10' Single Polycarbonate Top Gazebo.
Step-by-Step Guide:
- Preparation: Clear the installation area and ensure it is level. Unpack all components and verify against the parts list in your manual.
- Assemble Base Plates: Attach the base plates (Part J) to the bottom of the vertical posts (Part A) using the specified screws (Screws 1).
- Connect Horizontal Beams: Join the horizontal beams (Parts B, B1, P) together using the provided connectors and screws (Screws 1).
- Insert U-shaped Clips: Slide the U-shaped clips (Part U) into the designated slots on the horizontal beams.
- Attach Horizontal Beams to Posts: Secure the assembled horizontal beams to the top of the vertical posts using screws (Screws 1).
- Install Corner Braces: Attach the corner braces (Parts H, H1) to the upper corners of the frame, connecting the vertical posts to the horizontal beams with screws (Screws 1).
- Secure Corner Caps: Place the corner caps (Part K) over the top corners of the frame and fasten them with screws (Screws 4).
- Attach Top Frame Connectors: Install the top frame connectors (Part K1) and secure them with screws (Screws 3 and 4).
- Assemble Central Roof Hub: Connect the central roof hub components (Part L) using the provided hardware (Screws 9).
- Attach Roof Support Bars: Fasten the roof support bars (Parts E, W3) to the central roof hub using screws (Screws 3).
- Connect Roof Support Bars to Main Frame: Secure the other end of the roof support bars to the main gazebo frame using screws (Screws 1).
- Place Top Cap: Position the top cap (Part M) onto the central roof structure and secure it with screws (Screws 7).
- Install Polycarbonate Roof Panels: Carefully slide the polycarbonate roof panels into the designated channels on the roof frame.
- Secure Roof Panels: Attach the end caps (Part N1) and secure the roof panels using the provided screws (Screws 1) and clips (Parts G1, G2).
- Attach Curtains: Hang the curtains (Part T) onto the top rail of the gazebo frame.
- Attach Netting: Secure the netting (Part T1) to the vertical posts.
- Anchor Gazebo: Use the provided ground stakes and expansion screws to firmly anchor the gazebo to the ground for stability.
4. Usage Guidelines
- Ensure all parts are securely fastened before use.
- The polycarbonate roof provides UV protection and helps regulate temperature, offering a comfortable environment.
- Utilize the removable curtains for privacy or to block strong sunlight, rain, or snow.
- Deploy the mosquito netting to protect against insects while maintaining air circulation.
- In extreme weather conditions (heavy winds, snow, or storms), it is recommended to remove curtains and netting and, if possible, temporarily disassemble or secure the gazebo further to prevent damage.
5. Maintenance
- Cleaning: Clean the polycarbonate roof and aluminum frame with mild soap and water. Avoid abrasive cleaners or harsh chemicals that could damage the materials.
- Fabric Care: Curtains and netting can be spot cleaned with mild detergent. For deeper cleaning, follow care instructions on the fabric tags. Ensure they are completely dry before storing to prevent mildew.
- Fasteners: Periodically check all screws and connections to ensure they are tight. Re-tighten as necessary to maintain structural integrity.
- Winter Care: While the polycarbonate roof is durable, consider removing heavy snow accumulation to prevent excessive stress on the frame.
6. Troubleshooting
- Gazebo feels unstable: Ensure all screws are tightened. Verify that the gazebo is on a level surface and properly anchored to the ground using the provided stakes or other suitable anchoring methods.
- Water leakage from roof: Check that all polycarbonate panels are correctly seated in their channels and that all sealing strips and end caps are properly installed and secured.
- Curtains/Netting not closing properly: Inspect the hooks and rails for any obstructions or damage. Ensure the fabric is not snagged or twisted.
- Missing parts: If any parts are missing upon arrival, please contact customer support immediately.
7. Specifications
| Feature | Detail |
|---|---|
| Brand | Aoxun |
| Material | Polycarbonate (Roof), Aluminum (Frame) |
| Style | Modern |
| Product Dimensions (L x W x H) | 118.11"L x 118.11"W x 100.4"H |
| Item Weight | 133 Pounds |
| Water Resistance Level | Waterproof |
| Shape | Rectangular |
| Ultraviolet Light Protection | 25 |
| Assembly Required | Yes |
| Color | Gray |
8. Warranty and Support
For warranty information or technical support, please refer to the contact details provided with your purchase documentation or visit the official Aoxun website. Keep your proof of purchase for any warranty claims.


