EMTOP 20V Cordless Paint Spray Gun Kit - Model ELSG2003
Instruction Manual
Introduction
Thank you for choosing the EMTOP 20V Cordless Paint Spray Gun Kit. This tool is designed for efficient and precise paint application, suitable for various painting projects. To ensure safe operation and optimal performance, please read this manual carefully before using the spray gun. Keep these instructions handy for future reference.
Important Safety Instructions
Always follow basic safety precautions when using electrical tools to reduce the risk of fire, electric shock, and personal injury.
- Read all instructions: Familiarize yourself with the controls and proper use of the equipment.
- Wear appropriate personal protective equipment (PPE): Always wear safety glasses, a respirator mask, gloves, and protective clothing when operating the paint spray gun.
- Ensure proper ventilation: Use the spray gun in a well-ventilated area to avoid inhaling paint fumes.
- Keep work area clean and well-lit: Cluttered or dark areas invite accidents.
- Do not operate in explosive atmospheres: Do not spray flammable materials near open flames, pilot lights, or other ignition sources.
- Disconnect power: Always disconnect the battery pack before cleaning, adjusting, or performing maintenance.
- Keep children and bystanders away: Distractions can cause you to lose control.
- Use the correct battery and charger: This tool requires a 20V battery (sold separately). Use only compatible EMTOP 20V batteries and chargers.
- Do not immerse in liquids: Never immerse the spray gun in water or other liquids.
- Maintain the tool: Keep the spray gun and accessories clean for better and safer performance.
Package Contents
Your EMTOP 20V Cordless Paint Spray Gun Kit includes the following items:
- 1 x Cordless Paint Spray Gun (20V)
- 1 x Viscometer
- 1 x Nozzle Cleaning Needle
- 2 x Copper Nozzles
- 1 x 800ml Container
Note: Battery and charger are sold separately.

Image showing the EMTOP 20V Cordless Paint Spray Gun with its included accessories: two copper nozzles, one viscometer, and one nozzle cleaning needle.
Product Overview
The EMTOP 20V Cordless Paint Spray Gun is designed for ease of use and efficient paint application. Key features include:
- Cordless 20V Operation: Provides maximum portability and freedom of movement.
- 800ml Container Capacity: Reduces the need for frequent refills, allowing for more continuous work.
- Adjustable Flow and Pressure: Max flow of 800 ml/min and working pressure of 0.1-0.2 bar for uniform coating and exceptional control.
- Max Viscosity: Supports paint with a maximum viscosity of 120DIN-s.
- Included Accessories: Viscometer, nozzle cleaning needle, and two copper nozzles for enhanced precision.

Front view of the EMTOP 20V Cordless Paint Spray Gun, highlighting its compact and ergonomic design.
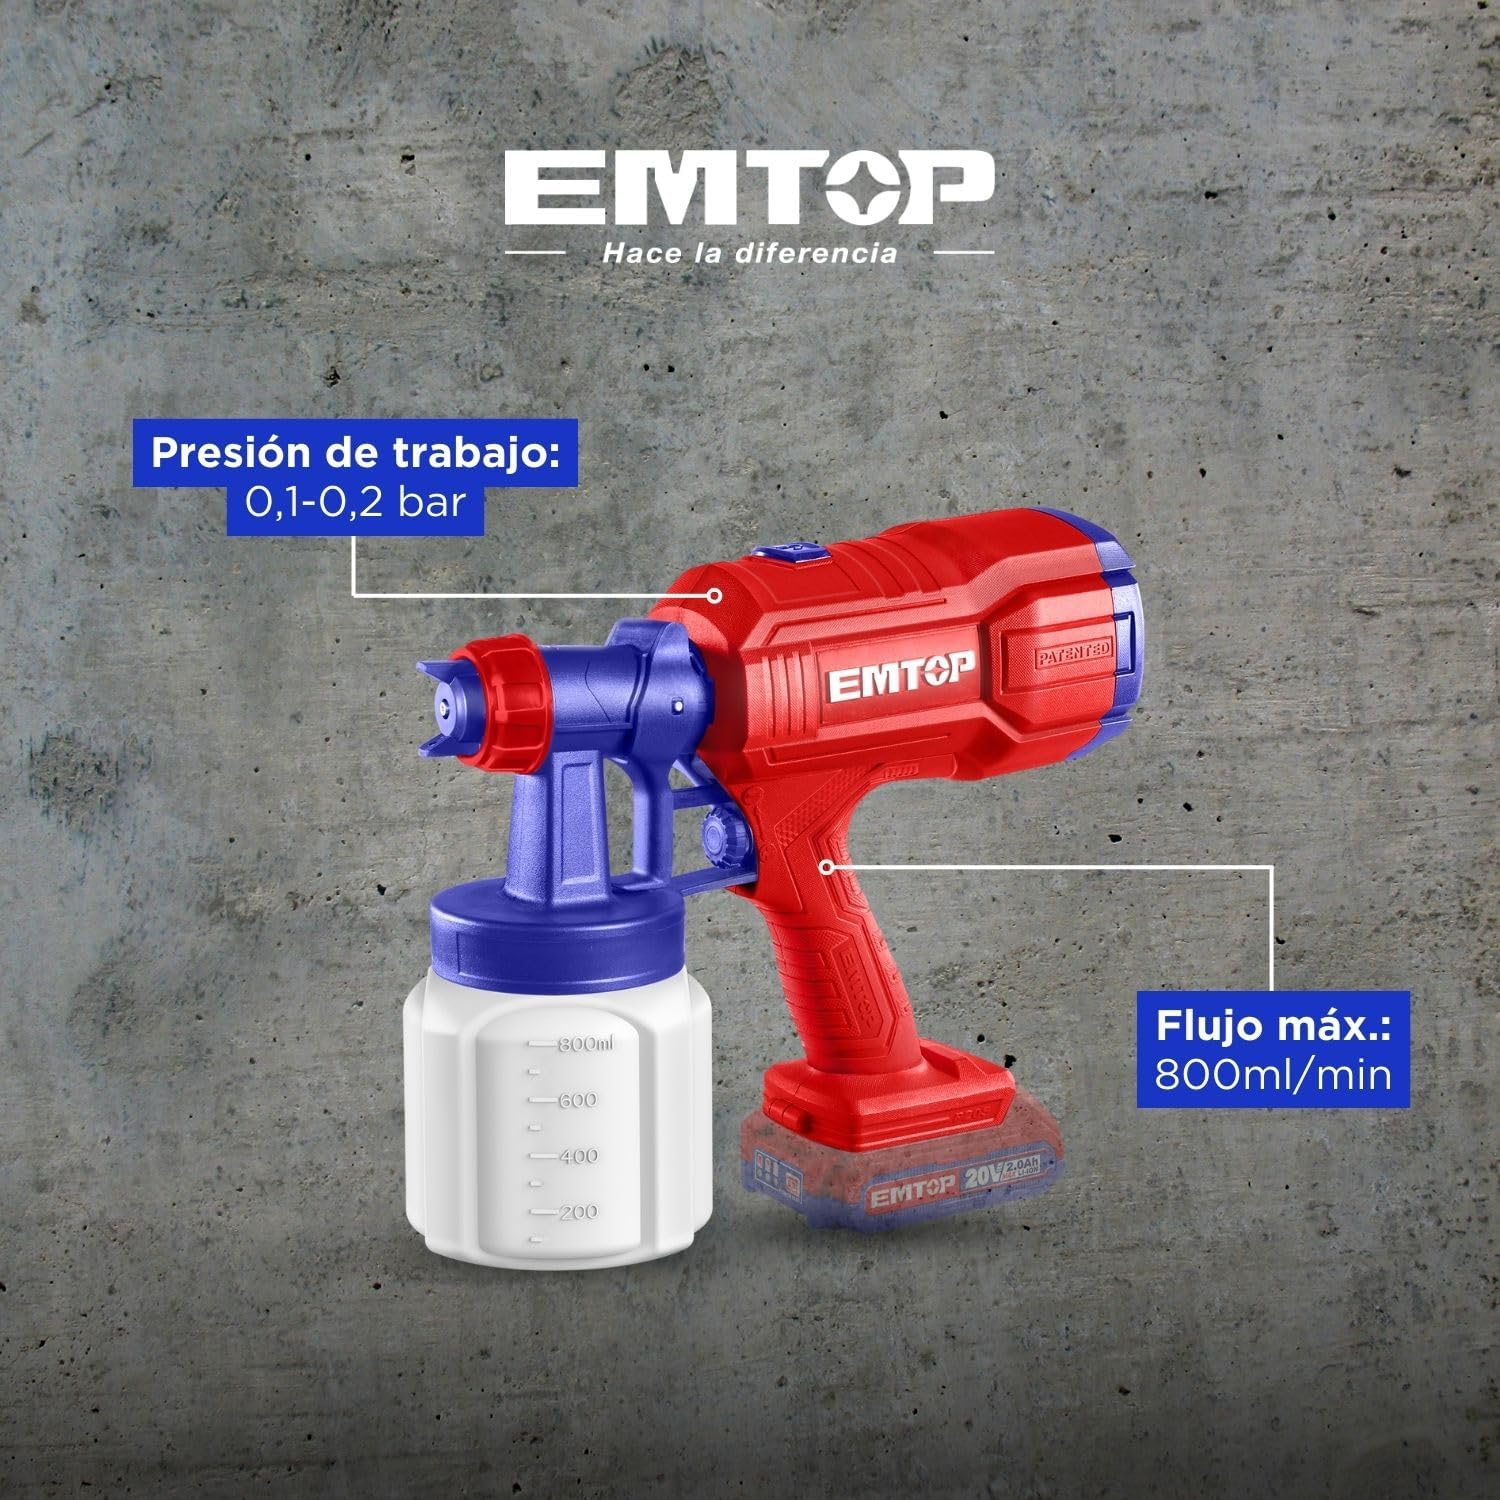
Side view of the EMTOP 20V Cordless Paint Spray Gun, illustrating the working pressure range of 0.1-0.2 bar and a maximum flow rate of 800 ml/min.

Side view of the EMTOP 20V Cordless Paint Spray Gun, showing the 800ml container capacity and indicating a maximum paint viscosity of 120DIN-s.
Setup
1. Battery Installation (Battery and Charger Sold Separately)
Ensure the battery is fully charged before use. Align the battery pack with the base of the spray gun handle and slide it in until it clicks securely into place. To remove, press the release button and slide the battery out.
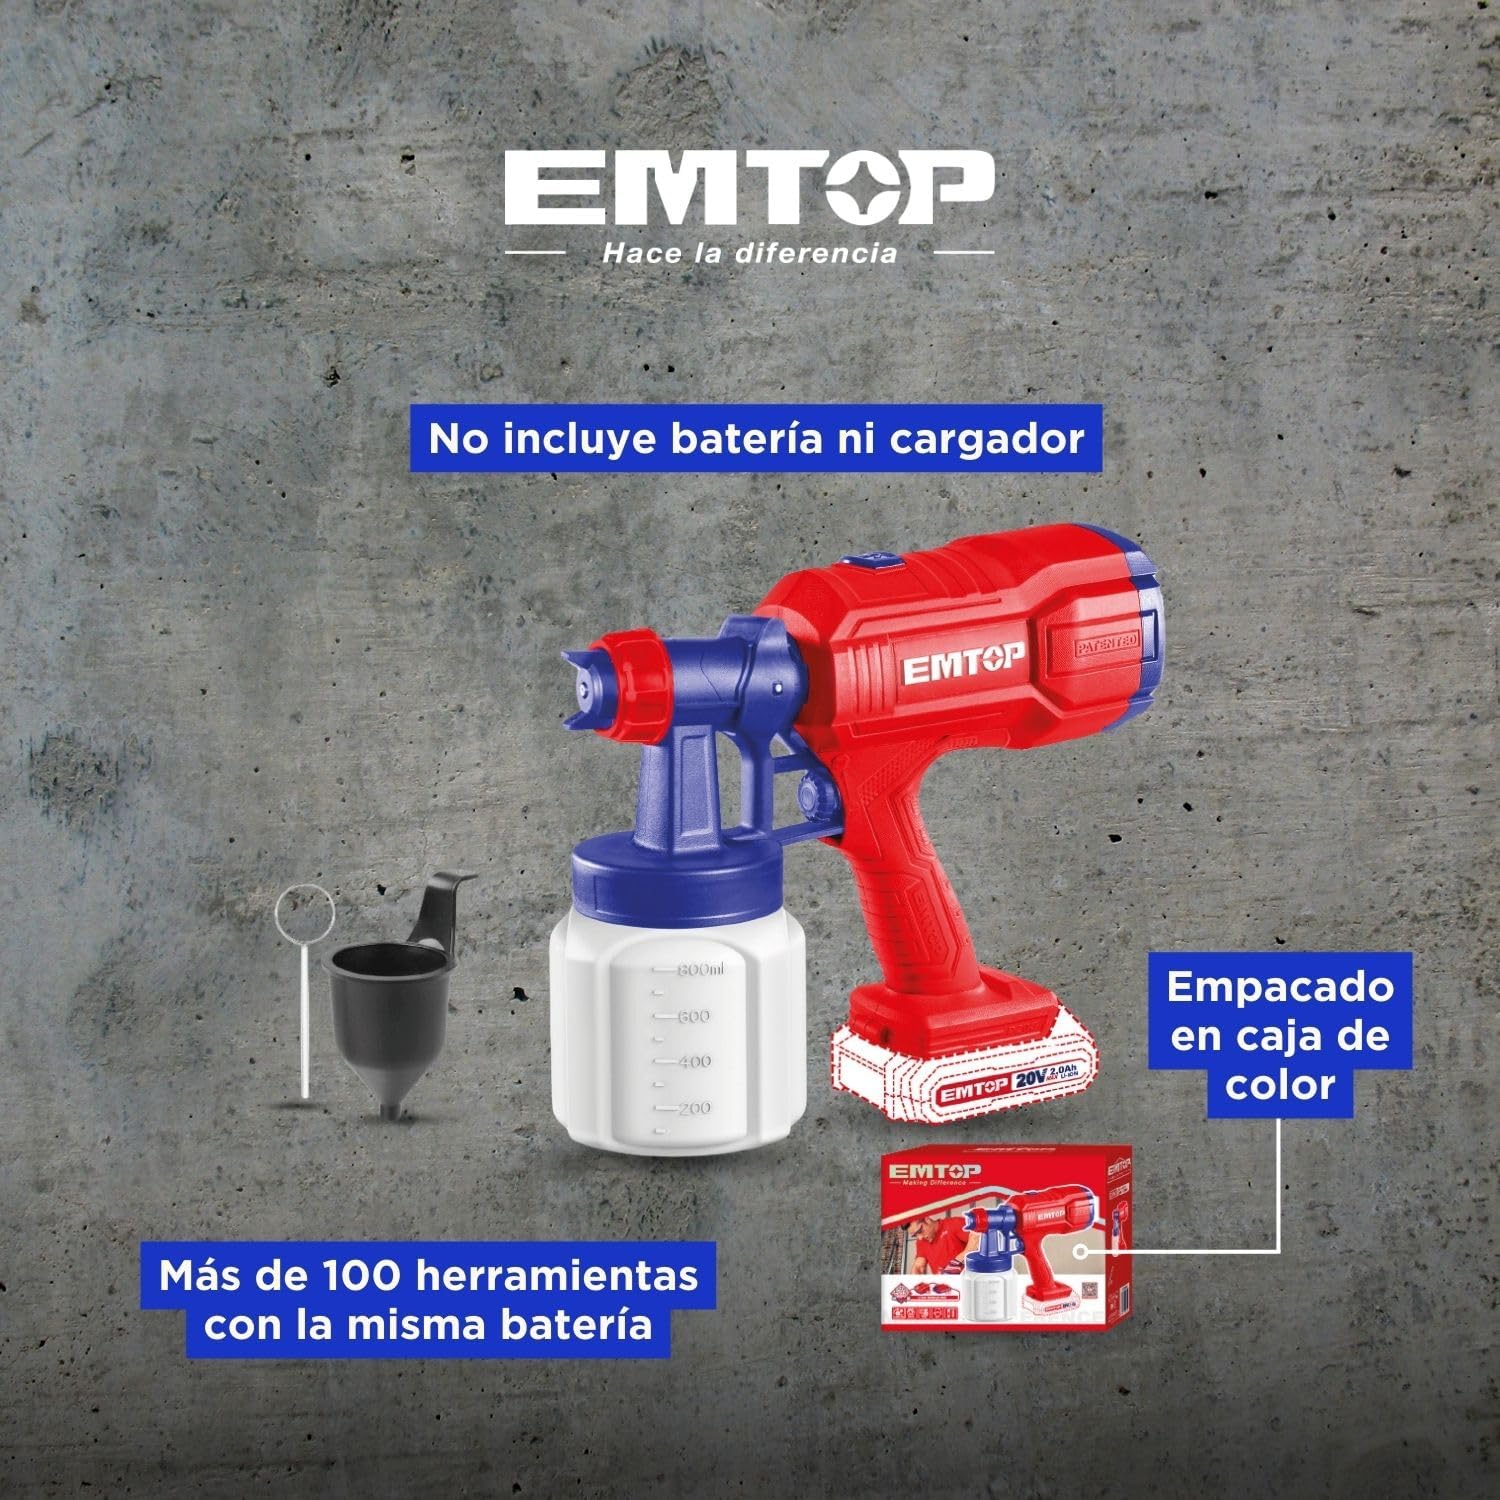
Image of the EMTOP 20V Cordless Paint Spray Gun, indicating that the battery and charger are not included and are sold separately. It also shows the product packaging.
2. Preparing the Paint
Proper paint viscosity is crucial for optimal spraying. Use the included viscometer to check the paint's consistency.
- Stir the paint thoroughly.
- Dip the viscometer into the paint until it is completely filled.
- Lift the viscometer and measure the time it takes for the paint to completely drain out.
- Refer to the paint manufacturer's recommendations for thinning. If the drain time exceeds the recommended value (e.g., 120DIN-s maximum for this sprayer), thin the paint with the appropriate solvent (water for water-based paints, mineral spirits for oil-based paints) until the desired viscosity is achieved.
- Mix thoroughly after thinning.
3. Filling the Container
Unscrew the paint container from the spray gun. Pour the prepared paint into the container, ensuring not to overfill. Securely screw the container back onto the spray gun.
4. Attaching the Nozzle
Select the appropriate copper nozzle for your painting project. The kit includes two copper nozzles for different spray patterns or material types. Screw the chosen nozzle firmly onto the spray gun head.
Operating Instructions
1. Preparing the Surface
Proper surface preparation is key to a professional finish. Follow these steps:
- Cleaning: Clean the walls or surface to remove dirt, dust, and grease.
- Repair: Apply filler or spackle to any cracks or holes and smooth with a spatula.
- Sealing: Apply a layer of primer or sealer before painting, especially on porous surfaces.

Image illustrating three tips for preparing surfaces before painting: cleaning to remove dirt and grease, repairing with filler and spatula, and sealing with a primer.
2. Spraying Technique
- Test Spray: Before painting your actual project, test the spray pattern on a piece of scrap material. Adjust the nozzle and flow rate as needed.
- Maintain Distance: Hold the spray gun approximately 6-10 inches (15-25 cm) from the surface.
- Even Strokes: Move the spray gun in smooth, even strokes, overlapping each pass by about 50%.
- Trigger Control: Press the trigger fully to start spraying and release it at the end of each stroke to avoid paint buildup.
- Avoid Tilting: Keep the spray gun perpendicular to the surface to ensure an even coat.
Maintenance
Regular cleaning and maintenance will extend the life of your paint spray gun and ensure consistent performance.
1. Cleaning After Use
- Empty Container: Empty any remaining paint from the container.
- Rinse Container: Fill the container with the appropriate cleaning solution (water for water-based paints, solvent for oil-based paints) and spray it through the gun until clear.
- Disassemble: Unscrew the container, remove the nozzle, and disassemble other removable parts.
- Clean Components: Thoroughly clean all parts with the cleaning solution and the included nozzle cleaning needle. Use a brush if necessary.
- Rinse and Dry: Rinse all components with clean water (if using water-based cleaning solution) and allow them to dry completely before reassembly.
2. Nozzle Cleaning
Use the provided nozzle cleaning needle to clear any dried paint or blockages from the nozzle openings. Ensure the nozzle is completely clear for an even spray pattern.
3. Storage
Store the clean and dry paint spray gun in a cool, dry place, away from direct sunlight and extreme temperatures. Keep it out of reach of children.
Troubleshooting
If you encounter issues with your paint spray gun, refer to the following common problems and solutions:
| Problem | Possible Cause | Solution |
|---|---|---|
| No paint spraying or weak spray | Clogged nozzle; paint too thick; empty container; low battery. | Clean nozzle with needle; thin paint to correct viscosity; refill container; charge/replace battery. |
| Uneven spray pattern | Partially clogged nozzle; incorrect nozzle selection; inconsistent spraying distance. | Clean nozzle thoroughly; ensure correct nozzle for paint type; maintain consistent distance. |
| Paint dripping | Nozzle not tightened; paint too thin; worn seals. | Tighten nozzle; adjust paint viscosity; check and replace seals if necessary. |
| Motor not running | Battery not installed correctly; battery discharged; faulty switch. | Reinstall battery; charge battery; contact customer support if switch is faulty. |
Specifications
- Model Number: ELSG2003
- Brand: EMTOP
- Power Source: 20V Cordless (Battery sold separately)
- Container Volume: 800 ml
- Max Flow Rate: 800 ml/min
- Working Pressure: 0.1-0.2 bar
- Max Viscosity: 120DIN-s
- Product Dimensions: 27.8 x 11.6 x 27.2 cm
- Color: Red
- Recommended Use: Painting
- Style: Handheld
Warranty and Support
EMTOP products are manufactured to high-quality standards. This product comes with a manufacturer's warranty against defects in materials and workmanship. Please refer to the warranty card included with your purchase for specific terms and conditions.
For technical support, spare parts, or warranty claims, please contact EMTOP customer service through your retailer or visit the official EMTOP website.
Extended warranty options may be available through third-party providers. Please check with your retailer for details.